Sweep Tool
Start a New Part in Inventor, then begin New 2D Sketch. Go to the Ribbon and initiate Rectangle tool:

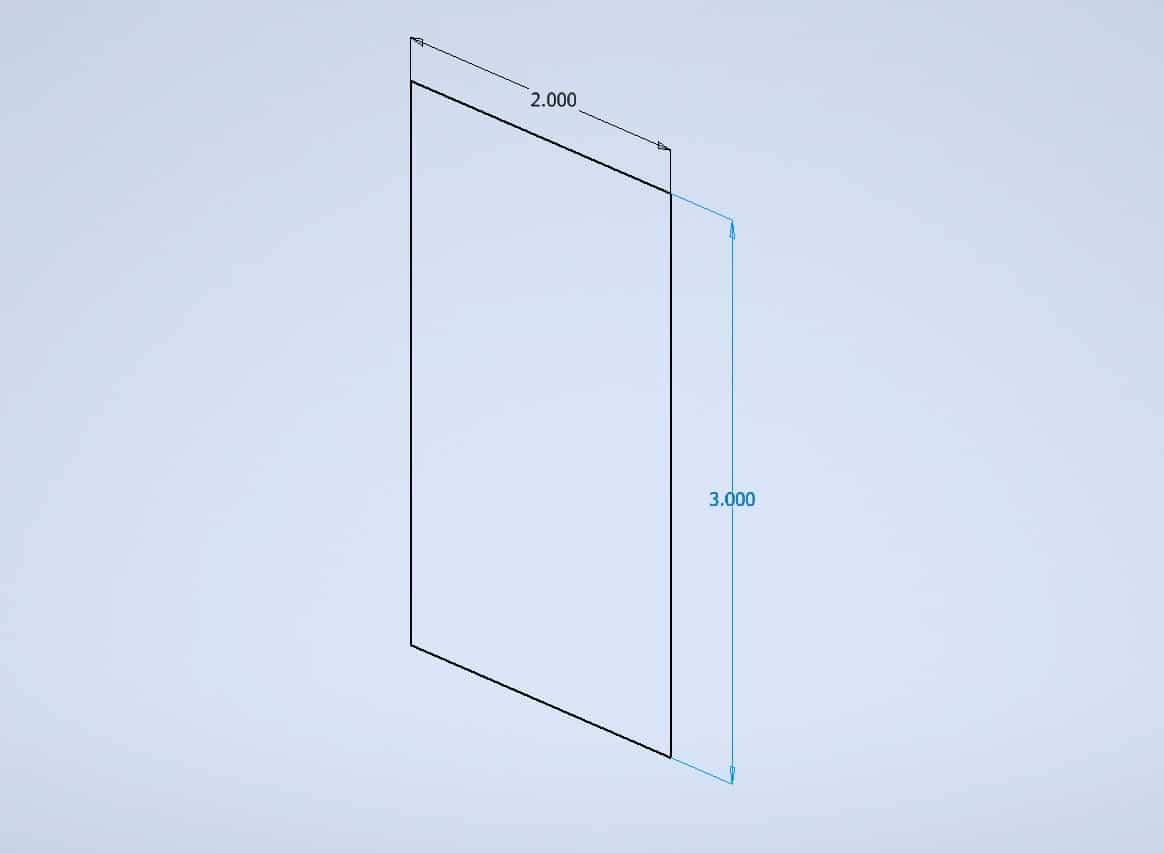
Make the sketch of 2 x 3 rectangle:
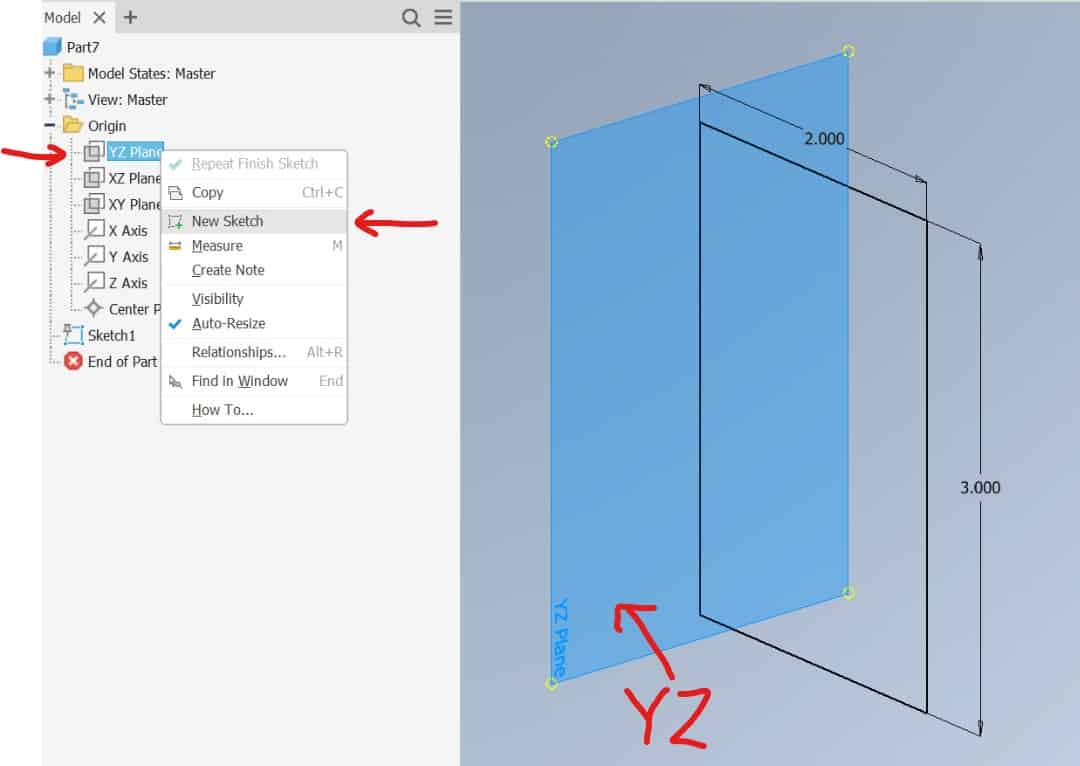
Move the cursor to YZ Plane, right-click, from the drop-down menu choose New Sketch:
Make the following sketch:
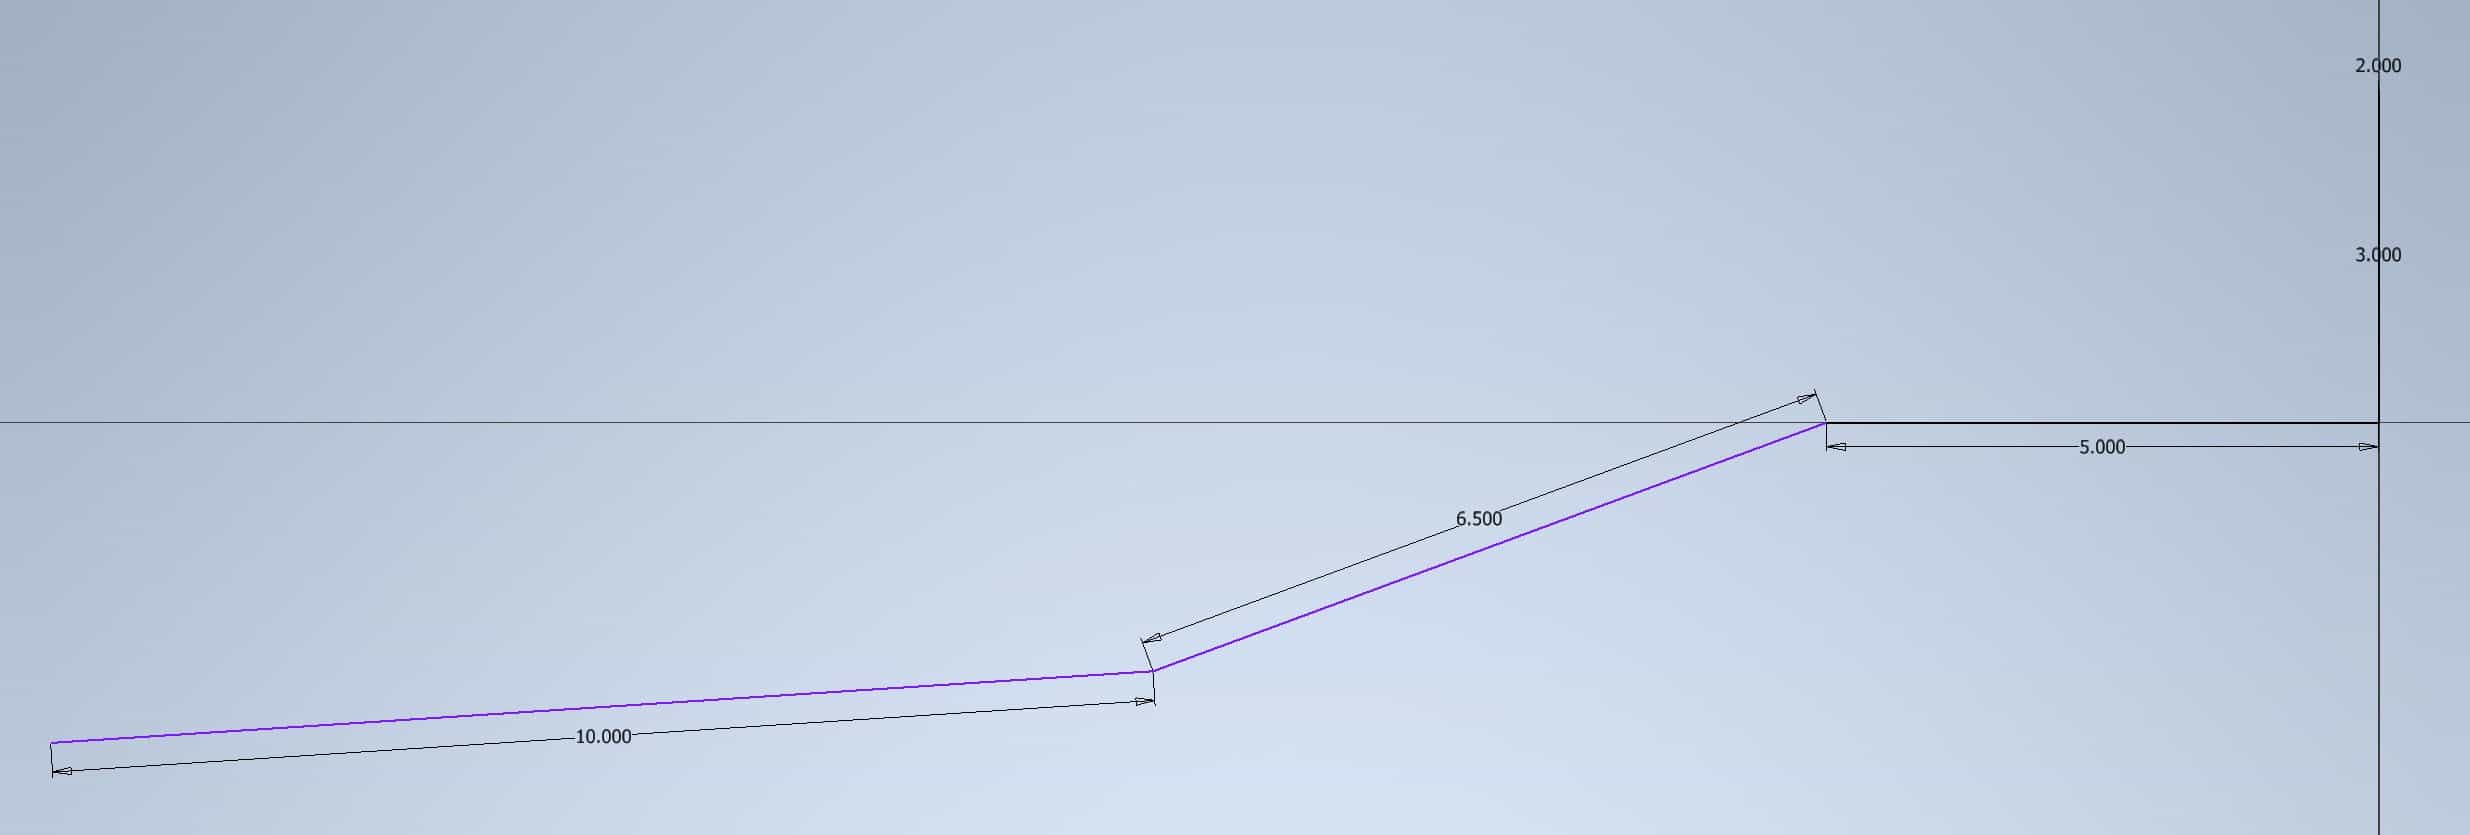
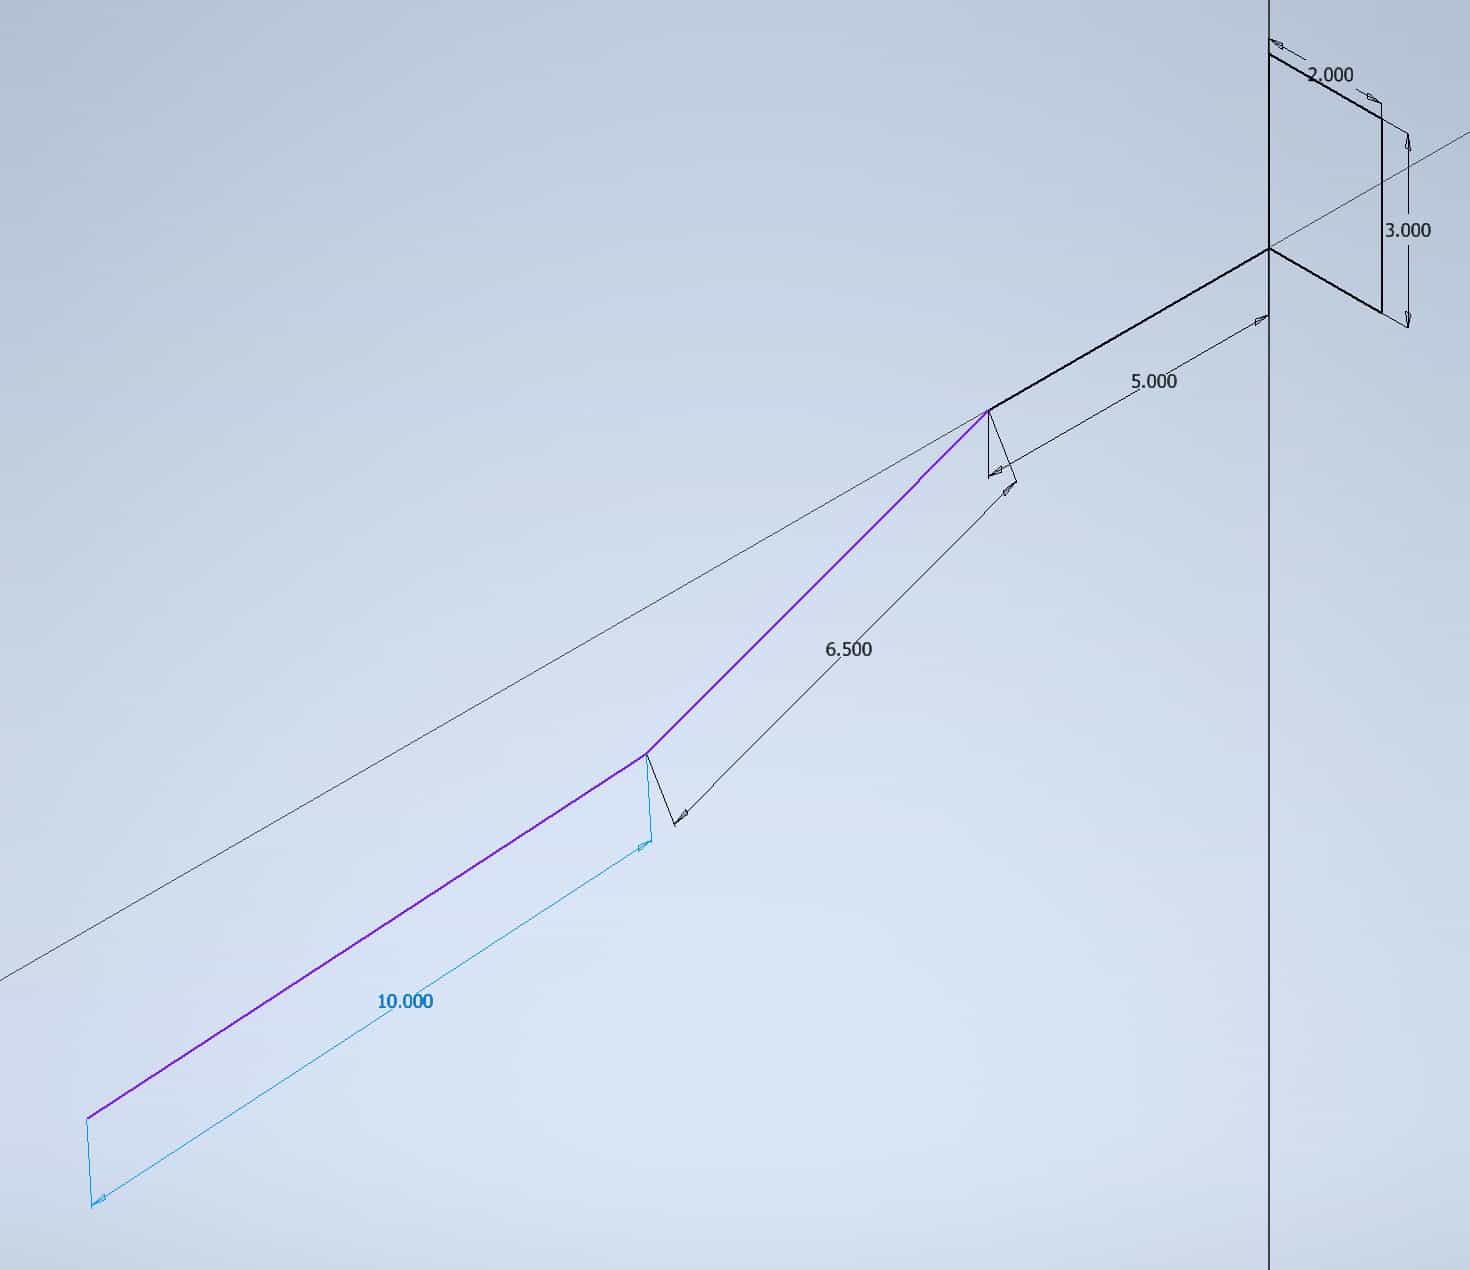
Choose a Sweep Tool from: The Ribbon > Create panel > Sweep

A preview of the Sweep will appear:
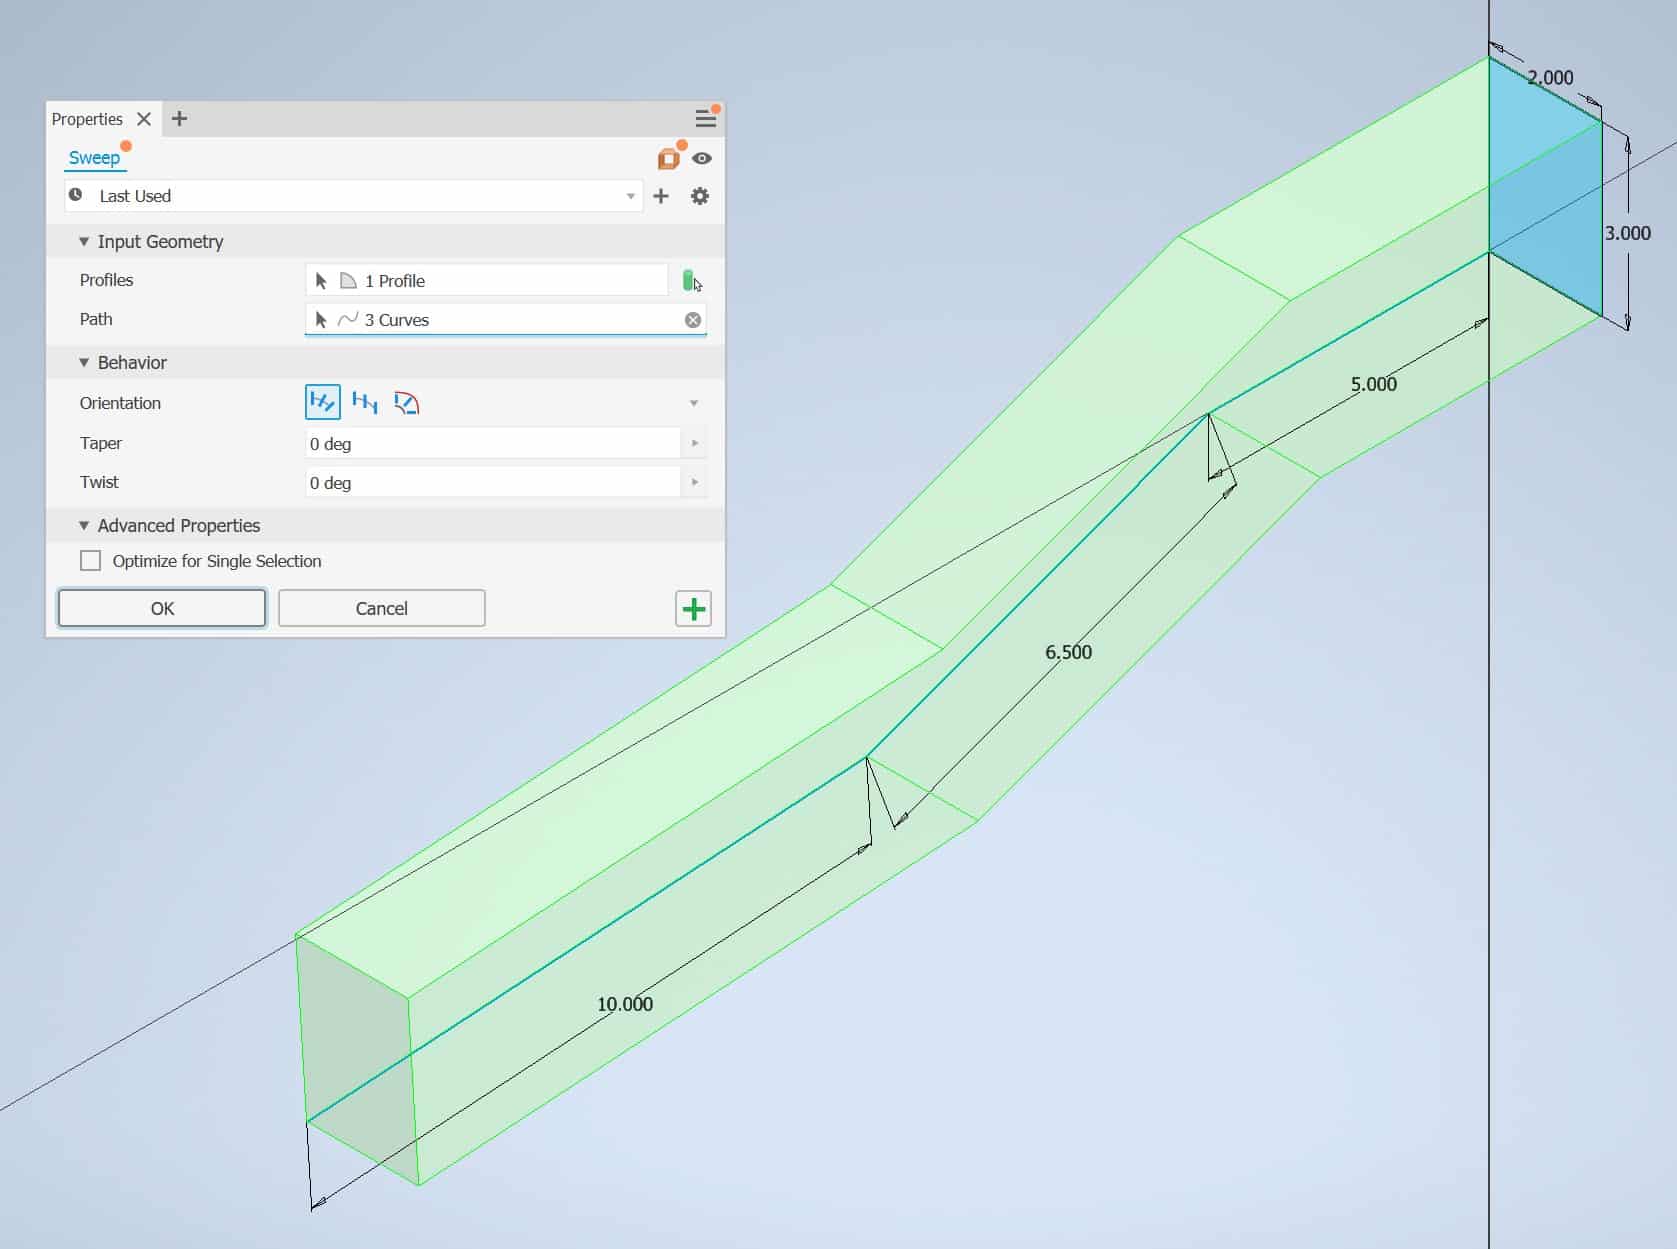
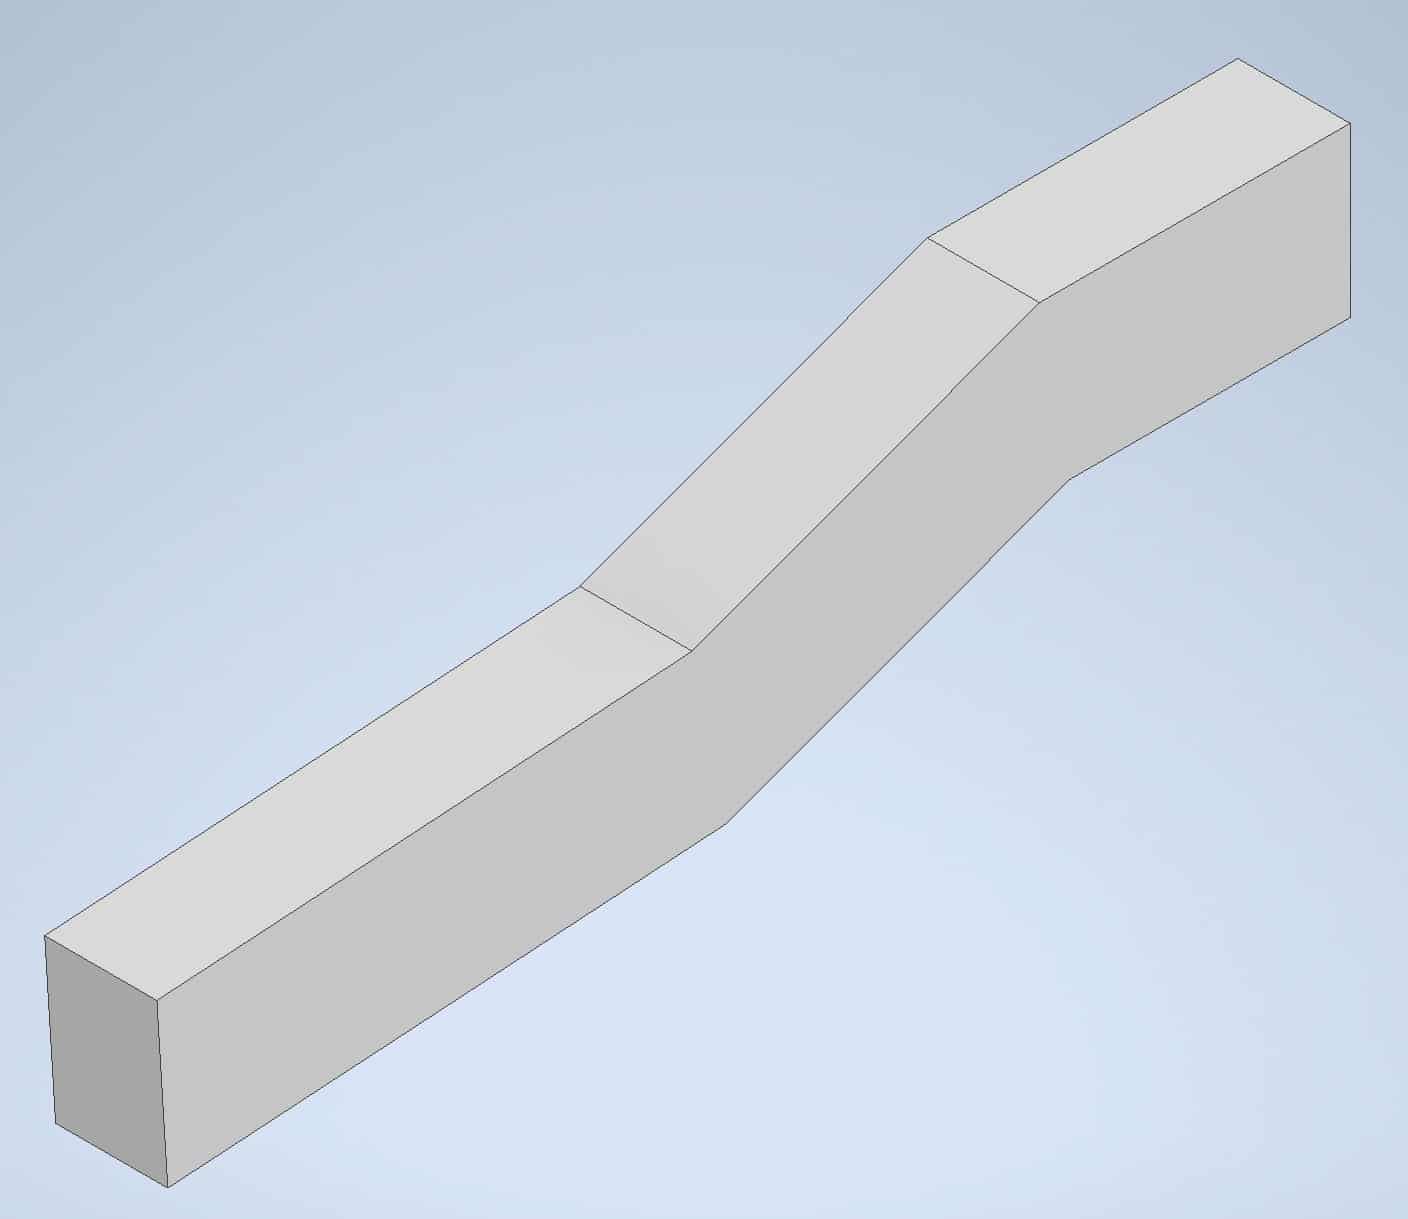
Click OK to exit. The result of the command:
The Shell Tool
If you need to model a tubing, use a Shell tool. To access the Shell tool go to:
The Ribbon > 3D Model tab > Modify panel > Shell tool

Choose the thickness for the walls and click OK:
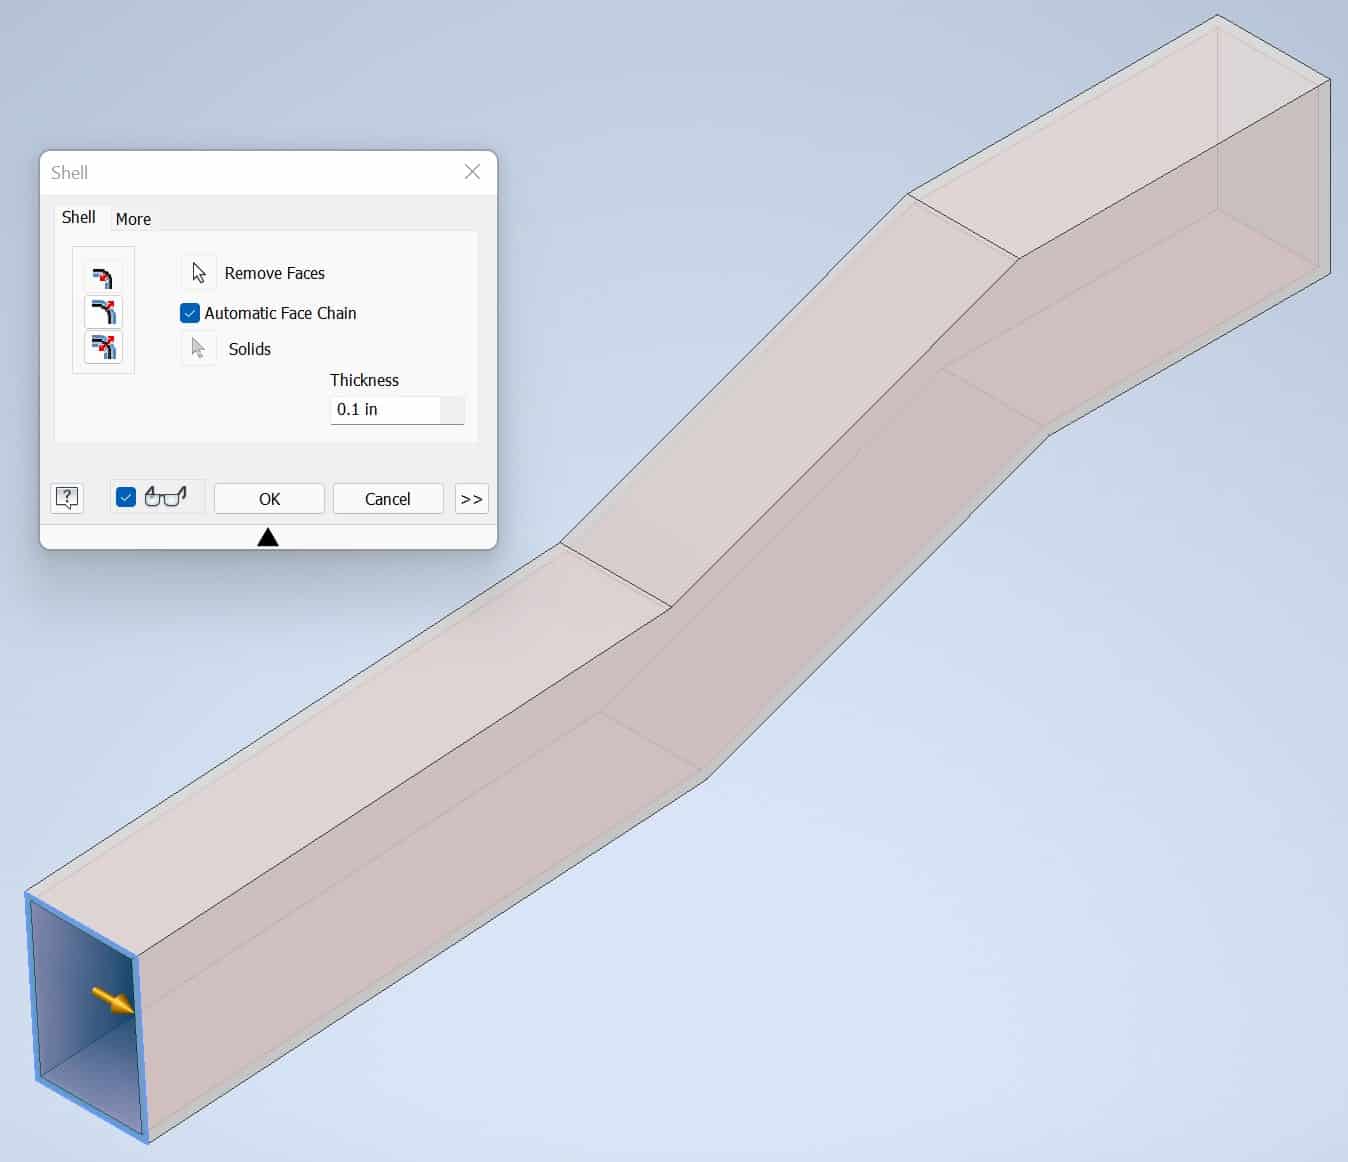
The result of the Shell command:
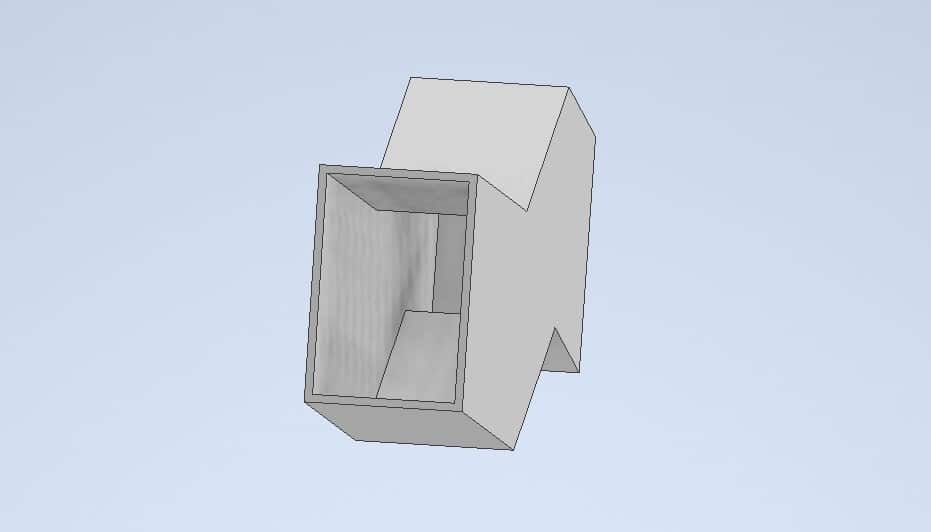
Rectangular Pattern Tool
Draw a circle on the surface of the shell:
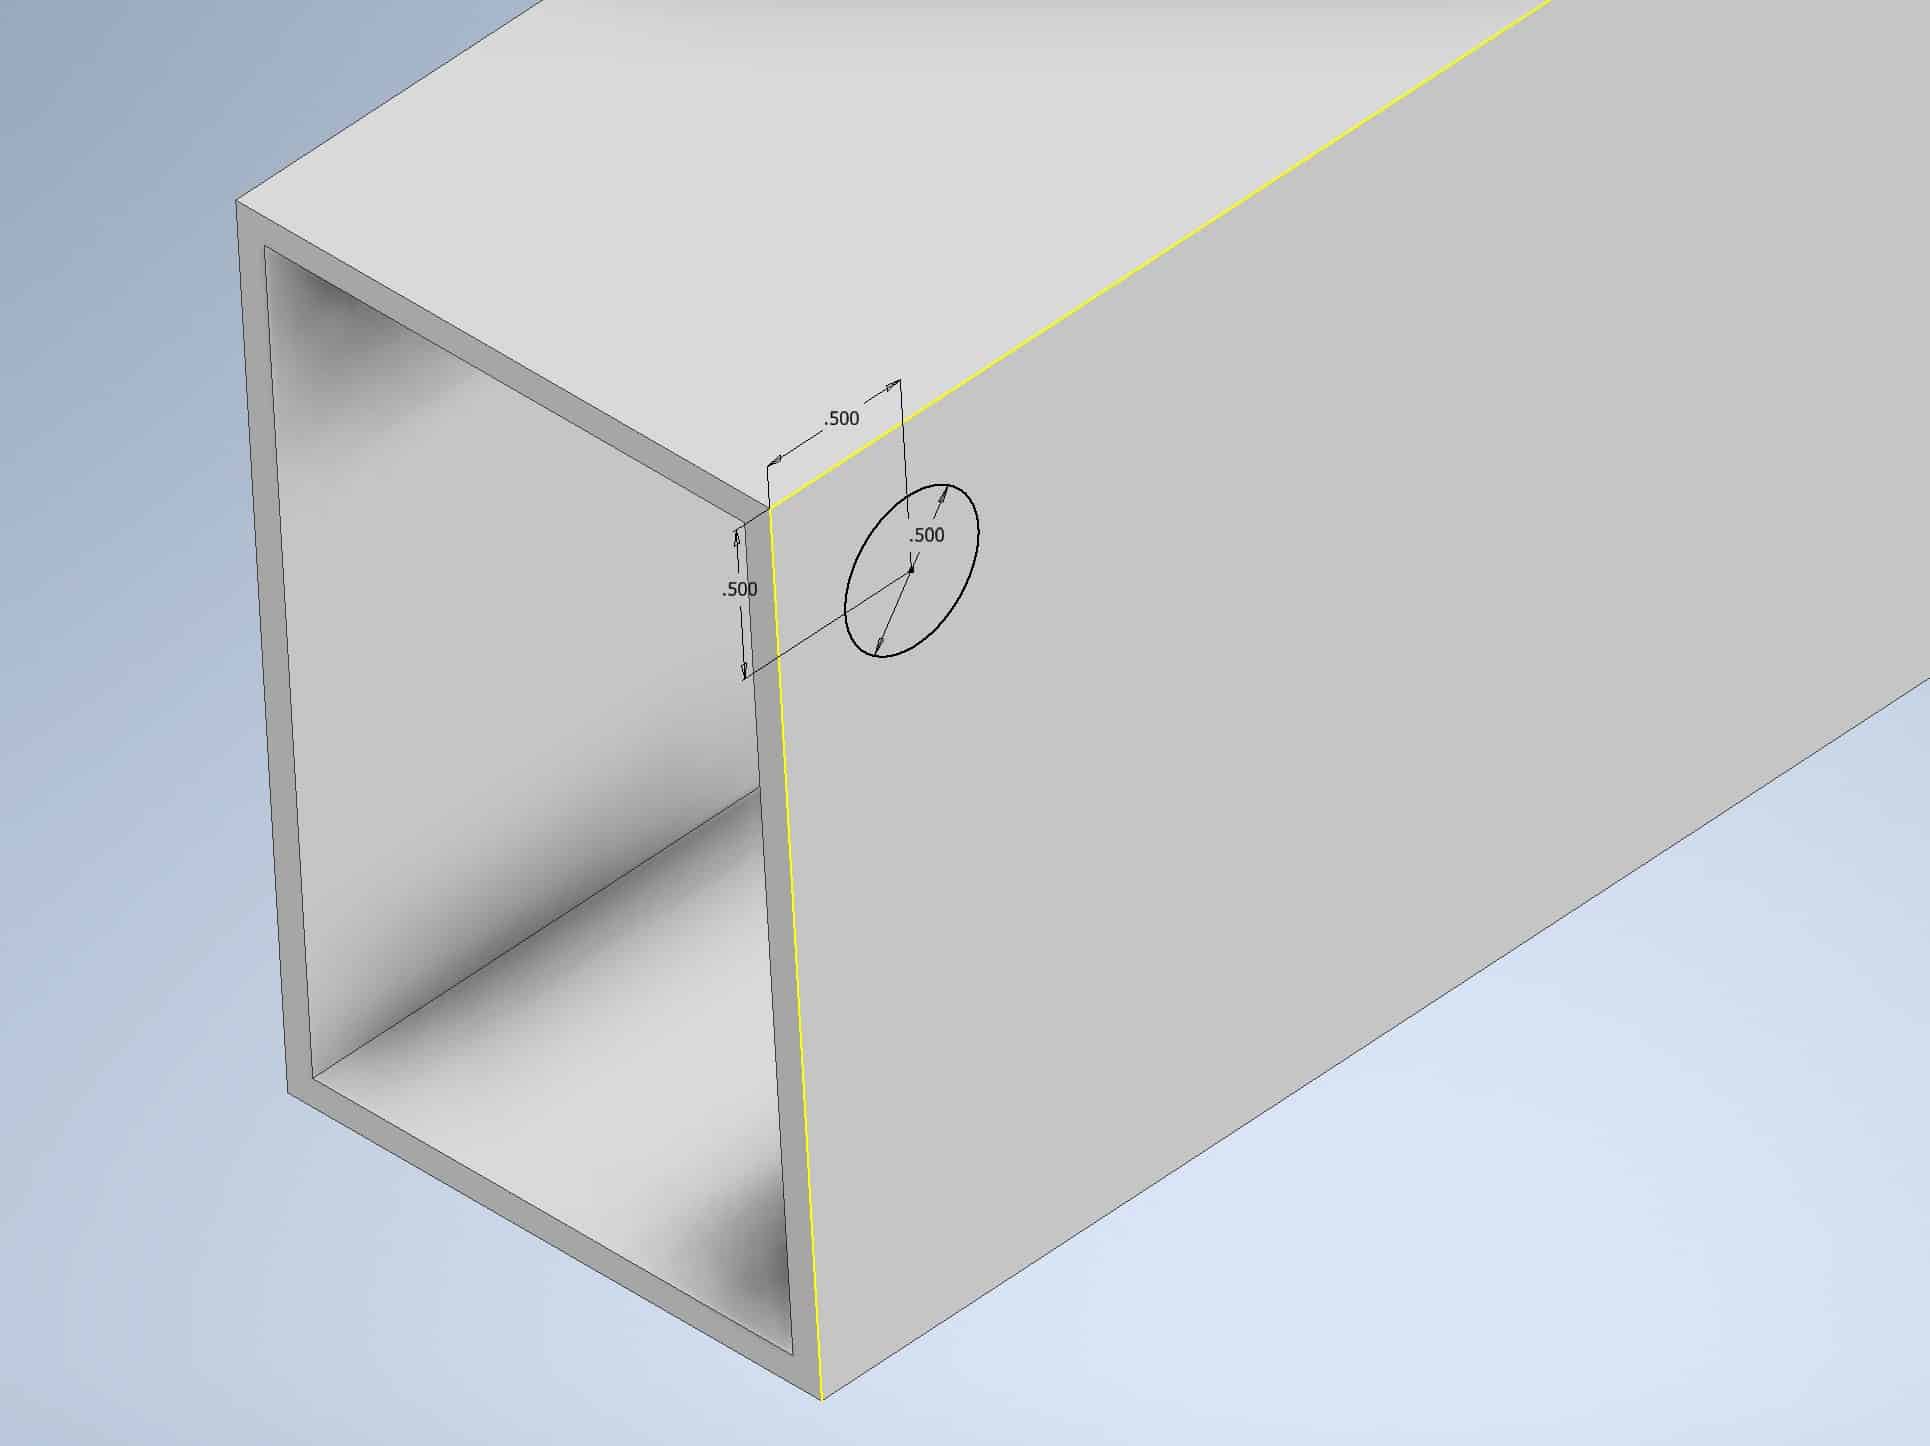
Use Extrude tool to punch a hole:
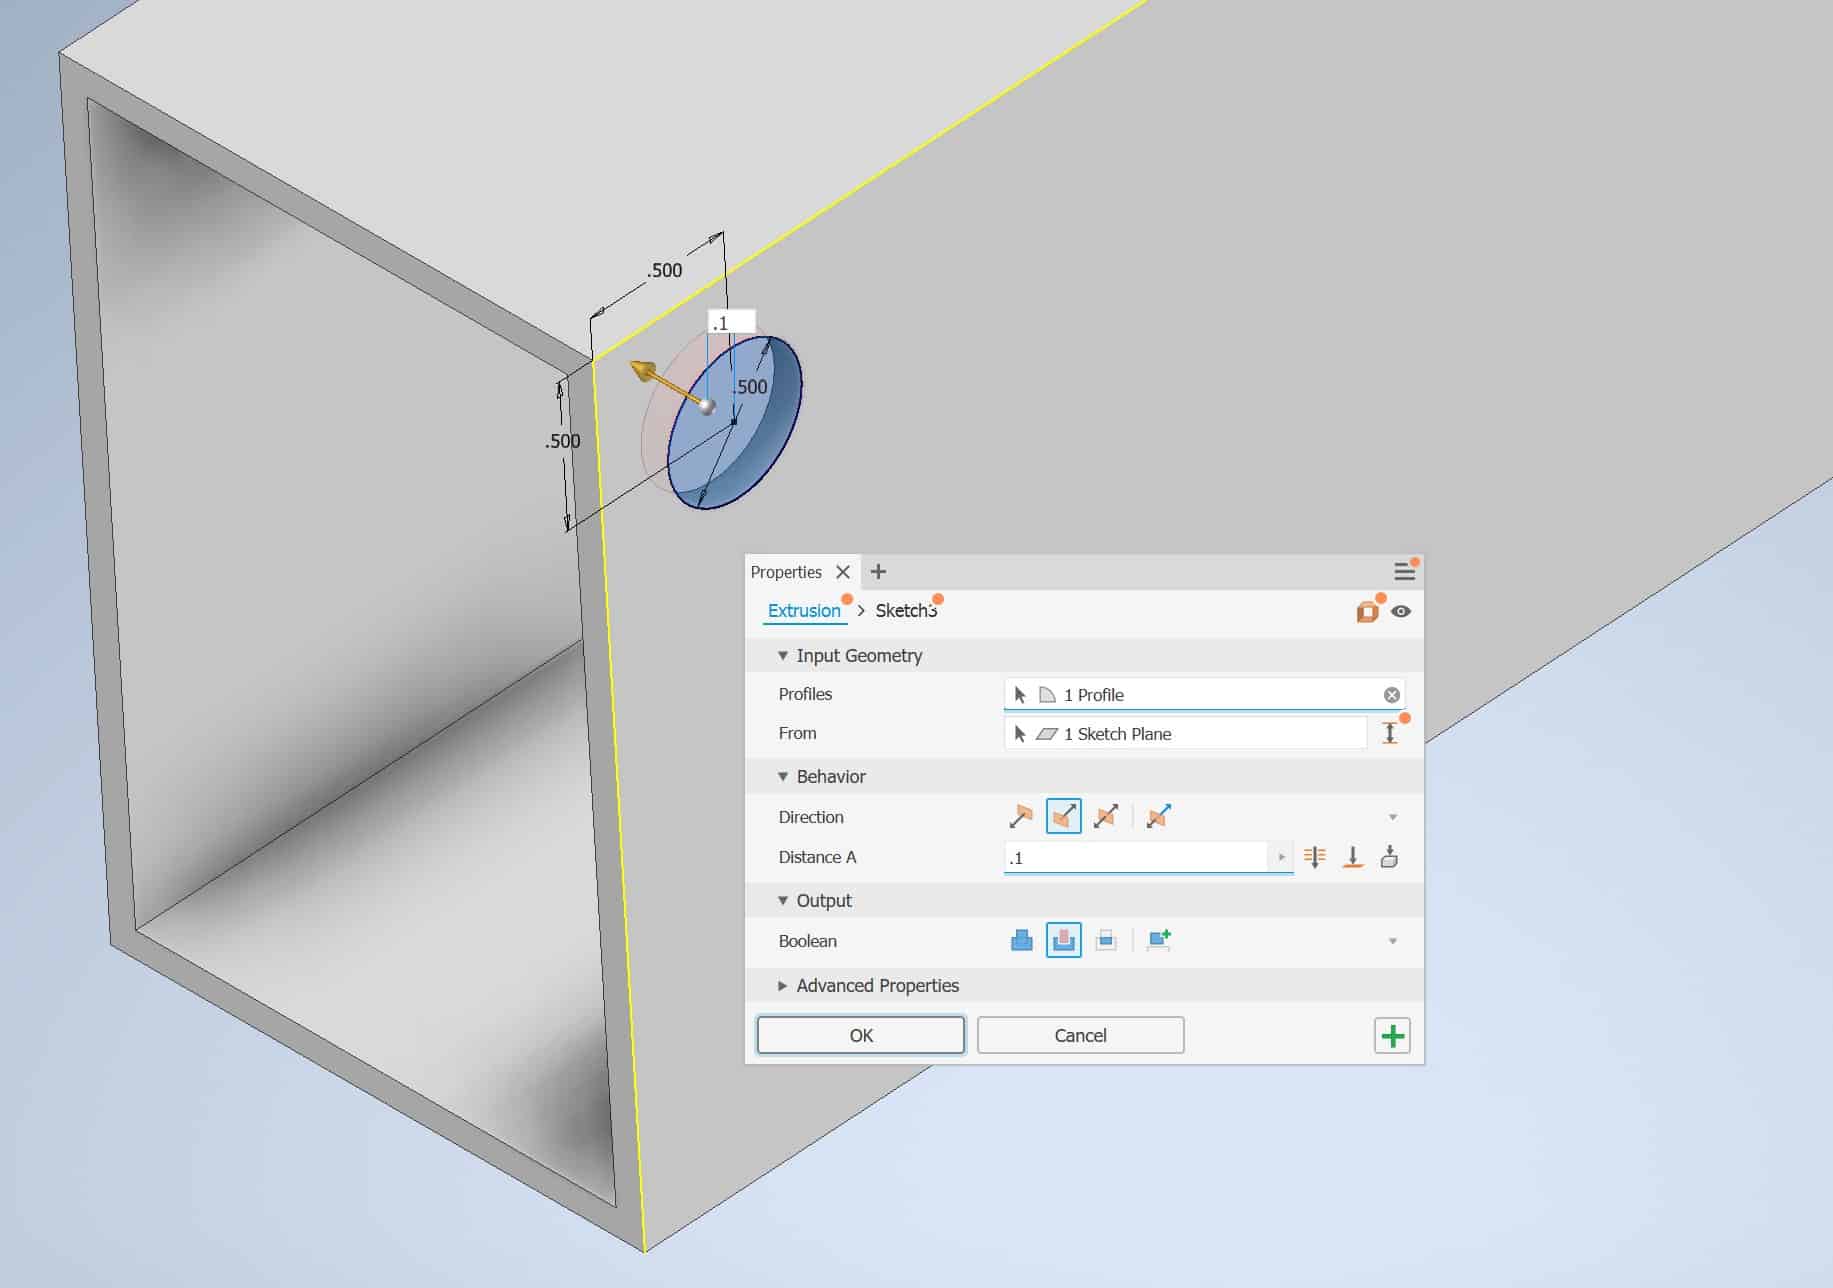
Click OK:
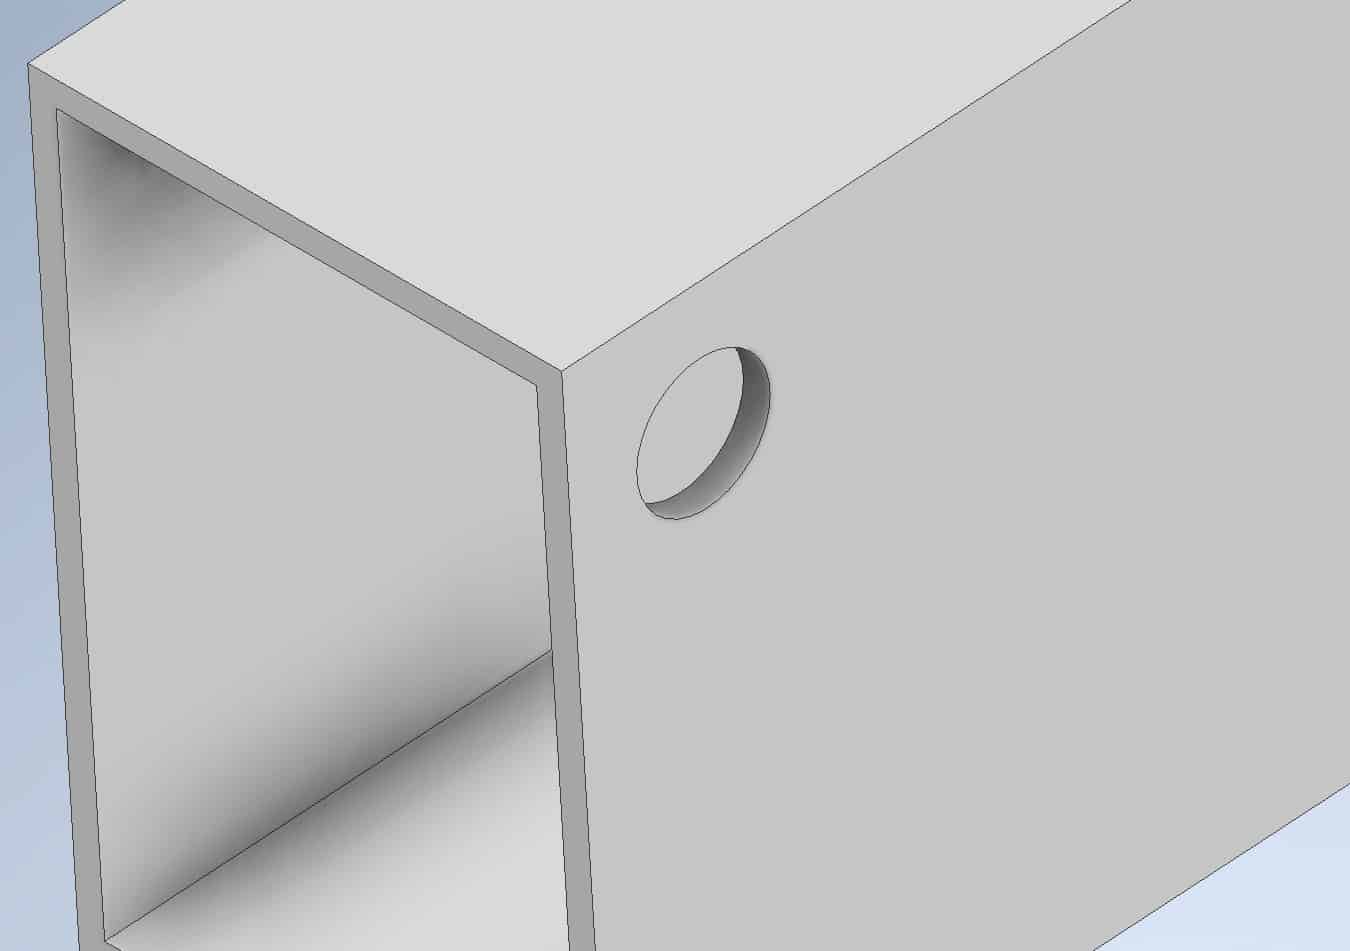
Invoke Rectangular Pattern tool:
The Ribbon > 3D Model tab > Pattern panel > Rectangular

The Pattern dialog box will open:
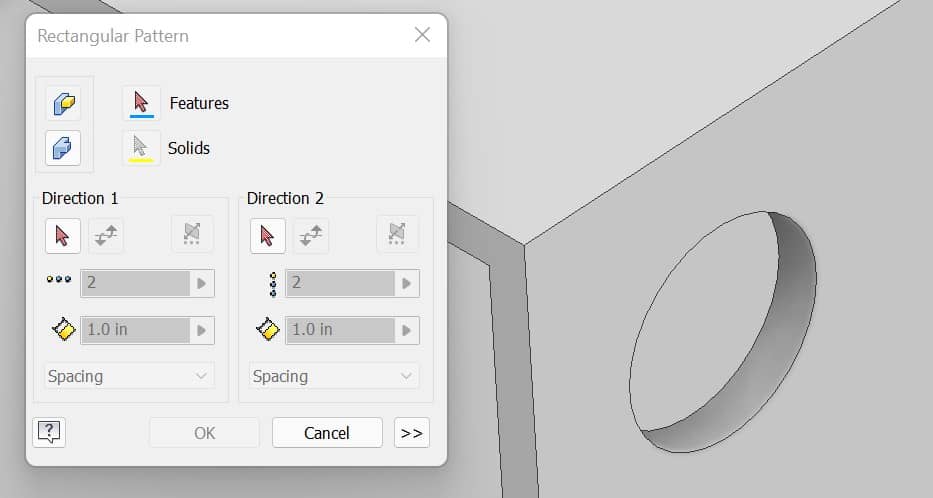
Click inside the hole, it will become outlined in blue:
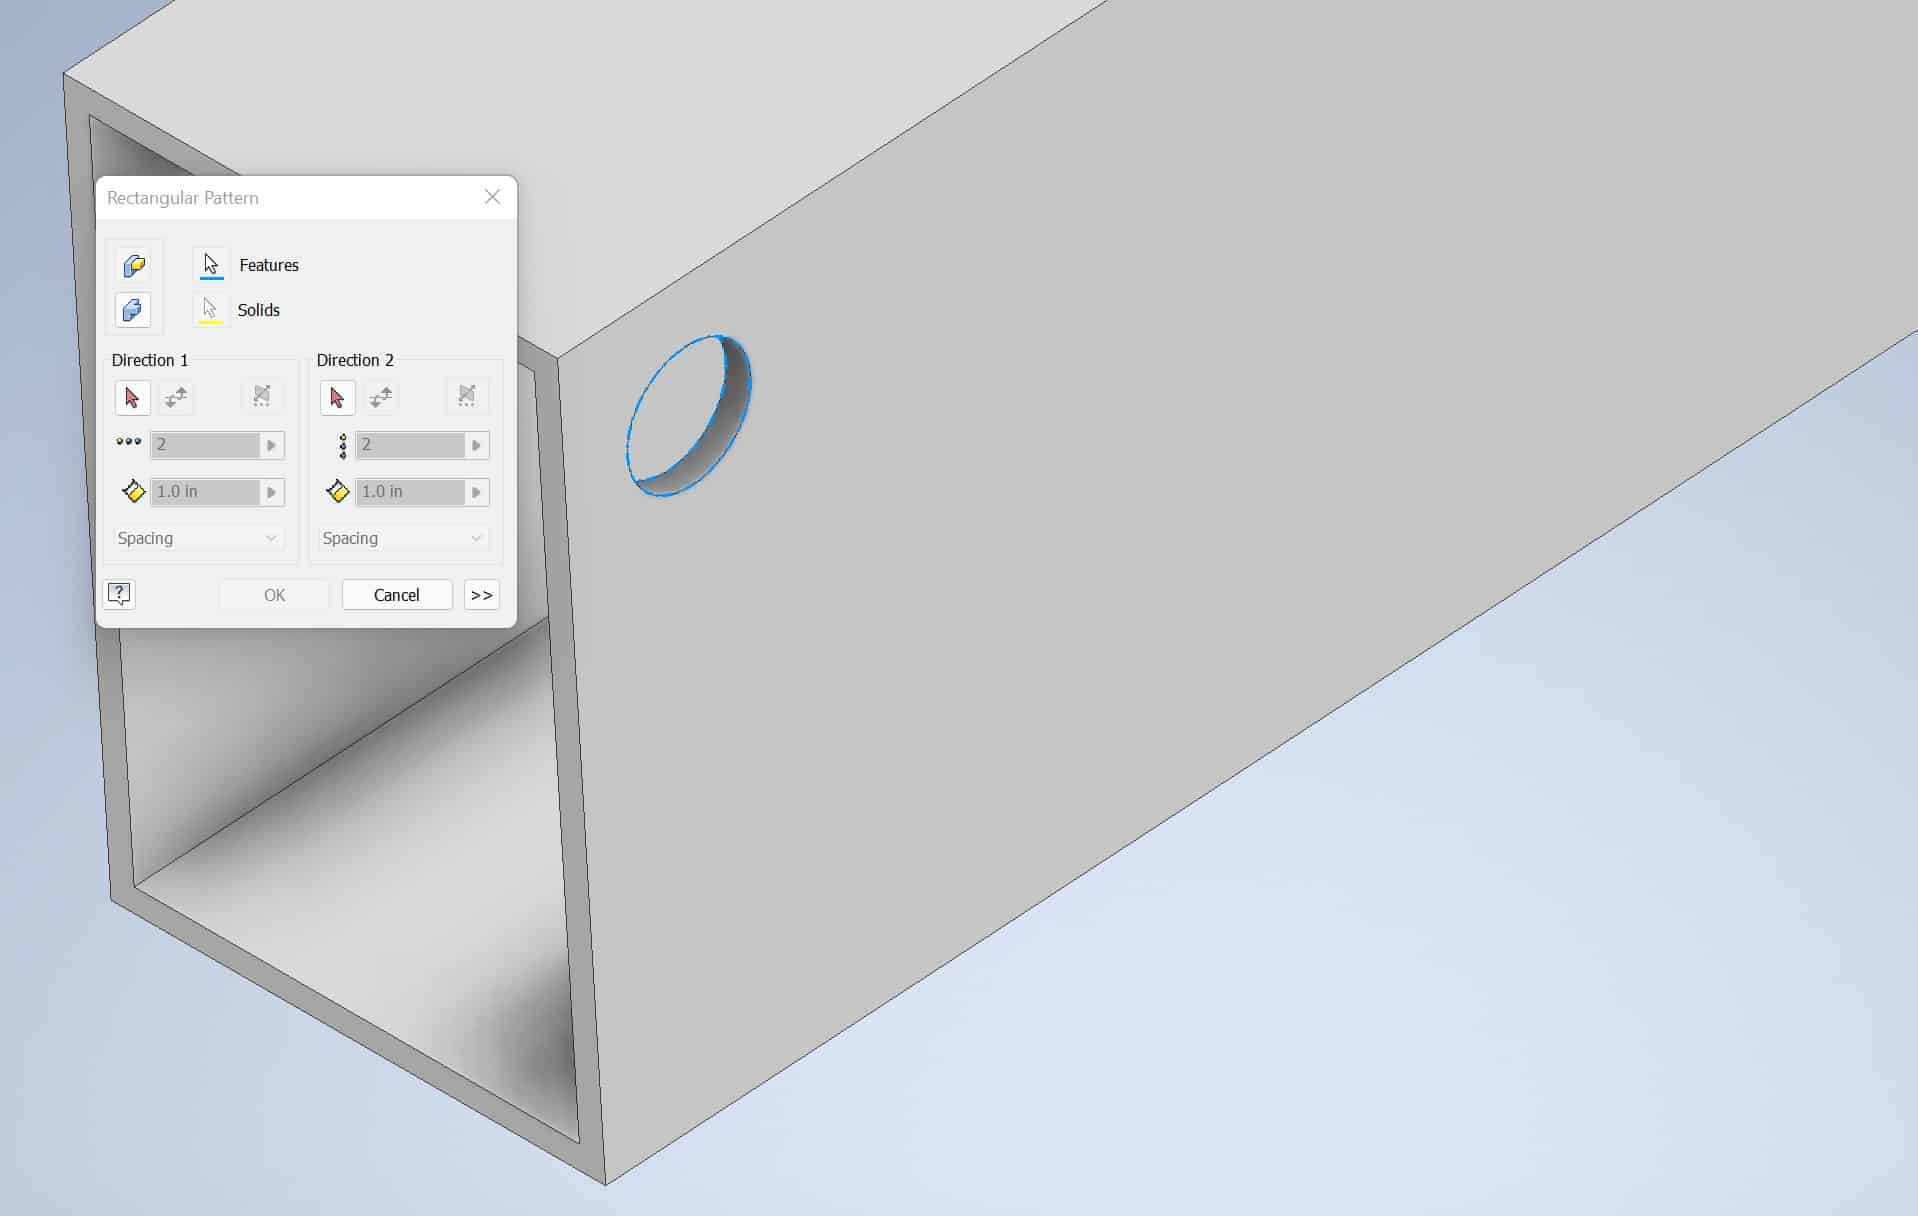
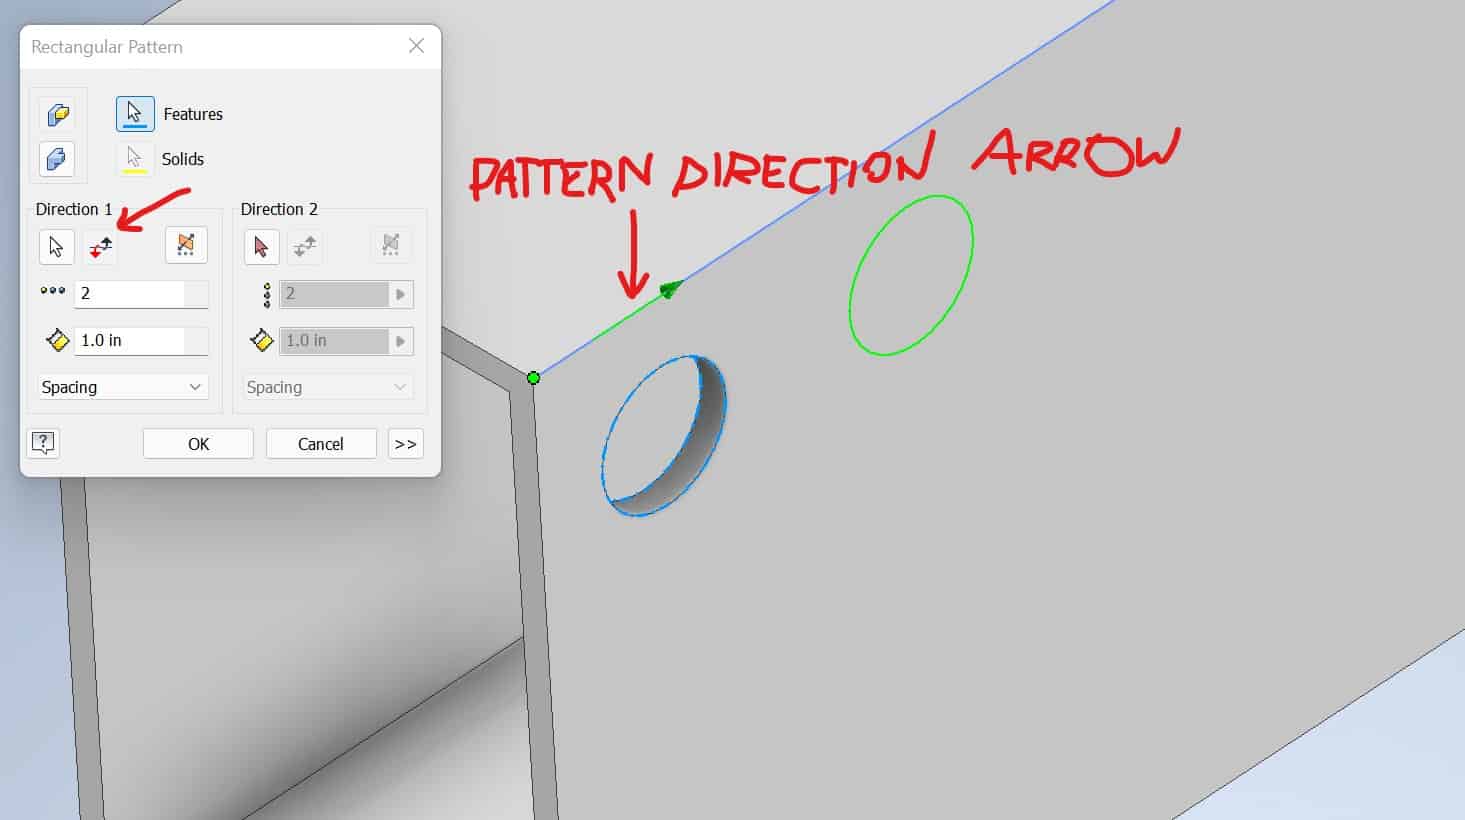
Click on the arrow under Direction 1 and then click on the long edge of the shell:
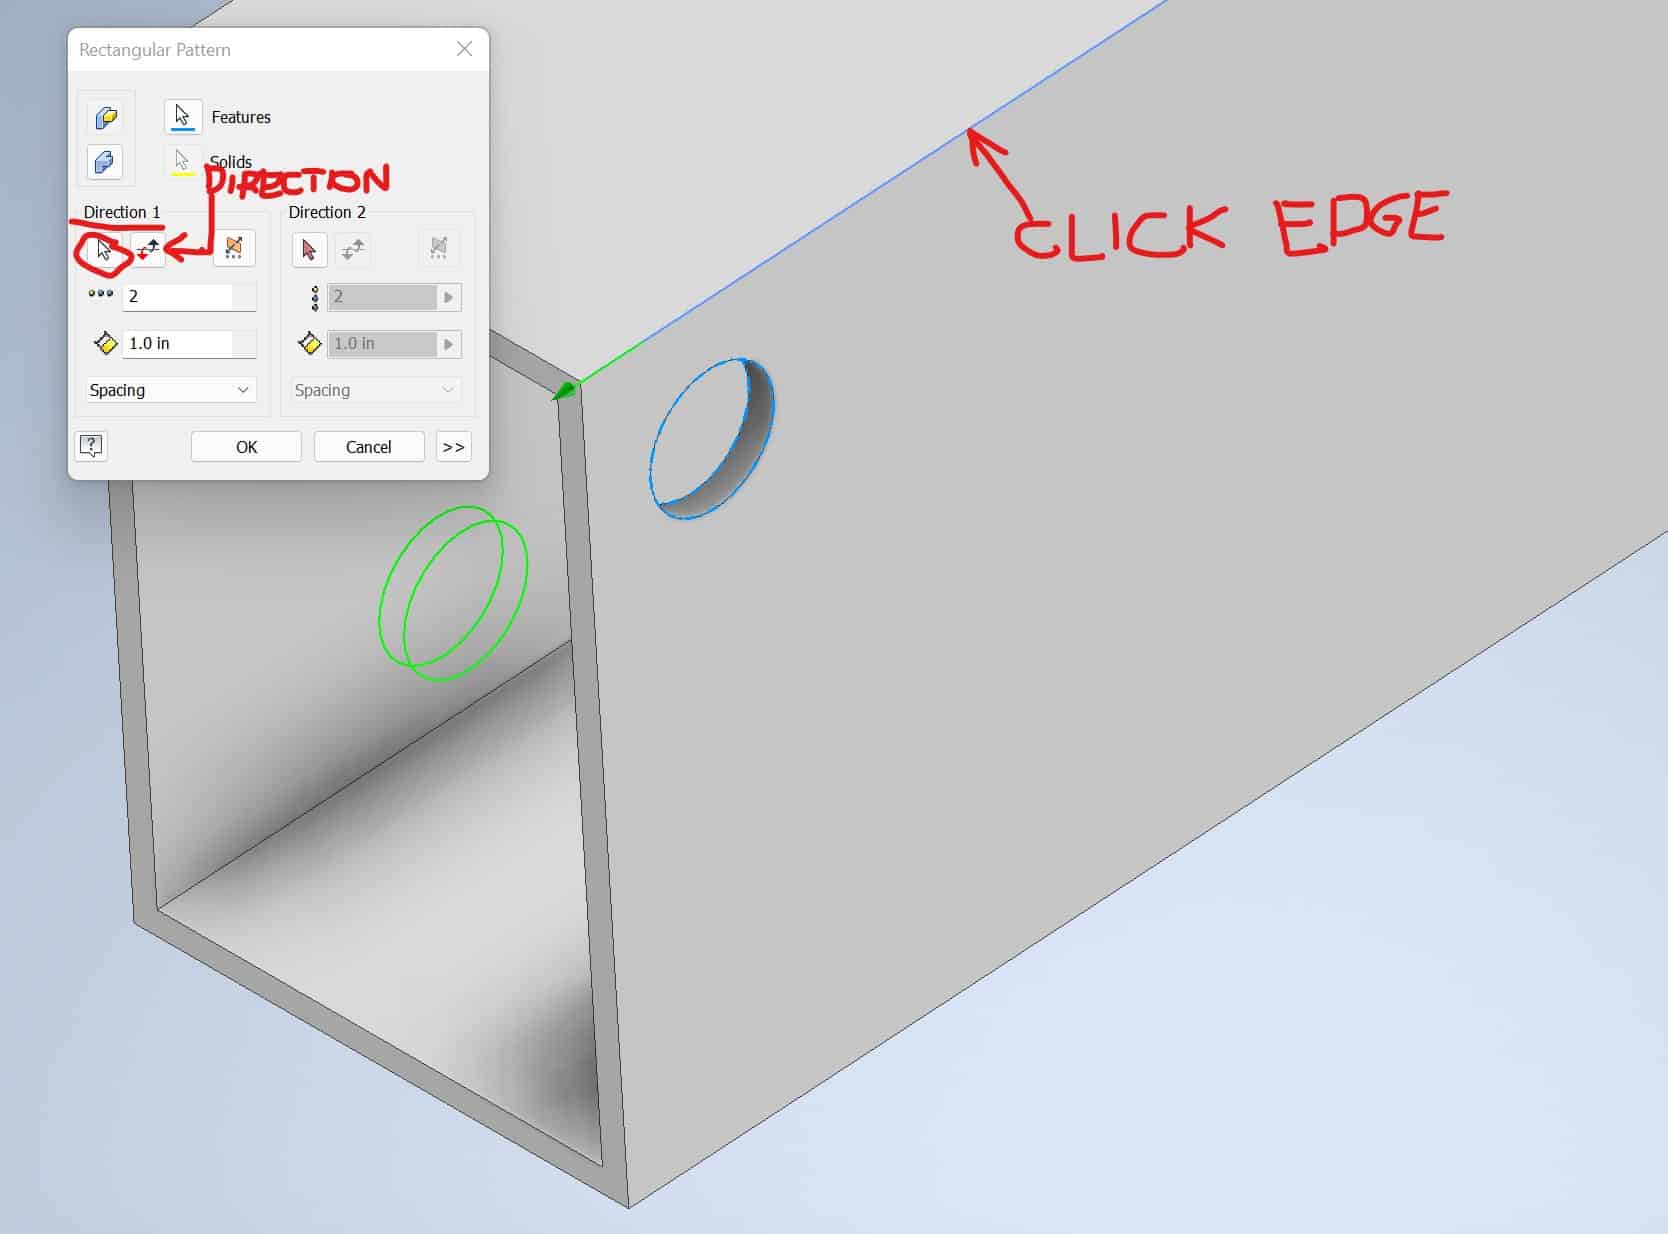
If the new hole appears on the wrong side of the existing hole, click on the Direction red/black arrows button. Green Pattern Direction Arrow will be reversed, and the new hole will appear on the correct side:
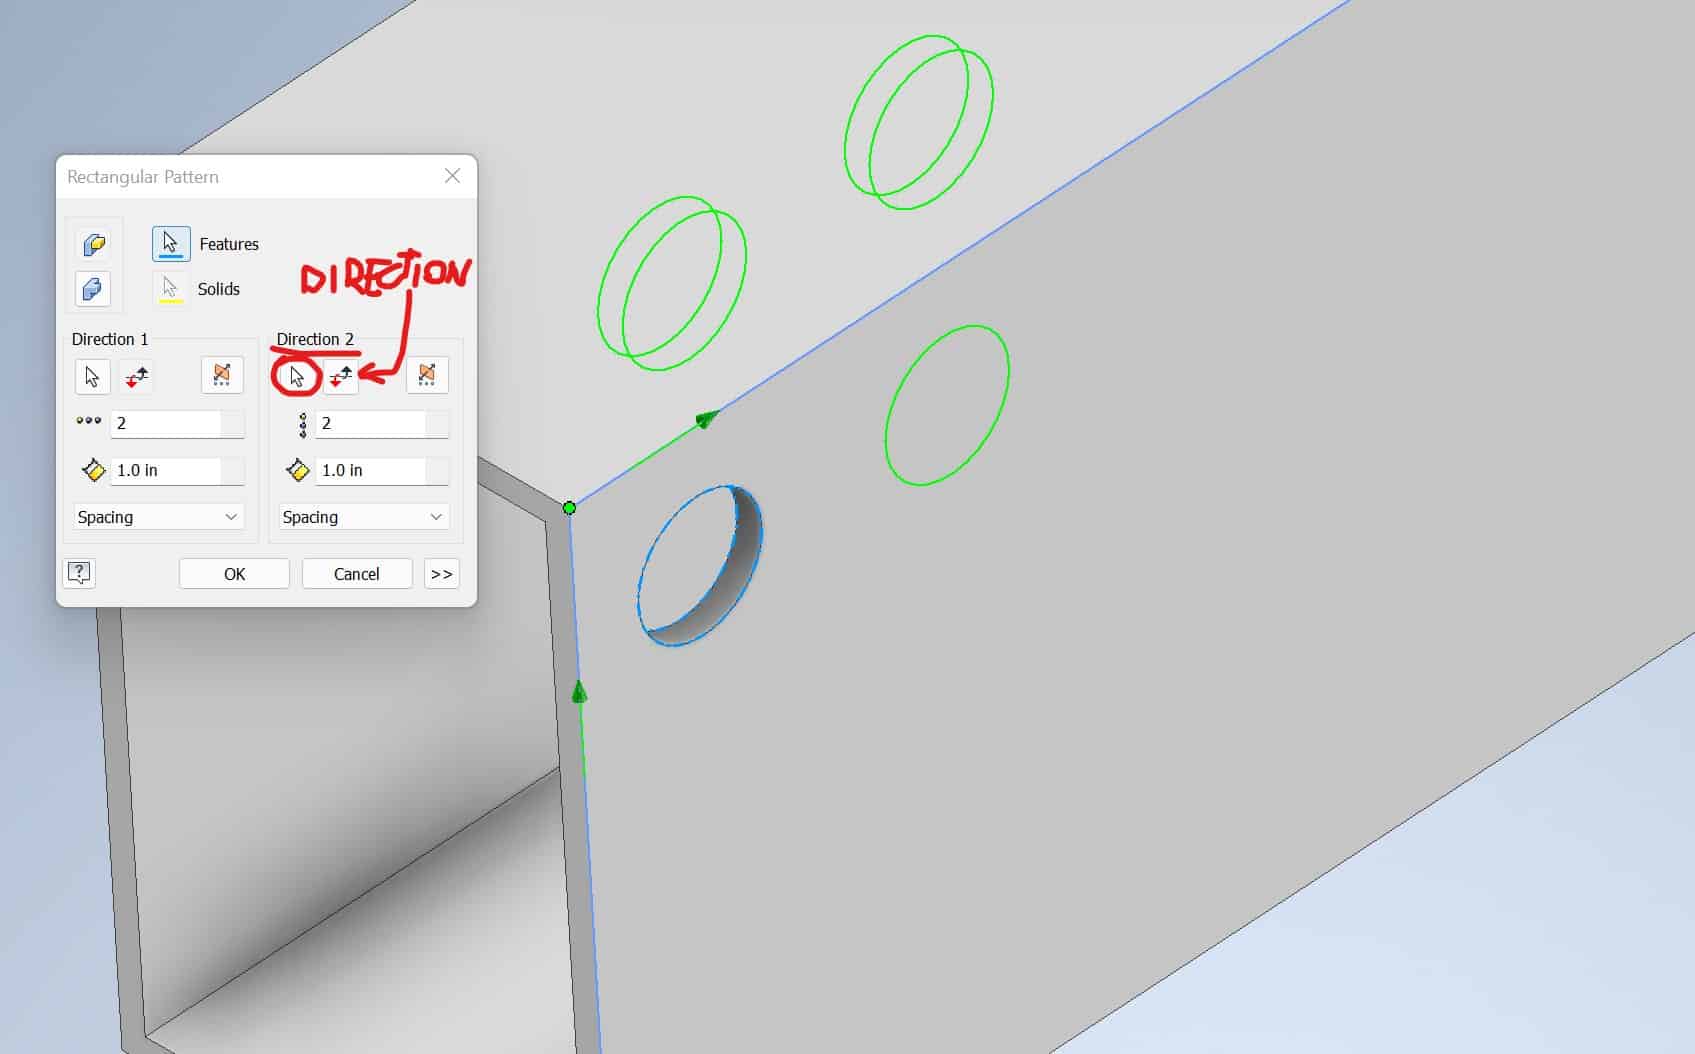
Click the arrow under Direction 2, and then on the side edge of the shell:
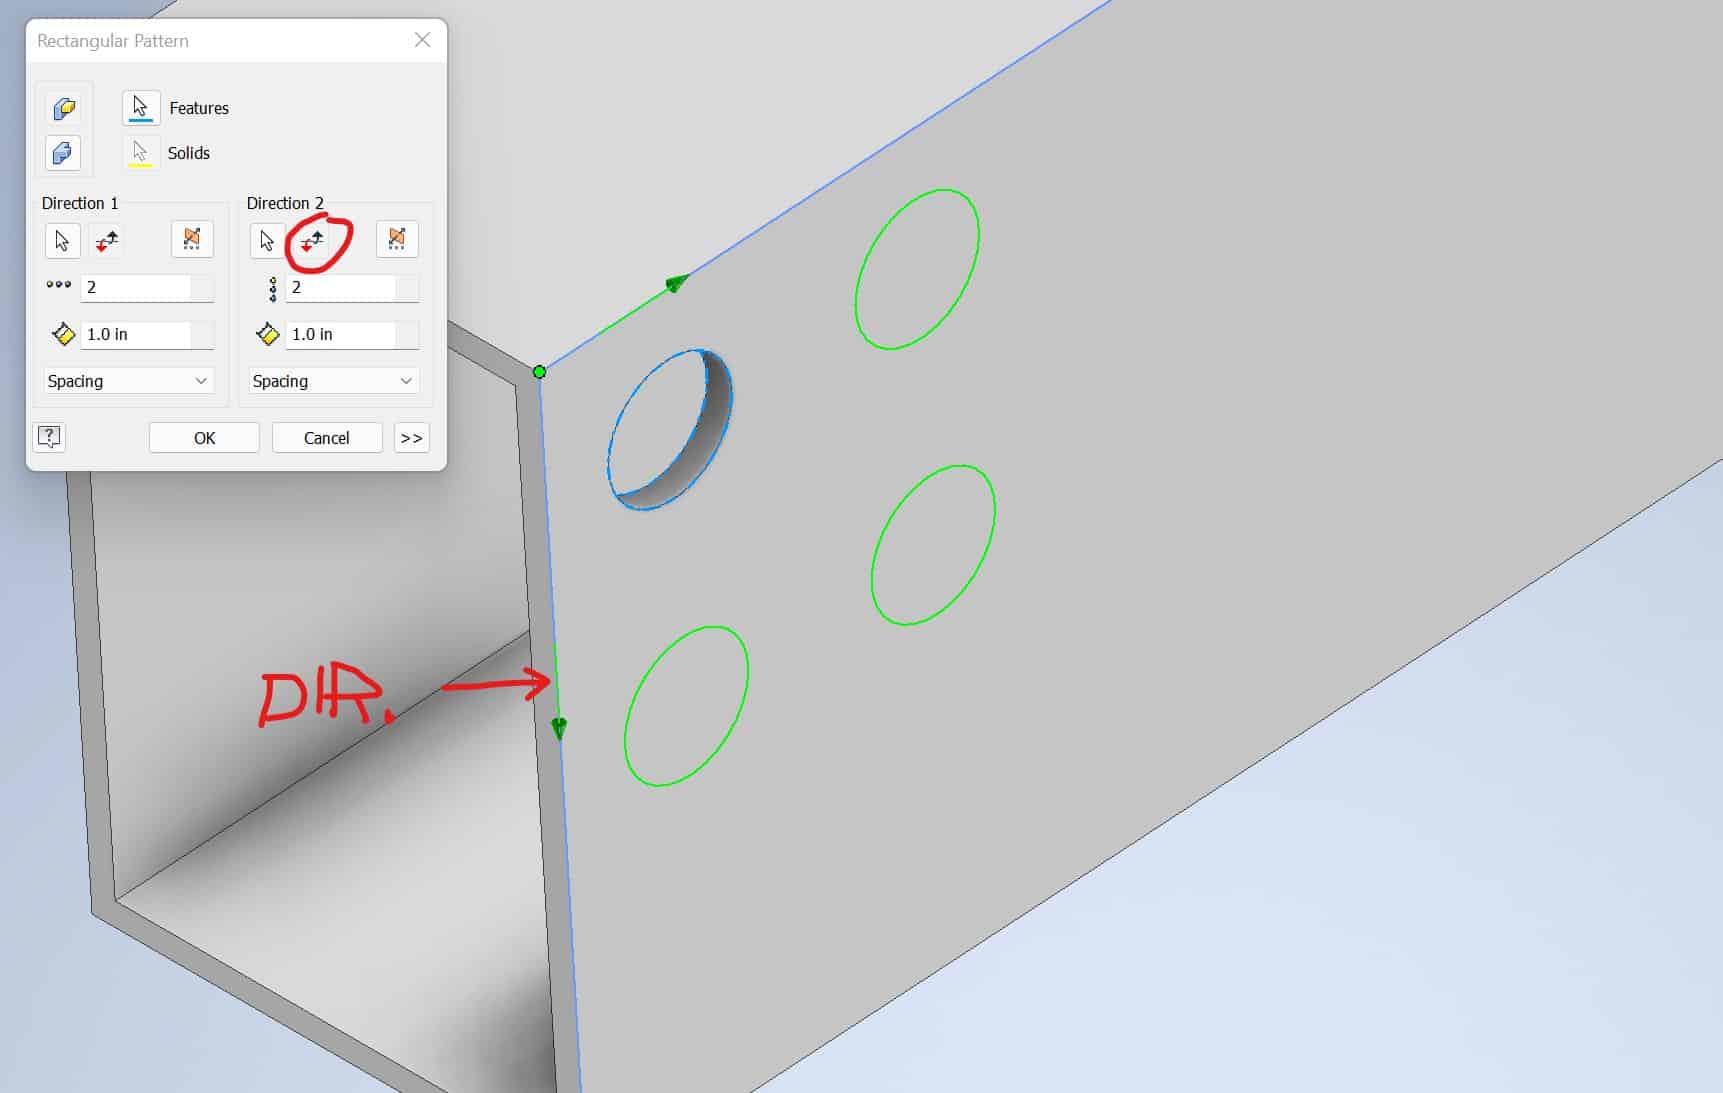
If the holes appear on the wrong side click on the direction icon. It will fix the problem – direction arrow will be pointing downward:
Now specify number of the holes in your pattern:
Direction1 (horiz.): 8 and Direction2 (vert.): 3
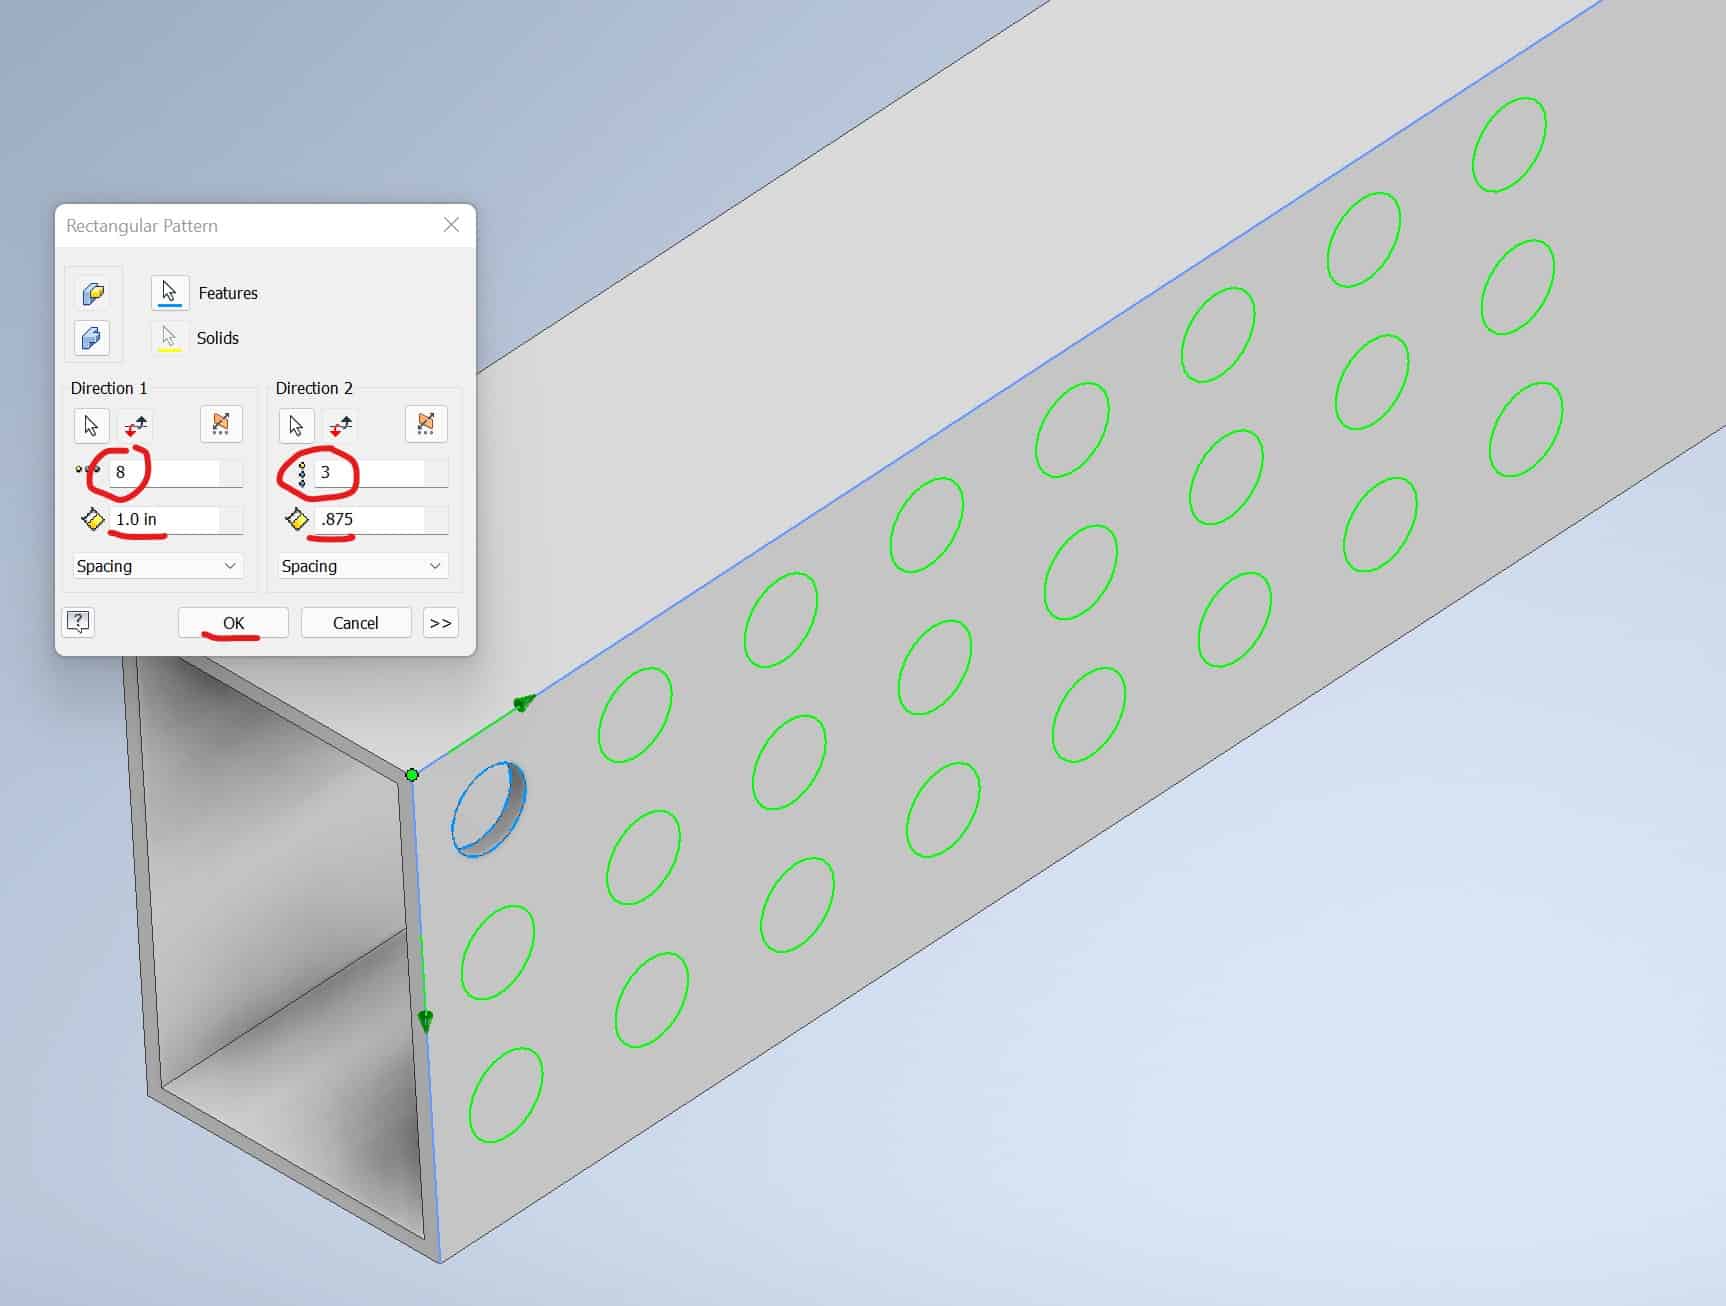
Click OK.
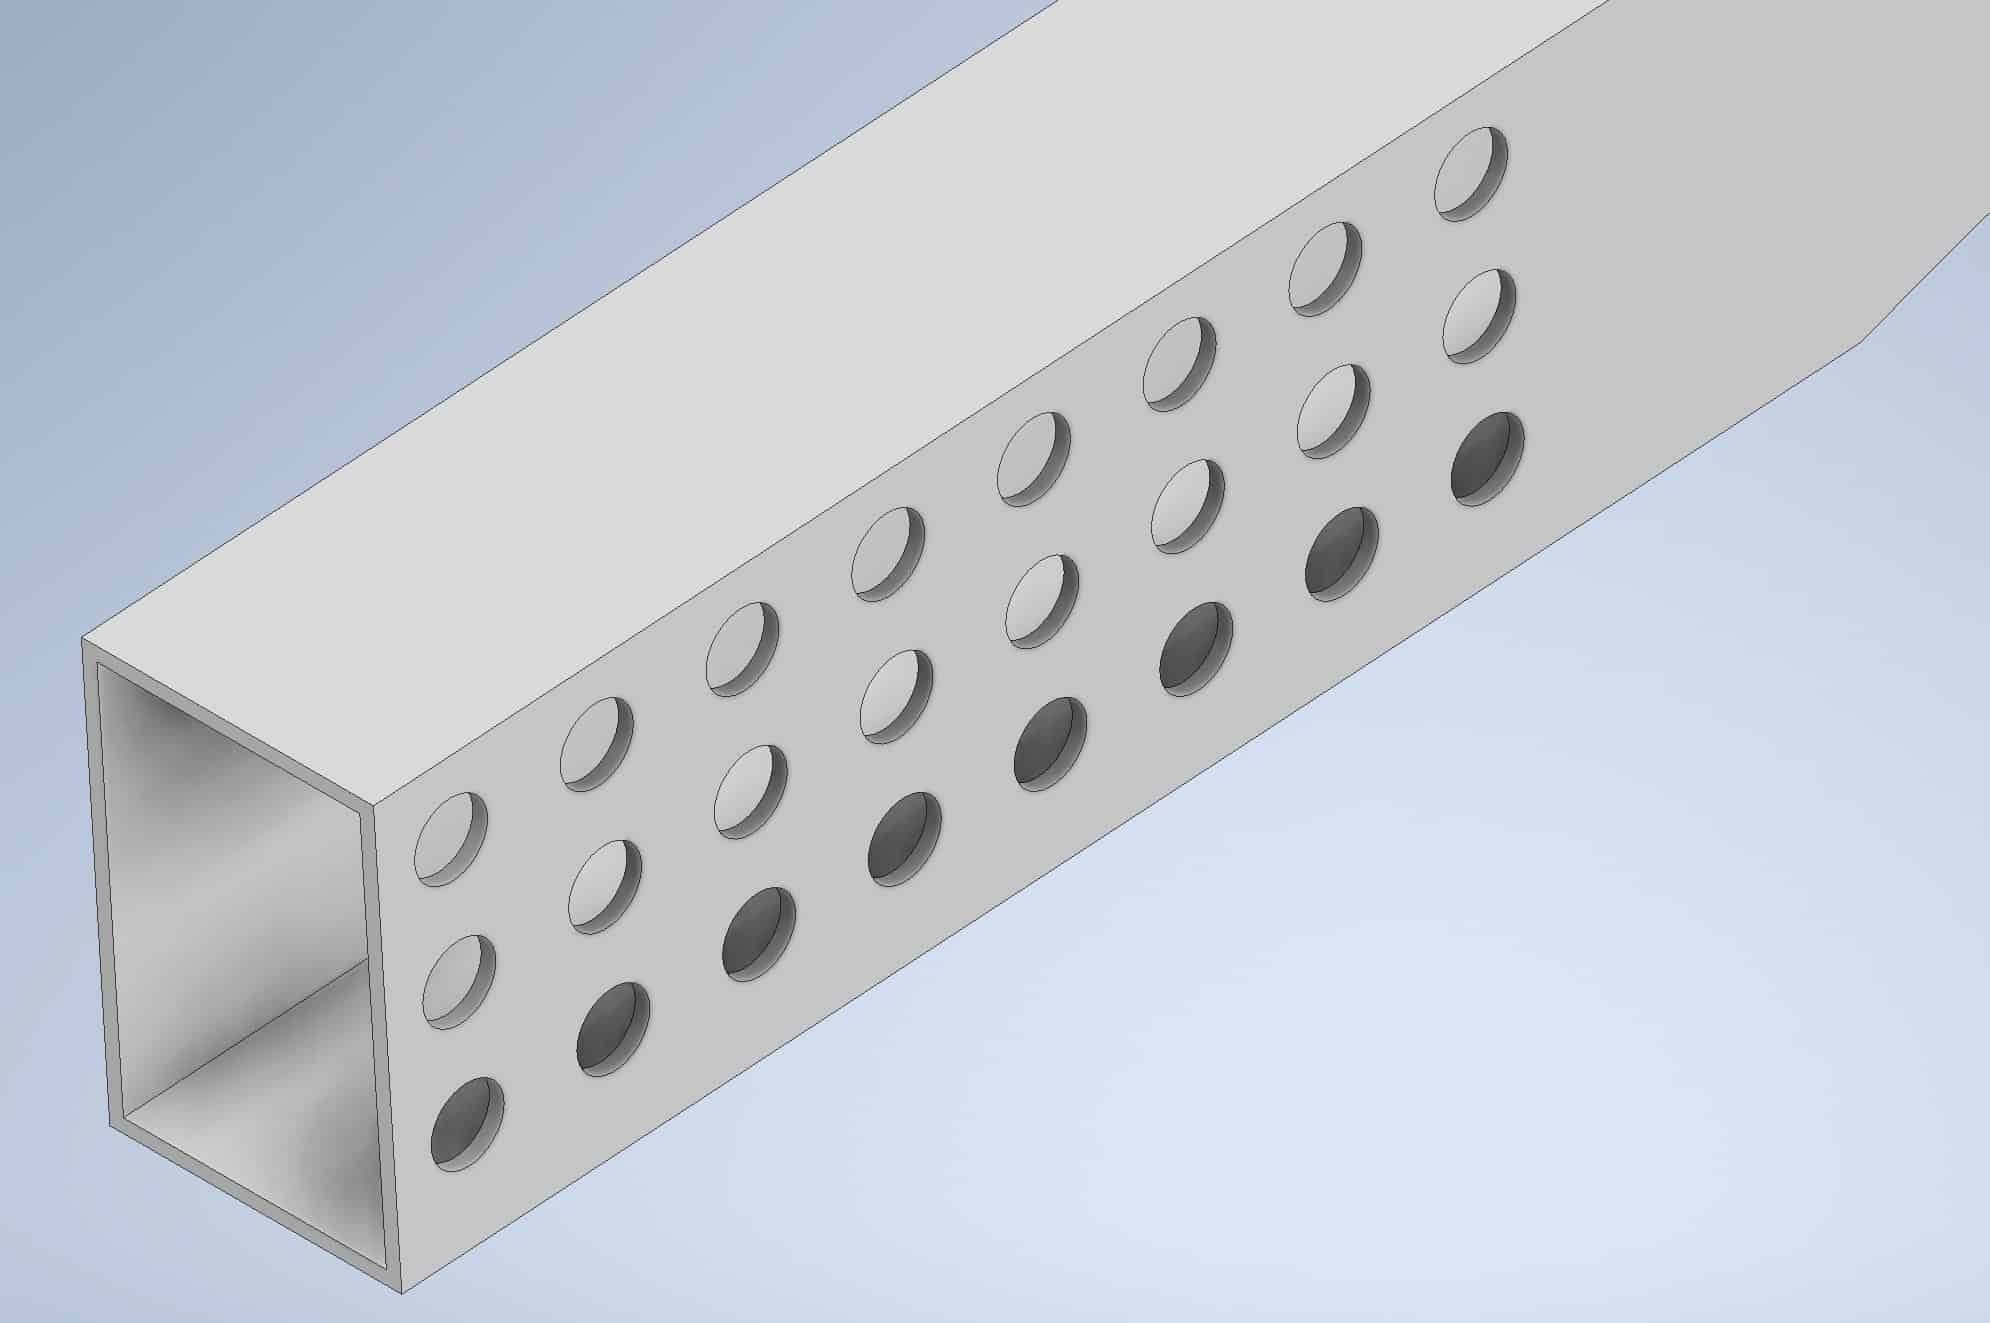
Save your model.
Loft Tool
Start a New Part. Start a New 2D Sketch on X,Y plane.
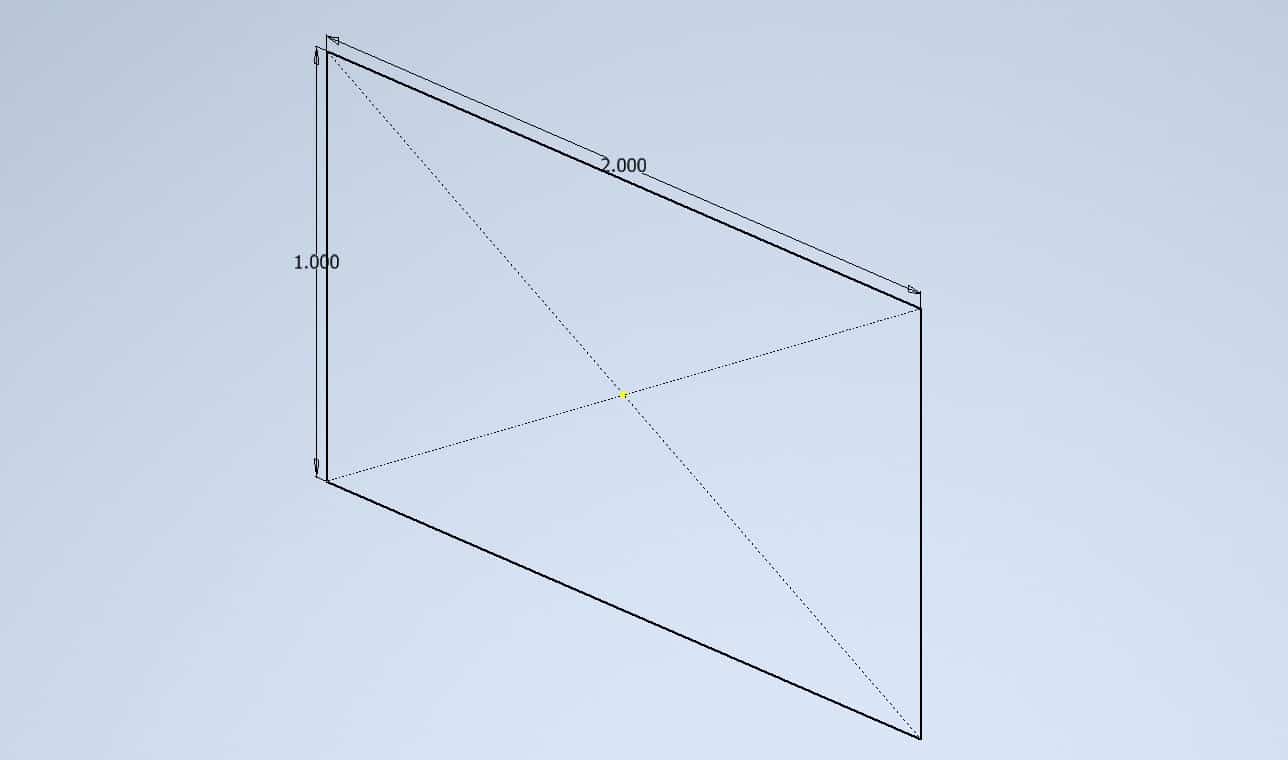
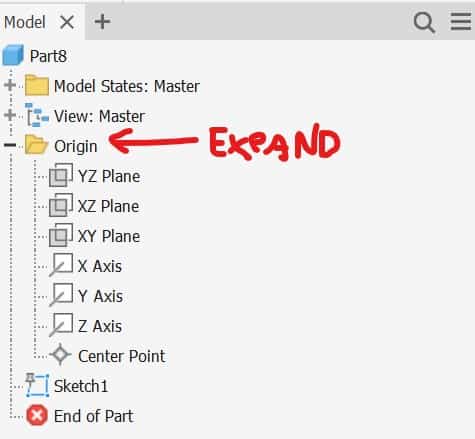
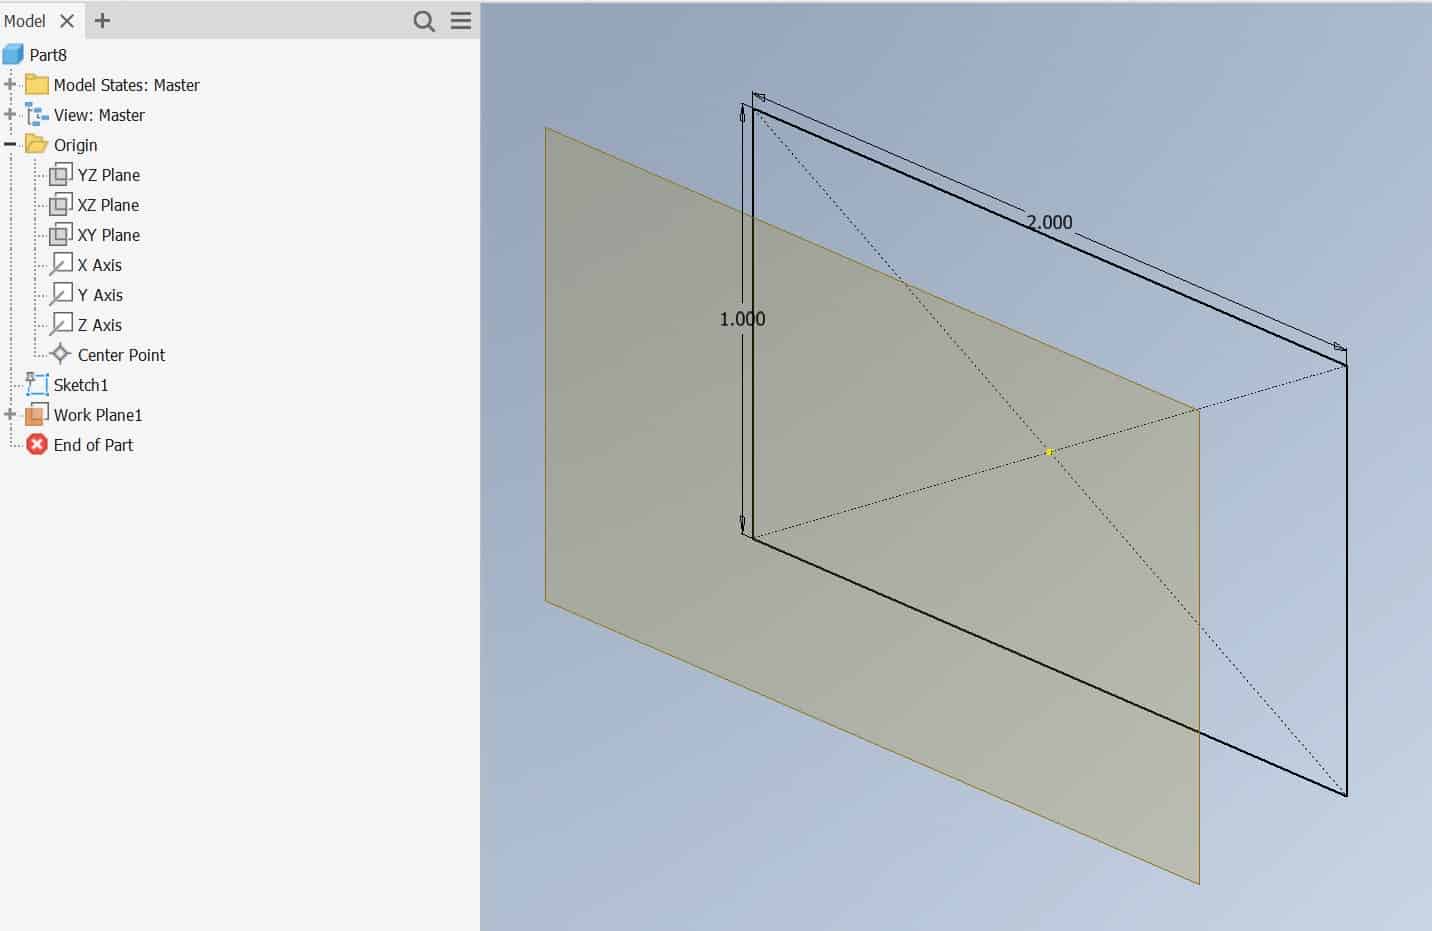
Expand Part Tree by pressing + sign next to Origin:
Additional Workplanes
Start a Plane tool from:
The Ribbon > 3D Model tab > Work Features panel > Plane tool

Click on the X,Y Plane in the Part Tree, the plane will become highlighted:
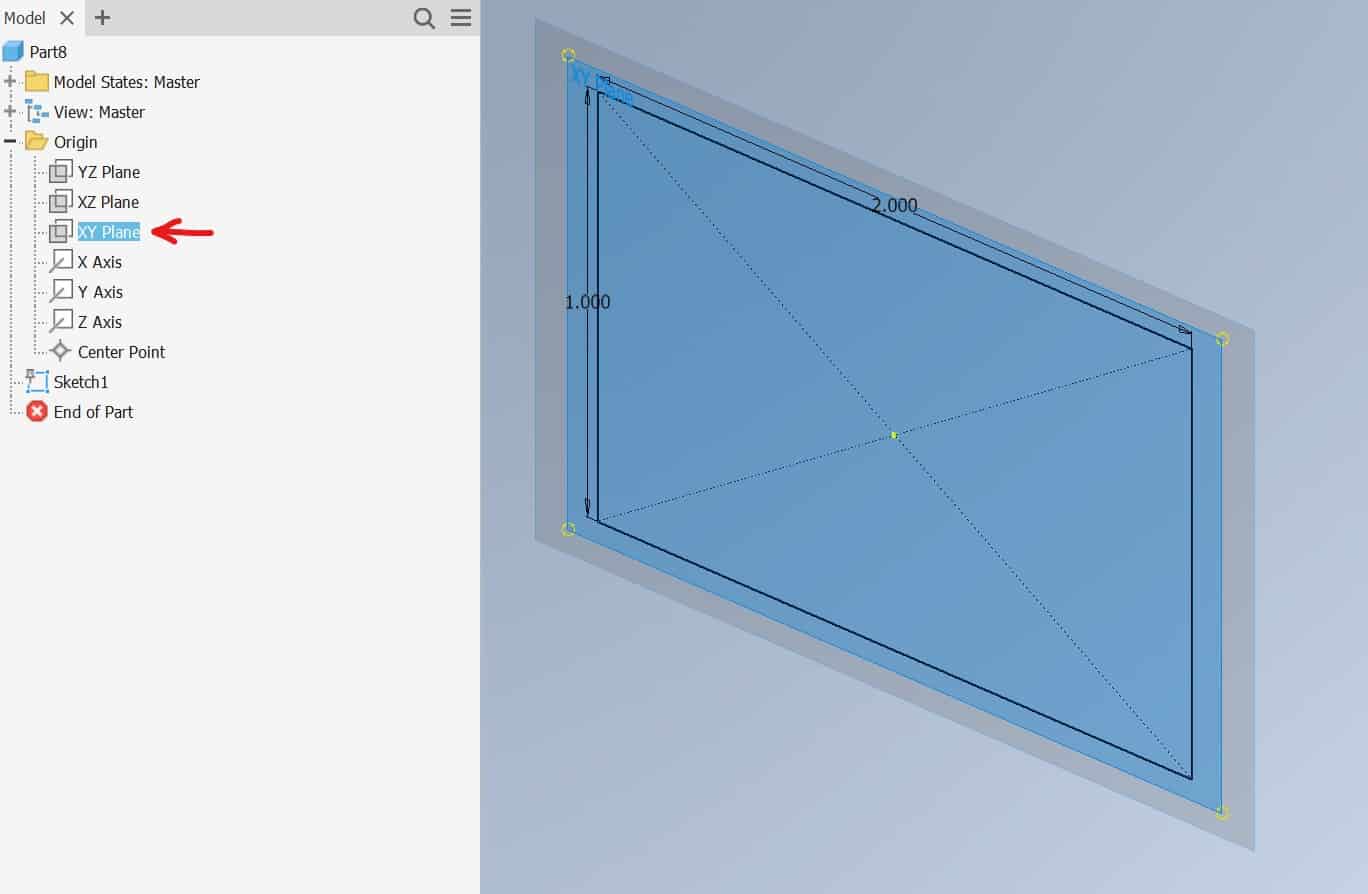
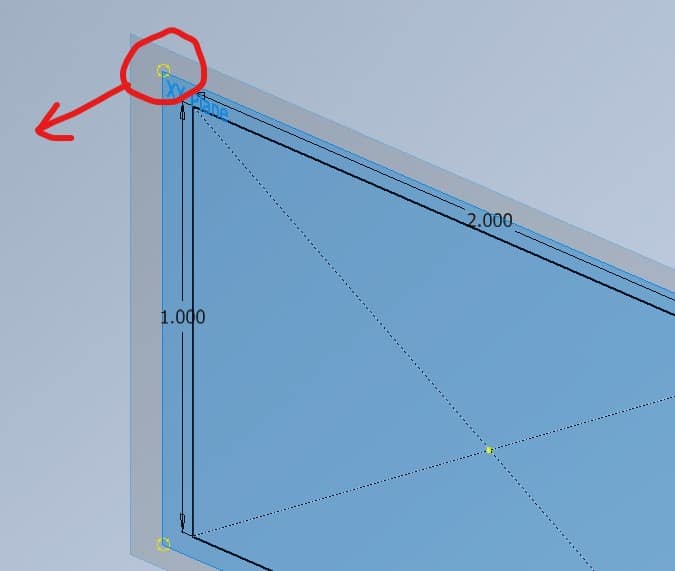
Start dragging the Plane using the yellow circle in the top-left corner:
Enter a value of 0.5 into a dialog box and press ENTER:
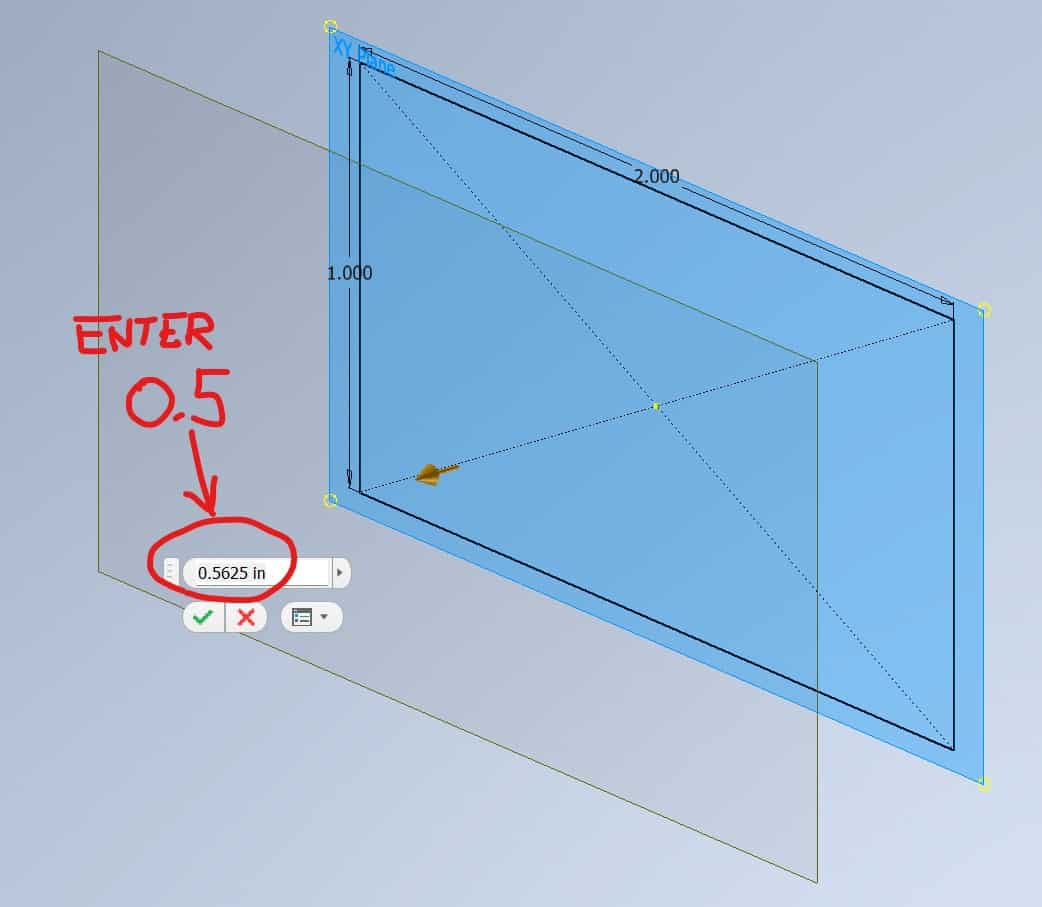
The current status of your screen should be like this:
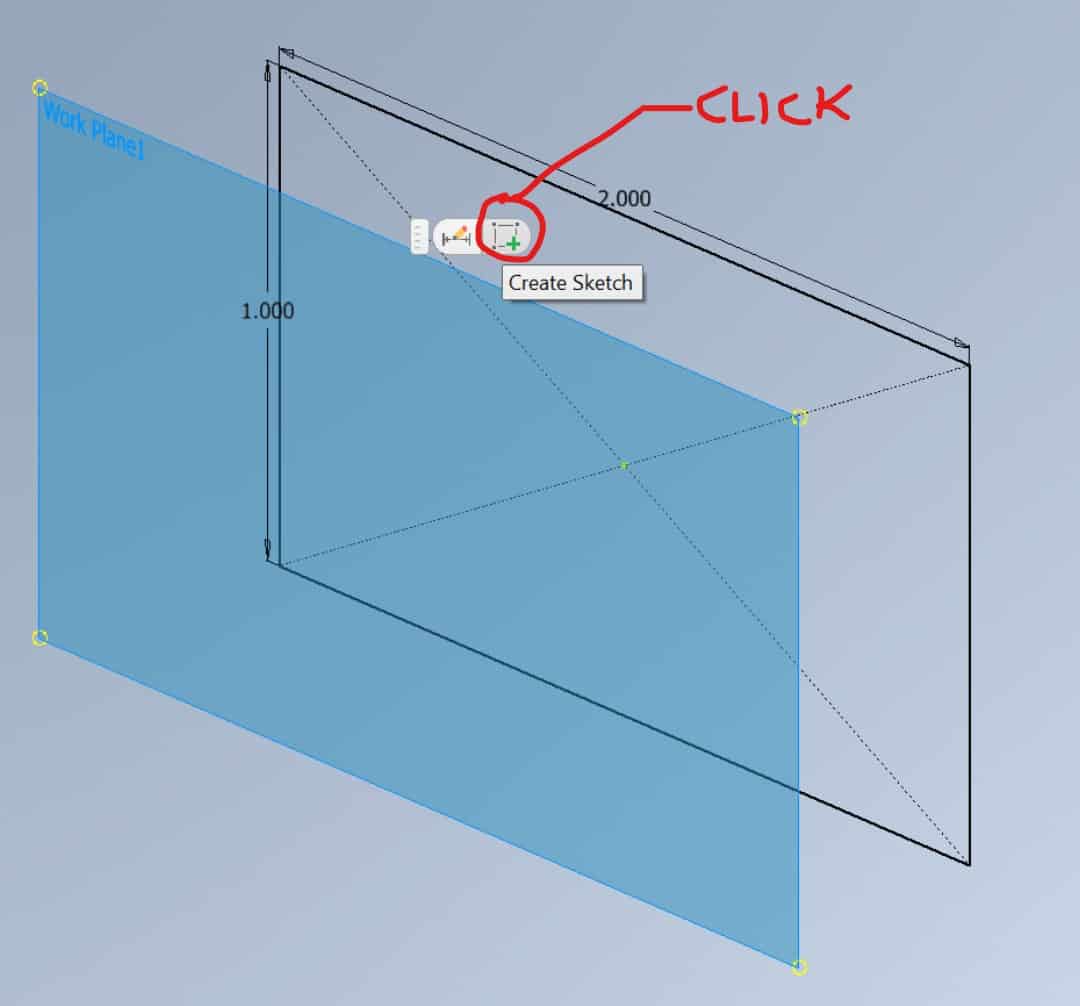
Left-click on the freshly created plane and choose Create Sketch on this plane option:
Draw a circle on this plane and click on Finish Sketch:
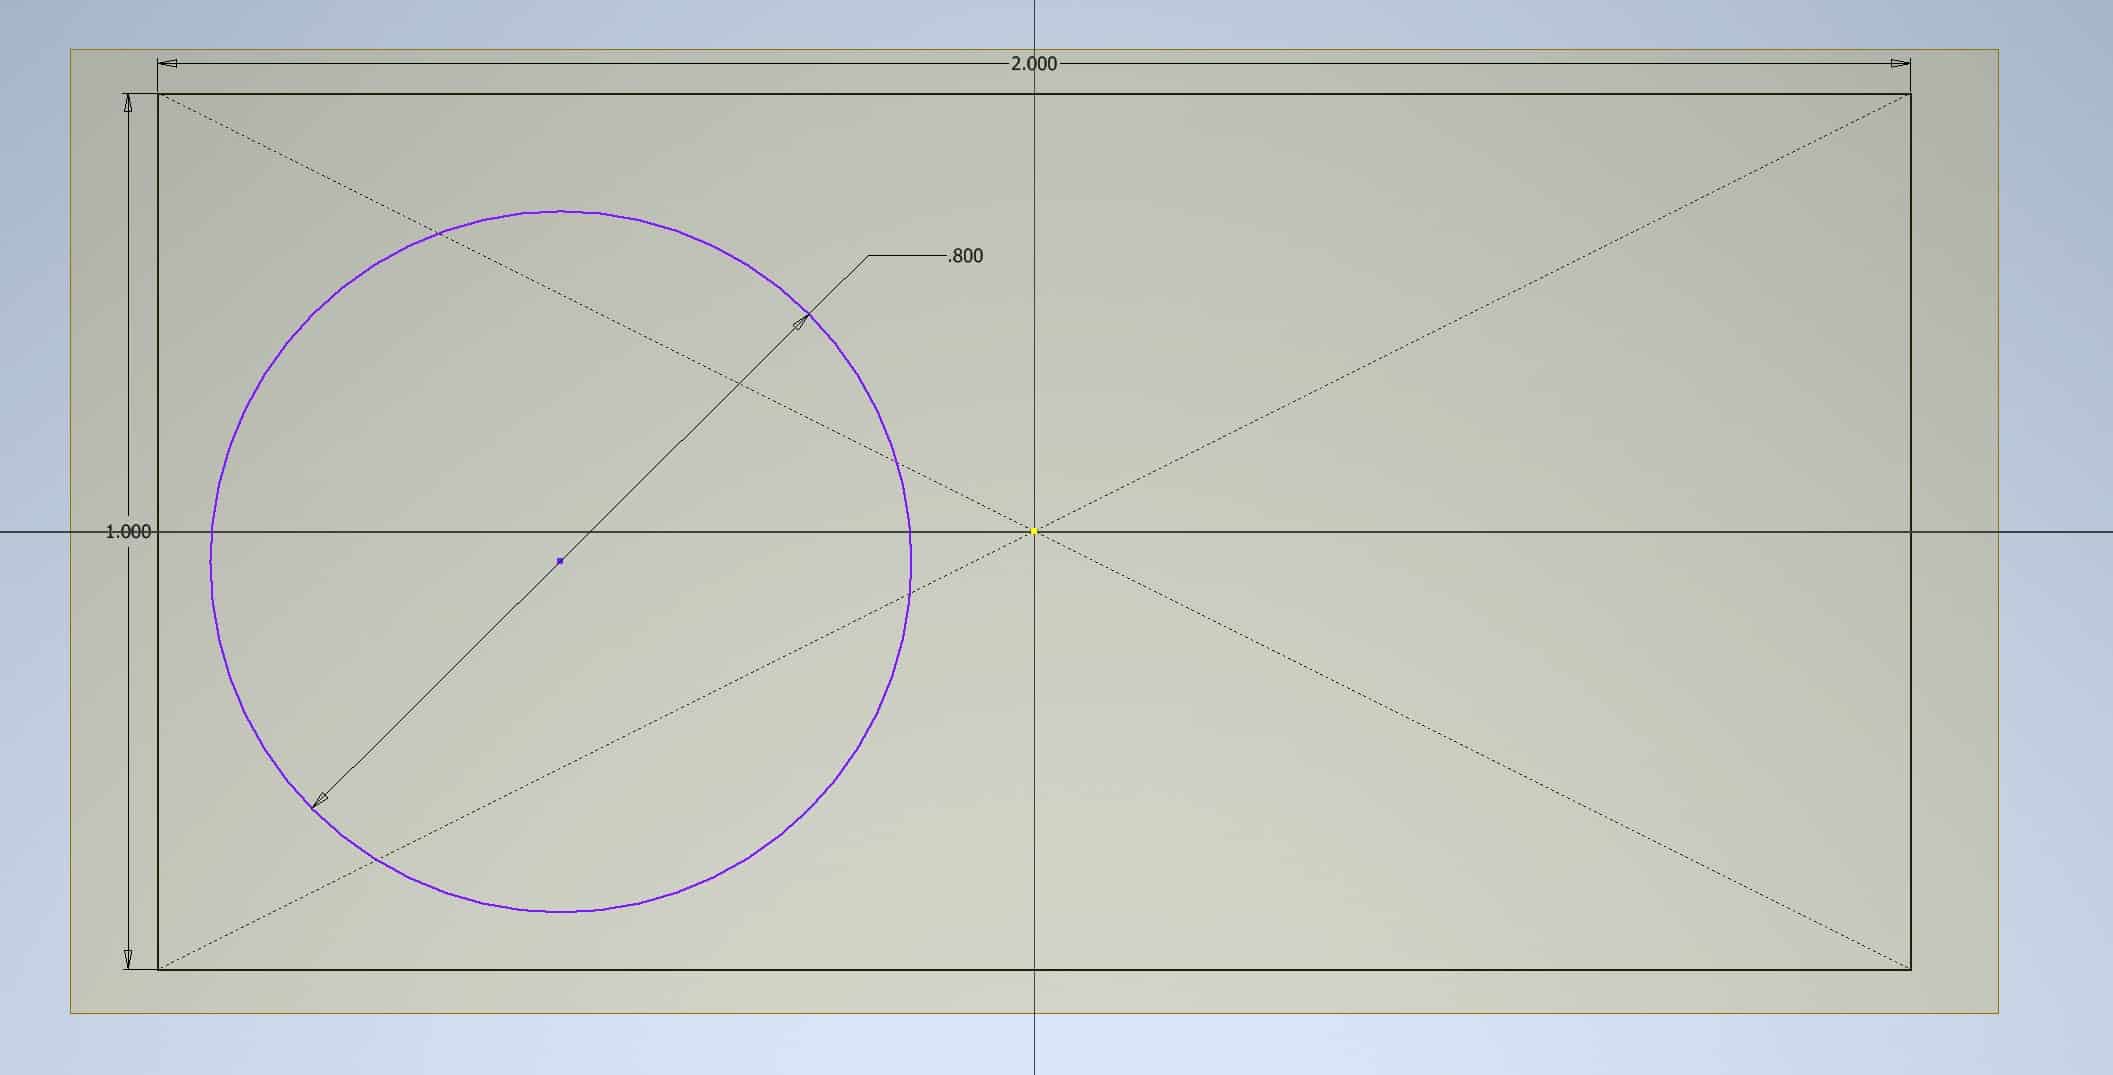
This should be current workspace status:
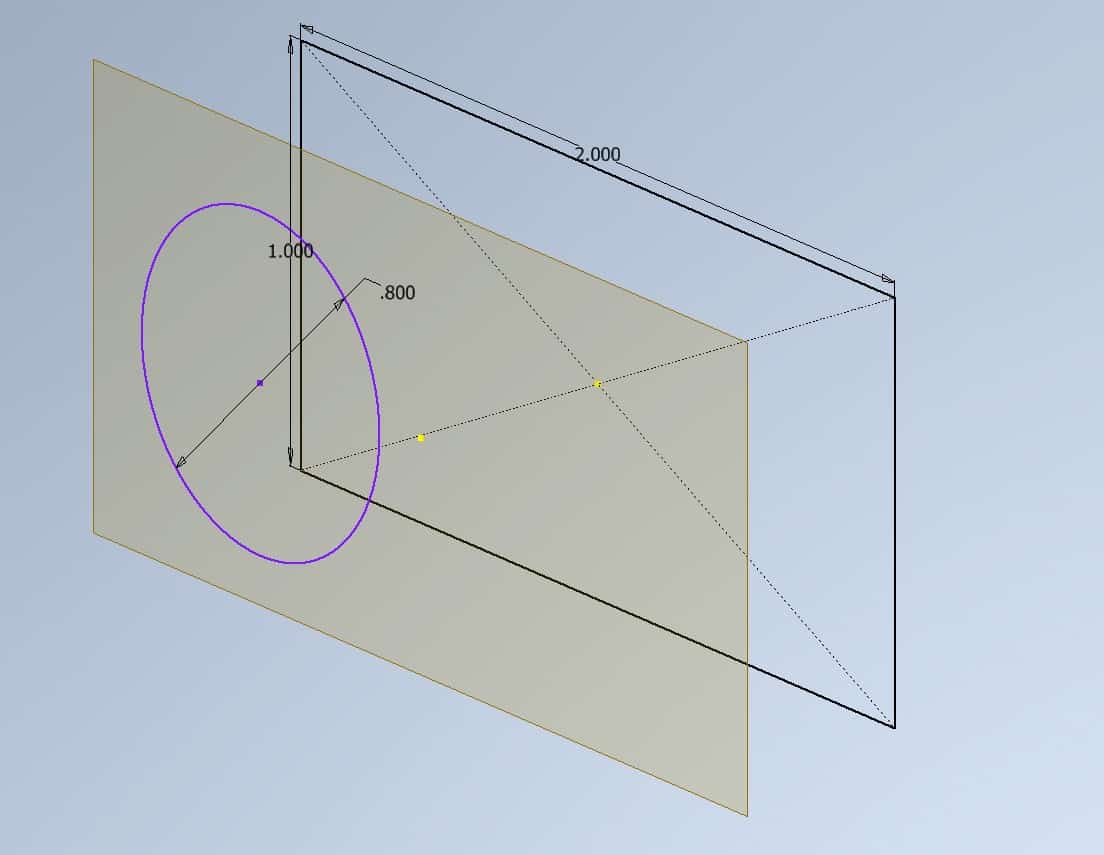
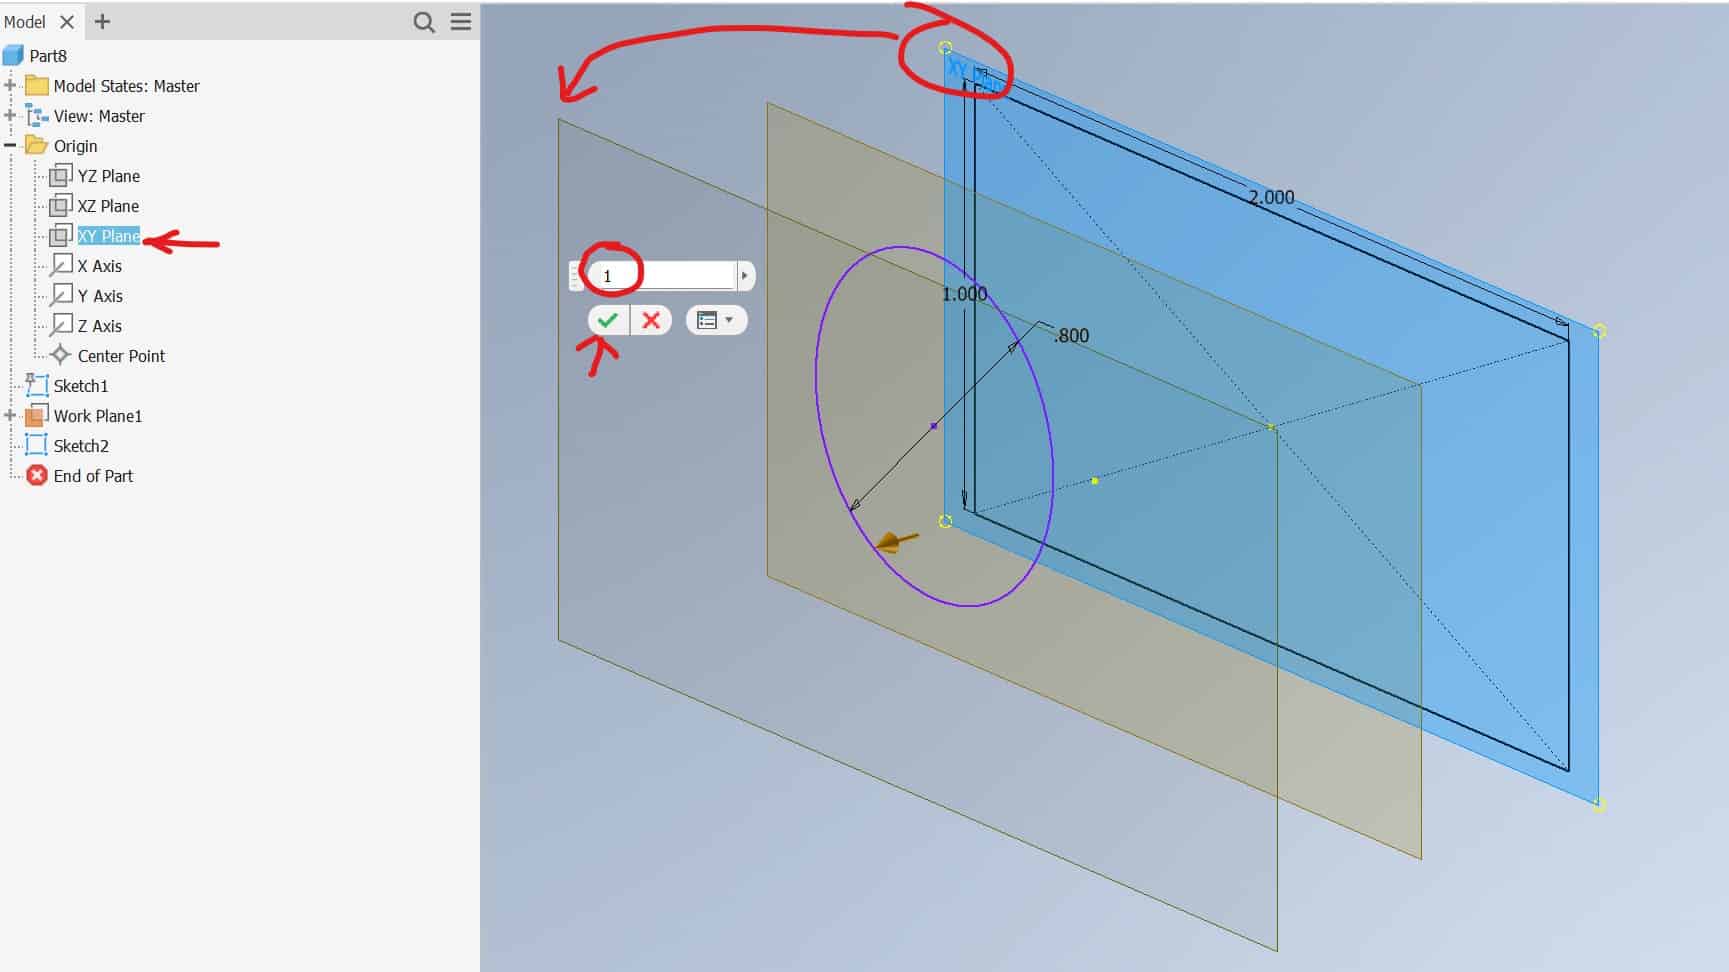
Add another X,Y Plane using the same procedure as described above, but enter a distance of 1, click a green tick sign:
Draw a rectngle on this plane:
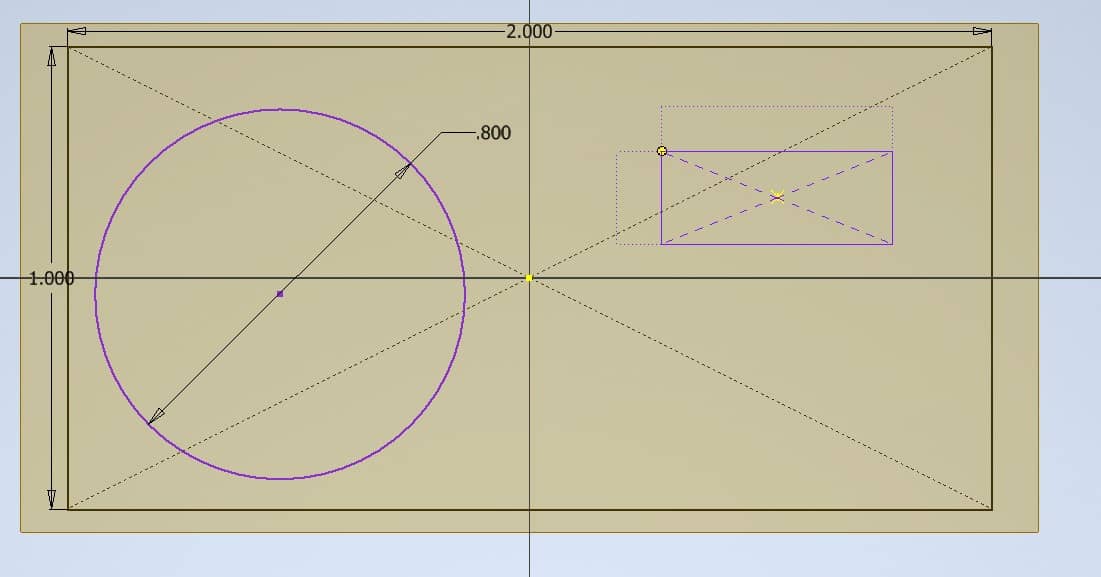
and click Finish Sketch. This should be your Workspace current status:
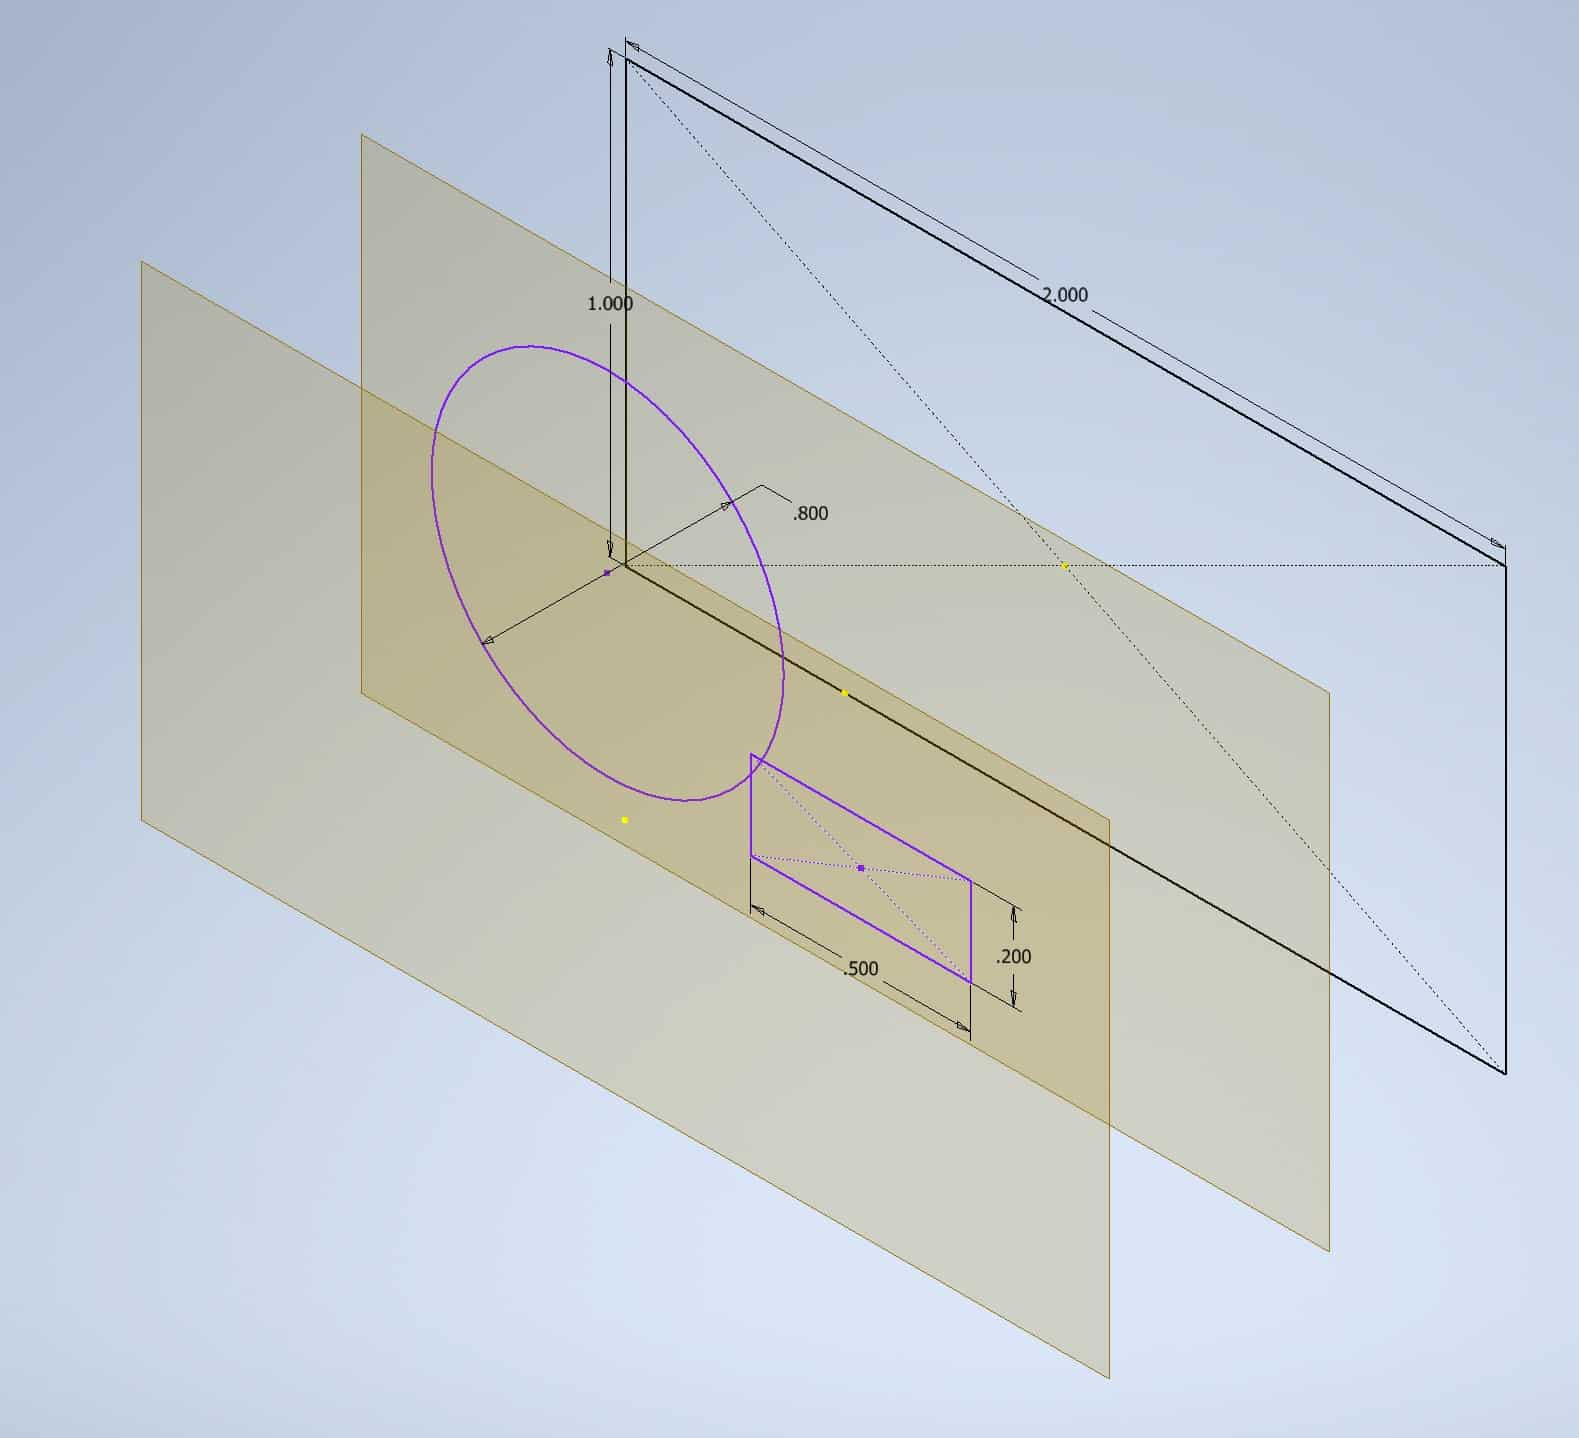
Invoke Loft command from:
The Ribbon > 3D Model tab > Create panel > Loft command

The loft dialog box will open:
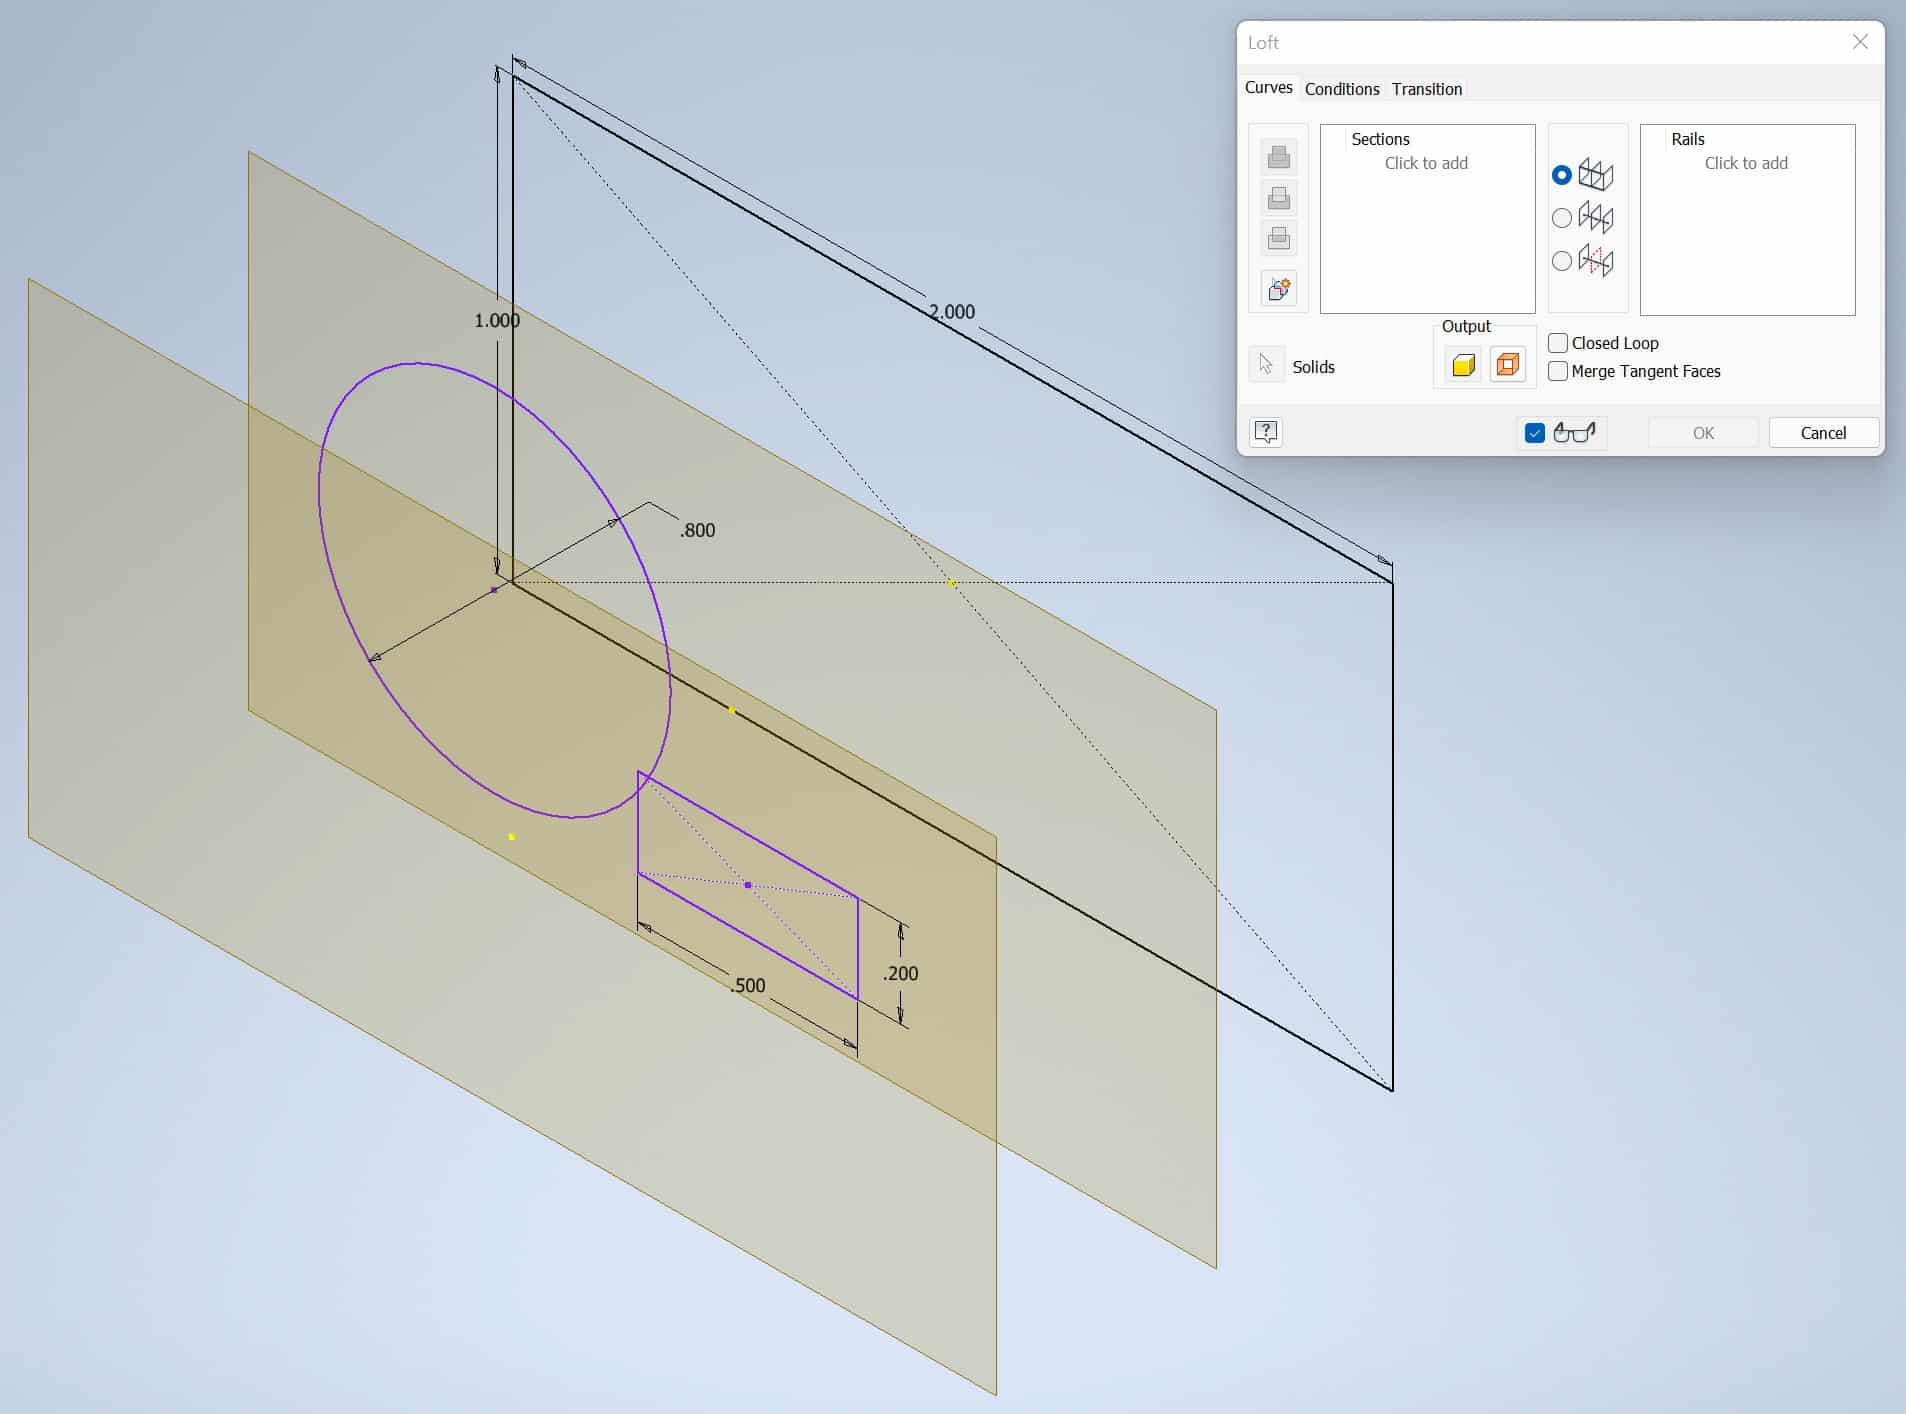
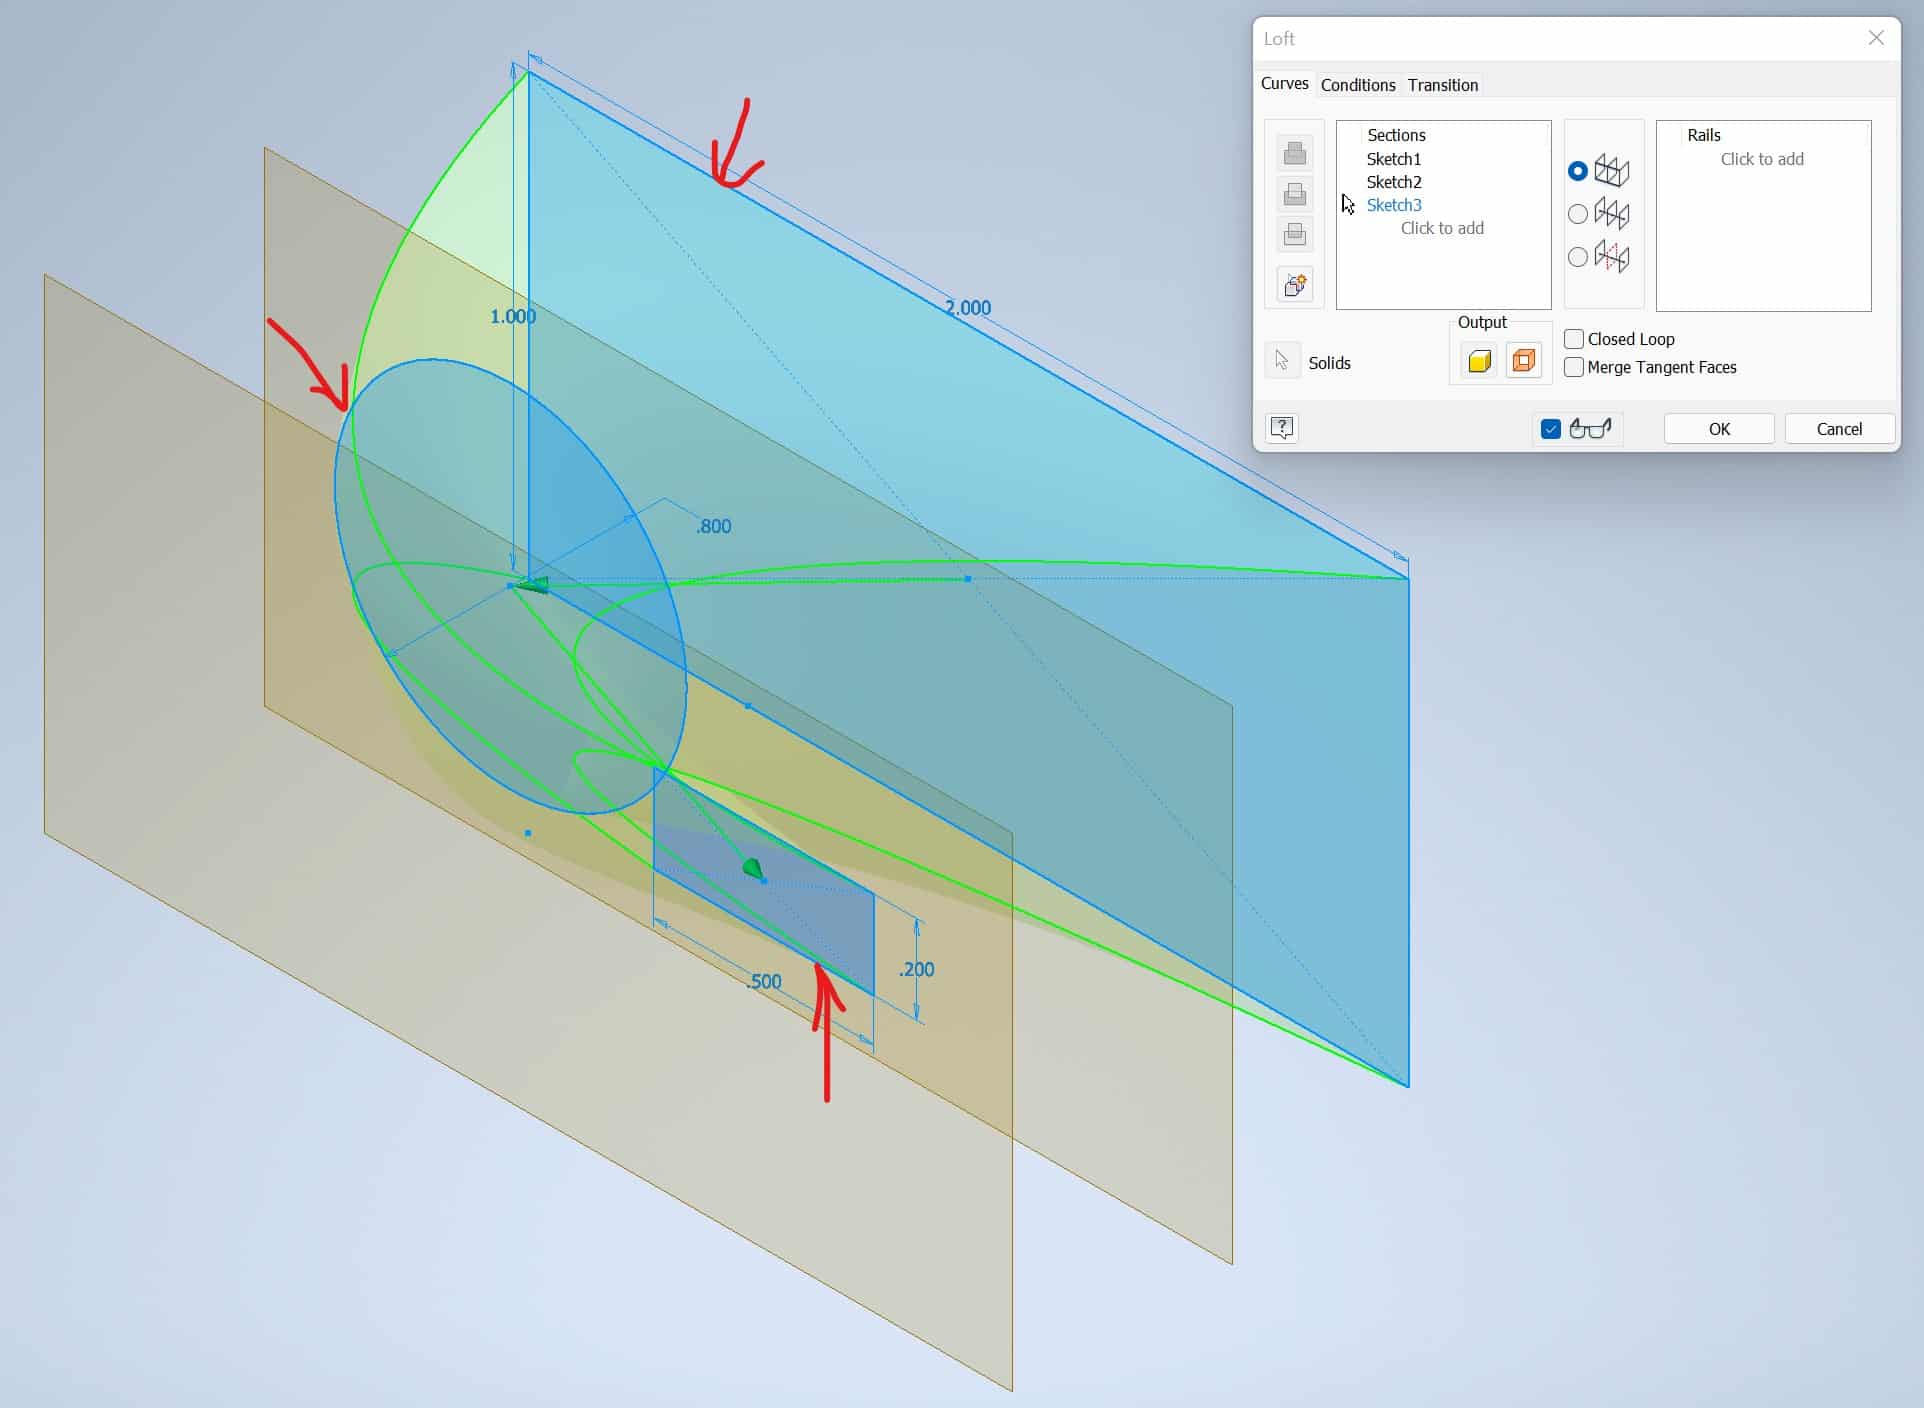
Select all three sketches, the preview of the loft will be visible, click OK:
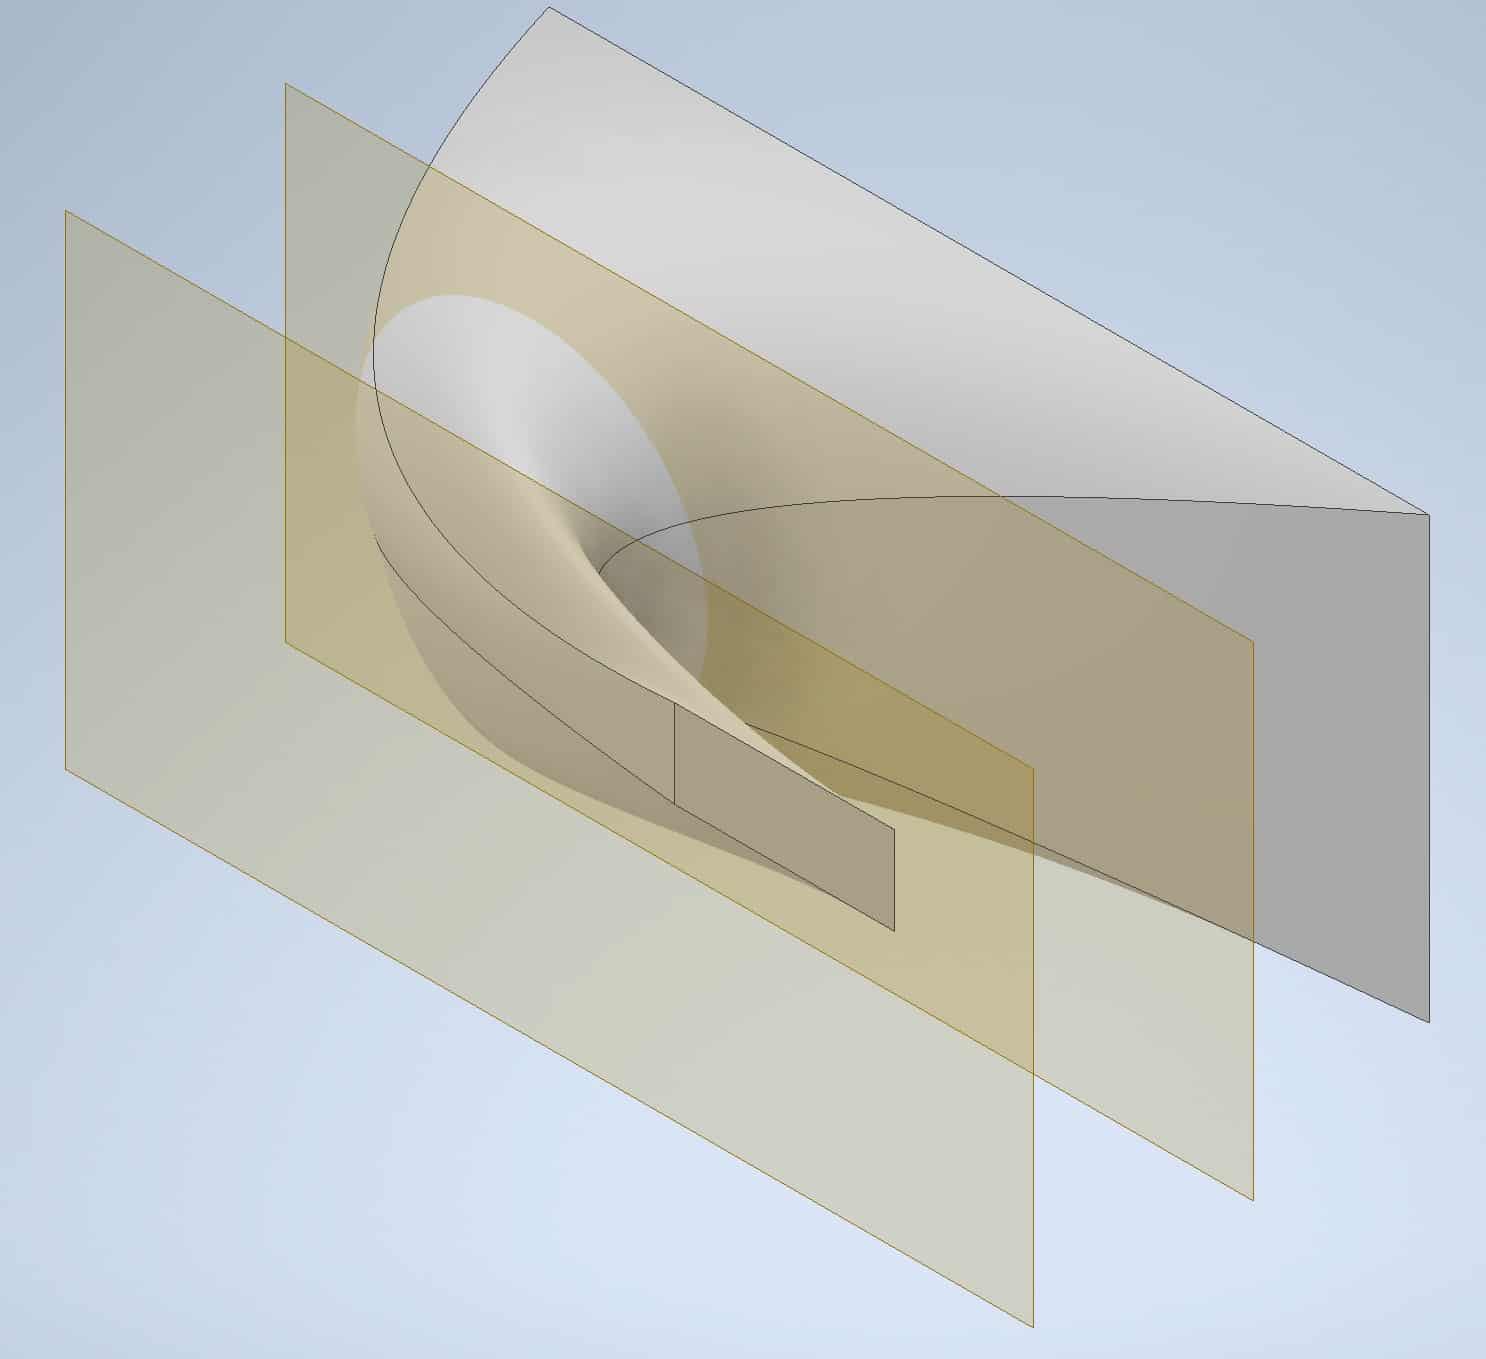
The loft will be completed and the additional workplanes will be visible:
Right-click on the plane which visibility you want to turn off and click on the Visibility option:
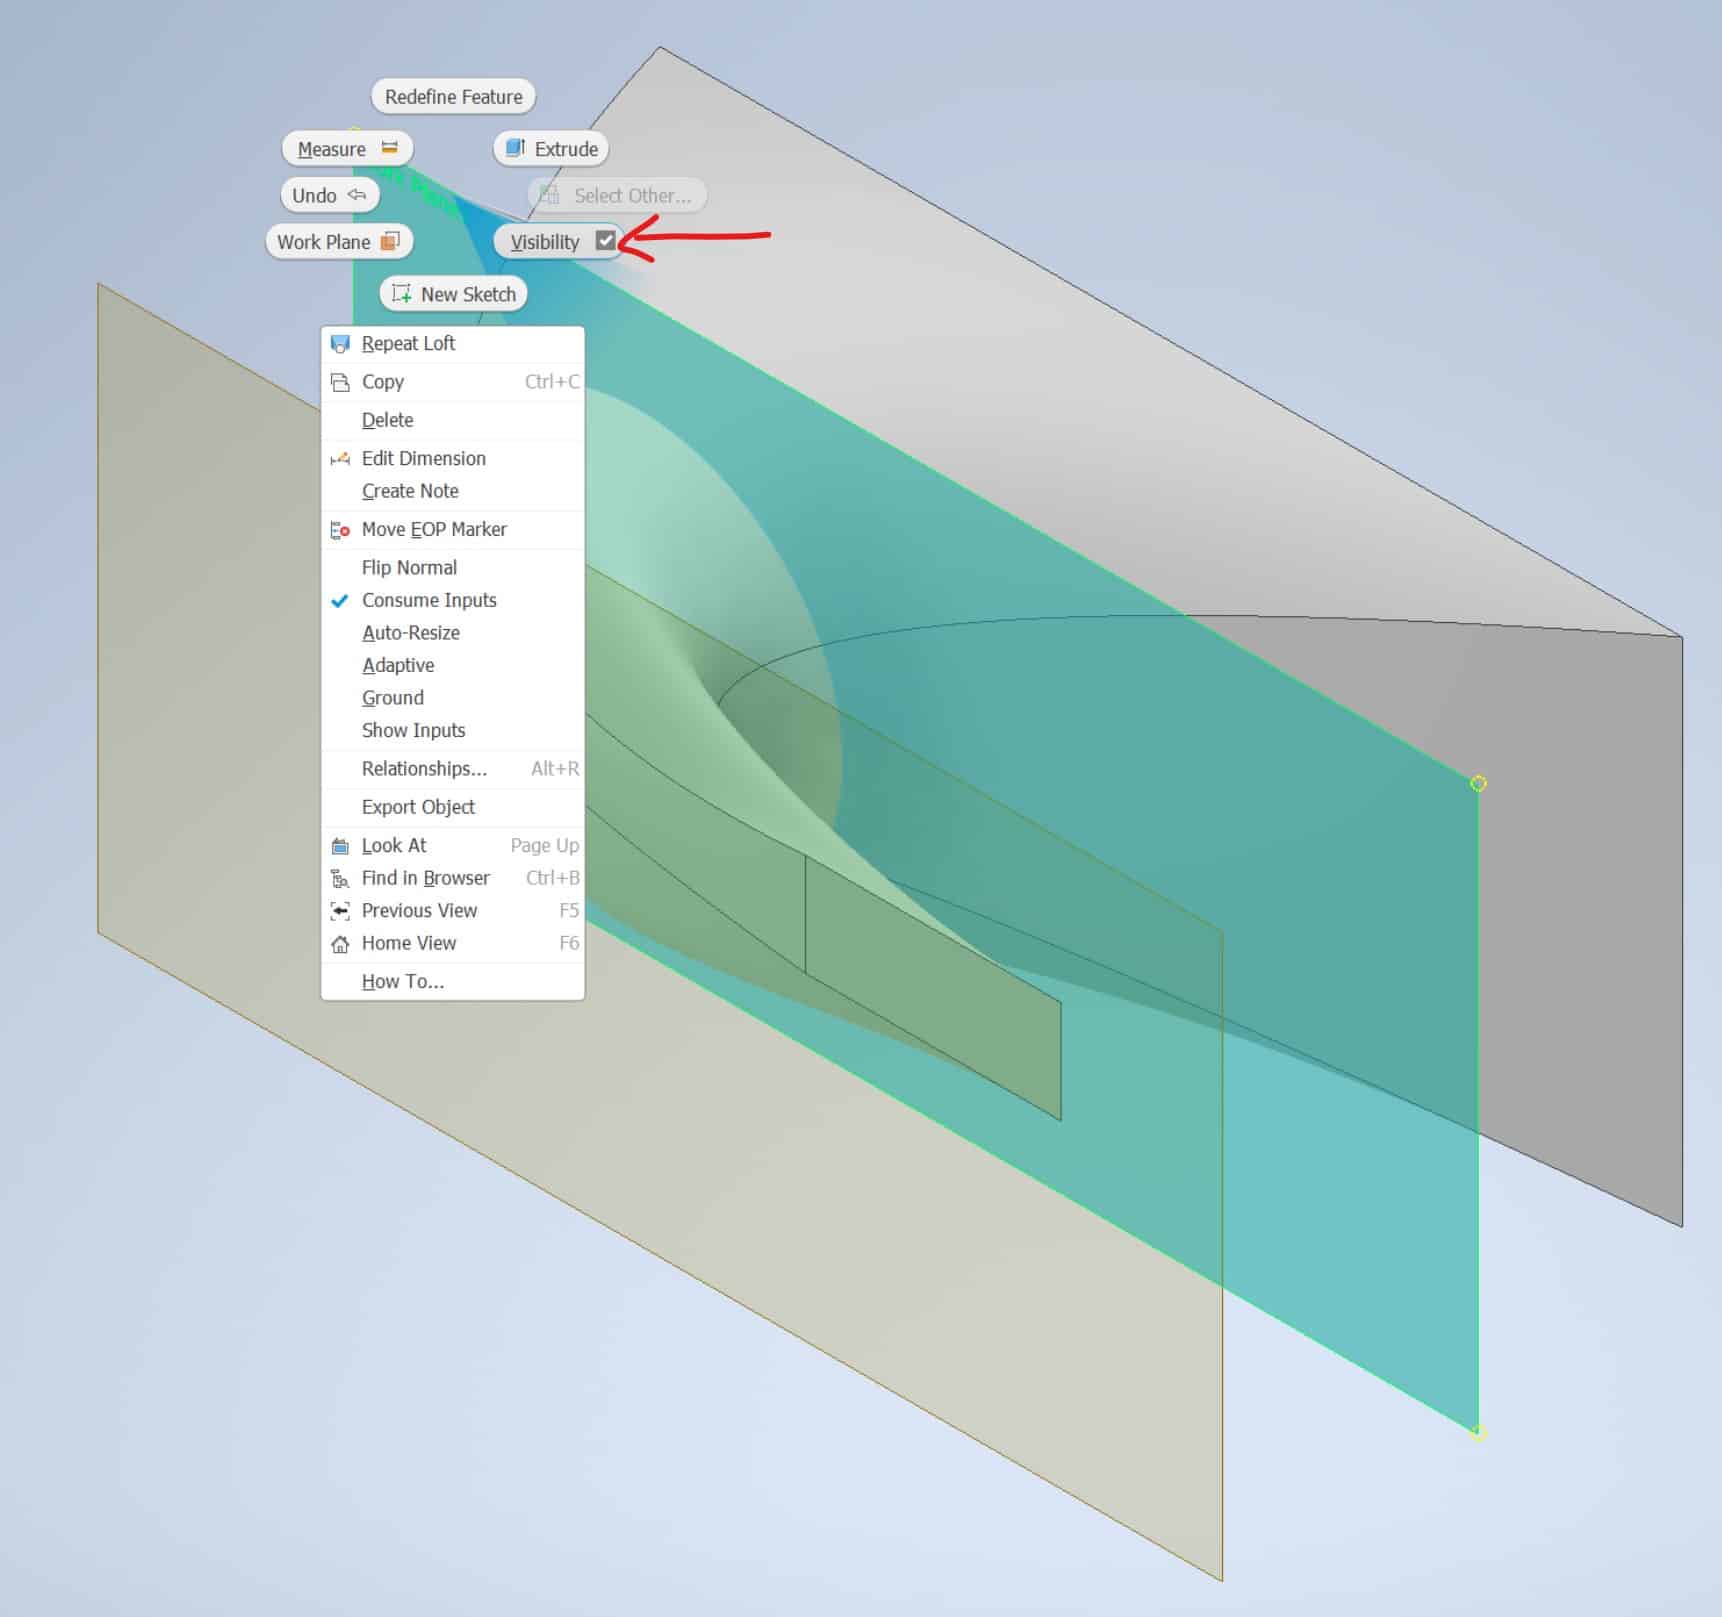
The visibility of the additional planes will be turned off:
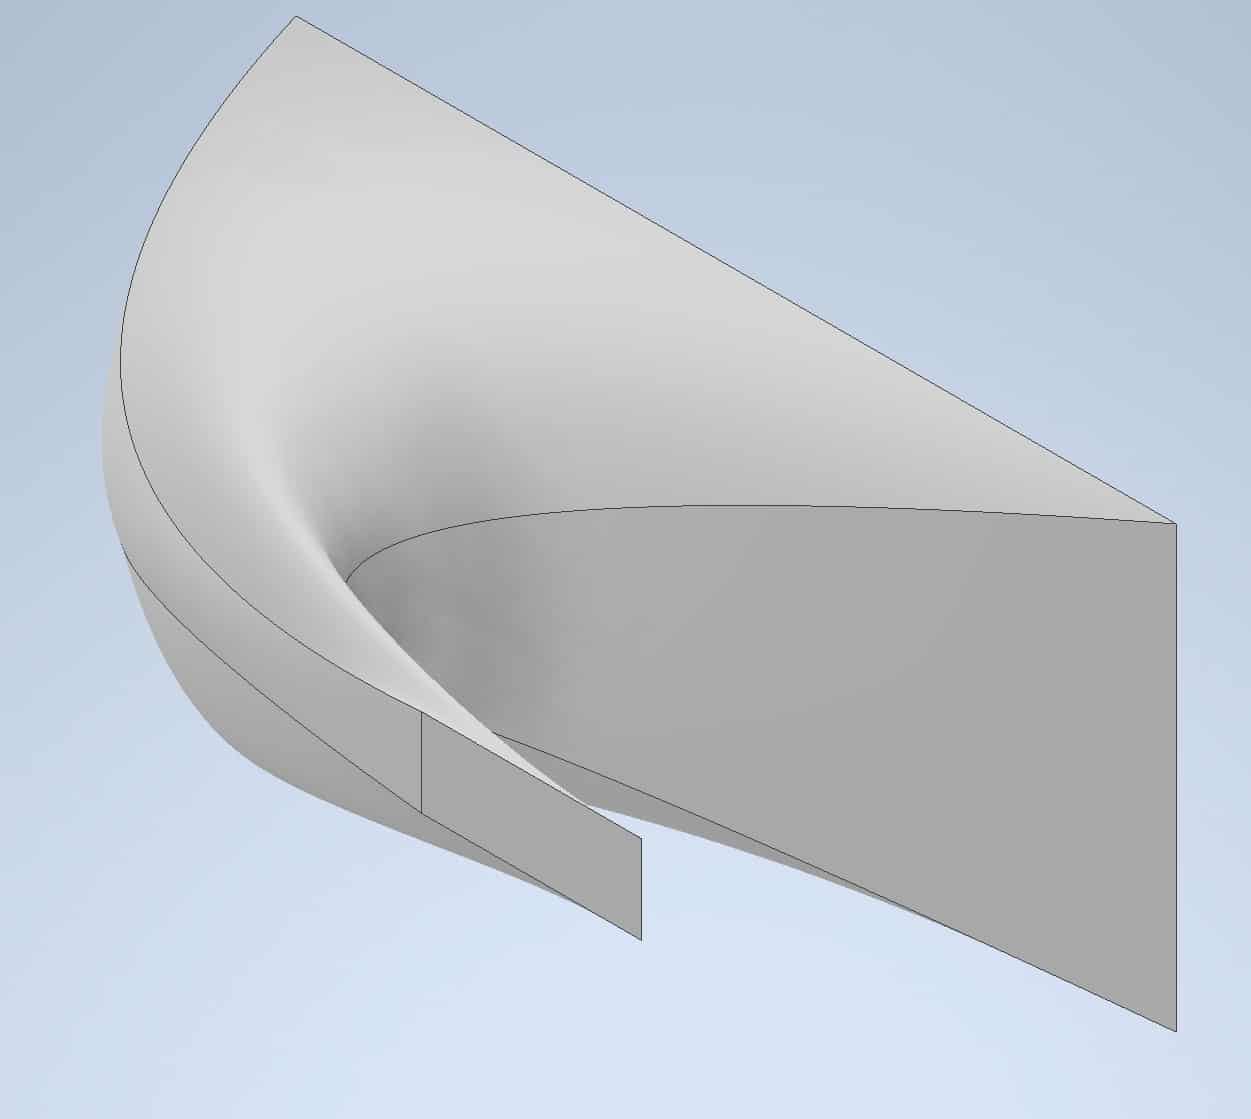
Save your Model.
Coil Tool
Start a new drawing and make a 2D Sketch:

Start the Coil tool:
The Ribbon > 3D Sketch tab > Create panel > Coil tool

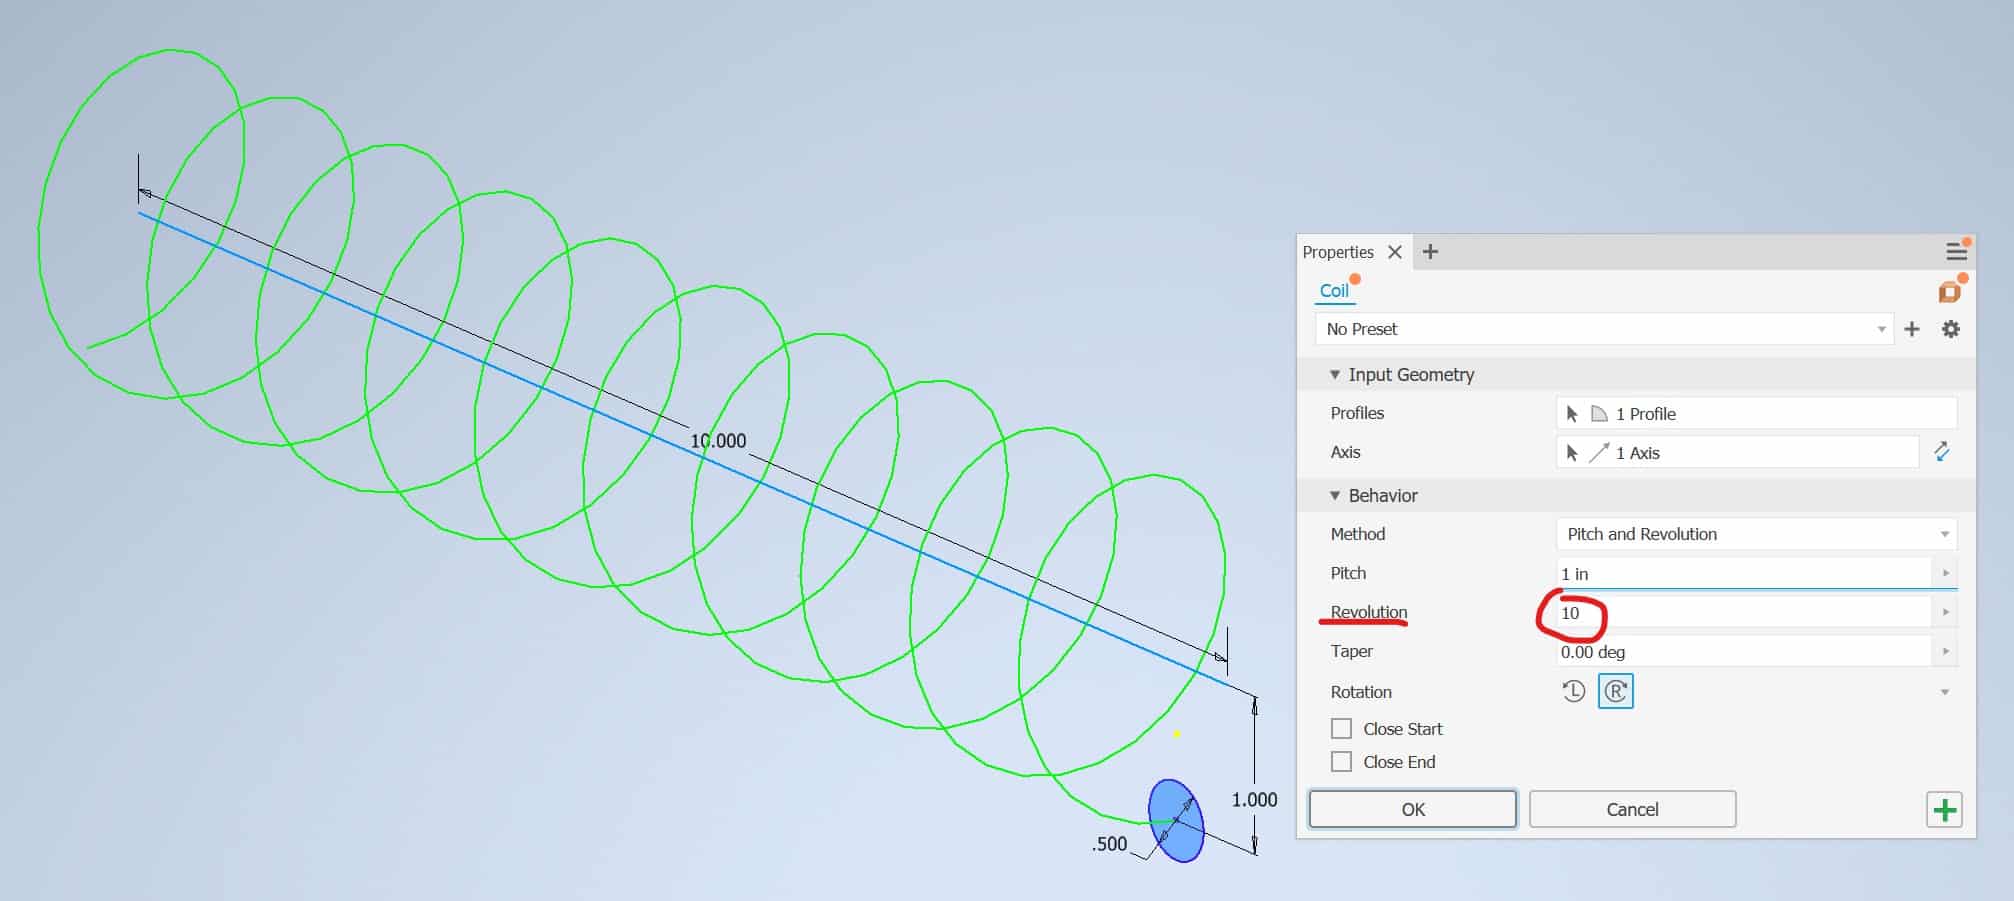
The dialog box will appear. Left-click on the Axis icon and select the horizontal line:
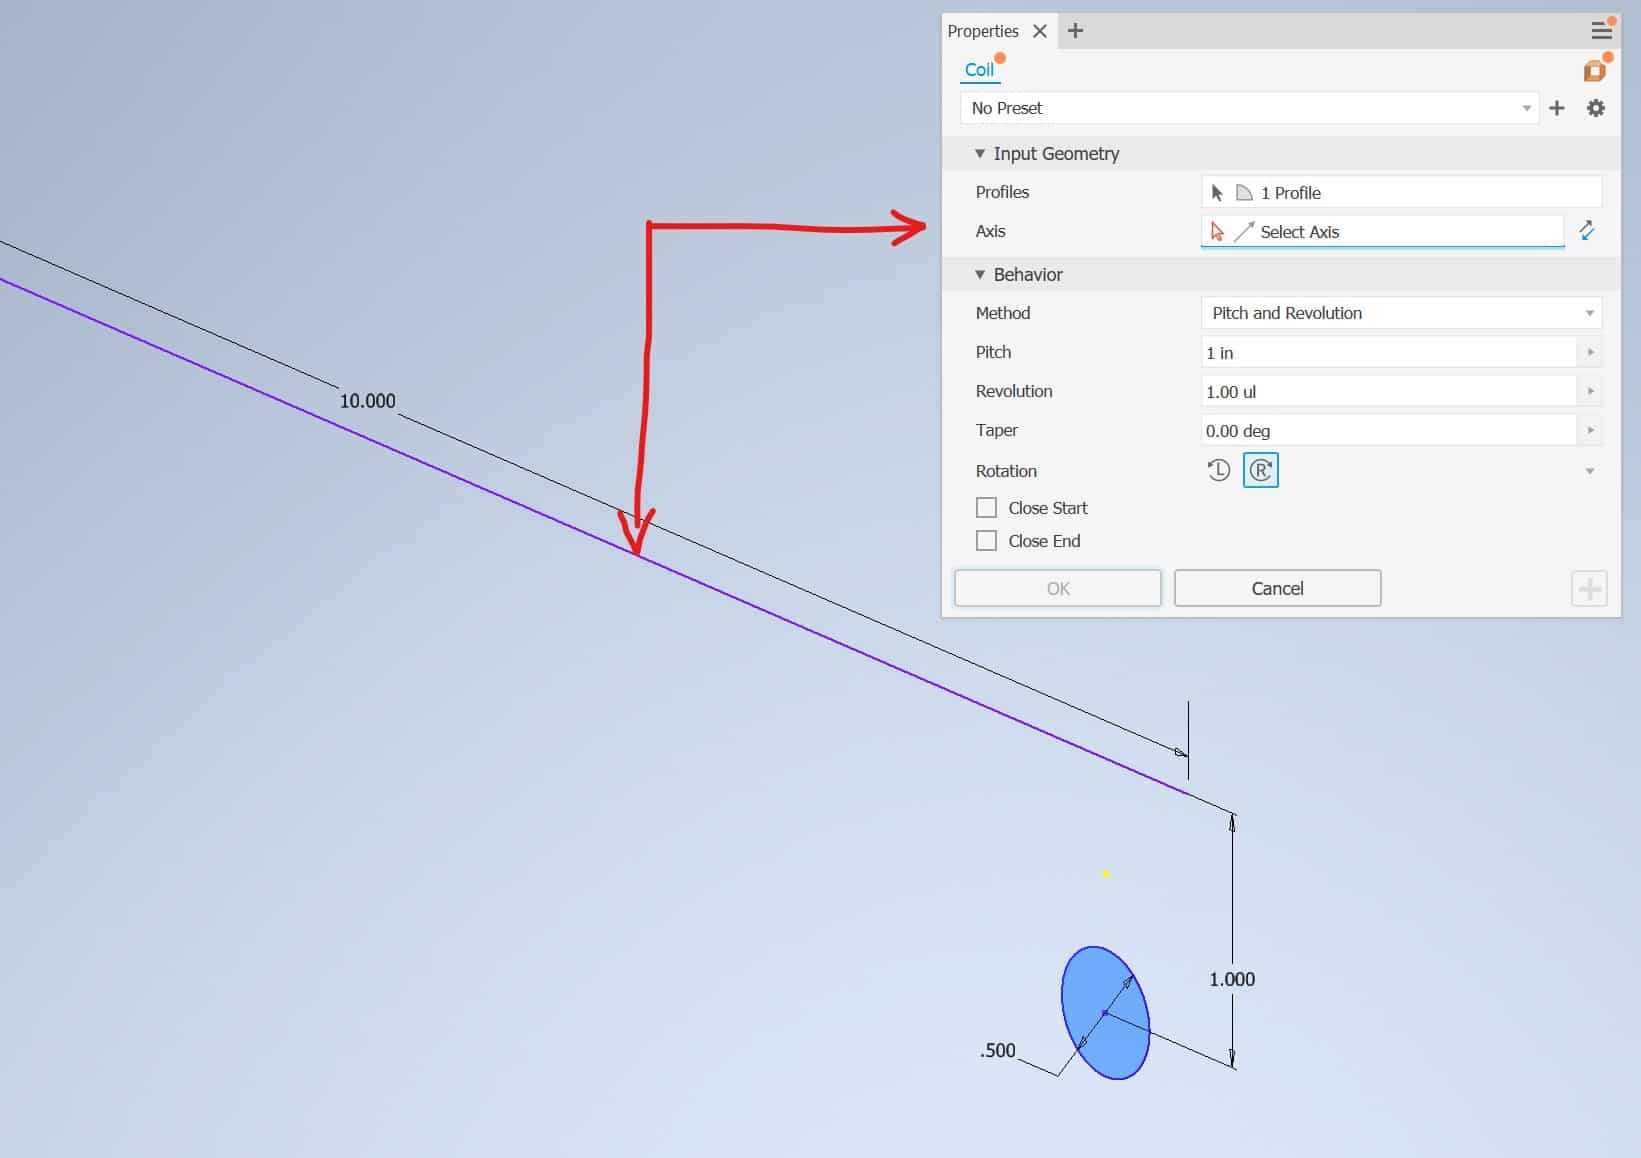
The coil preview will be provided. If you need to switch the direction of your Coil, click on the Direction button:
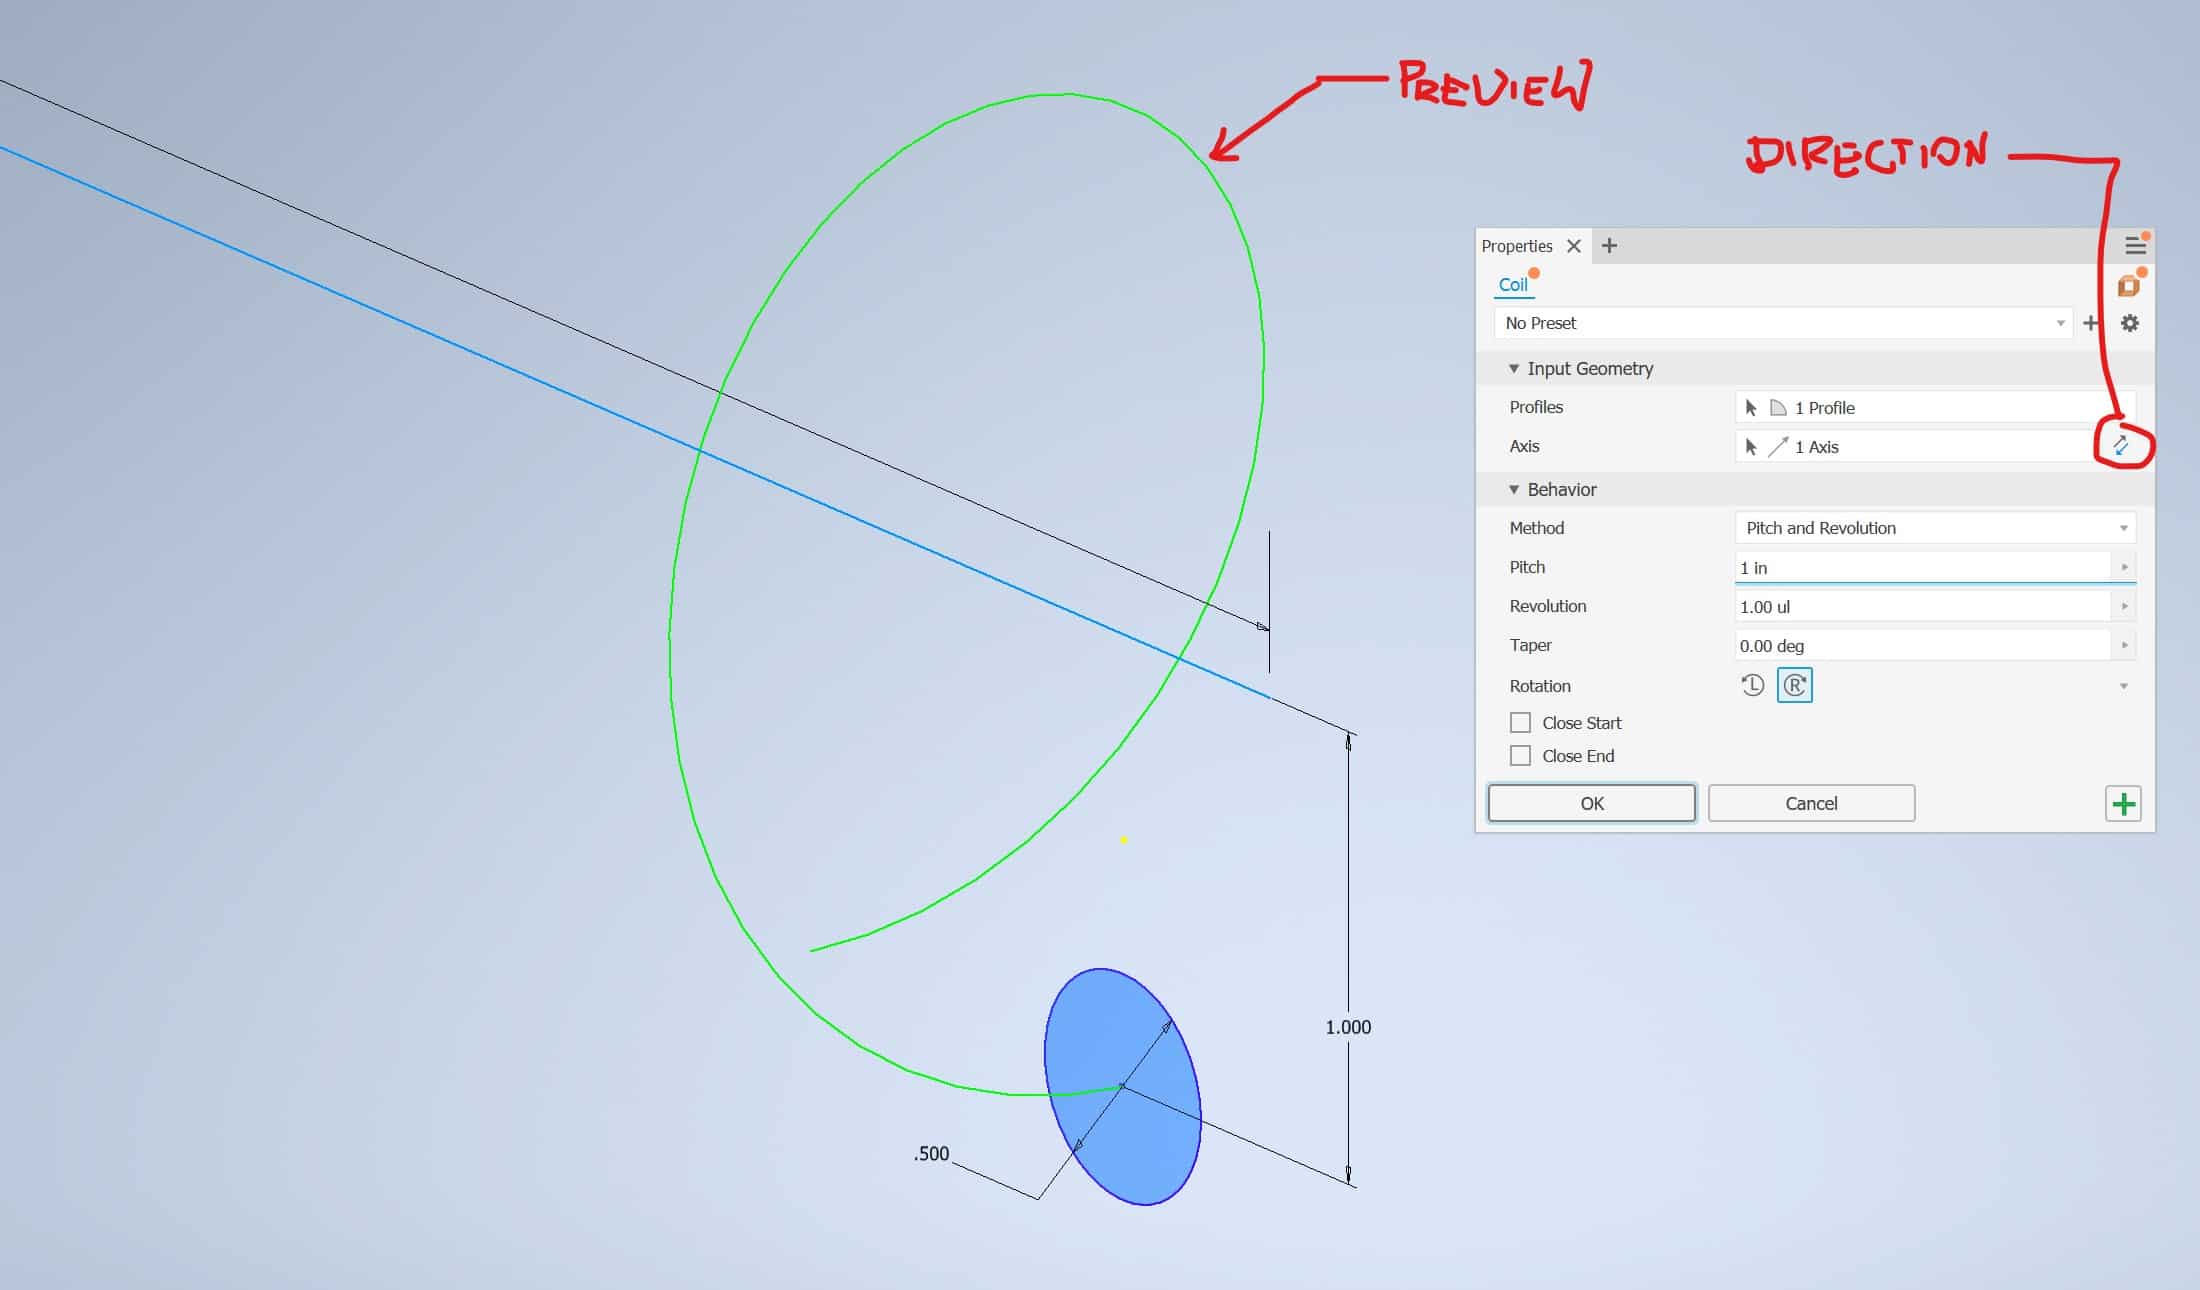
Enter desired quantity of the revolutions, and click OK:
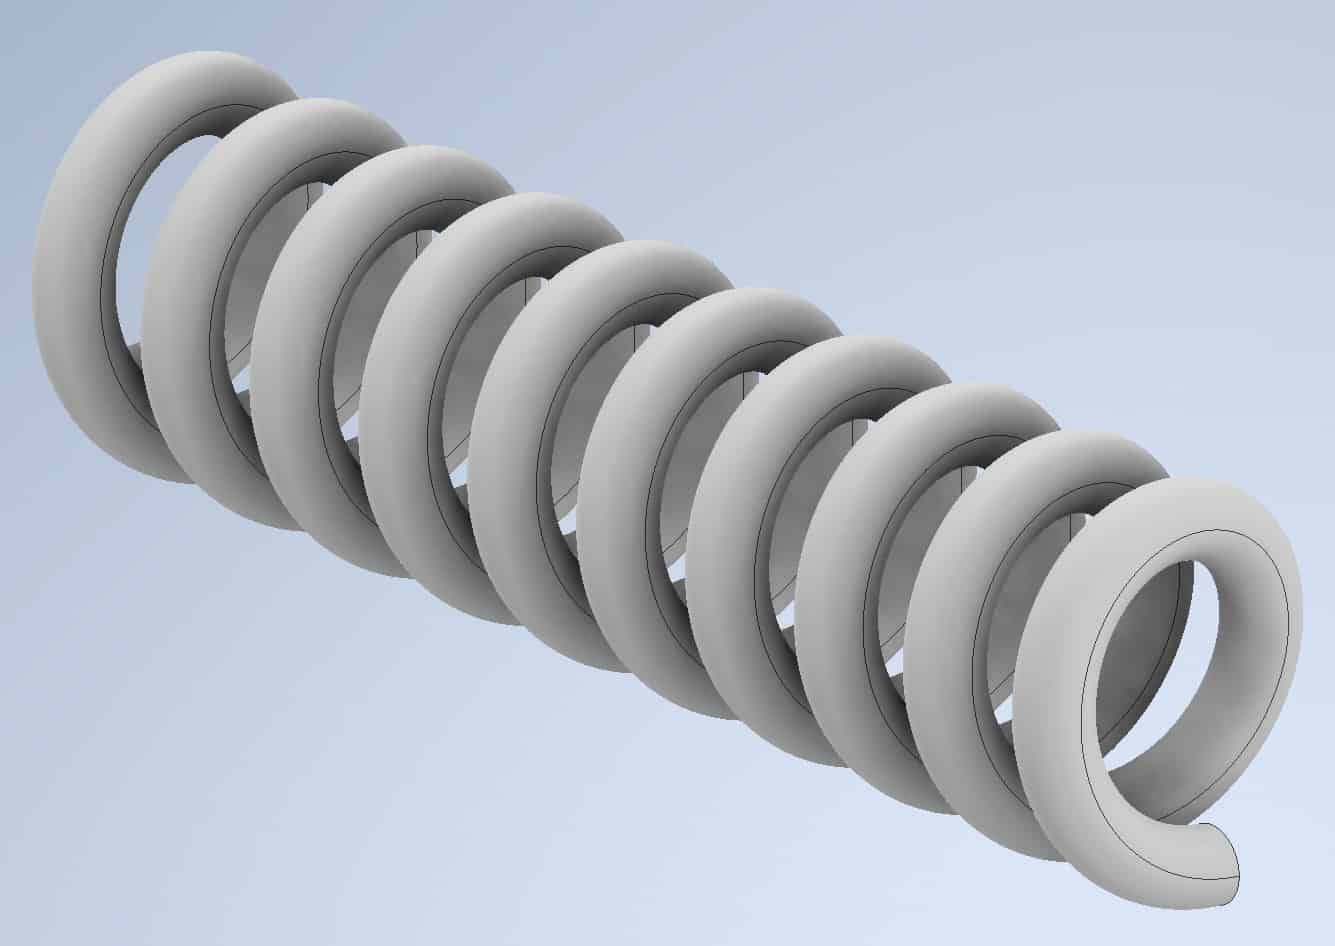
The coil is now completed:
Save your Model.

