You can create wall segments in the Advance Steel. The wall you will create will stand vertically on a current XY plane. You can do it using the Wall tool. If you want to know how to use this tool – please read on.
Table of Contents

Accessing the Wall Tool
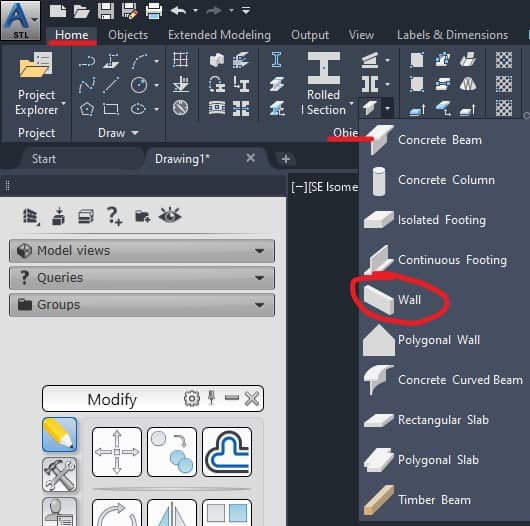
You can access the Wall tool either from Home or from Objects ribbon tabs:
Home tab > Objects panel > Concrete Beam > Wall
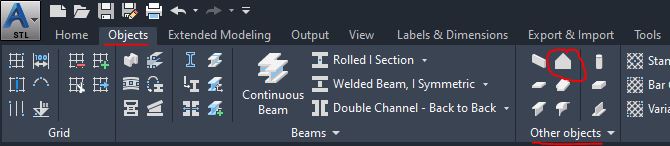
To access the Wall Tool from the Objects ribbon tab:
Objects tab > Other Objects panel > Wall

Using the Wall Tool
When you start the tool you will be asked to specify the first point of the wall. When you done specifying the first point, you will be asked to specify the next point. If you want to insert just a single wall, press ENTER after specifying the second point, but if you wish to insert multiple wall segments keep specifying endpoints of the wall segments until you are done. You are specifying the wall segments, but they will be inserted as individual entities.
After you done specifying all the points and confirming it by pressing ENTER, the dialog box will open, where you can tweak the wall parameters.
Command Line Options
- If you are inserting the wall segments in a closed loop – you can use the Close option in the command line by pressing CL.
- To Undo previous section press U.
- To Change UCS for the next segment – type: CH.
The Wall Tool Dialog Box

Lenght
If you have created only one wall segment – you will see the length of that segment.
If you have created multiple wall segments with varying lengths – this edit box will be blank. If you enter a value into this edit box – all the wall lengths will be changed accordingly to this value.
Height
Specify the wall height here.
Convert To Polygon
When you select this check box, your wall will be converted into a polygonal element, which means that you will be able to drag the top endpoints of the wall independent of the bottom endpoints.
If this box is not selected, dragging one of the endpoints will change the overall length.
Thickness
Edit the thickness of the wall here.
Material
Choose the wall material from the drop down list.
Placing The Polygonal Wall
This tool is to place a polygonal wall lying horizontally on the XY plane in the current UCS (User Coordinate System). When you start this tool you will be asked to specify all the points that define the contour of the wall. After you done – just press ENTER. The dialog box will open. You can modify all the wall parameters there. The dialog box options are described above – in the The Wall Tool Dialog Box section.
Accessing the Polygonal Wall Tool
You can access the Polygonal Wall tool either from Home or from Objects ribbon tabs:
Home tab > Objects panel > Concrete Beam > Polygonal Wall

To access the Polygonal Wall Tool from the Objects ribbon tab:
Objects tab > Other Objects panel > Polygonal Wall