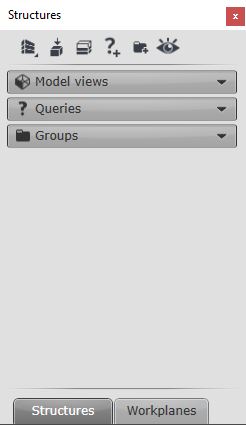
In the Project Explorer dialog box, you can basically manage your entire structural model. Here you can create Model Views, Levels, Queries, Groups, and Workplanes. The Project Explorer dialog box has two panes displayed at the bottom: Structures and Workplanes. By default, the Structures pane is active.
Table of Contents

Accessing The Project Explorer
You can access the Project Explorer from the Home ribbon tab:
Home tab > Project panel > Project Explorer

Navigating The Project Explorer
The Structures Pane
The Structures pane allows you to manage the visibility of the objects in your model by creating Model Views, Levels, Queries, and Groups.
It is also possible to break down the entire project into multiple structures if, for example, your project spans over a large area. You can create multiple structures to represent each area. For each of those structures, you can create Model Views, Levels, Queries, and Groups.
Model Views
Isolate a particular area of the model by creating a box. Only part of the model inside the box will be displayed, and the rest will be turned off.
Levels
Levels are used to isolate the model by turning off the visibility of the objects above and below the selected level. Levels are created by defining their height from the WCS (World Coordinate System). When you turn the Level on, the objects on that Level will be isolated, and the visibility of the remaining objects in your model will be turned off. Also, an important thing to note is that any new object you place in your model using tools such as Rolled I Section or Continuous Beam will have its ends restricted to the active Level.
Queries
Queries let you search for objects based on their properties and then save those objects as selection sets for future use.
Groups
Queries are used to associate selected objects and save them with a certain name so you can easily identify them and select them again or control their visibility.
The Workplanes Pane
This is the other pane in the Project Explorer dialog box.
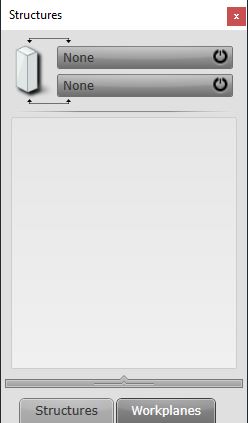
The Workplanes pane is used to create workplanes to place model components like structural elements.
Let’s say that you want to place columns at Level 3 of your building – you can create a workplane there by defining the elevation of the Level 3 workplane. As the result, your column will be placed on that level instead of Level 0.
Creating Model Views
Model Views are used to isolate certain areas of the model by turning off the visibility of the objects that are not contained in the model view. If the element is partially included in the model view, the rest of it will be chopped off.
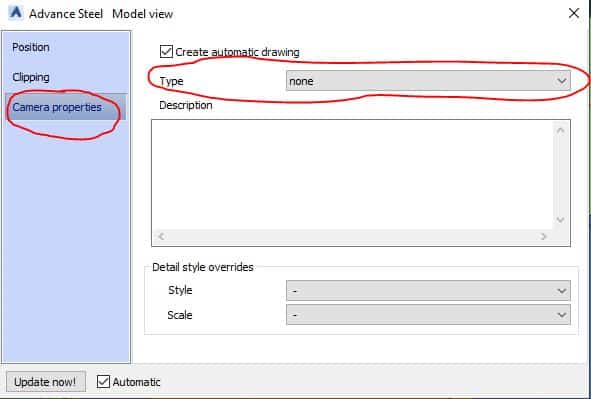
Once the Model View is created, you can right-click on its name in the Project Explorer and click Properties to display the Advance Steel Model Views dialog box. Use the Camera Properties tab to assign a camera to the model view. This will allow you to create a detailed drawing using the model view based on the camera type. This is mostly used to create a camera at the joint box if you want to detail that joint in your drawing.
Start the Create New Model View tool from the toolbar at the top of the Structures pane in the Project Explorer window:
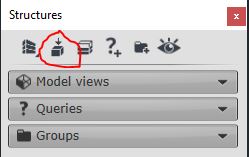
The Definition Box will be displayed. Choose how you want to create your Model View:
- One Point in UCS
- Two points in UCS
- At Grid Line
- At Joint Box
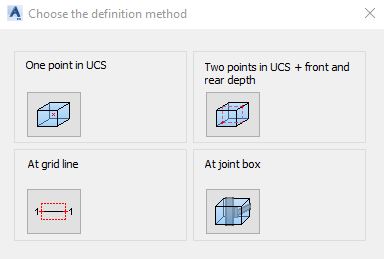
One Point in UCS
- From the Toolbar, find the Project Explorerwindow; then in the Structures pane, start the Create New Model View
- Choose One Point in UCS. Initiate the tool.
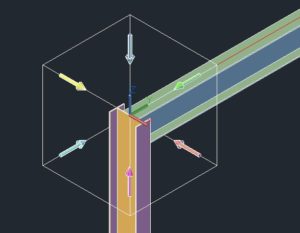
- Specify one pointon the Model to place the View Box.
- You will be asked to assign a name to your new View. Type the name and confirm by pressing ENTER.
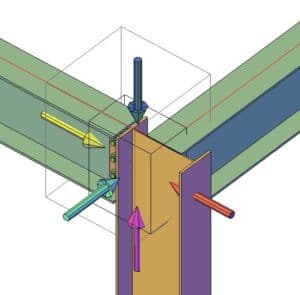
- The box with arrows will be displayed. Specify the direction of the view of your model by using the direction arrows.
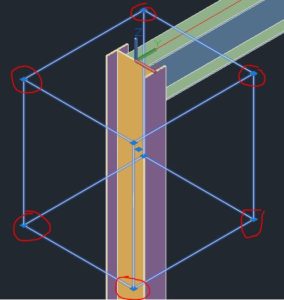
- The size of that View Boxcan be changed using the Blue Grips (circled in red in the picture):
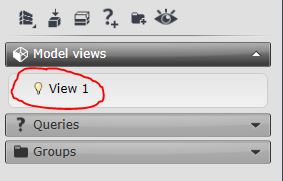
- Your new View can be found in Model Views:
- The size of that View Box can be changed using the Blue Grips (circled in red in the picture):
- Your new View can be found in the Model Views:
- By right-clicking on the box, select Advance Propertiesto change the view properties:
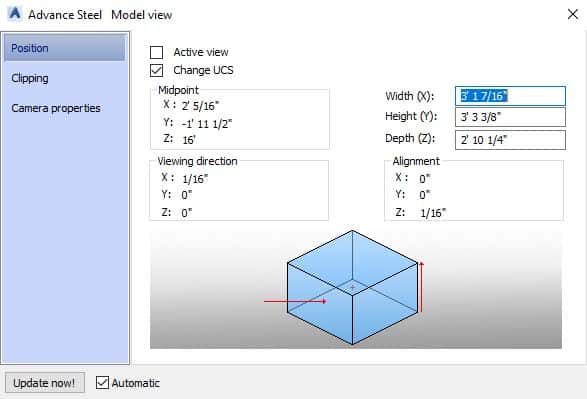
Note: To delete the Model View, just select a box and delete it. Another way of doing it is by right-clicking on the name in the Project Explorer window and selecting Erase from the menu.
Two Points in UCS + Front and Rear Depth
Specify the View Box using two points and the front and rear depth of the View Box using this method, then you can specify the direction to view the model from. The size of the View Box can be changed by using blue grips or in the dialog box.
To create the Model View using this method, you need to follow this procedure:
- Align the UCS(User Coordinate System) to the correct location.
- Start the Create New Model View tool from the Project Explorer window > Structures pane
- In the dialog box, initiate Two Points in UCS = Front and Rear Depth
- You will be prompted to select the first point. Select a point in your model where you want to start the model view box.
- You will be prompted to select the second point. Select a point in your modelwhere you want to end the Model View box.
- You will be asked to specify the Front Depth. Specify the front depth of the view by entering the numeric value.
- You will be asked to specify the Rear Depth. Specify the rear depth of the view by entering the numeric value.
- You will be prompted to specify a name for your new Model View. Type a new name and confirm it by pressing ENTER.
- A box will be placed in the you specified with arrows on each face of the box.
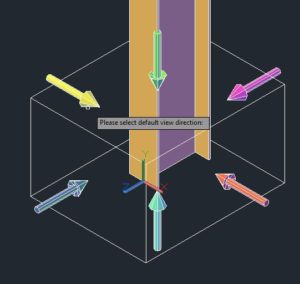
- You will be asked to specify the direction of the view. Select one of the arrows.
- The Model Viewwill be created, and its name will be displayed in the Project Explorer window > Structures pane > Model Views. You can turn the view on and off

- When you click on the box, the blue grips on each corner will be displayed. By dragging the blue grips, you can adjust the size of the View Box. Alternatively, you can adjust the view size by entering the numerical values in the dialog box that will be displayed after double-clicking on the View Box.

Note: To delete the Model View, just select a box and delete it. Another way of doing it is by right-clicking on the name in the Project Explorer window and selecting Erase from the menu.
At Grid Line
You can create the View Box at the Grid Line using this method. Then you can define the direction of the view and the View Box size by using the blue grips or the dialog box.
- Start the Create New Modeltool from Project Explorer > Structures
- The Choose the Definition method will be displayed.
- Choose the option: At Grid Line
- You will be asked to choose the grid line.
- Select the Grid Line around which you want to create the Model View Box and confirm your selection by pressing ENTER.

- You will be asked to specify the name of the View. Type the new name of your View and press ENTER.
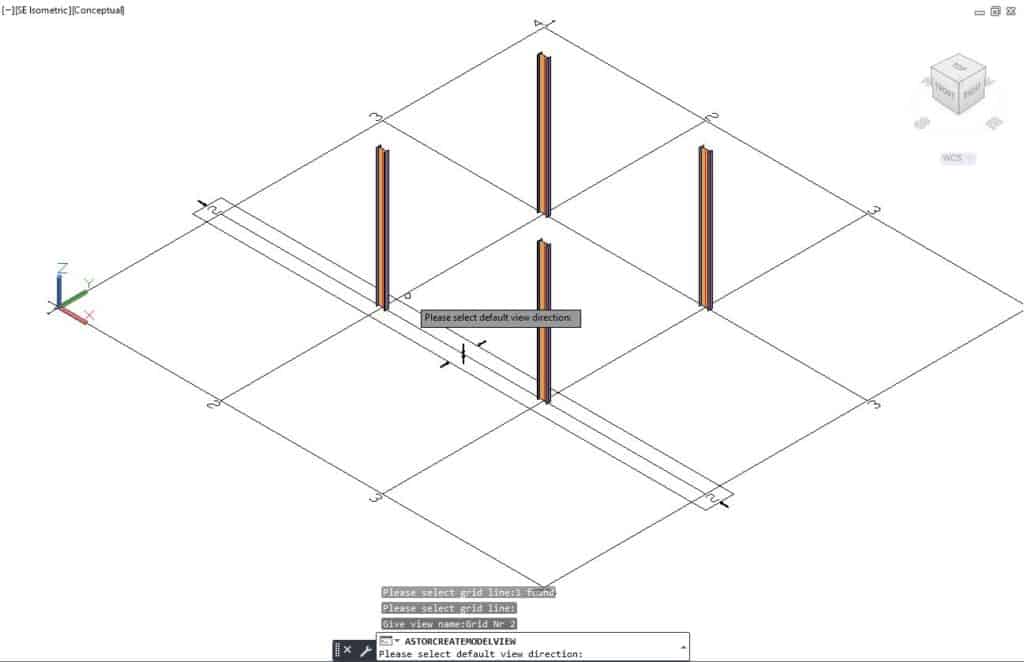
- A rectangle will be displayed around the grid line with six arrows representing the direction of the view.
- Choose the default view direction by selecting one of the displayed arrows. Press ENTER.
- The Model Viewwill be created, and its name will be displayed in the Project Explorer window > Structures pane > Model Views. You can turn the view on and off

Sidenote #1: The height of this view is the height of your entire model.
Sidenote #2: By dragging the blue grips, you can resize the view
At Joint Box
Use this method if you want to create a detailed drawing of the specific joint. You can specify the View Box at the Joint Box and then the direction of the view. The View Box size can be modified by using the blue grips or the dialog box.
To use this option, be advised that the Connection Boxes/Joint Boxes layer needs to be turned on.
- Start the Create New Modeltool from Project Explorer > Structures
- The Choose the Definition method will be displayed.
- Choose the option: At Joint Box
- You will be asked to select the Joint Box.
- Select the Joint Box where you want to create the view.
- You will be asked to specify the name for your new View.

- Specify the name of the View and confirm by pressing ENTER.
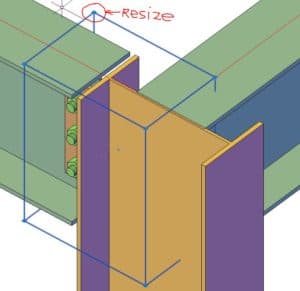
- A box with arrows will be displayed around the joint box; you will be asked to specify the view direction.
- Select the default view direction by selecting one of the arrows.
- Confirm your selection by pressing ENTER.
- The Model Viewwill be created, and its name will be displayed in the Project Explorer window > Structures pane > Model Views. You can turn the view on and off
- You can resize the view by dragging the blue grips of your Model View.

Assigning Camera Type To The Model View To Create The Drawings
- Go to the Project Explorerwindow
- Right-click on the Model Viewname
- From the menu select Properties
- The dialog box will be displayed
- Go to the Camera Properties tab
- Select Create Automatic Drawings
- In the Typedrop-down, select the desired camera type (Anchor Plan, Intersection, Node, Overview, Roof Plan)
Creating Levels
If you want to create Levels in Advance Steel, I have prepared an entire article about it. You can read it here.
Creating Queries
Queries let you search for objects based on their properties and then save those objects as Selection Sets for future use.
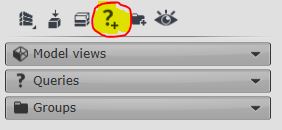
- To create a query, start the Create New Querytool from the toolbar in the Structures pane of the Project Explorer
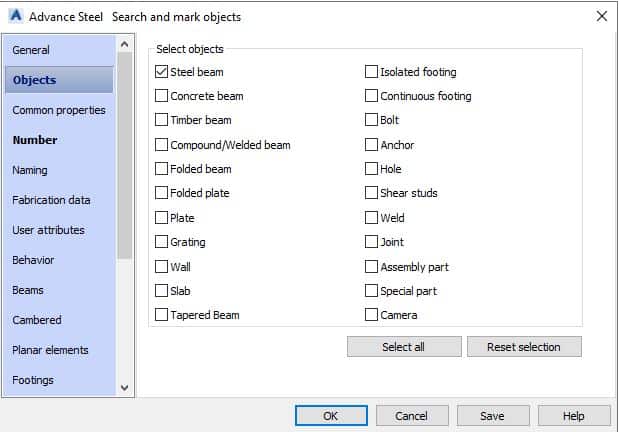
- The dialog box will open where you can specify the criteria for searching objects. Use the various tabs to specify your criteria – see in the picture below:
- Once you are done specifying the details, click SAVE.
- You will be asked to name your Query. Enter the new Namefor your query and click OK.
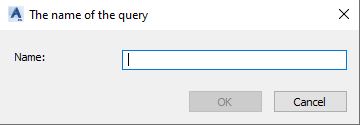
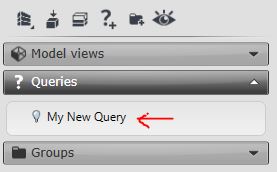
- The Name of your query will appear in the Project Explorer window:
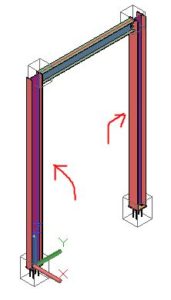
- The result of the Query will be marked in your Project:
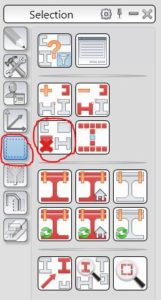
- To unmark those objects, go to: Advance Steel Tool Palette> Selection tab > Clear Marked Objects tool
- Checking the light bulb icon on the left of the query name will ISOLATE the queried objects.
- To edit a query, right-click on the name of this query and select Properties.

Creating Groups
- Go to the Project Explorerwindow > Structures pane to start the Create New Group
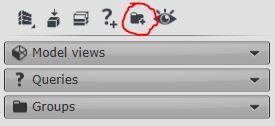
- You will be asked to specify the name for the new Group.
- Enter the name for your group and confirm by clicking OK.

- Right-click on the name of your group in the Project Explorer and click on +Add Elements.
- Select all the objects you want to add to this group.
- Confirm your selection by clicking ENTER.
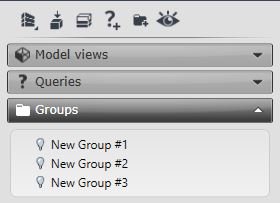
- To isolate the selected elements in this group, turn on the light bulb on the left next to the name of the group you wish to isolate.
- If you want to remove elements from the group, right-click on the name of the group and choose -Remove Elements. Then choose the elements you want to remove.
Creating Workplanes
You can create Workplanes in Advance Steel that act as modeling planes to create the elements of your model. I have a separate article on how to create Workplanes using three methods, and you can access it here.

