The levels in Advance Steel are created by defining their height from the World Coordinate System (WCS). Once the level is active, all the new objects created will be placed on this active level. I also will be locked into that level.
To create a new level, go to Project Explorer from the Home tab. You need to use the Create Level Above tool from the toolbar.
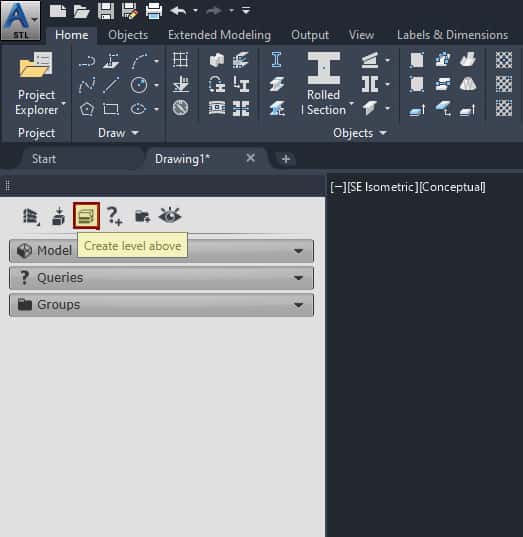
The tool is available in the “structures” pane in the Project Explorer window.
When you click on the icon for “Create Level Above”, a new dialog box will open:
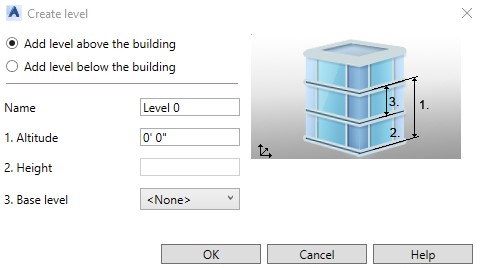
Using this dialog box you, can create levels below or above the structure.
What Is A Procedure To Create Level?
- In the Project Explorerwindow > Structures pane, find the Create Level Above It doesn’t matter if you want to create a level below – in that case, just click on the radio button Add Level Below the building.
- In the Name field, enter a name for your new level
- In the Altitude field, enter the altitude of the current level. This is the distance between the workplane of the current level you are creating and the WCS.
- If this is the first you are creating, the Heightedit box will be disabled and “None” will be selected in the Base Level/Top Level drop-down list. But if you have already created a level, you can select from the Base Level/Top Level drop-down list and then specify the height of the new level from that base level.
- Select the base/top reference level to be used from the Base Level/Top Level drop-down list. The height of the new level will be automatically changed in the Height edit box based on the altitude you have defined.
- To confirm the level, click OK, and the new level is created. The model is sliced based on the level parameters. Also, a level symbol is inserted. The level name is listed in Model Viewsin Project Explorer.
- Once you are done using the level, click on the light bulb icon on the left side of the level name to turn off this level slice and restore visibility to the entire model. Because the UCS is aligned to the level, it needs to be restored to the world position after turning off that level.
- Restore the WCS.
This concludes the Levels Tutorial. Good luck using all the methods and tools described above. If you find this article valuable, please subscribe to my blog to be notified when I publish a new article.
If you are interested in upgrading your hardware or software, make sure to check out My Toolbox article, where I share information about the tools I use and special discounts you can use as well.
If you are into Advance Steel –