Take control of your project base points and ensure accurate elevation references in every model.
Working with the correct global datum level is essential for maintaining consistent elevations across your structural models in Advance Steel. Whether you’re aligning with architectural drawings or setting a custom base elevation for your site, knowing how to add and edit the Project Global Datum Level can save you time—and prevent costly errors. In this quick guide, we’ll walk you through the steps to confidently manage your global levels and keep your project grounded from the very beginning.
What Is the Project Global Datum Level?
The Global Datum Level in Advance Steel represents the reference elevation for your entire project. It’s a baseline from which all vertical measurements are calculated—similar to sea level in geographic terms. Setting this correctly ensures coordination with other disciplines, especially when integrating with architectural or civil files.
How To Add a Datum Level to Your Project?
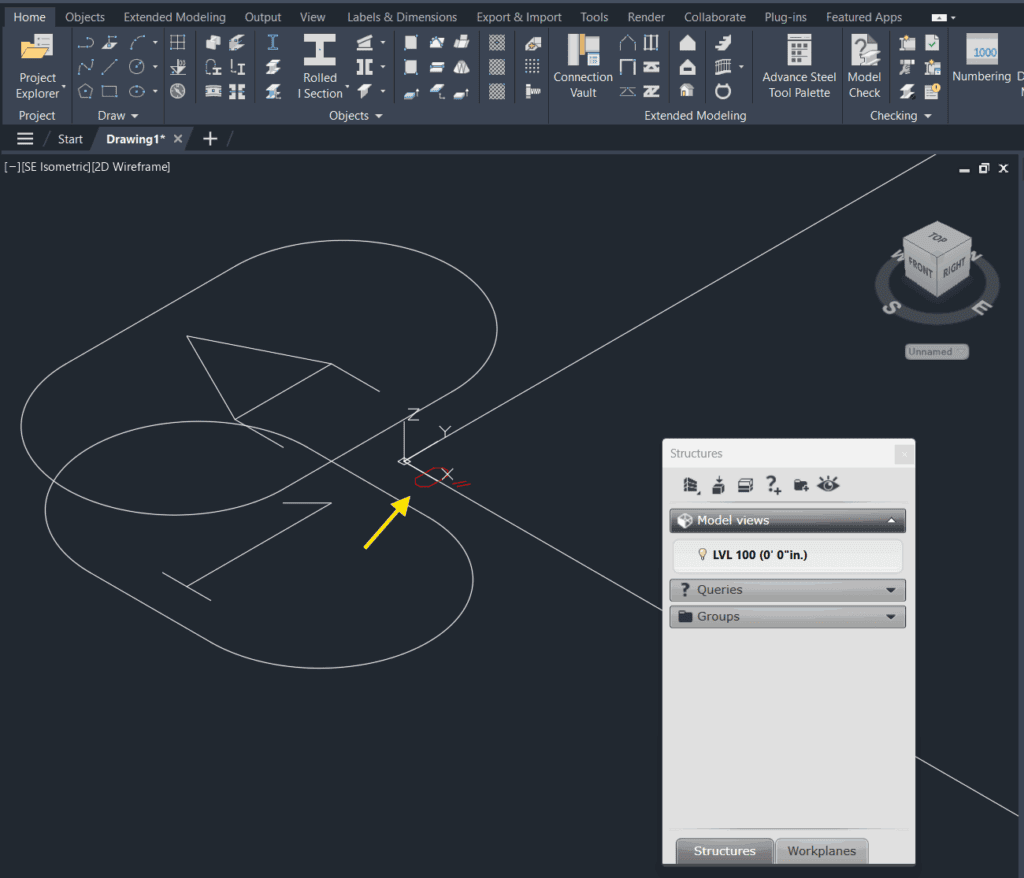
I have drawn a simple Grid and I have added a project internal level LVL 100 at a height of 0′-0″ as you can see below:
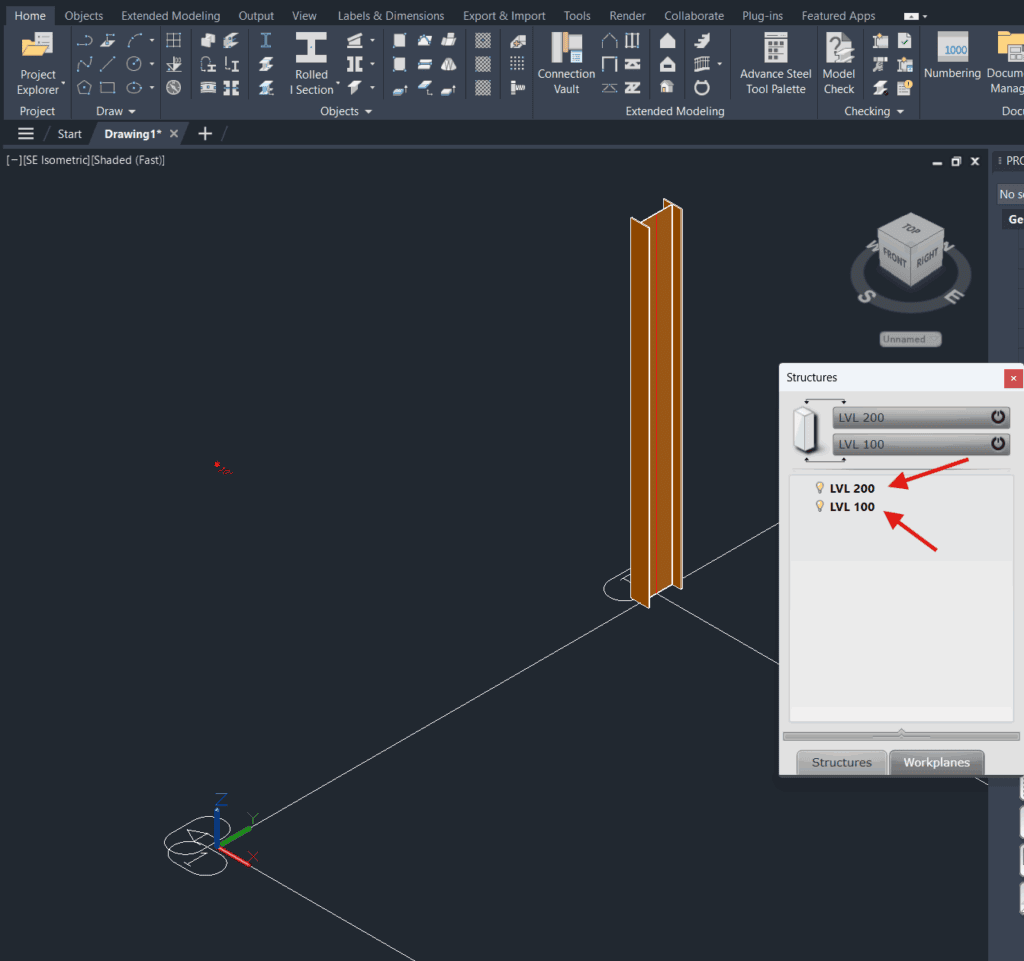
Then I have added another level above at the height of 10′-0″ above the LVL 100. Then, I have drawn a single column attached at the bottom to the level LVL 100, and at the top to the level LVL 200, as shown below. Notice another level height shown in red font above the level mark below:
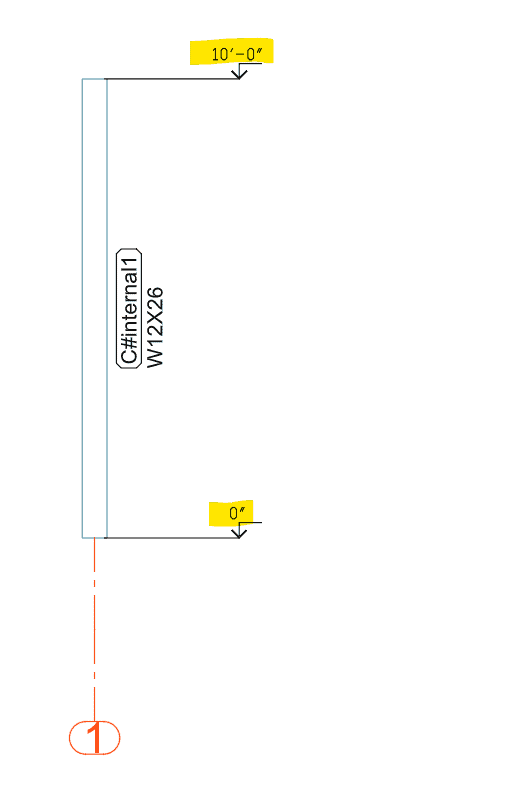
When I run Numbering and print the project showing elevation view, the level will be shown at 0′-0″ and 10′-0″:
Global Datum Level
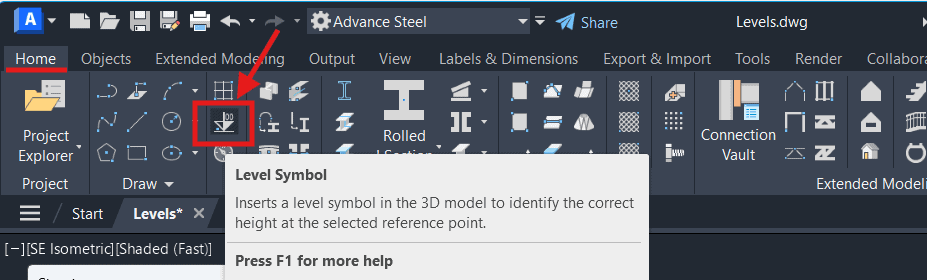
Now, let’s add the Global Datum Level. Go to Home tab, Objects panel, and click on Level Symbol:
You will be asked to define the insertion point. I use the 0,0,0 point as my Global Level Point reference:
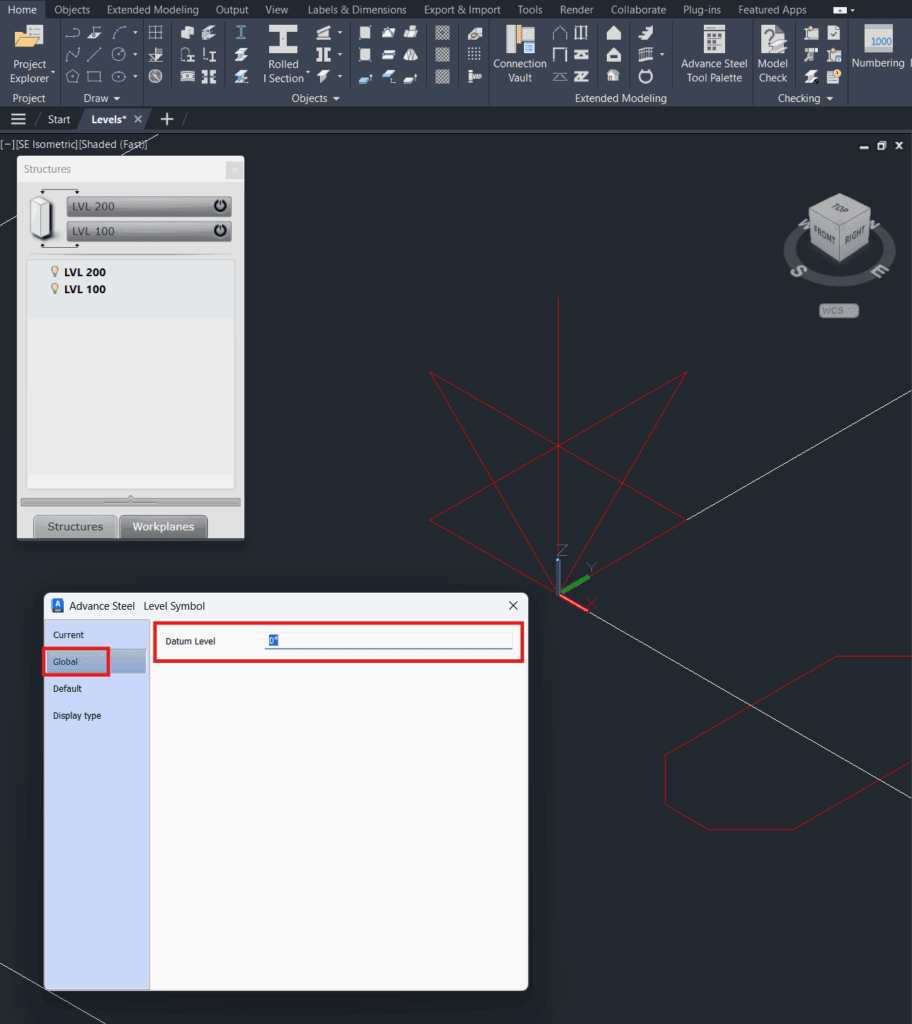
Now you can enter the reference elevation based on the architectural or civil drawings.
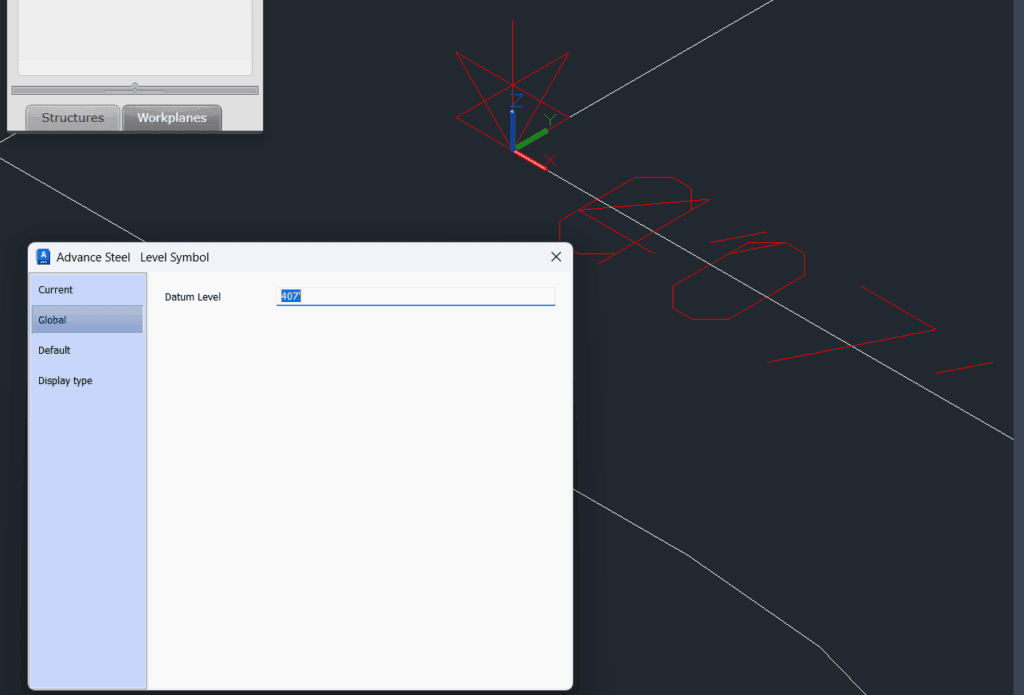
In this example, I entered a value of 407′, which was immediately reflected on the screen in red as the new Project Level.
Now, if you go to Output → Document Manager → Force Update, and then open your drawing, you’ll see that the level marks on both levels have been updated to reflect the new global datum.
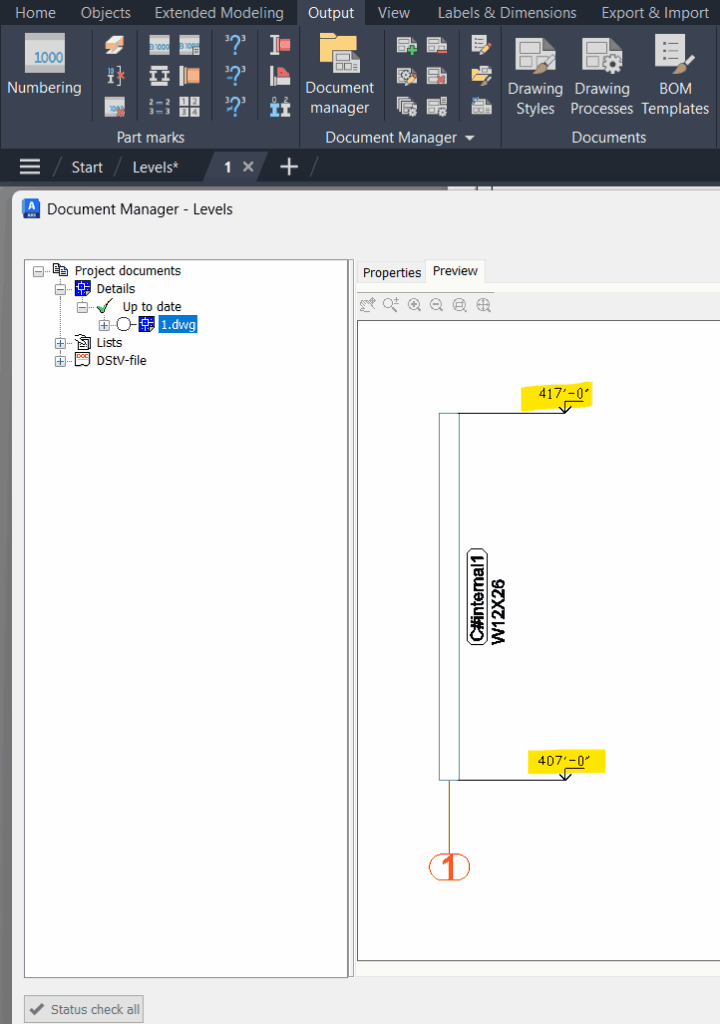
The bottom level, which previously displayed 0′-0″, now shows 407′-0″, because the Global Datum Level was set to 407′.
The top level, originally at 10′-0″, has been updated to 417′-0″, accurately reflecting the new elevation shift.
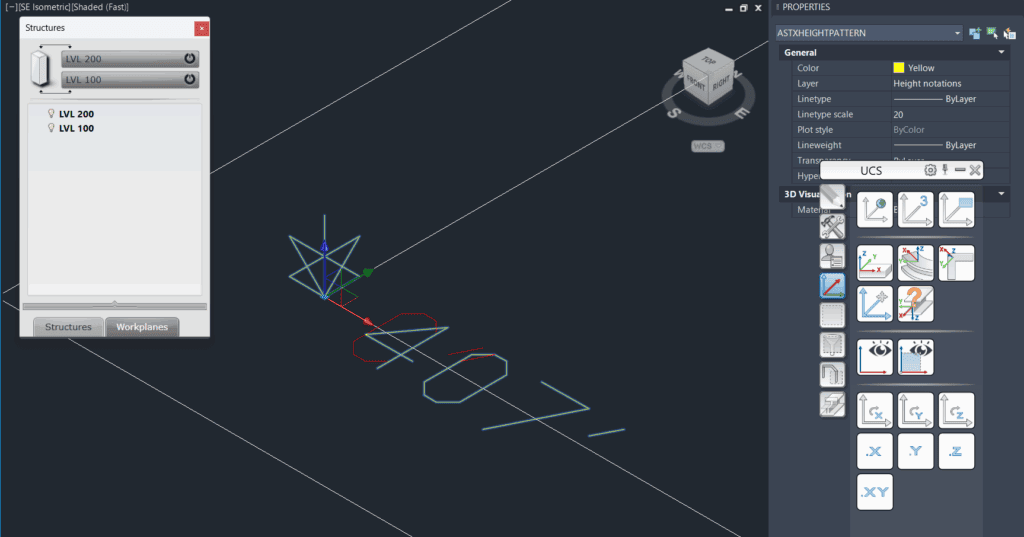
To clearly distinguish between levels, I changed the color of the datum level to yellow, while keeping the project levels in red. This visual distinction makes it easier to identify the global reference point at a glance, especially in complex models.
To change the datum level at any time later on, simply double-click on it. This will reopen the dialog box, allowing you to adjust the Project Global Level as needed.
Conclusion
Setting and managing the Project Global Datum Level in Advance Steel is a simple but critical step in ensuring your model aligns with real-world elevations and external references. By adjusting the global level, you not only maintain consistency across drawings and models but also improve coordination with architects, engineers, and field teams.
Whether you’re starting a new project or aligning an existing one, always take a moment to confirm your datum settings—your future self (and your project team) will thank you.