Before you start generating the drawings of your structure, all the parts in the model need to be numbered; otherwise, your pages will return blank. Each part of your model will have to be assigned two-part marks: a Single Part number and an Assembly Number. These numbers are used to identify the objects in the documentation.
Accessing The Numbering Tool
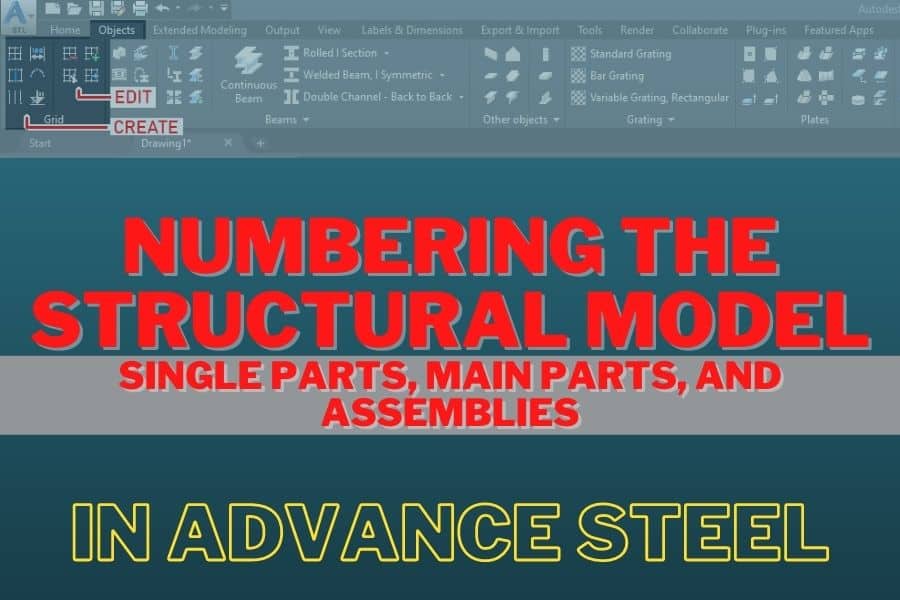
To assign numbers to all the objects in your model in Advance Steel use, the Numbering Tool available in the Home and Output ribbon tab.
Accessing The Numbering Tool from The Home Tab
Home tab > Documents panel > Numbering

Accessing The Numbering Tool from The Output Tab
Output tab > Part Marks panel > Numbering

Categorizing Objects
When you run the tool, the software analyzes the model for the relationship between the objects, and then they fall into one of the following three categories:
- Main Part. The heaviest or the largest part of an assembly. While generating the assembly drawing views, these parts are placed horizontally.
- Single Parts. The parts that are notthe main parts of the assembly.
- Standalone Parts. Standalone parts are not connected to any other part.
Equal Parts And Quantification
Once the parts are categorized, the software identifies the ones that are equal and calculates their quantities. Next, the software looks at the prefix configuration and then uses that configuration when assigning numbers to all the parts. It is important to make sure that the correct model roles are assigned to the parts in the model so the prefixes are matched to the parts based on the model role.
Starting The Numbering Tool
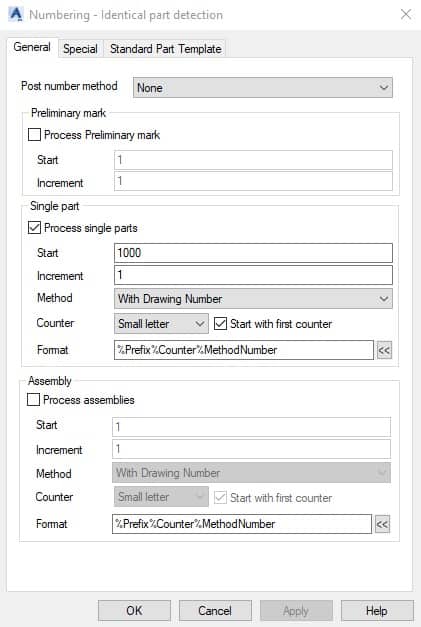
When you start the numbering tool, the dialog box will open. You can individually process single parts and assemblies or process them together. It is wiser to process single parts and assemblies together, but if you have a wish to process them separately, first process single parts and then you can process the assemblies.
Post Number Method
This drop-down provides four options:
None
This is selected by default. No post numbering is used – the assembly and the parts are numbered separately.
Assembly Group
The method assigns the assembly number to the main part and the single
parts are assigned part numbers relative to the assembly where they were first detailed.
SP No (For Main Part) = Assembly No
The method assigns the assembly number to the main part of the assembly as well, while the single parts are numbered using their custom prefix schemes.
SP No (For Standalone Part) = Assembly No
The method assigns the assembly number to the standalone part as well, while the main part and the single parts are numbered using their custom prefix schemes.
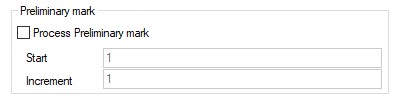
Preliminary Mark Area
Options available for numbering the preliminary parts:
Process Preliminary Mark
When you check this box, all the preliminary parts will be processed for numbering. You can specify the Start number and the Increment for the preliminary mark in the edit boxes on the right.
Single Part Area
Options are provided for numbering the single parts.
Process Single Parts
When this box is selected, all the preliminary parts will also be processed for numbering. You have the option to specify the Start number and the Increment for the preliminary mark in the edit boxes available below.
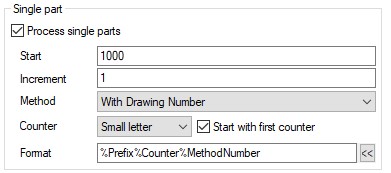
Method
Methods used for numbering the single parts. The first three options assign fixed numbers to single parts; however, the With Drawing Number method assigns #internal number to the single parts. Once the drawings of the single parts are generated, this #internal number is automatically changed to the detail drawing number.
Counter
Only available when you select With Drawing Number from the Method drop-down. You can select the counter type to be used: Small Letter, Capital Letter, or Number.
Format
Define the format of the numbering. You can use the [<<] button on the right to select additional tokens to be used for numbering.
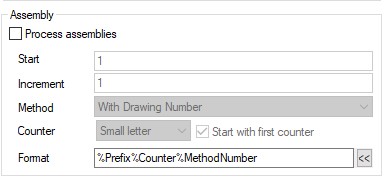
Assembly Area
Options for numbering the assemblies are provided here. The options are similar to the options described in the Single Part Area above.
Numbering MP Window
Once all the options in the dialog box are fine tuned, and you click the OK button, all the parts and assemblies will be numbered, and the Numbering MP window will open. Using the tools available on the left of this window, you can switch between the main part numbering, single part numbering, and preliminary part numbering. Preliminary part numbering will only show if you numbered the preliminary parts.
*** Important Note ***
When a model is numbered and you make changes or edit anything, make sure that you run the Numbering tool again to update all the numbering of your model.
Procedure For Numbering Single Parts
Of course, it is more beneficial to number both parts and assemblies together, but if you need to number them separately, then you need to number the parts first. Follow this procedure if you need to do that:
- Make sure all the parts have their model role assigned.
- Invoke the Numbering The dialog box will open.
- From the Post Number Methoddrop-down, select None. This is the only method that allows the numbering of single parts.
- From the Single Part,the area selects the Process Single Parts check box.
- From the Methoddrop-down, select the numbering method to be used.
- Specify the start number in the Startedit box.
- Specify the increment value in the Increment
- Verify that the option to process preliminary parts and assemblies is turned off.
- Click OKin the dialog box. All the single parts will be numbered, and the Numbering MP window will open.
- From the left side in the Numbering MPwindow, click Numbering SP. The single part numbering will be displayed in the window.
- In the Numbering SPwindow, double-click on any part number row; the parts will be marked in the graphics window, and the view will zoom to the marked part.
- From the toolbar available in the lower right in the Numbering SP window, click Clear Marked Objects to clear the marked objects.
***If the Numbering window is closed by mistake and you want to display it again, you can use the Extended Modeling tab > Checking panel > Data Panel tool.
Procedure For Numbering Single Parts And Assemblies Together
This is the recommended method for numbering parts in your model, and here is the entire procedure:
- Engage the Numbering The Numbering – Identical Part Detectiondialog box will be displayed.
- From the Post Number Method drop-down, select any method. All methods other than None will automatically select both. If you select None, you will have to manually select the checkboxes to process single parts and assemblies.
- Depending on the method you select from the Post Number Methodlist, make sure to check boxes to process single parts and that assemblies are turned on.
- Specify the start number in the Startbox in the Single Part and Assembly.
- Specify the increment value in the Increment edit boxes in the Single Part and Assembly.
- Click OK. All the single parts and assemblies will be numbered, and the Numbering MPwindow will open, displaying the main part numbers.
- In the Numbering MPwindow, double-click on any main part number row. The main part will be marked in the graphic window, and the view will zoom on the marked part.
- From the toolbar available in the Numbering window, click Clear Marked Objects to clear the marked objects.
***If the Numbering window is closed by mistake and you want to display it again, you can use the Extended Modeling tab > Checking panel > Data Panel tool.
This concludes the Numbering the Structural Model in Advance Steel – Single Parts, Main Parts, and Assemblies Tutorial. Good luck using all the methods and tools described above. If you find this article valuable, please subscribe to my blog to be notified whenever I publish a new article.
If you are interested in upgrading your hardware or software, make sure to check out My Toolbox article, where I share information about the tools I use and special discounts you can use as well.
If you are into Advance Steel –