PBR refers to the notion of using lighting and shading models on measured surface values for offering viewers an accurate representation of real-world materials. So, today we will discuss different types of texture maps related to PBR material by learning more about its basics and functions. Come let’s begin!
Table Of Contents
- Metallic Workflow
- Stylized Workflow
- Benefits of Using PBR
- What PBR Means for an Artist
- How We See the World around Us
- Characteristics of Traditional Shaders
- How to Convert Traditional Shaders to PBR Specular
- Myths and Misconceptions of PBR
- Advancements in PBR
- Significance of Energy Conservation in PBR
- Final Thoughts
- How Can I Make Those?
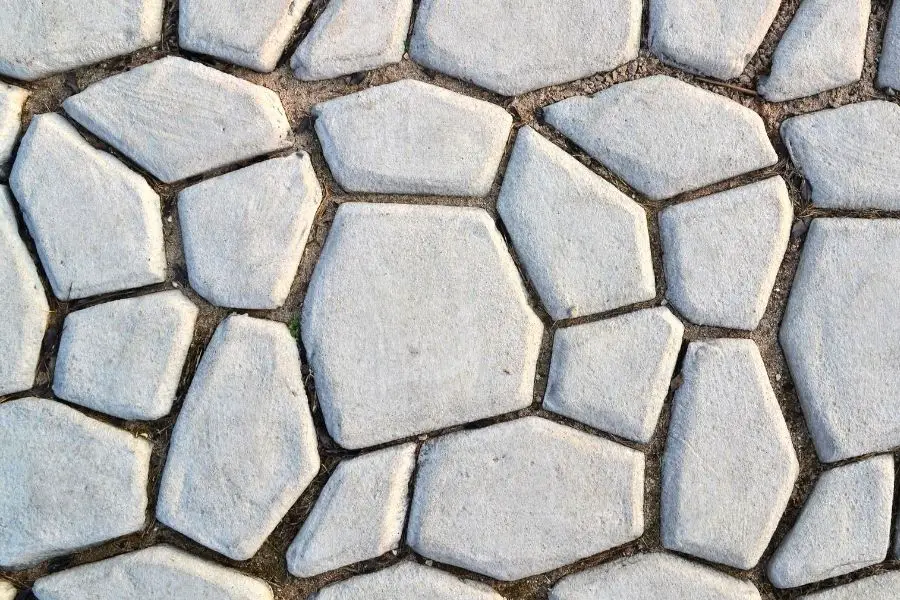
How Ordinary Materials Are Structured
- Color – The dispersed color that material reflects in the presence of light is the color that our eyes see. For example, a banana is yellow because it reflects yellow and absorbs all other colors.
- Reflectivity – The amount of light that material reflects is known as its reflectivity. This amount changes depending on our viewing angle.
- Microsurface – These very small irregularities on a material’s surface interfere with how reflections are defined.
- Extra material details, such as pores or cracks, are called “relief.”
Distinctions between Dielectric and Conductive Materials
Dielectric materials – These are non-metals such as plastic, wood, and stone. In this type of material, if the light of incident is white in color, the reflection will automatically be white. For most non-metals, the F0 (Fresnel Zero – see below) fluctuates between 2% and 5%. At these percentages, materials reflect extremely poorly when viewed directly. However, the percentages increase up to 100% when you view the materials at grazing angles.
Conductive materials – Metals with high reflectivity, heat, and electrical conductivity, such as gold, copper and aluminum, are examples of conductive materials. Metals lack a diffuse color, so the material’s color is what we see in specular reflections, i.e., if the incident light is white in color. For example, gold will reflect a yellowish hue. Metals that have been worn out or corroded, on the other hand, have a low F0 and tend to reflect light like dielectric materials rather than like metals.
For most metals, the F0 ranges from 50% to 100%. That means that, unlike dielectric materials, they are often very reflective when you view them directly. The F0 increases up to 100% when grazing angles are used.
The Fresnel Effect
The Fresnel effect states that the number of reflected rays of light we experience is proportional to the angle at which we view the material. When we look at a material directly at an angle of 0°, known as “Fresnel Zero,” or F0, it reflects less light. However, at grazing angles, the material reflects more light.
For example, it is easy to see the bottom of a lake by looking down when you are inside because the amount of light reflected by the water when you look directly at it is very little. On the other hand, looking at the horizon, we can see that the ocean reflects a lot more light, almost like a mirror.
The Basics Of PBR Maps
The PBR map enhances the viewer’s experience. It offers the spectator a useful graphic description of the place. Now, in order to better understand the different types of texture maps involved in PBR maps and the use of these maps, let us begin with the basics. Here you go!
Base Color
The base color map indicates the color of things. So, for example, if you have the brick wall texture and you want to use it on another surface, then in the base color map you can apply the texture of the wall to the base color of another surface or material and then use it on an object. The base color can be a solid color or a gradient. The base color is known by various names like diffuse and Albedo. However, it is worth noting that some experts believe that Albedo and base color are not the same, arguing that while the base color is the rough texture, Albedo, on the other hand, is the tip texture that you get after you remove shadows and highlights from the base texture.
Ambient Occlusion
There are three types of shadows. The first one is the cast shadow which is when an object blocks the light and forms shadow on another object, the second one is the form shadow that shows the shape of the object when it is getting away from the light, and the third one is the ambient occlusion which forms when two areas make contact or are placed too close to each other as a result of which a smooth shadow develops between them. Ambient occlusion maps are significant because they lend depth to your object. Also, another thing to note down about these maps is that the ambient occlusion maps are often white and they indicate the soft shadows in black or grey shade based upon the intensity.
Height Maps
Now, height maps are designed in black and white, and they advance from pure black to pure white with an antique gray race between them in the middle. The middle gray that has no circle around it causes no visible effect on the material, while the gray that features a white circle on the circumference simulates a bump and the gray featuring a black circle on the border demonstrates a hole. Based on how light or dark the circle is related to the middle gray, the intensity of the bump or hole is calculated. The height maps are practical for illustrating scarce, scratches, people, terrains, and everything that casts depth to it. The aim of using such maps is to save resources. If instead of using height maps, one uses pure vertices to make the vamps, then he will need to use a high power computer to handle the process in real-time.
Normal Map
At first, it may appear that the normal maps are similar to the height maps, but that is not the case. Between the normal maps and height maps, the map stencils are very different as the height maps are black and white while the normal maps are colorful featuring red, blue, purple, and other colors. The other difference is that while the height map indicates up and down, the normal map represents the angle of the surface. In the normal maps, the angles are represented on the normal sphere in the center of the surface pointing directly at the camera. Now, for those of you who do not know what normal is, let me tell you that normal is basically an arrow that stands perpendicular from the face indicating the orientation of a face in the 3-D model.
Normal maps are very useful because they can be used to actually indicate angles. They are of two types, OpenGL normal maps that are used by some programs like planners, and DirectX that are useful for Unreal, Engine, etc. The only difference between these two types of normal maps is of the green and white inverted channel. To change OpenGL to DirectX normal map go to the editing software, then go to the Channels, click on the green channel, and press “Ctrl I.” After completing this process, turn on the channels again.
Note: Normal map and height maps can be used together.
Roughness Map
Unlike other black and white maps, the roughness maps are easy to understand. The less roughness an object has the dimmer it reflects the surroundings, the rougher the surface is the less it reflects. So, working on this scale the roughness that measures one or pure-white doesn’t reflect anything, while the roughness measuring zero or pure black makes the surface completely reflective. These maps are most useful for suggesting surface details because with roughness variations one can show fingerprints on the glass or on the wet metal surfaces.
Metallic Map
Metallic maps are also a kind of black and white maps, where the black represents the non-metallic also known as the electric, while the white stands for metal. In general, in the practical world, the materials are either electric or metallic; hence the value of the metallic map must be pure white or pure black. However, if you want to, then as an artist you do have the freedom to use middle gray in your work.
Thus, these are the basics of the main maps of the PBR material. Apart from the maps that we have discussed above, there are some other significant maps as well, like the vector displacement maps.
The Main Workflows
The term “workflow” is frequently used to describe the process of developing materials, which involves determining which texture maps will be used in place of others or how these maps will be mixed. You get to choose the workflow you use based on the software you’re going to use, the style of art you’re going to create, the project’s requirements, and so on.
Whatever your workflow selection is, you can achieve a desirable outcome. What is important is to stick to one workflow from the beginning to the end to ensure consistency in the project’s aesthetic and to avoid any confusion.
Here are the commonly used workflows:
Specular Workflow
The specular workflow has been used for quite some time by numerous offline renderers, and there is a good number of renderers that still use it today. Diffuse, glossiness, and specular maps are the key maps used to regulate the color and reflection of the material in a spectacular workflow.
You are completely in control of the F0 in this workflow, but it’s less intuitive and less optimized because, if you choose the wrong numbers, you can easily break the law of energy conservation.
Merits of a Specular Workflow
In this workflow, reflectance and diffusion occur in two distinct maps, making it ideal for artists who work with traditional shaders.
Artists have more reflexivity control for insulators, which results in various colors.
Demerits of a Specular Workflow
- Since the artist decides which values to use, it is possible to use inaccurate values, which can alter the results.
- A specular workflow requires more texture memory than a metallic one.
Metallic Workflow
A metallic workflow is an improvement on the specular workflow and more user-friendly. This is because the shader controls the light reflectance values, making it easy for you to keep them within realistic standards.
A number of gaming engines, as well as offline renderers, have embraced this workflow. Base color, roughness, and metallic maps are the key maps used in this workflow. For newcomers, it’s a more welcoming starting point.
You can also use other maps, such as bump, normal, occlusion, and ambient, in the metallic and specular workflows.
Merits of a Metallic Workflow
In this workflow, the albedo map defines the color we see in an object no matter the object’s material, creating a more straightforward concept for artists.
The materials are categorized into metals and insulators, enabling artists to only author content with realistic texture values.
Compared to a specular workflow, a metallic workflow requires less texture memory.
Demerits of a Metallic Workflow
In a metallic workflow, material transition lines result in white line artifacts.
There is also less insulator reflexivity control.
Finally, if an artist doesn’t truly understand this workflow, they may end up using illogical figures in the metalness map, which stumps the system.
Stylized Workflow
Several games do not use these workflows because they use a stylized art style. Their materials also don’t require reflection since they already have light information painted directly on their color texture.
A stylized workflow is not a PBR workflow since it is not committed to physical precision.
What Are the Benefits of Using PBR?
The workflow of most render engines produced the same effect before PBR. The transition from blender to unity required more stages that involved shaders. As a result, the workload was more, a significant disadvantage back then.
However, after Physically Based Rendering (PBR) was introduced, many of these difficult steps were eliminated.
PBR is, to some extent, an industry standard, so it would be smart to learn how to use it in addition to the more traditional techniques. Its texture and quality provide a fantastic experience.
Because PBR’s techniques and algorithms are based on physically precise mathematics, it eliminates the guesswork of creating surface properties like specularity. As a result, creating realistic-looking assets is a lot easier.
In all lighting situations, assets will appear accurate.
PBR establishes a standard for producing consistent artwork, even among various creators.
What PBR Means for an Artist
Because developments in computer hardware and graphics allow us to imitate the physics of light more closely, we as artists must think differently about the maps that describe the qualities of a surface.
Traditional rendering workflows must abandon the concepts of diffuse and specular maps, as these maps are only workarounds for estimating materials that interact with light.
Through bidirectional reflectance distribution function (BRDF) and energy conservation, the shader does most of the work of physics laws in PBR, while the artist comes up with maps that are in line with the physical principles. PBR’s scientific aspects do away with the guesswork of values of materials, allowing the artist to focus on the more artistic aspects. Although it is critical to follow criteria and author maps accurately, we should still consider our artistic instincts.
The artistic viewpoint is what gives an object its personality, telling its tale through meticulously produced detail and expression. The artist’s first interest should never be the physics of the process. The fact that they are working in a more physically correct setting should not restrict the artist from creating stylized art.
Disney’s physically based reflectance model, for example, was created to be a principled approach. That is, rather than being a simple physical model, it aims in the direction of art. It’s critical to learn the principle ideas and follow the guidelines without becoming enslaved by them.
How We See the World Around Us
Diffusion and reflection are concepts used to describe how we see items around us.
A reflection occurs when light hits an object’s surface and bounces off in the opposite direction. For flat surfaces, reflections occur in a mirror-like way. Specular is a term derived from a Latin word that means “mirror.”
When light hits a surface, not all rays are reflected. The material absorbs a few while others are internally dispersed. A number of the scattered rays bounce away from the surface and can be seen by people and captured by cameras.
For every wavelength of light, the absorption and scattering of light change, and this is how objects obtain their colors. For example, after an object absorbs most light, if it scatters blue, the eyes will see blue.
Transparency and translucency are two more complicated phenomena of diffusion that rely on the object’s form and thickness. They are both distinct from the ordinary diffusion process. As a result, distinct shaders are necessary to make these operations possible.
Translucent materials are those that are thin enough that light is often dispersed from their backside. When the diffusion is too low, there is no dispersion, and the entire image passes through the object unchanged, which is why it is called translucent.
Characteristics of Traditional Shaders
With traditional shaders, the diffuse is excessively dark. At one time, it probably looked good in a specific lighting scenario, but it does not in more modern ones.
Traditionally, in both specular and diffuse maps, cavity detail and ambient occlusion are baked in. A shader should be able to use the AO/cavity content if it is added as a separate input. On top of that, large-scale AO should not be applied directly to the specular pass since blocked light is not the same as a less reflective surface. Basically, this is what a specular map entails.
Diffuse and specular maps both have a gradient map baked in. Gradient maps can be helpful in creating masks for specific effects.
Gloss maps used in a previous asset are not supported by shaders. Therefore, the specular map is forced to perform double duty, which involves representing the microsurface while maintaining a consistent glossiness across the entire material.
Traditionally, artists would use their eyes and instincts to set up specular values instead of calculating actual material properties. Because of that, metals that were painted black are excessively reflective and slightly yellowish, but rubber and plastic materials do not reflect enough.
How to Convert Traditional Shaders to PBR Specular
Since we already talked about PBR textures and what traditional shaders entail, it’s time to learn how traditional shaders are converted to PBR.
You should start by eliminating all the gradient content and baked lighting from the specular and albedo maps. Move the cavity content and the AO to two different textures and hook them up in respective shader slots. Then, change the value of the diffuse map to a more reasonable number. After that, divide the specular content into a specular map and a gloss map.
Change the base values to match each material’s microsurface structure and relocate all surface variation from the previous specular map into the newly constructed gloss map.
If there is an existing gloss map, confirm your values to ensure that they are reasonable. For example, on a rifle, the fundamental raw material would be glossier and smoother than a nonglossy coating finish, whereas scratches in a glossy paint finish might reveal the rougher primer beneath.
Myths and Misconceptions of PBR
A number of assumptions are made about PBR that are not actually true. One of them is that metalness maps are a mandatory requirement. In reality, using specular maps does not make the asset any less PBR.
Another myth is that old contents loaded into a PBR shader must produce physically accurate results. The truth is, to get accurate results, you need to use art content that has been logically calibrated.
Lastly, there is some confusion between diffuse and albedo. Both terms basically have the same meaning and can therefore be used interchangeably.
Advancements in PBR
First, modern shaders now come with a lighting calculations advancement. We now have dynamic light sources capable of casting realistic shadows as well as lighting that is image-based and which produces accurate diffuse and striking reflections.
This means an artist no longer has to manually paint reflection, lighting, or shadow content on to a texture. Rather than baking under certain lighting conditions, we can now concentrate on duplicating material qualities.
Furthermore, linear space rendering eliminates the need to paint specular maps a hue contrasting the diffuse in order to achieve a neutral white highlight while the microsurface function conserves energy. Essentially, there is no need to darken rough areas and brighten glossy regions manually in a specular map.
As a result, specular maps for each type of material will often have values slightly higher than flat values, whereas microsurface maps define the majority of the surface variation.
Significance of Energy Conservation in PBR
As you already know, you can neither create nor destroy energy; it can only be converted into different forms. On the same note, the force in which light falls on a surface is always greater than the intensity it requires to scatter or diffuse. This means that materials that have low reflectivity have more diffuse light and ones with high reflectivity have less.
Energy conservation conforms with the albedo values and law of reflectivity without interfering with the law of physics. Thus, it is viewed as an important aspect of PBR.
Final Thoughts
When compared to traditional real-time models, PBR is a rendering technology that delivers a more accurate picture of the material and how it responds to light. Unlike in traditional models where people are forced to rely on their artistic insists and guesswork, in PBR, the numbers are automatically generated.
The separation of lighting and material caused by the PBR process makes it much easier to come up with objects that appear well in all lighting conditions.
How Can I Make Those?
If you have JPEG basic photo you can make your own PBR texture for free using the online tool I use this one: http://cpetry.github.io/NormalMap-Online/
Just by tweaking some sliders, you will get your professional PBR texture in no time!
Have fun!
