Just getting started with your CNC plasma table? No worries! This guide is here to help you cut steel plates using a machine like the STV Plasma Table and Optimum CNC software. We’ll break it down step by step so you can start cutting basic shapes in no time—even if you’ve never done anything like this before.
Designing Your Project
OPTION 1: Choose or Create Your Shape
Now for the fun part—designing what you want to cut! You can either pick one of the stock shapes available in the Optimum CNC software or draw your own custom shape. If you choose a stock shape, feel free to tweak the size or layout to fit your needs. If you’re drawing something from scratch, keep it simple to start. This is where your creativity kicks in!
To Access Stock Shapes:
To find the basic shapes you can edit and use, head to the CAM tab at the top ribbon of your screen in Optimum CNC. There, you’ll see a list of ready-made shapes that you can easily modify to match your project. It’s a great way to get started without designing everything from scratch!

Once you’re in the CAM tab, look for the ‘SHAPES’ button. Click it, and you’ll see a variety of basic shapes like circles, squares, brackets, and more. Just pick one that fits your project, adjust the dimensions, and you’re ready to move on to the next step!
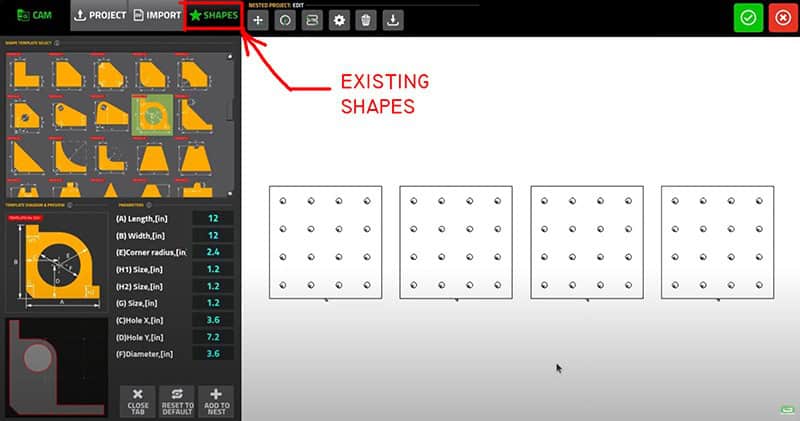
Browse through the yellow shapes, click on the one you want to use, and then look just below—it’ll open a window where you can tweak the dimensions. Adjust the width, height, hole sizes, or whatever details you need to make it just right for your project.
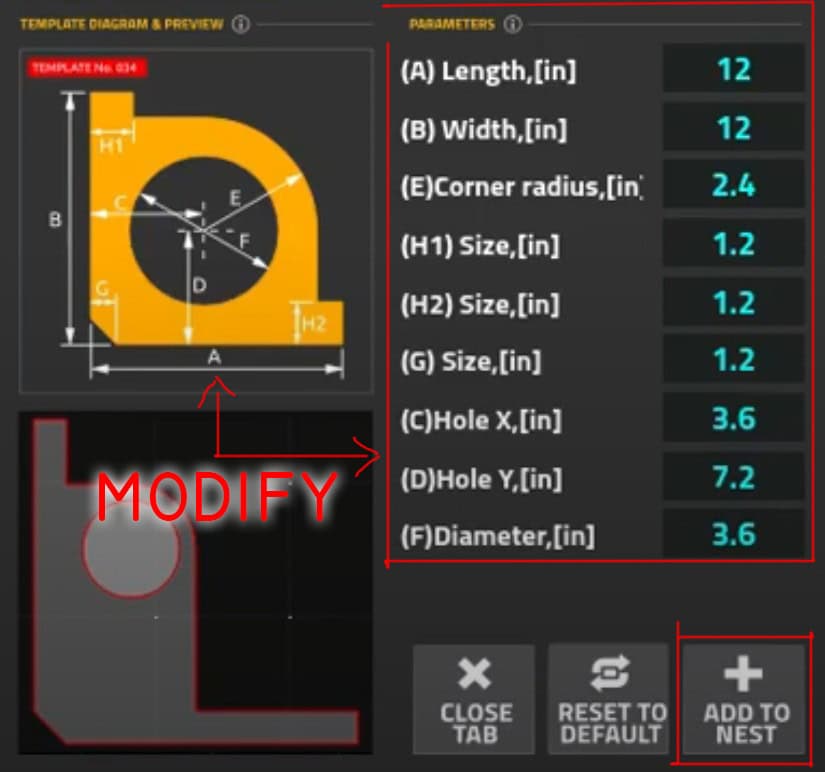
Once you’re happy with the changes you made to the shape, go ahead and click the “Add to Nest” button. This drops your shape onto the cutting layout (visible on the right), so it’s ready to be positioned and cut. You’re getting closer to making sparks fly!
PRO TIP! Want More Copies?
If you need multiple copies of the same shape, just click the “Add to Nest” button as many times as you need. Each click adds another instance to your cutting layout—easy as that!
OPTION 2: Drawing a Custom Shape?
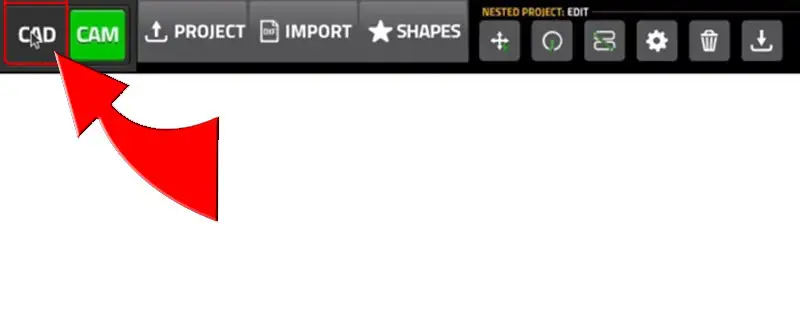
If you want to create your own custom design from scratch, you can use the built-in CAD software that comes with your Optimum Plasma Table. It’s simple and beginner-friendly! To access it, first click on the CAM tab at the top ribbon:
then switch over to CAD on the left side. Now you’re ready to start drawing your unique shape!
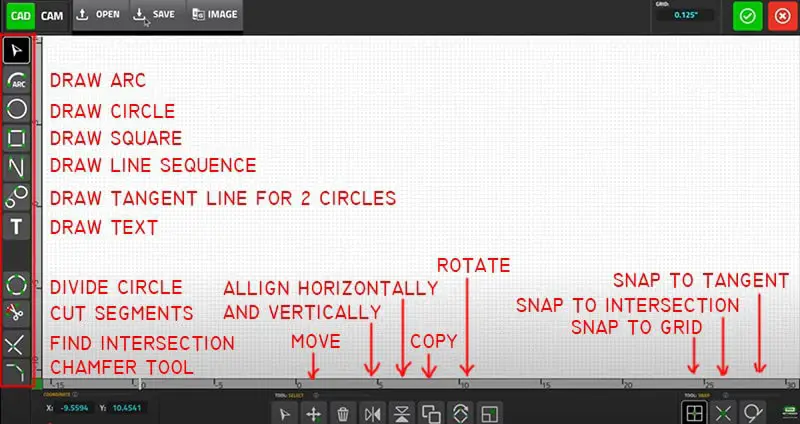
Once you’re in the CAD section, you’ll see a set of easy-to-use drawing tools—lines, circles, rectangles, arcs, and more. Just click on the tool you need and start sketching out your shape right on the screen. Don’t worry about making it perfect on the first try—you can always tweak it as you go!
When you’re happy with your custom design, just click the “Save” button to lock it in. It’s always a good idea to give your file a clear name so you can find it easily later.

Send Your CAD Design to CAM:
After saving your CAD drawing, click the green button with the check mark inside a circle. This will export your design into the CAM window, where you can prep it for cutting and nest it along with any other shapes you’re planning to cut on the plasma table.
Make Final Adjustments
In the CAM window, you can fine-tune details like lead-in distances, cut paths, and other settings to get the best results. Once everything looks good, hit the green button again to export your project into the Optimum window.

You’re Ready to Cut!
At this point, you can go ahead and start cutting your design with the plasma table—exciting stuff!
But wait—there’s another way to load a project onto your computer:
If you’re working with a steel detailer or already have a design prepared, you can import a DXF file directly into the software. Let’s walk through how to do that next.
OPTION 3: Importing a DXF File from Your Steel Detailer
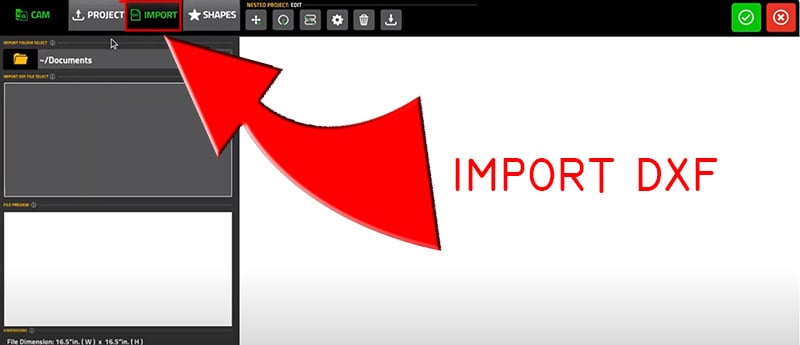
If you’ve received a DXF file from a steel detailer—maybe made in Tekla, Advance Steel, or similar software—you can easily bring it into your project. To get started, go to the CAM section on the top ribbon in the Optimum software. This is where you’ll begin the import process.
Once you’re in the CAM section, look for the “Import DXF” button and click it. This will let you browse your computer for the DXF file you received. Select the file you want to use, and it will load right into your project, ready for nesting and cutting.
Review and Adjust Your DXF File
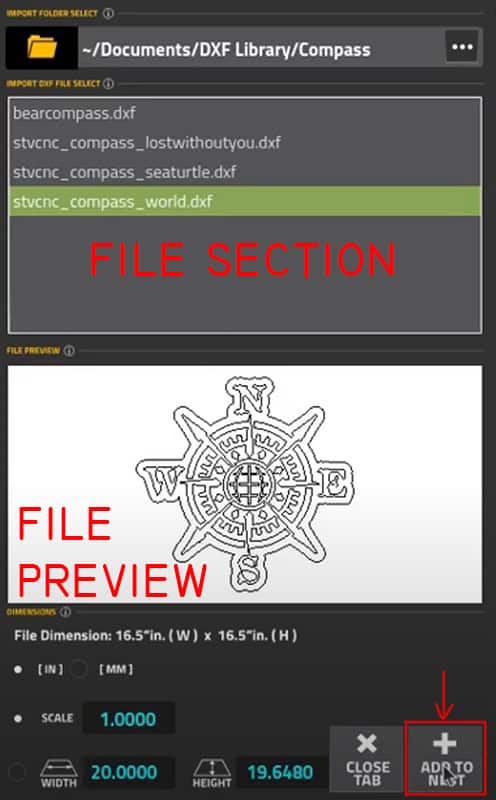
After selecting your DXF file, you’ll see its location displayed in the File section, and a preview of the drawing will appear just below. In the final section of the window, you can make a few adjustments—like choosing the correct units (inches or millimeters), scaling the file, or making other small tweaks to get everything just right.
Once you’re happy with the settings, simply click the button in the bottom right corner “Add to Nest” to import the design into your workspace. Add as many copies as you want.
Finish and Head Back to Cut
When you’re done making adjustments and everything looks good, click the green button with the check mark in the upper right corner. This will take you back to the main Optimum window, where you can set up the final cutting procedure and get ready to start slicing through steel!
Cutting Your Project
Now comes the exciting part—actually cutting your design! With everything set up in the Optimum window, double-check that your material is properly positioned and secured on the plasma table. Make sure your air compressor is running, and your torch is clear of obstructions.
Step 1: Place the Material on the Plasma Table
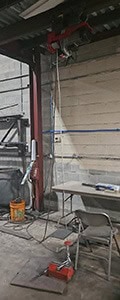
Let’s start by getting your steel plate onto the plasma water table. We’re assuming your table is already set up, your computer is connected, and the Optimum CNC software is ready to go. The easiest way to place the material is with an overhead crane—but if you don’t have one, no problem. Just use any safe method that works for you. The key is to get the plate on the table securely and safely.
PRO TIP!
Try to line up your material as straight as possible with the ribs (slats) on the water table. The better aligned it is, the easier your cuts will be—and everything will look cleaner and more professional in the end.
PRO TIP!
Make sure your material is clean before cutting. Wipe off any dust, rust, or leftover weld smears—this helps ensure better arc stability and cleaner cuts. A little prep goes a long way!
Step 2: Power Everything Up
Now it’s time to fire things up. First, switch on the control unit—it’s usually located at the corner of the table, around knee height. Then, turn on your plasma cutter and your air compressor. Finally, power up your computer, which will be running the software to control both the table and the cutter. Once everything’s on, you’re getting close to making your first cut!
Step 3: Zero the Table Coordinates to Your Material
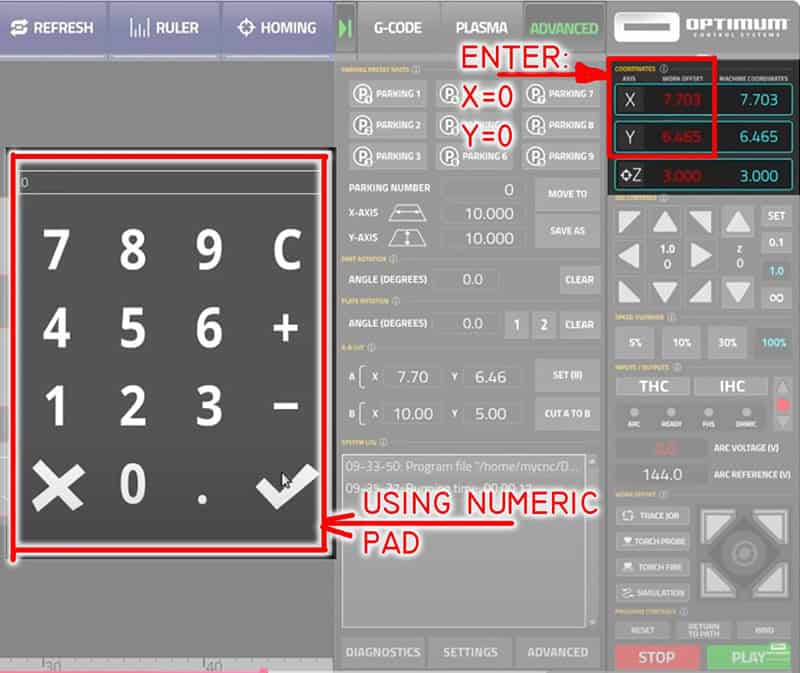
Before cutting, the machine needs to know where your steel plate is sitting. Using the controls, manually move the torch to the bottom-left corner of your material. Once it’s in position—close enough but not touching—go ahead and zero the X and Y coordinates in the Optimum CNC software. This tells the machine, “Hey, this is where we’re starting from!”
STEP 4: Check If Your Design Fits the Material
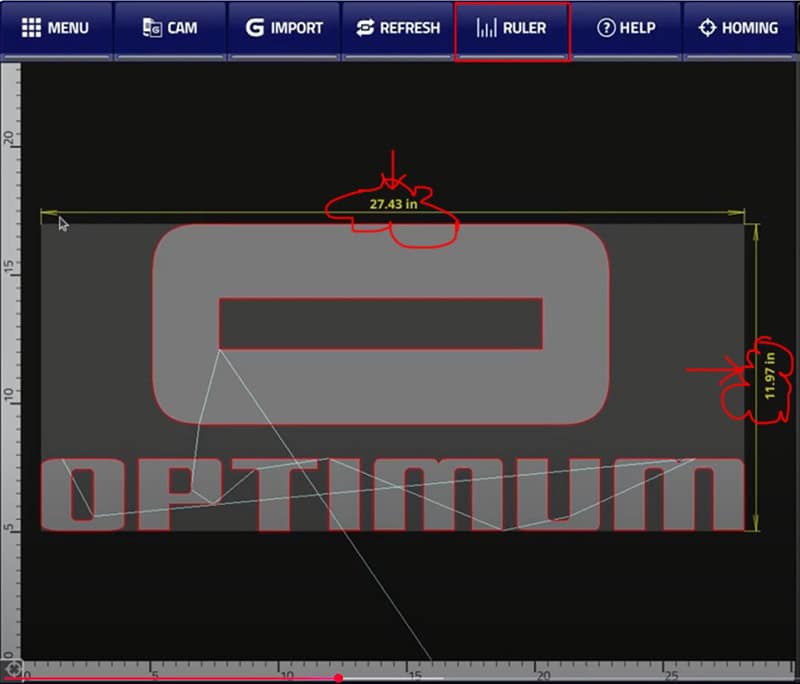
Before you start cutting, make sure your design actually fits on the steel plate you’ve loaded. One simple way to do this is by turning on the Ruler tool in the ribbon at the top of the screen.
When enabled, the software will show you the exact dimensions of the material required to cut your project. Compare that with the size of your plate to avoid surprises. It’s a quick check that can save you time, material—and headaches!
STEP 5: Run a Simulation Before Cutting
To double-check that everything is set up correctly, you can run a quick simulation of your cut. Just click the “Simulation” button, then hit the green “PLAY” button located in the lower right corner of the screen.
The software will show you exactly how the torch will move and cut your design. It’s a great way to spot any issues before you start the real cut—kind of like a dress rehearsal for your plasma table!
See the Plasma CNC in Action – Simulation Mode
Want to see how it all comes together before you try it yourself? Check out the video below to watch the plasma CNC running in simulation mode.
You’ll get a clear look at how the torch moves along the programmed path, how each cut is made, and what to expect when you hit that final “PLAY” button for real. It’s a great way to build confidence and make sure everything is dialed in!
🎥 Watch the video below:
STEP 6: Time to Cut!
Once you’ve checked everything in the simulation and it all looks good, go ahead and turn off the “Simulation” mode. Then, simply click the green “PLAY” button again to start cutting your material for real.
If you noticed anything that needs fixing, no worries—make your final adjustments, then hit “PLAY” when you’re ready. Now you’re officially cutting with confidence!