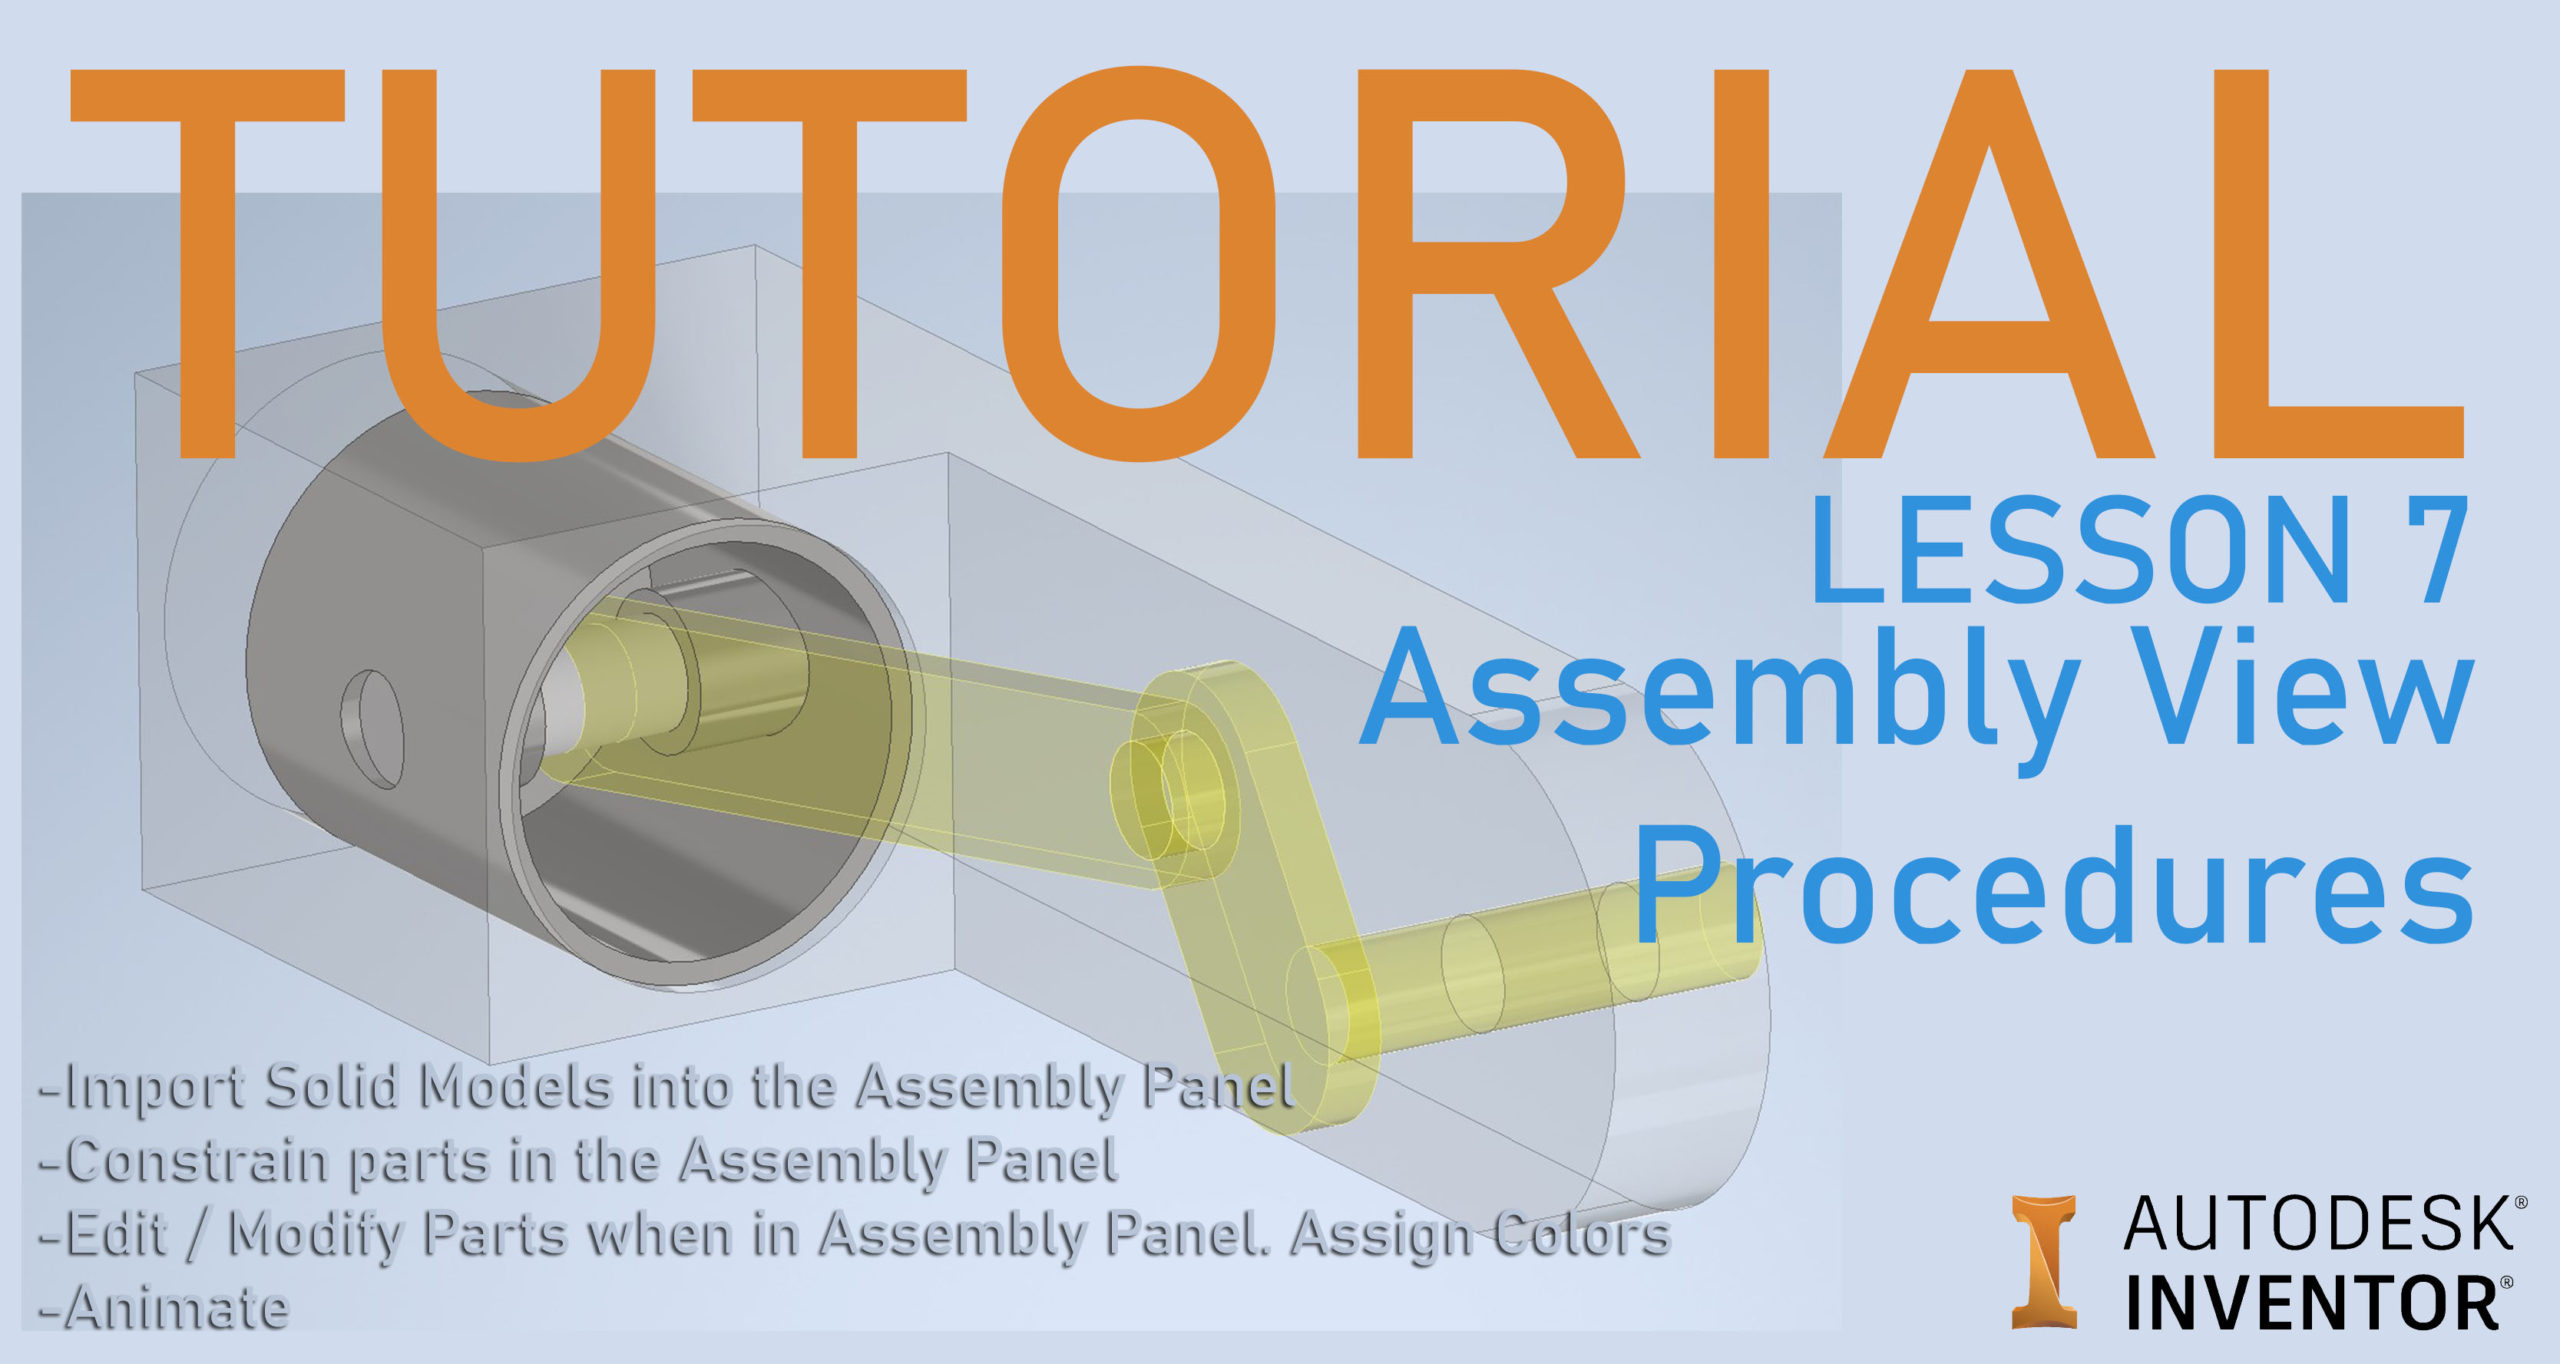
Objectives:
- Import Solid Models into the Assembly Panel
- Constrain parts in the Assembly Panel
- Edit / Modify Parts when in Assembly Panel. Assign Colors
- Animate
- Create Video Animation
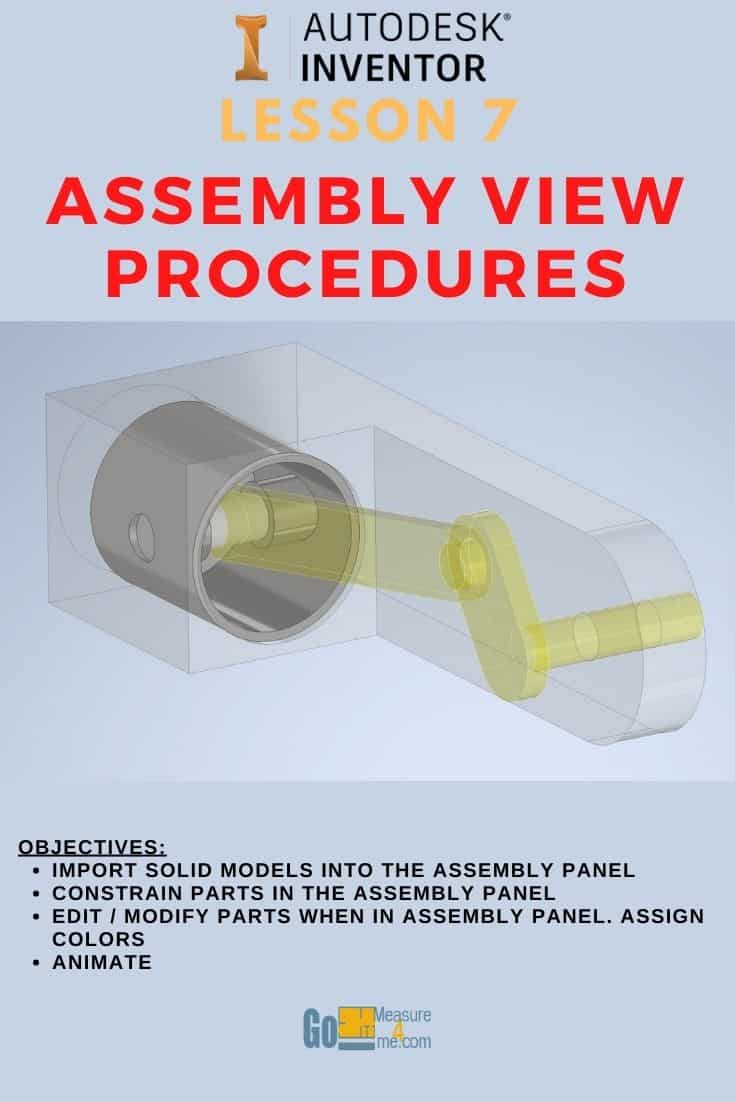
Open New Standard Assembly project, click Create:
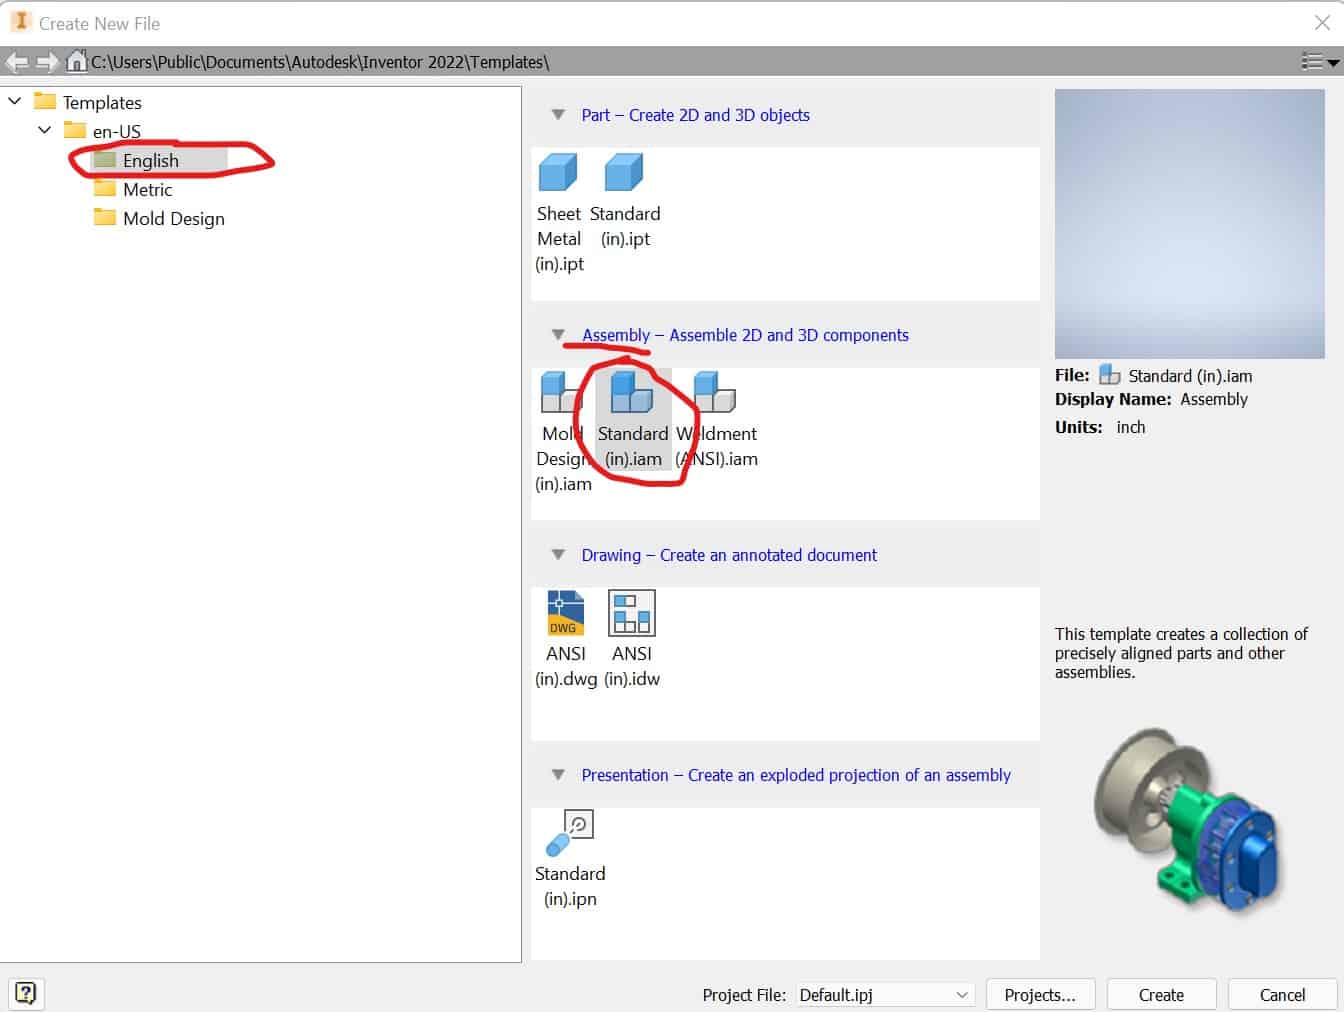
Import Solid Models into the Assembly Panel
To import existing solid model into your Assembly Project in Inventor, go to:
The Ribbon > Assemble tab > Component panel > Place tool
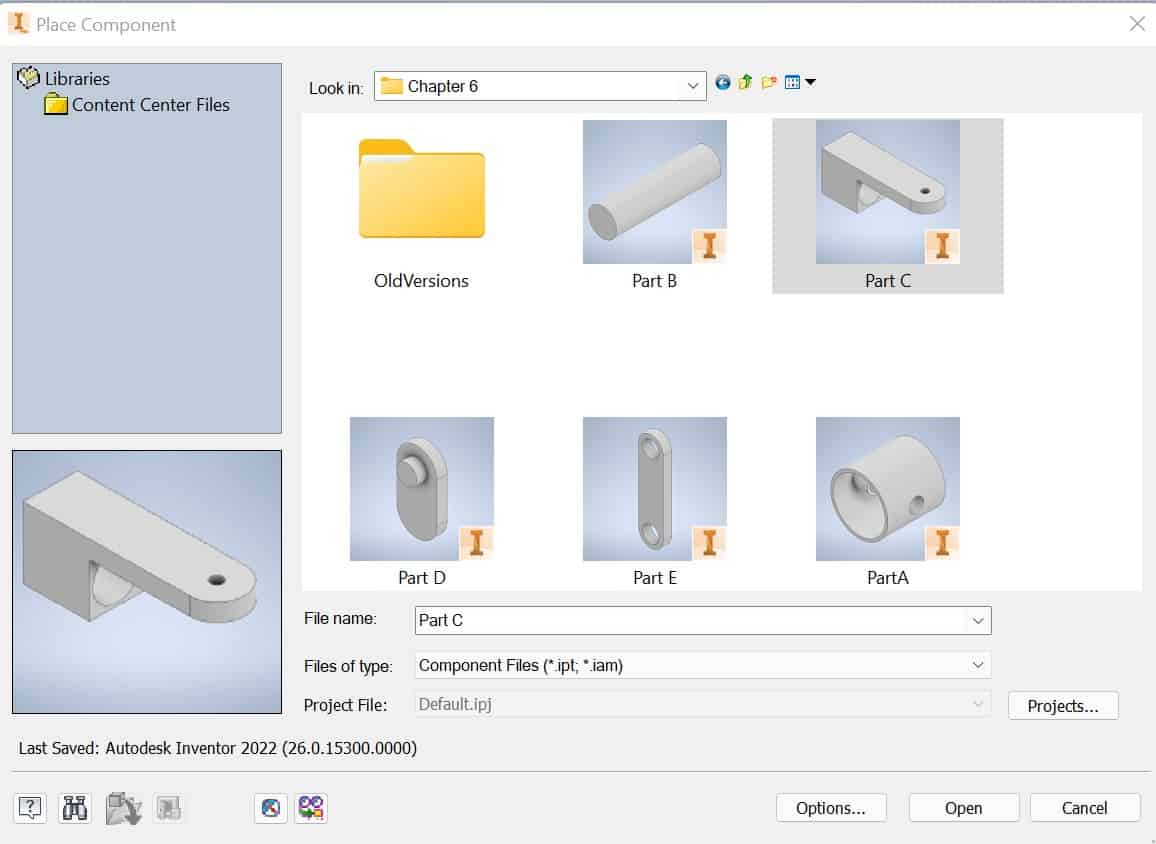
The Place Component dialog box will appear. Locate Part C you did in the previous lesson: Lesson 6 – Making Parts for the Assembly. Click Open to import this model:
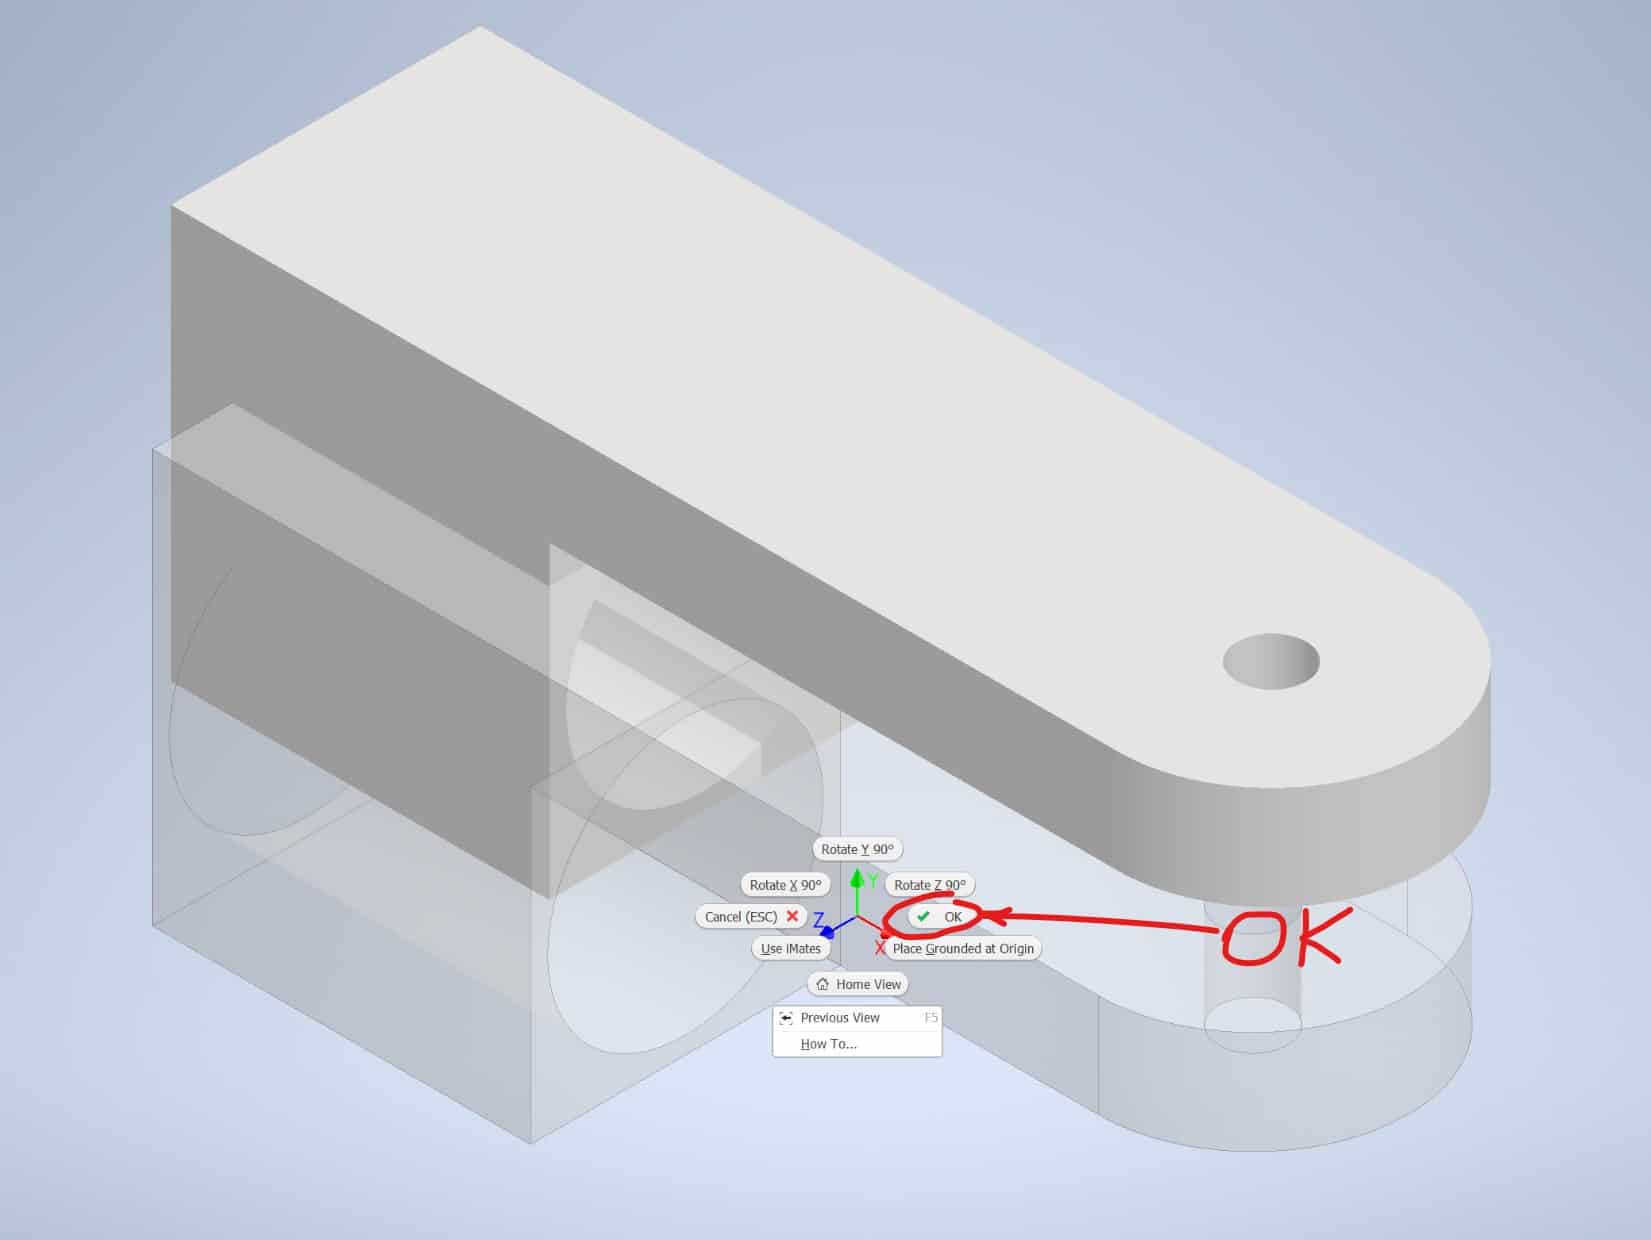
Left click anywhere on the screen to place the Part into your Assembly and then right-click and OK to exit out of the command:
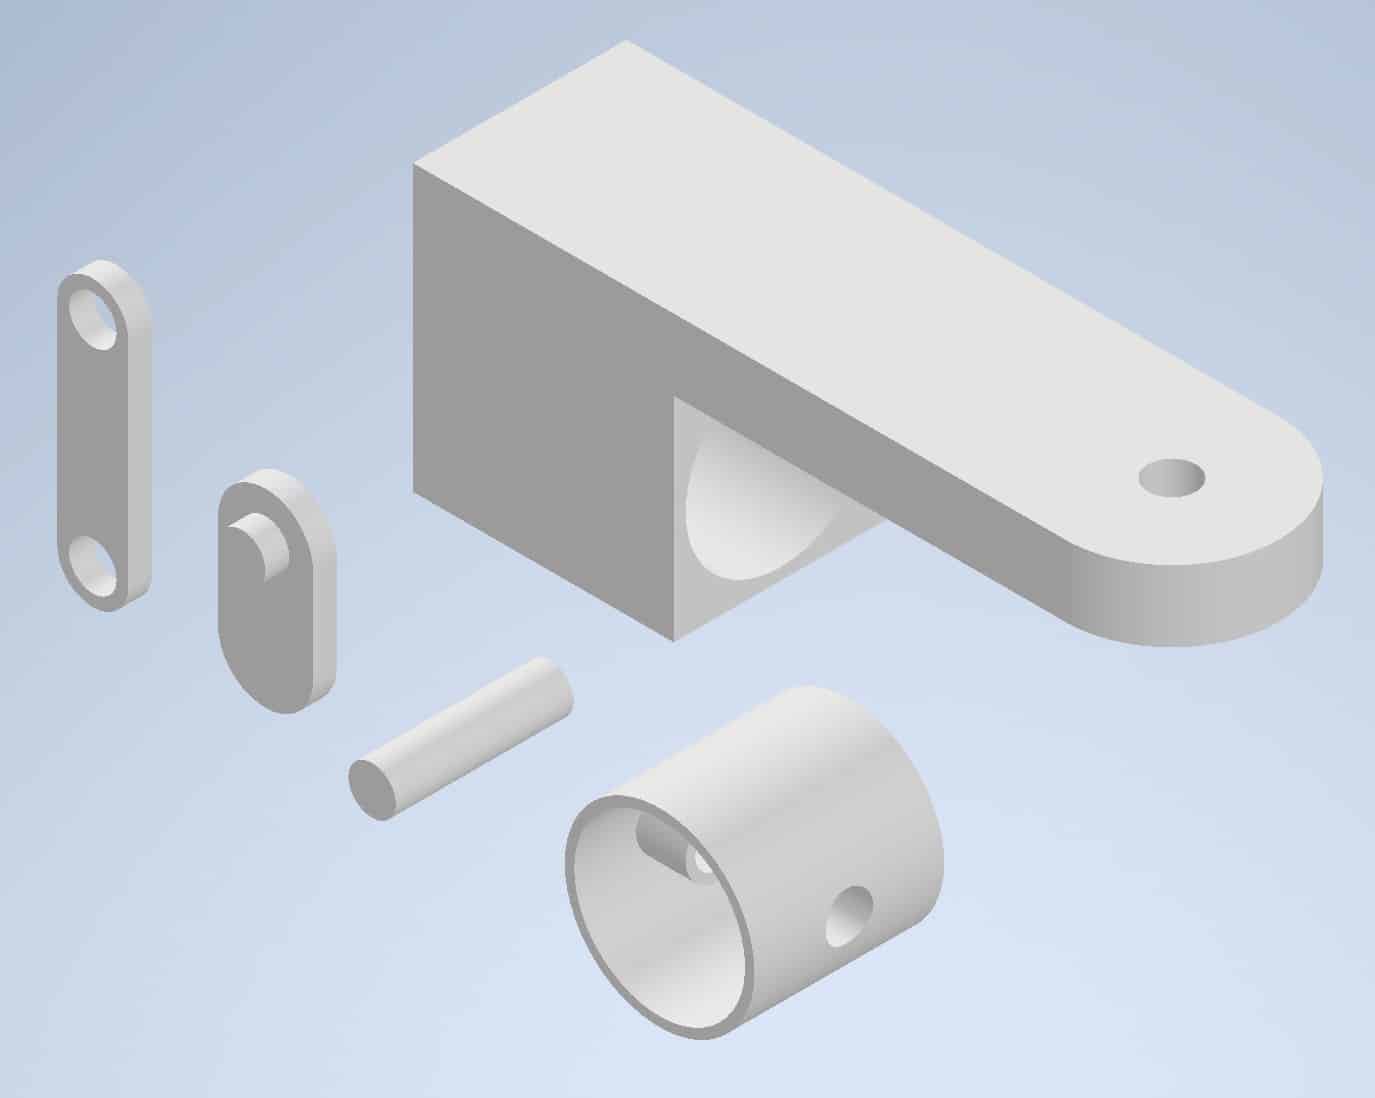
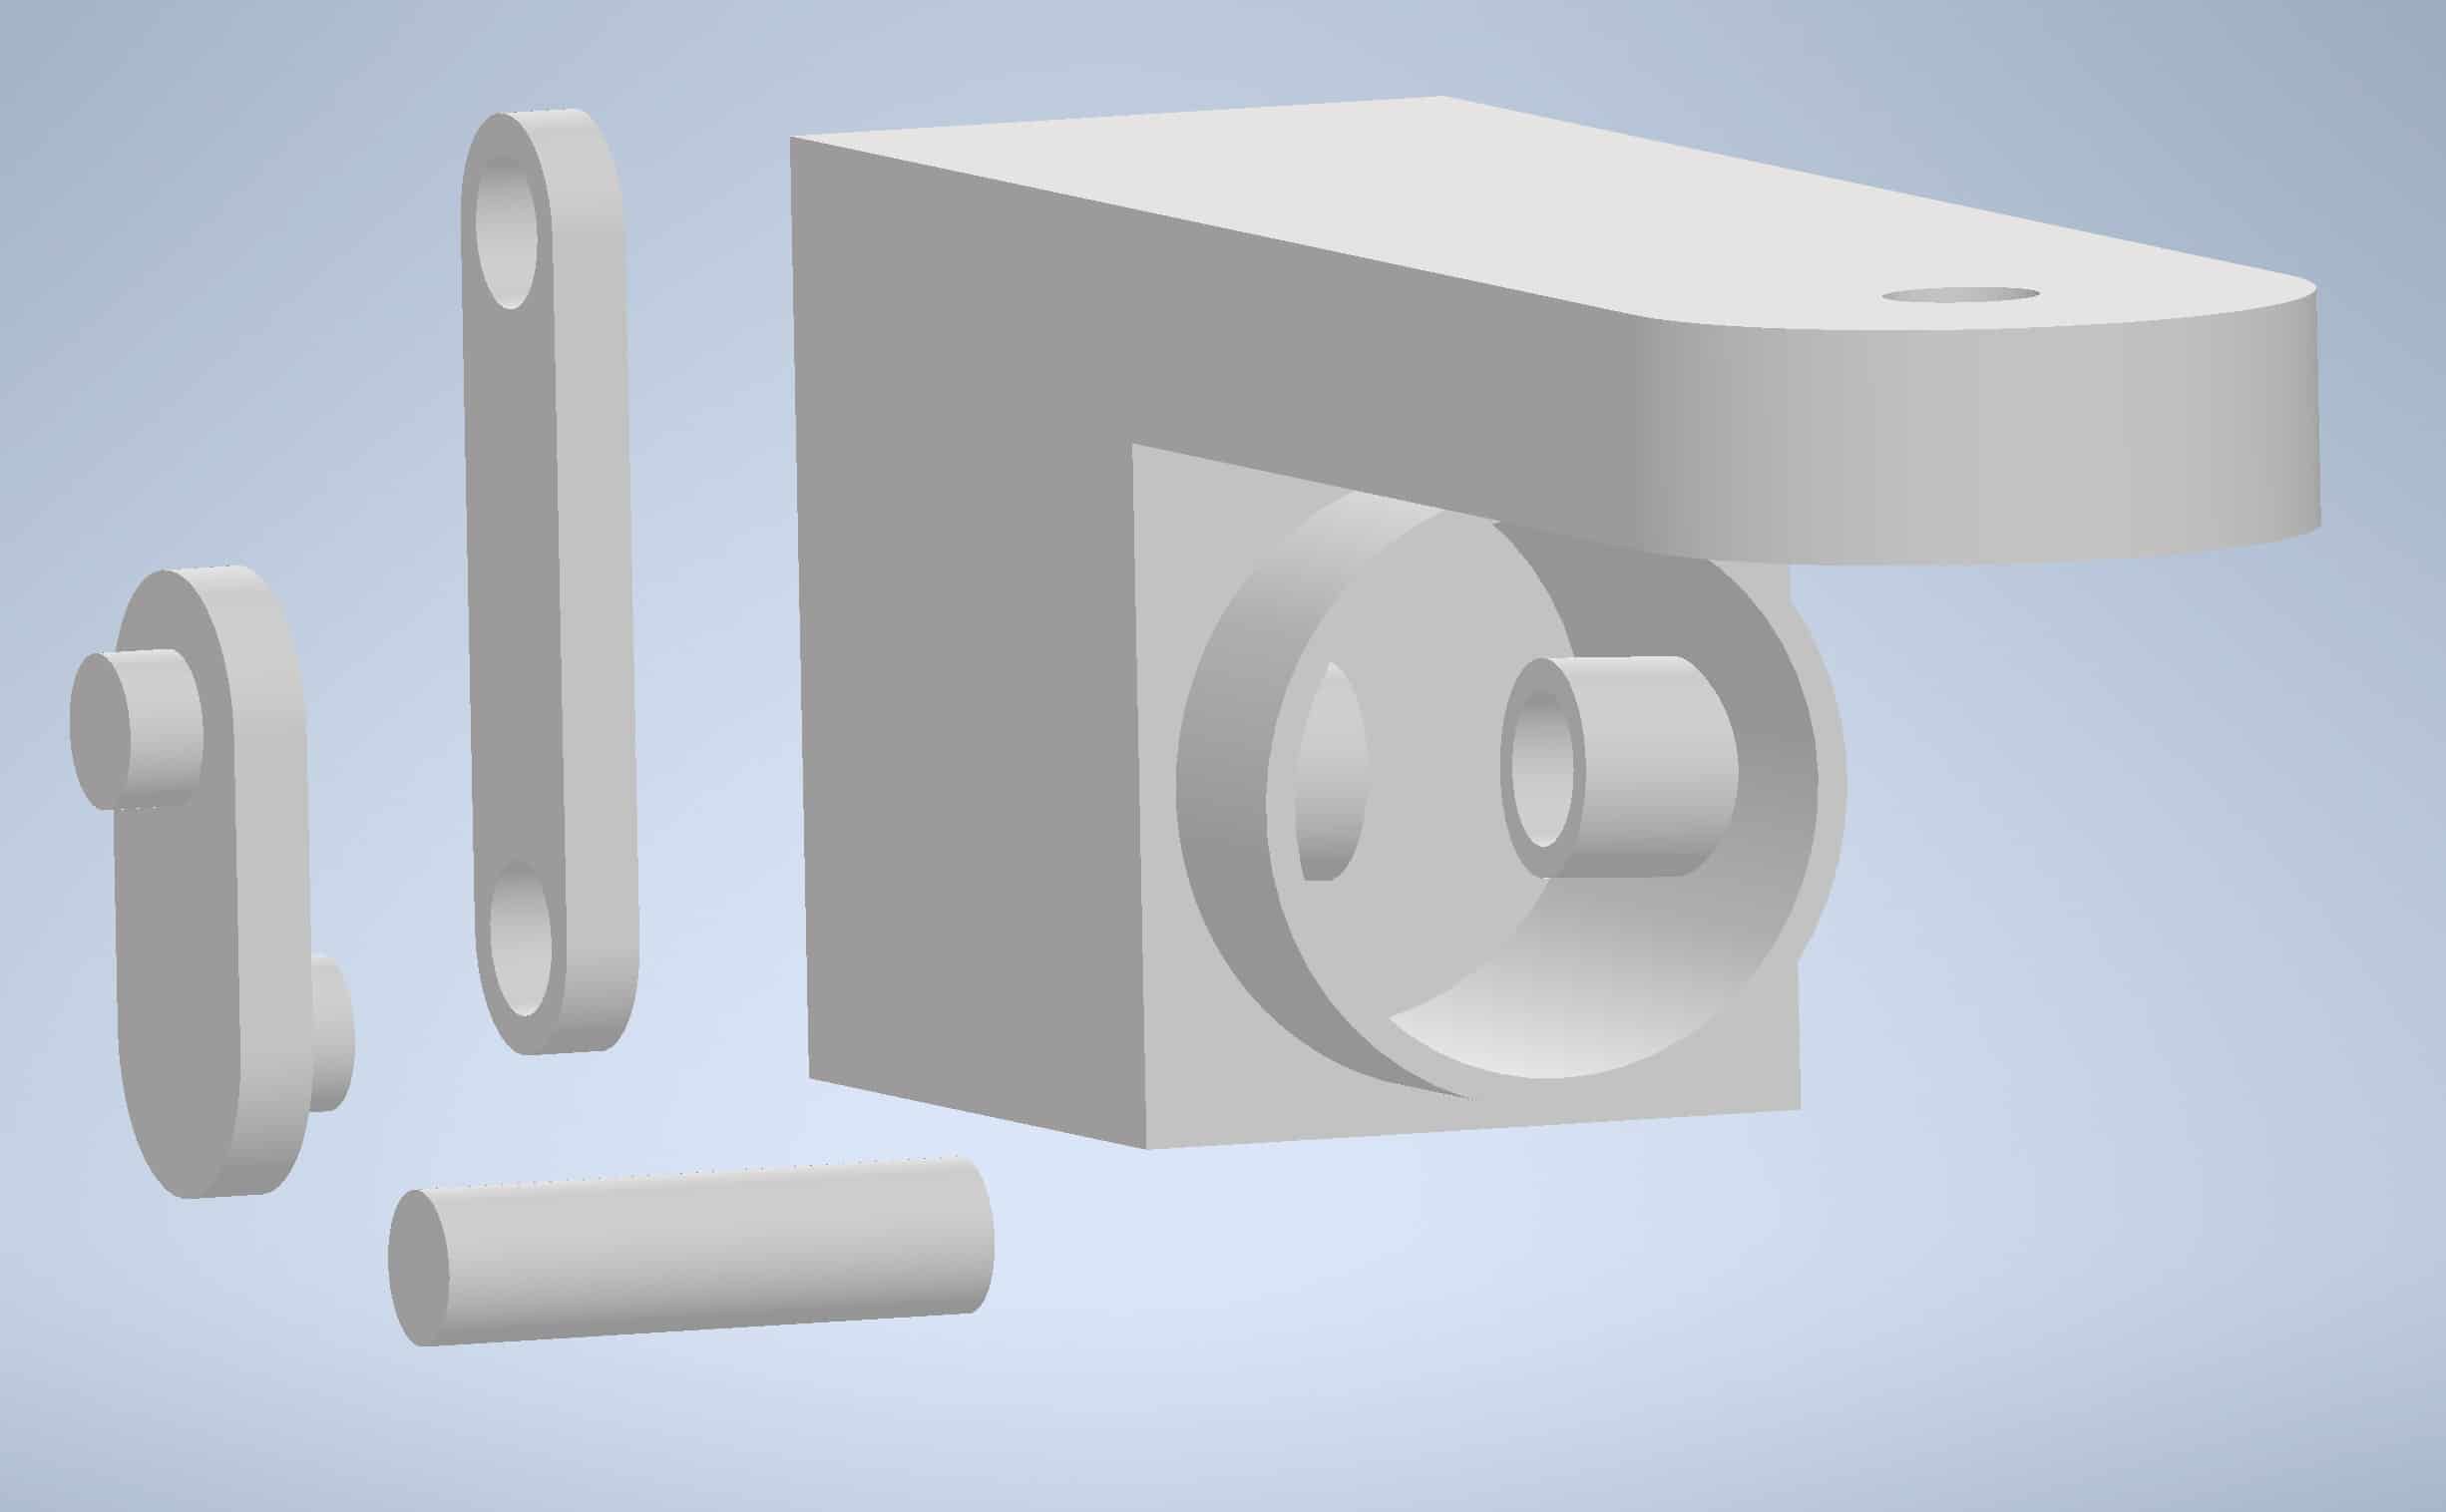
Using this method import remaining parts: A, B, D, E and place it in your Assembly:
Right-click on the Part C, and from the drop-down menu select the option Grounded:
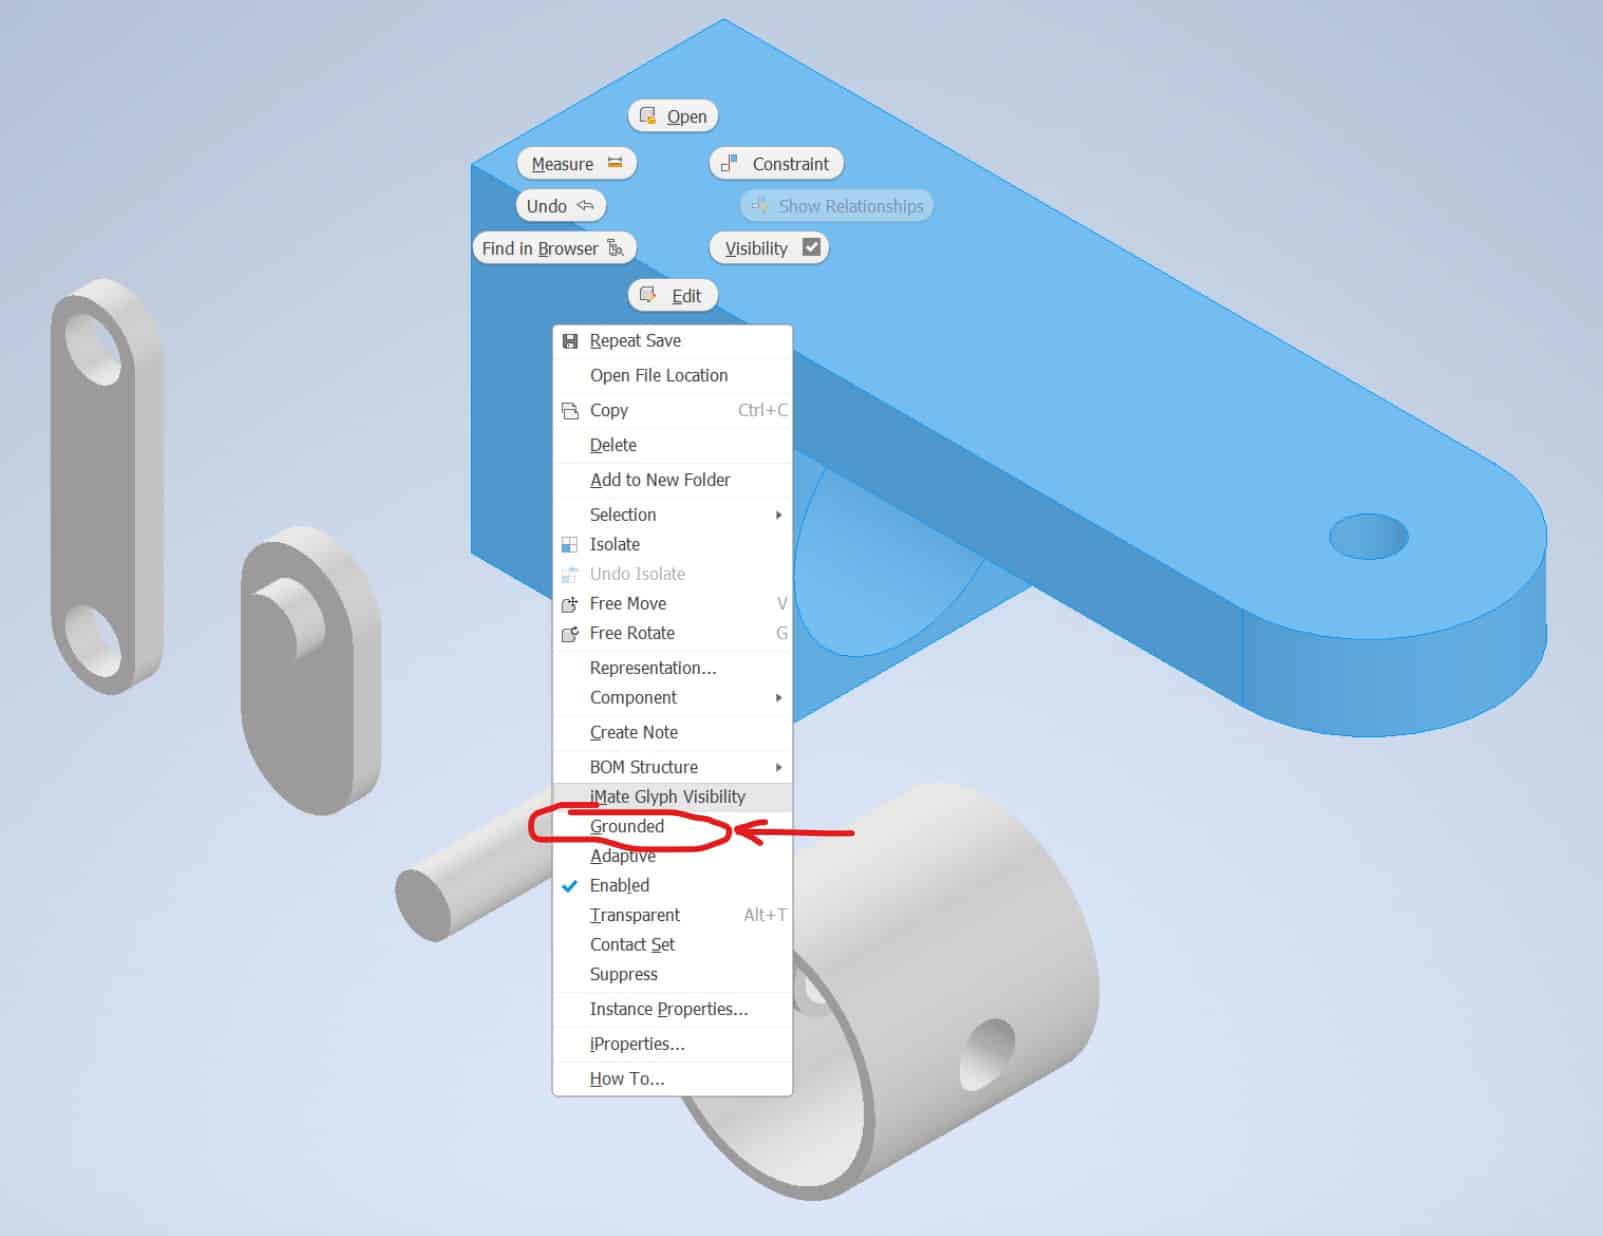
The Inventor will lock in place this part. All movements will be restricted.
Constrain parts in the Assembly Panel
Invoke the Constrain tool from:
The Ribbon > Assemble tab > Relationships panel > Constrain tool

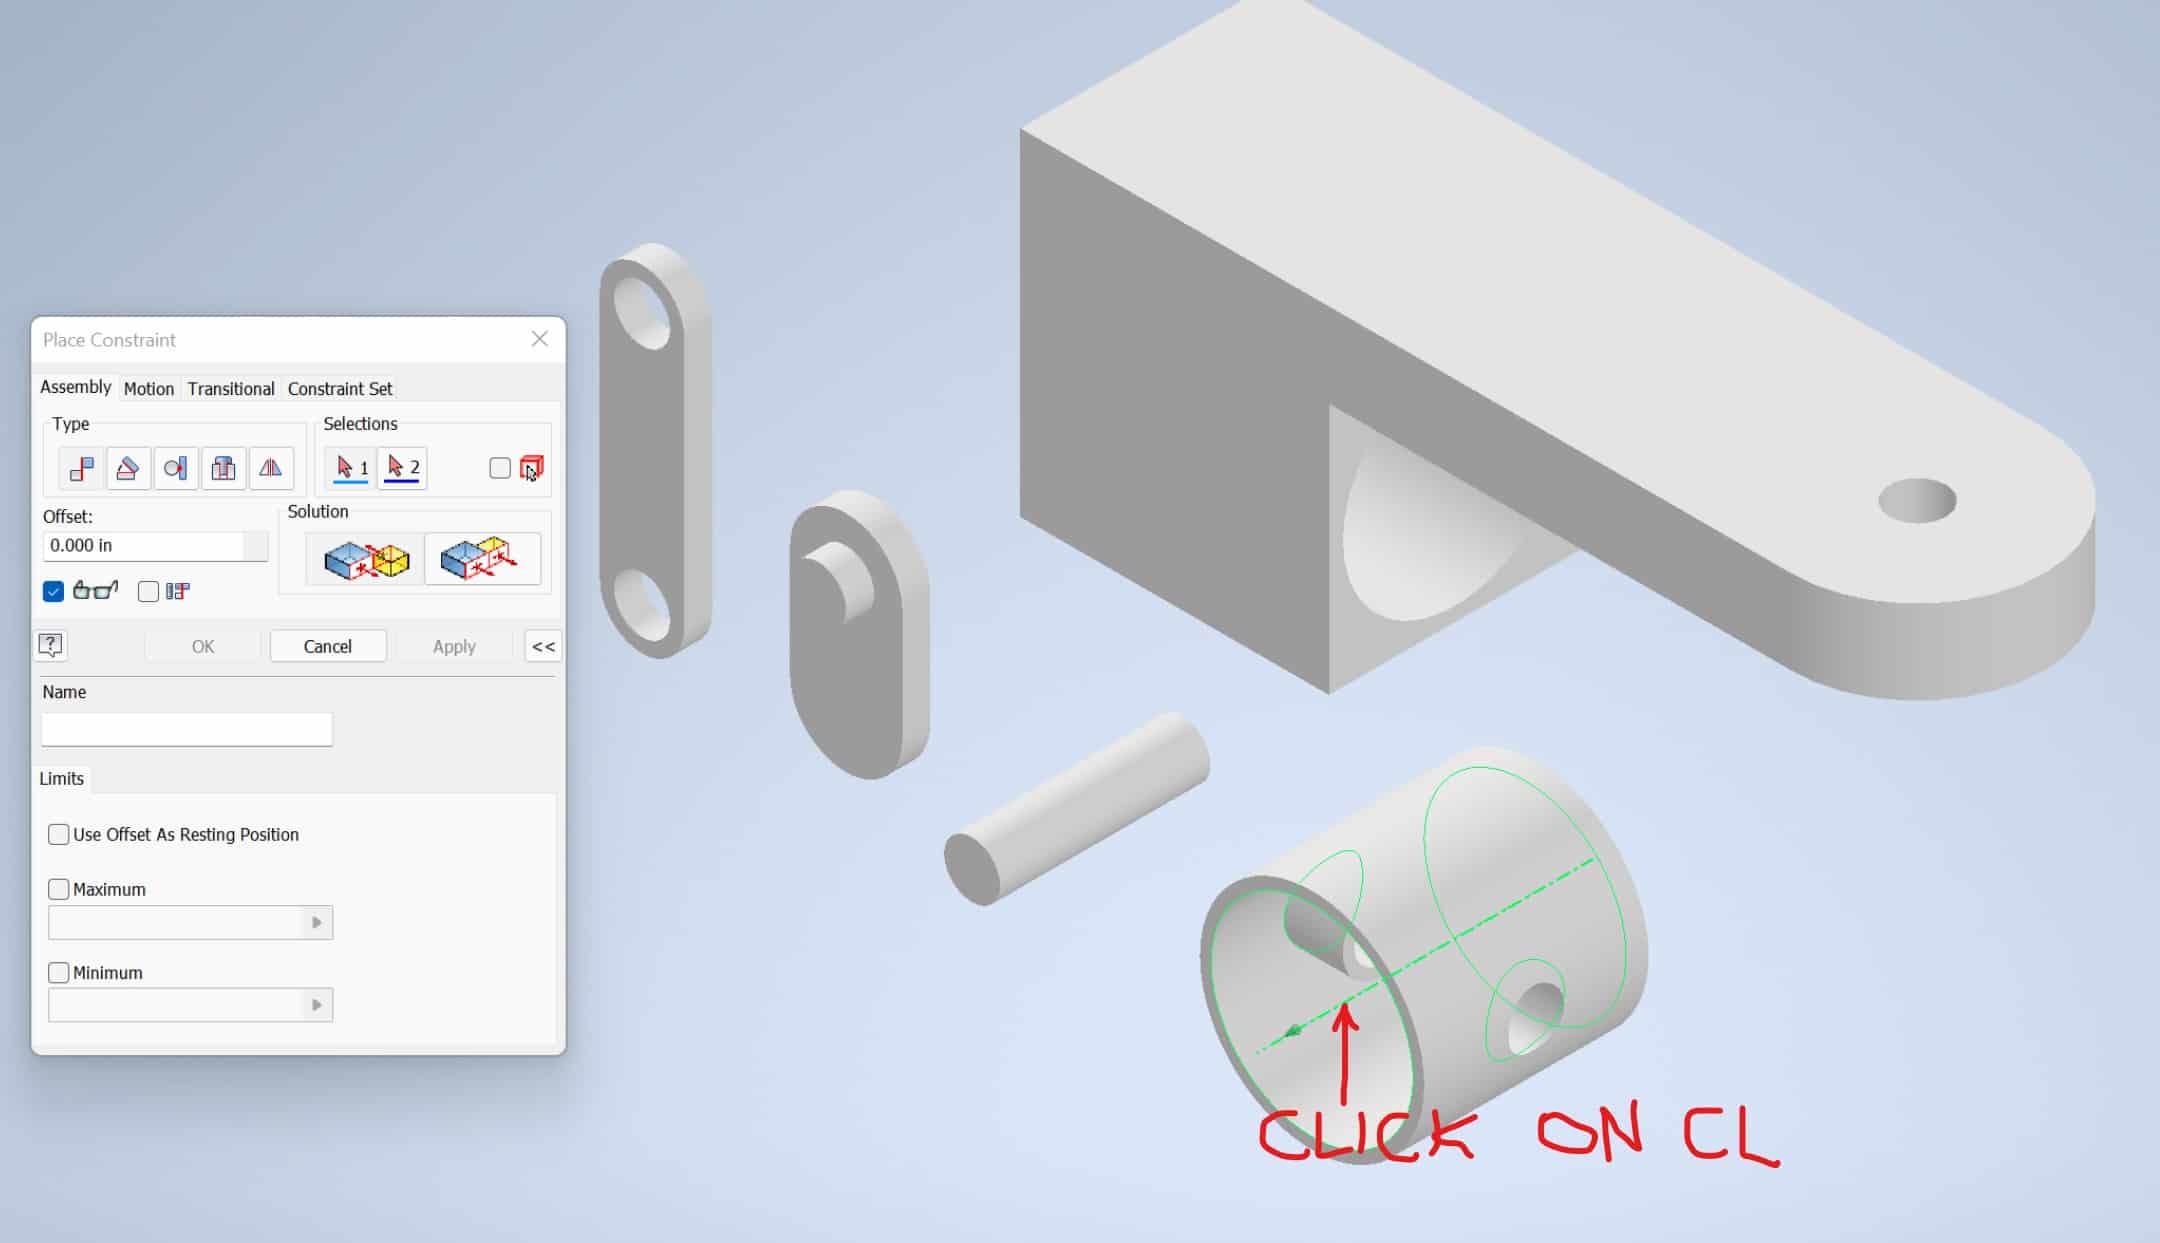
The dialog box will appear. Left-click on the Center Line of the Part A:
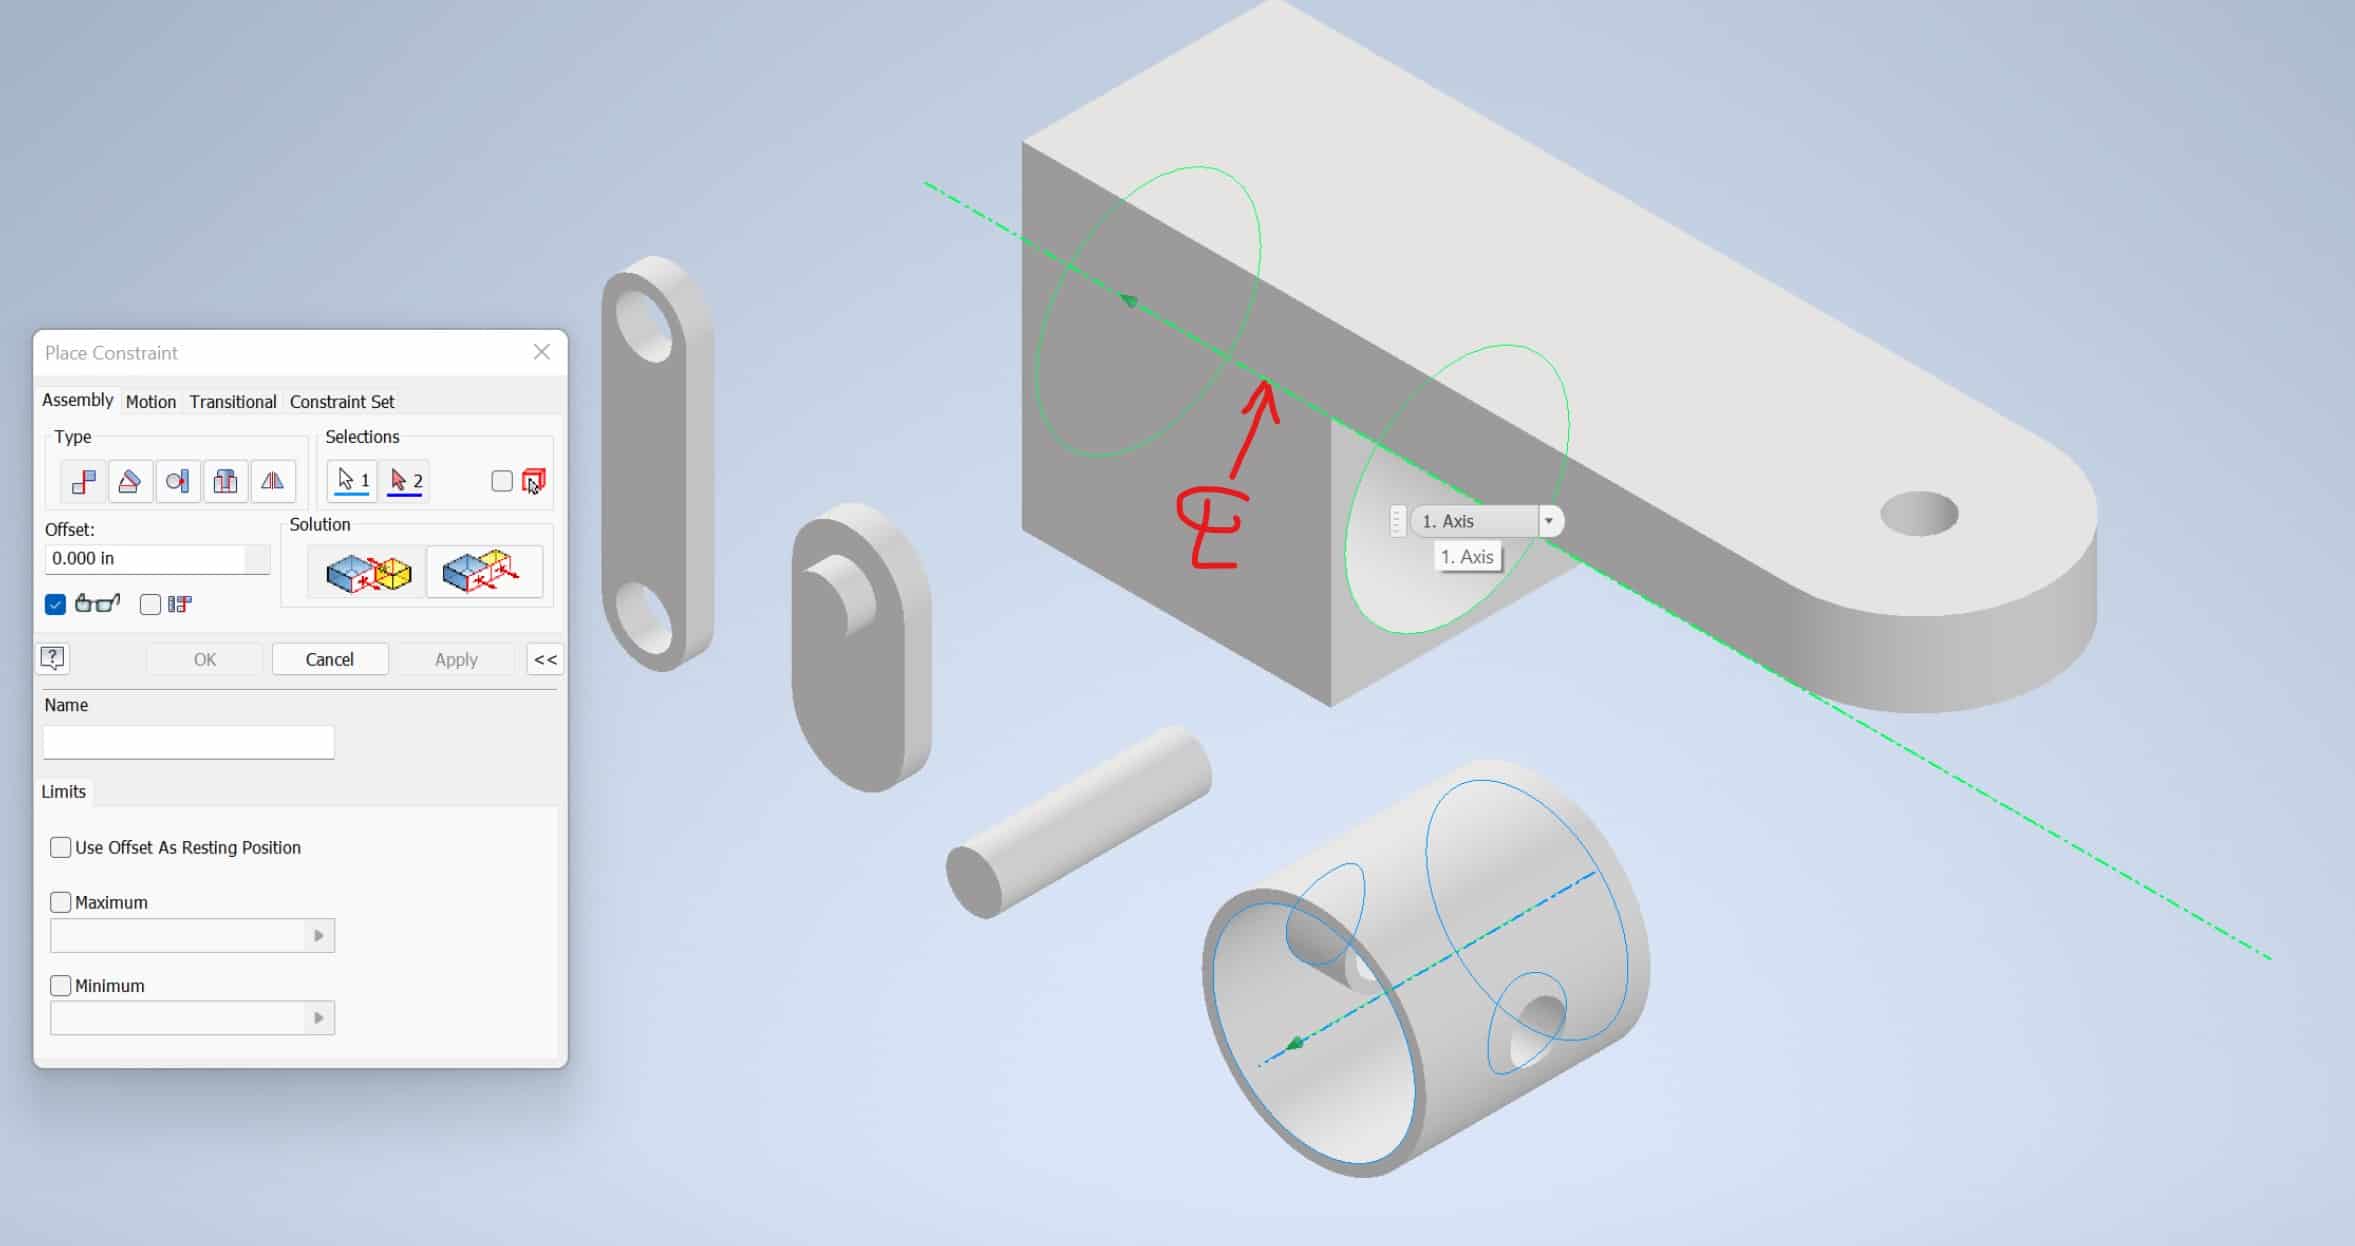
Next, find and click on the CL of Part C:
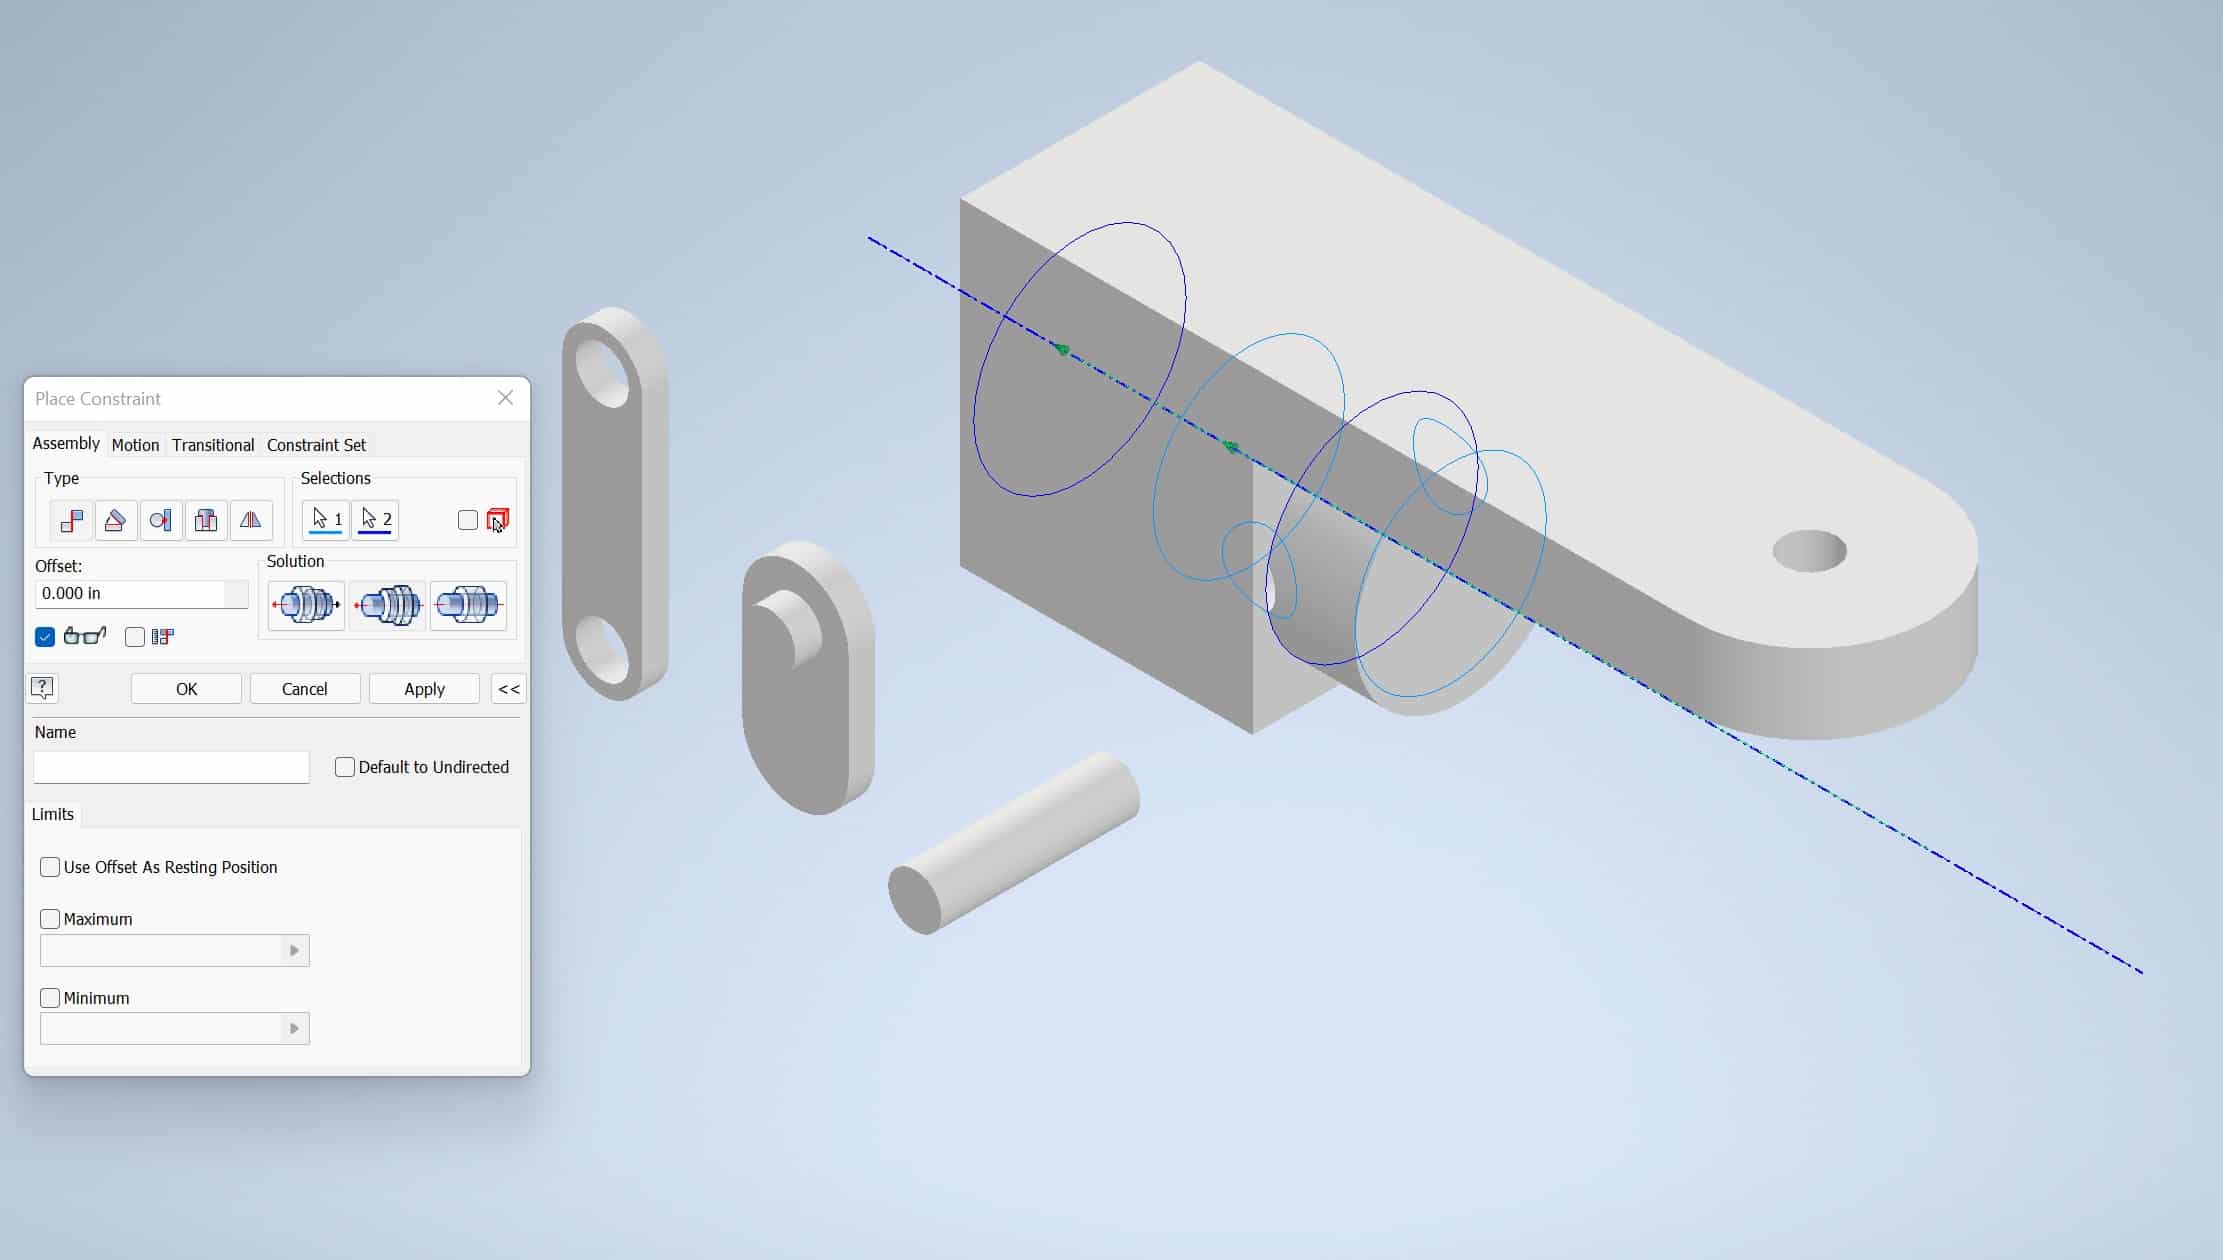
The Part A and Part C Centerlines will become aligned:
If the part is inserted in the wrong direction:
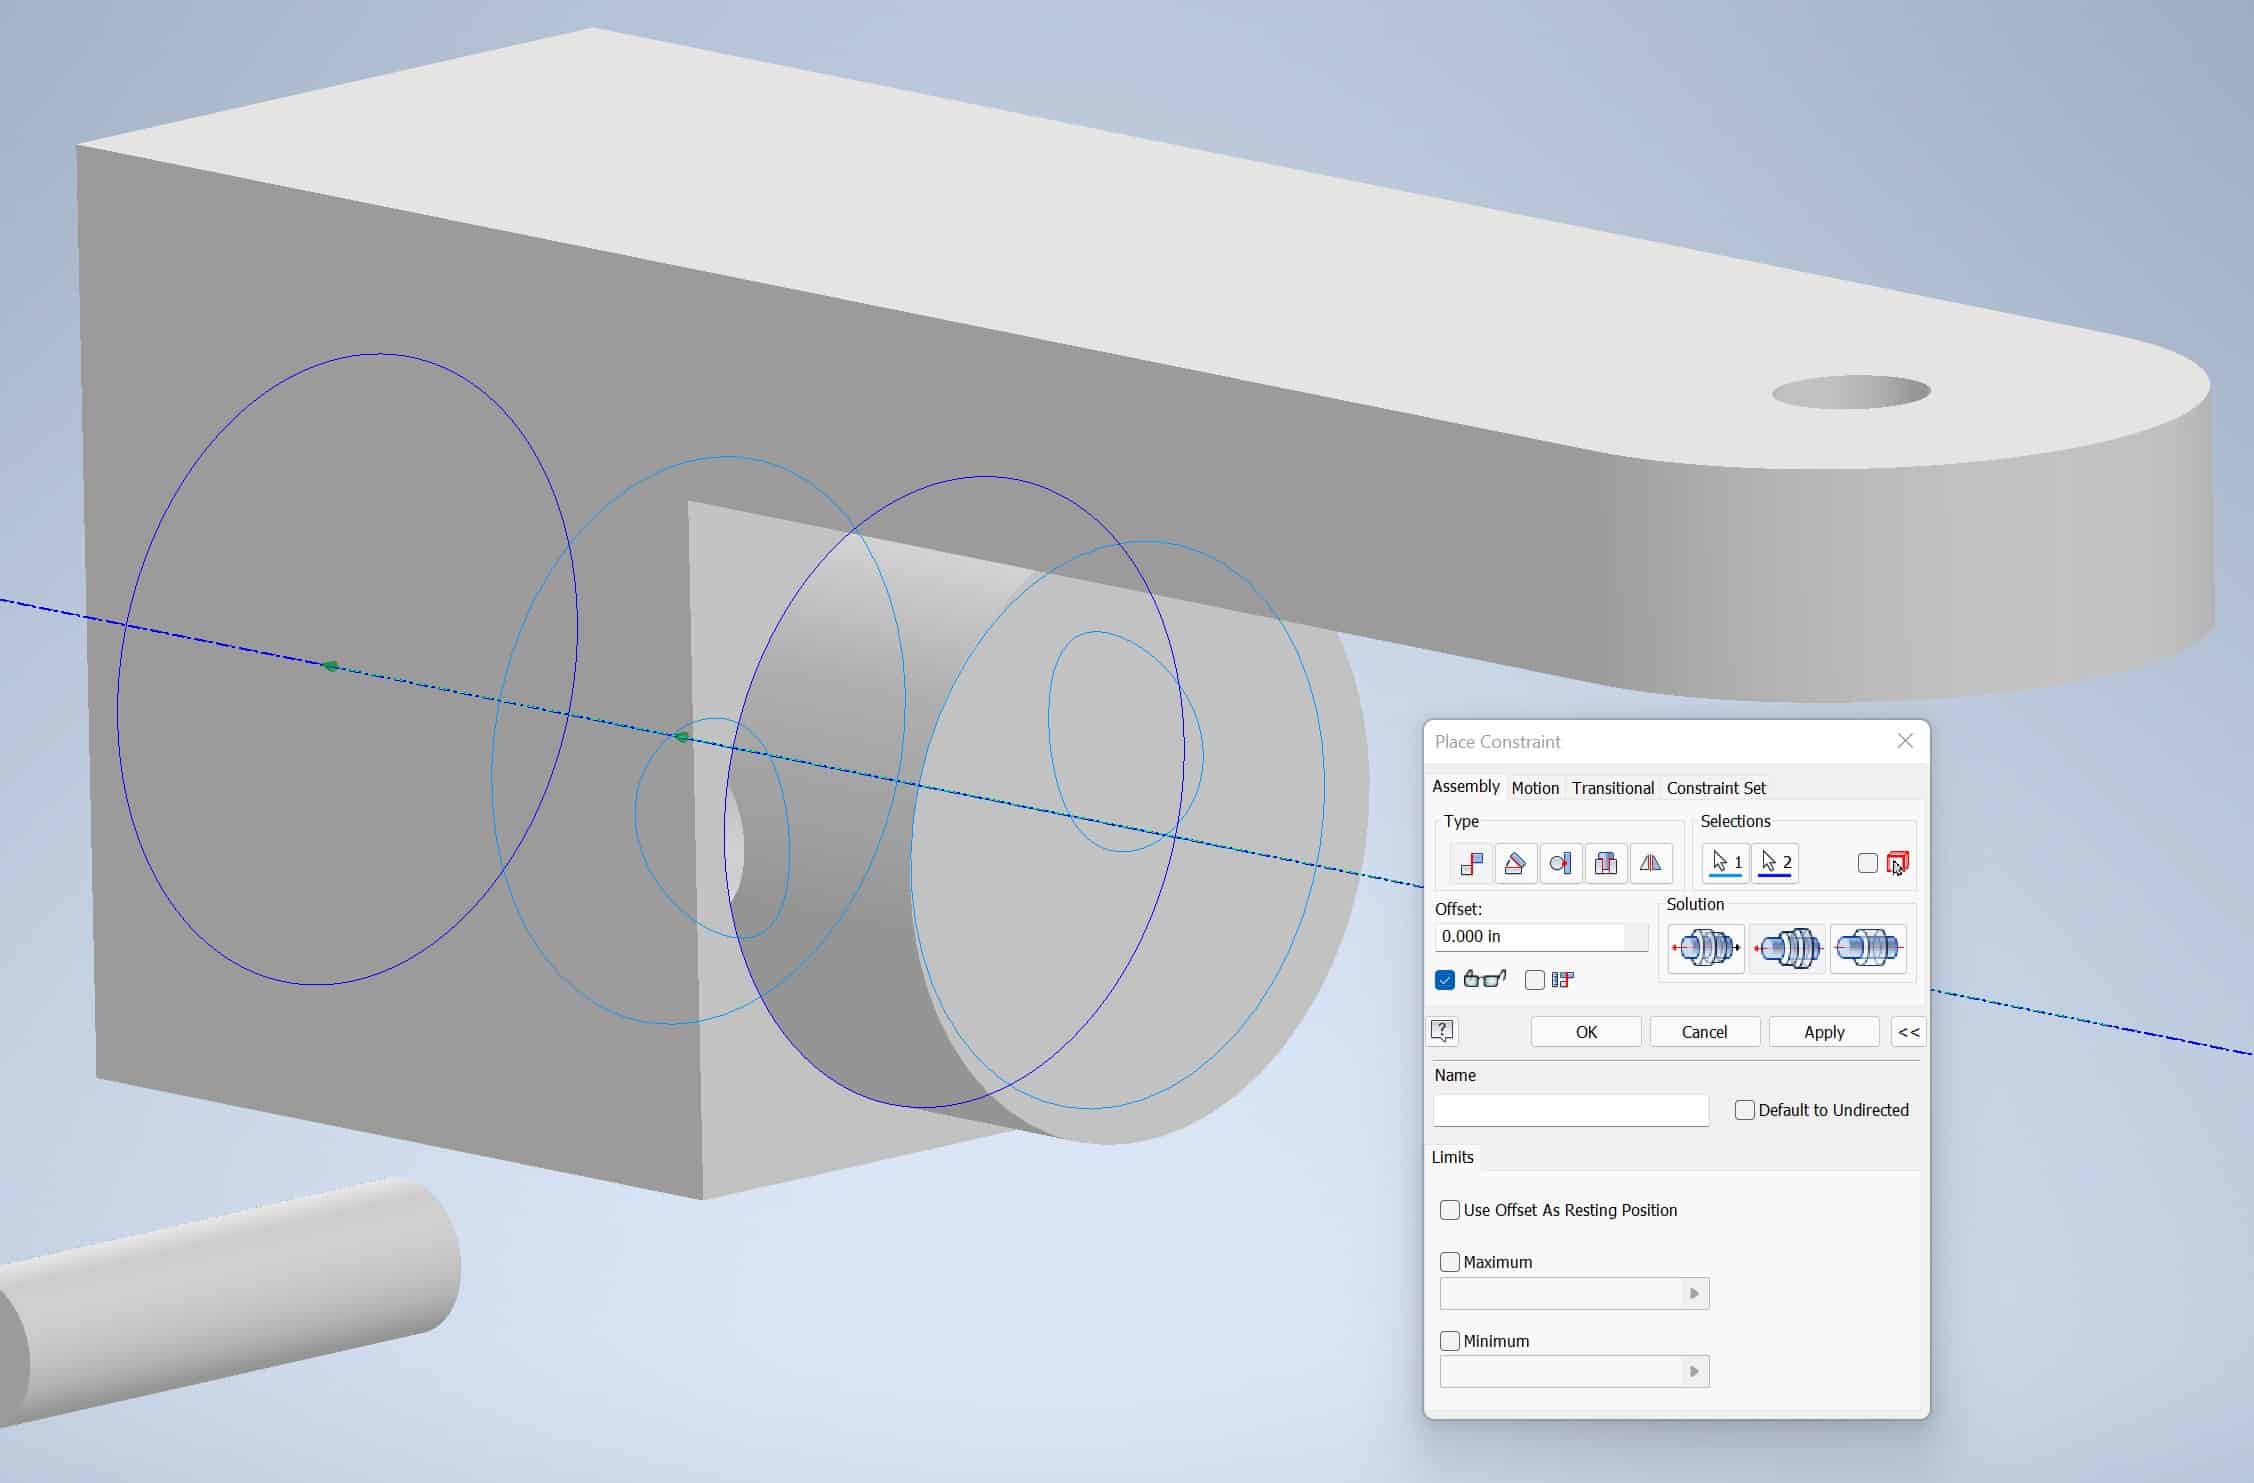
Click on the Rotate Component option to reverse the direction, and click OK:
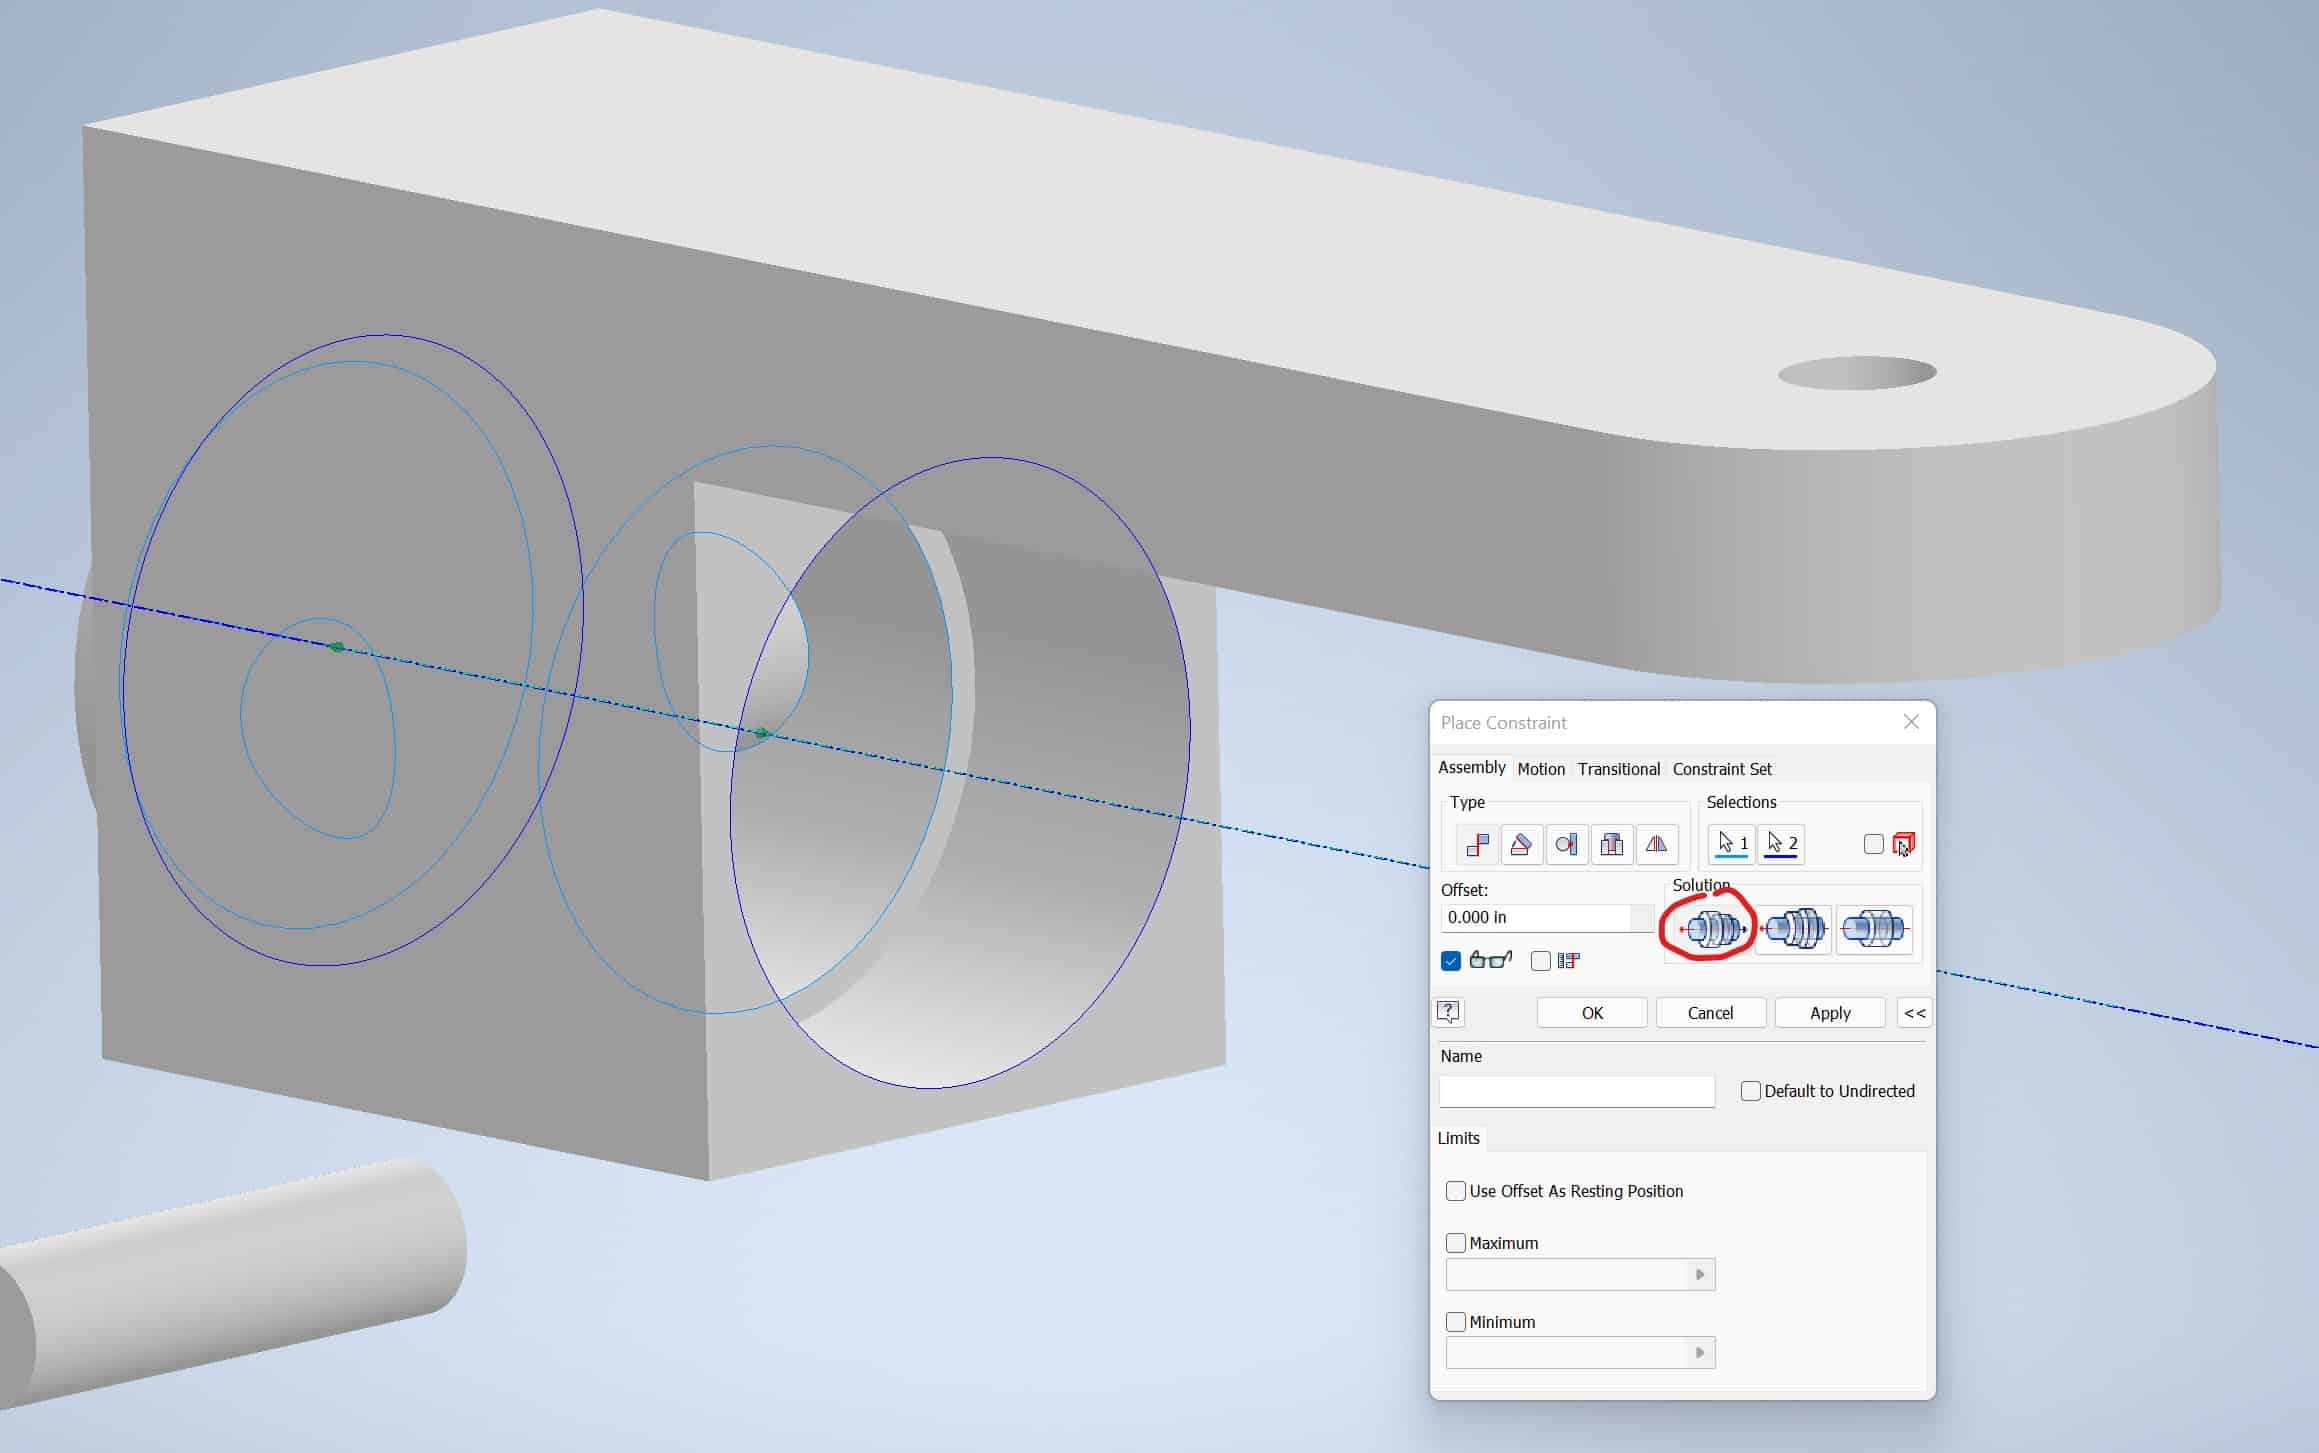
You can slide the internal part by left clicking and sliding in and out this part. Your screen should look like this:
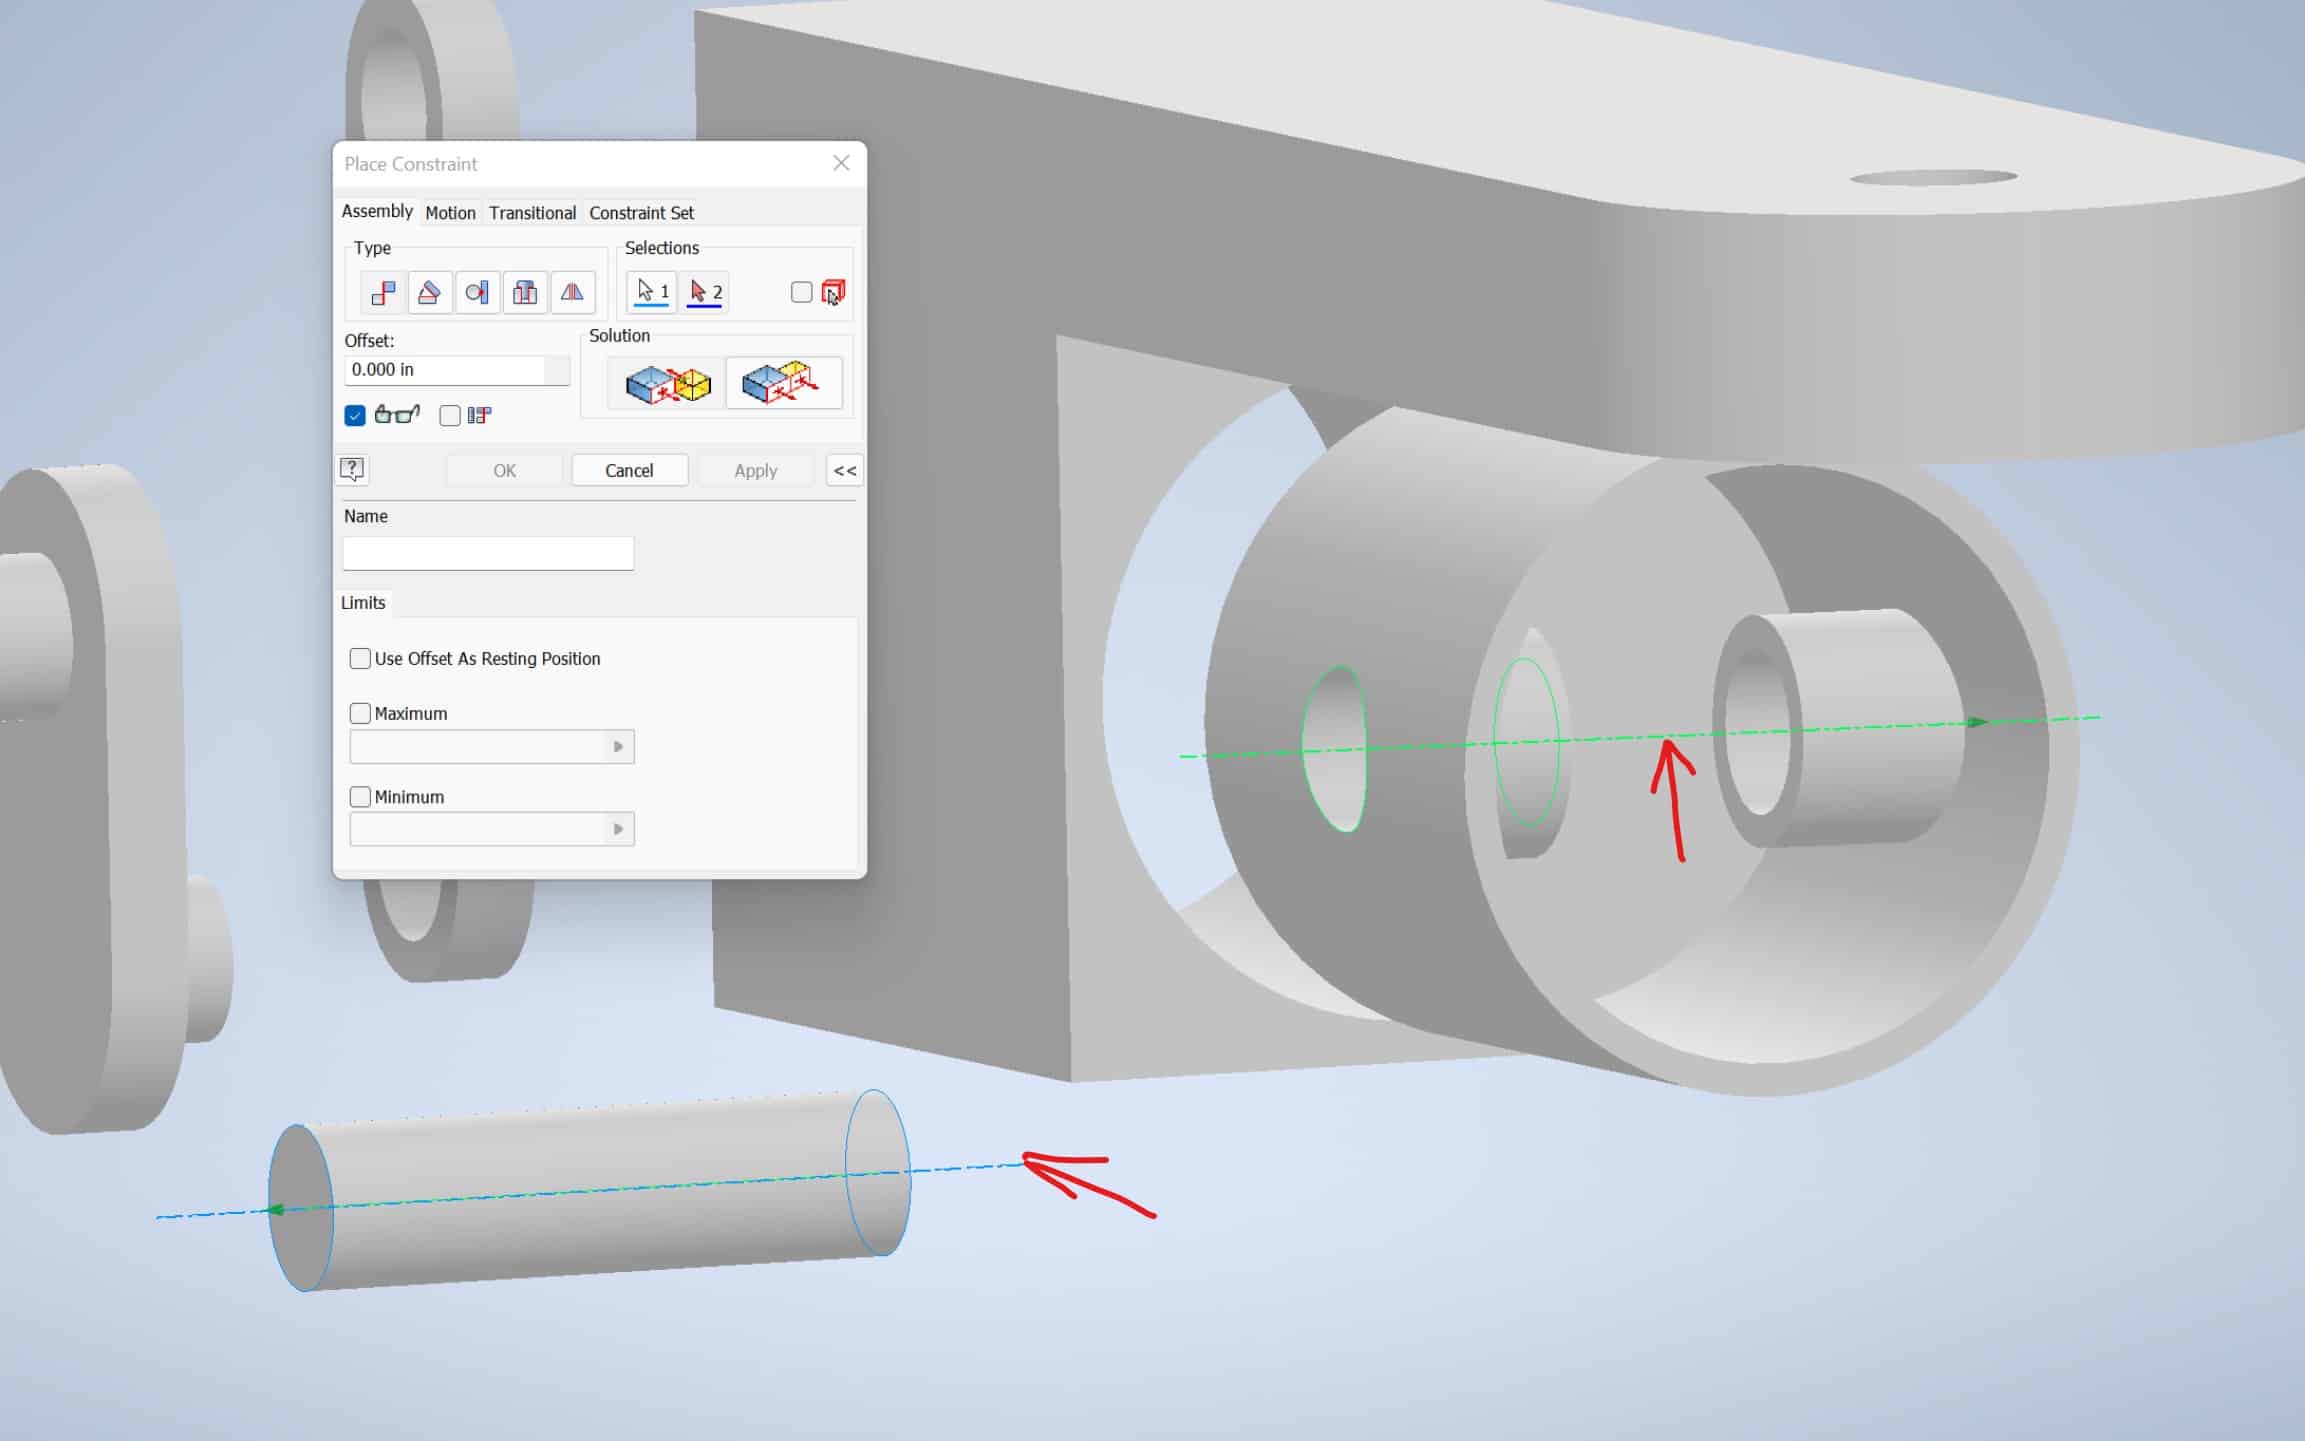
By using similar procedure let’s insert Part B into Part A:
Part B will be inserted:
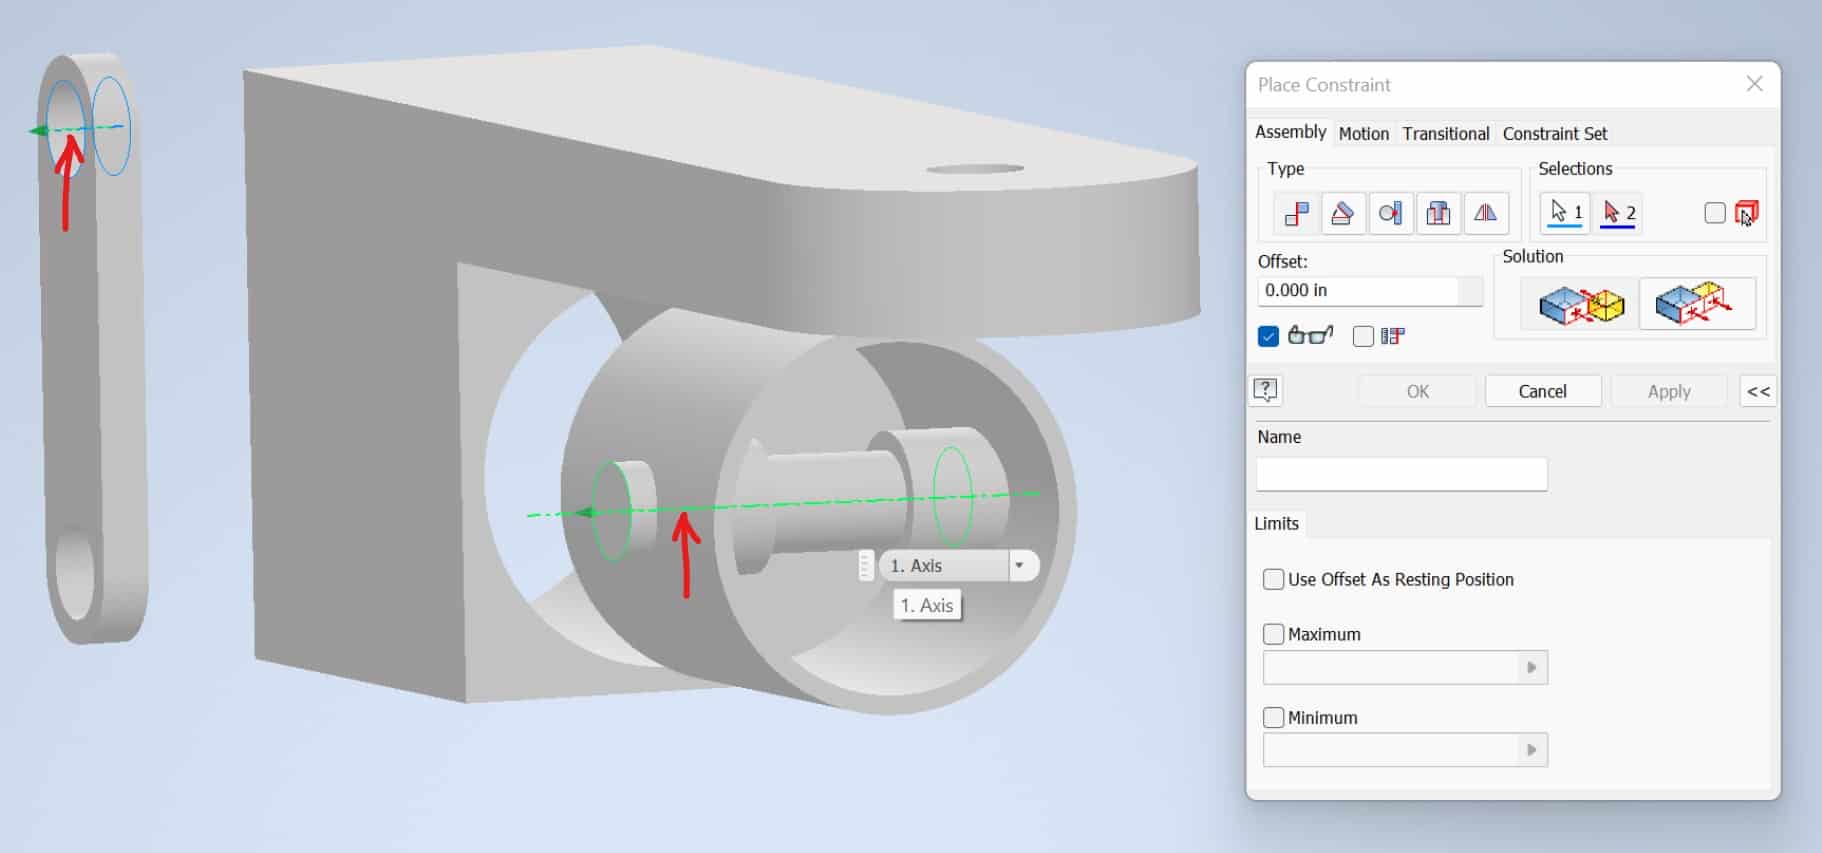
Your model at this point should look like this:
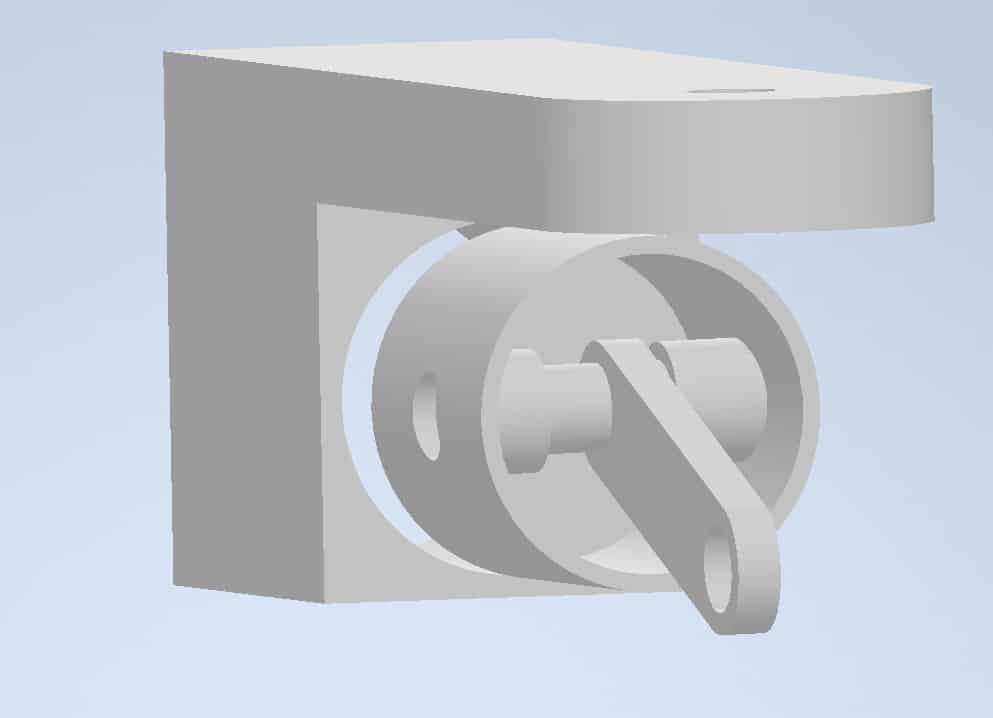
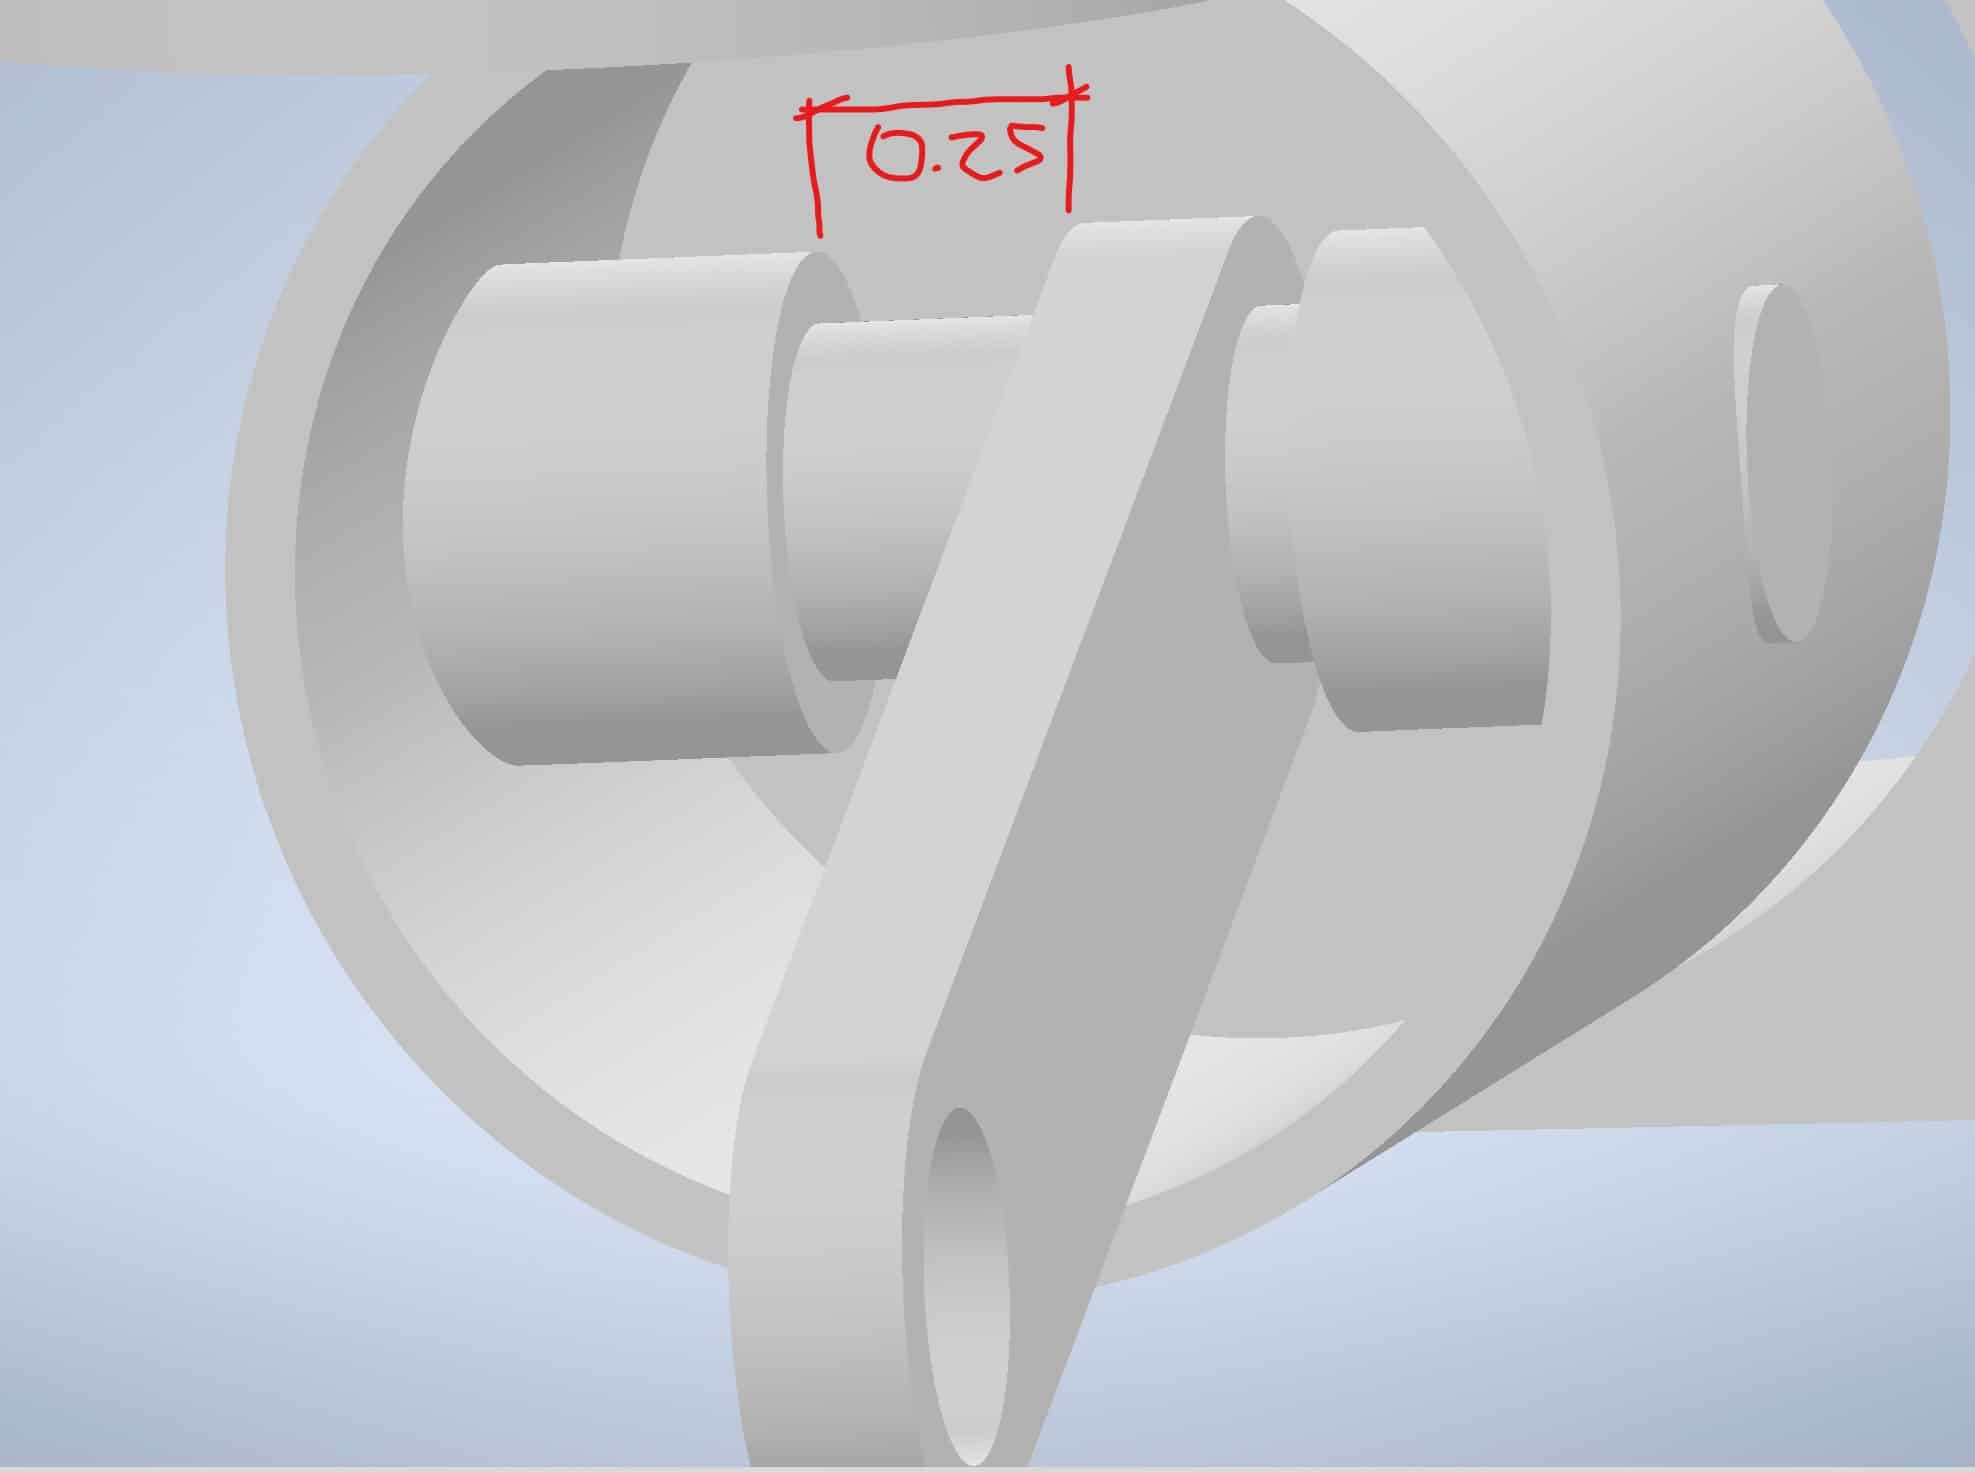
The next thing to do is we need to keep part E at the distance of 0.25 from the interna face of Part A:
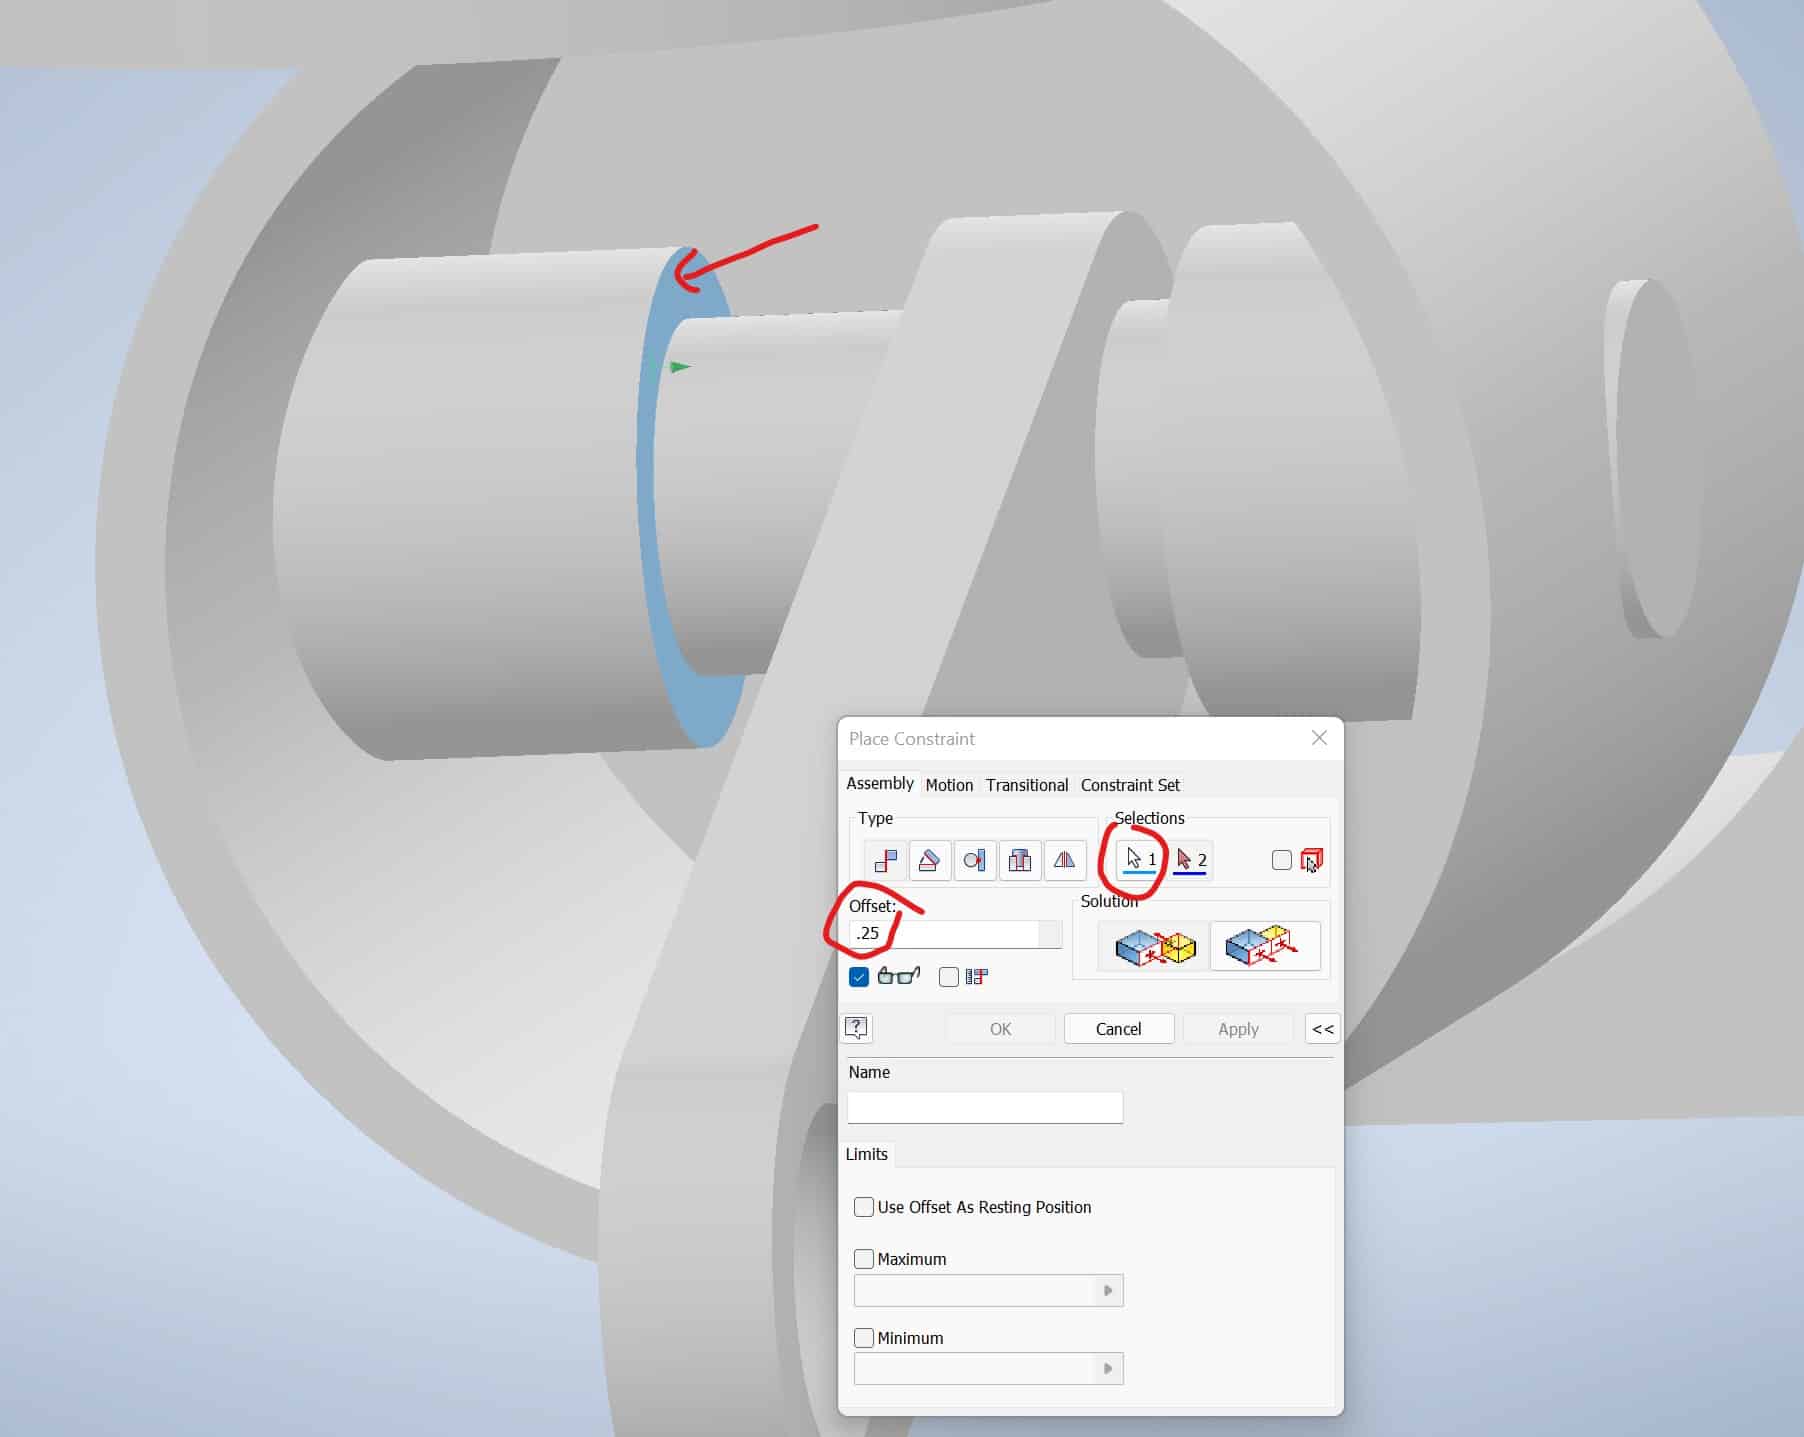
To achieve this, initiate Constraint tool from the Ribbon, select the surface and enter 0.25 in Offset value:
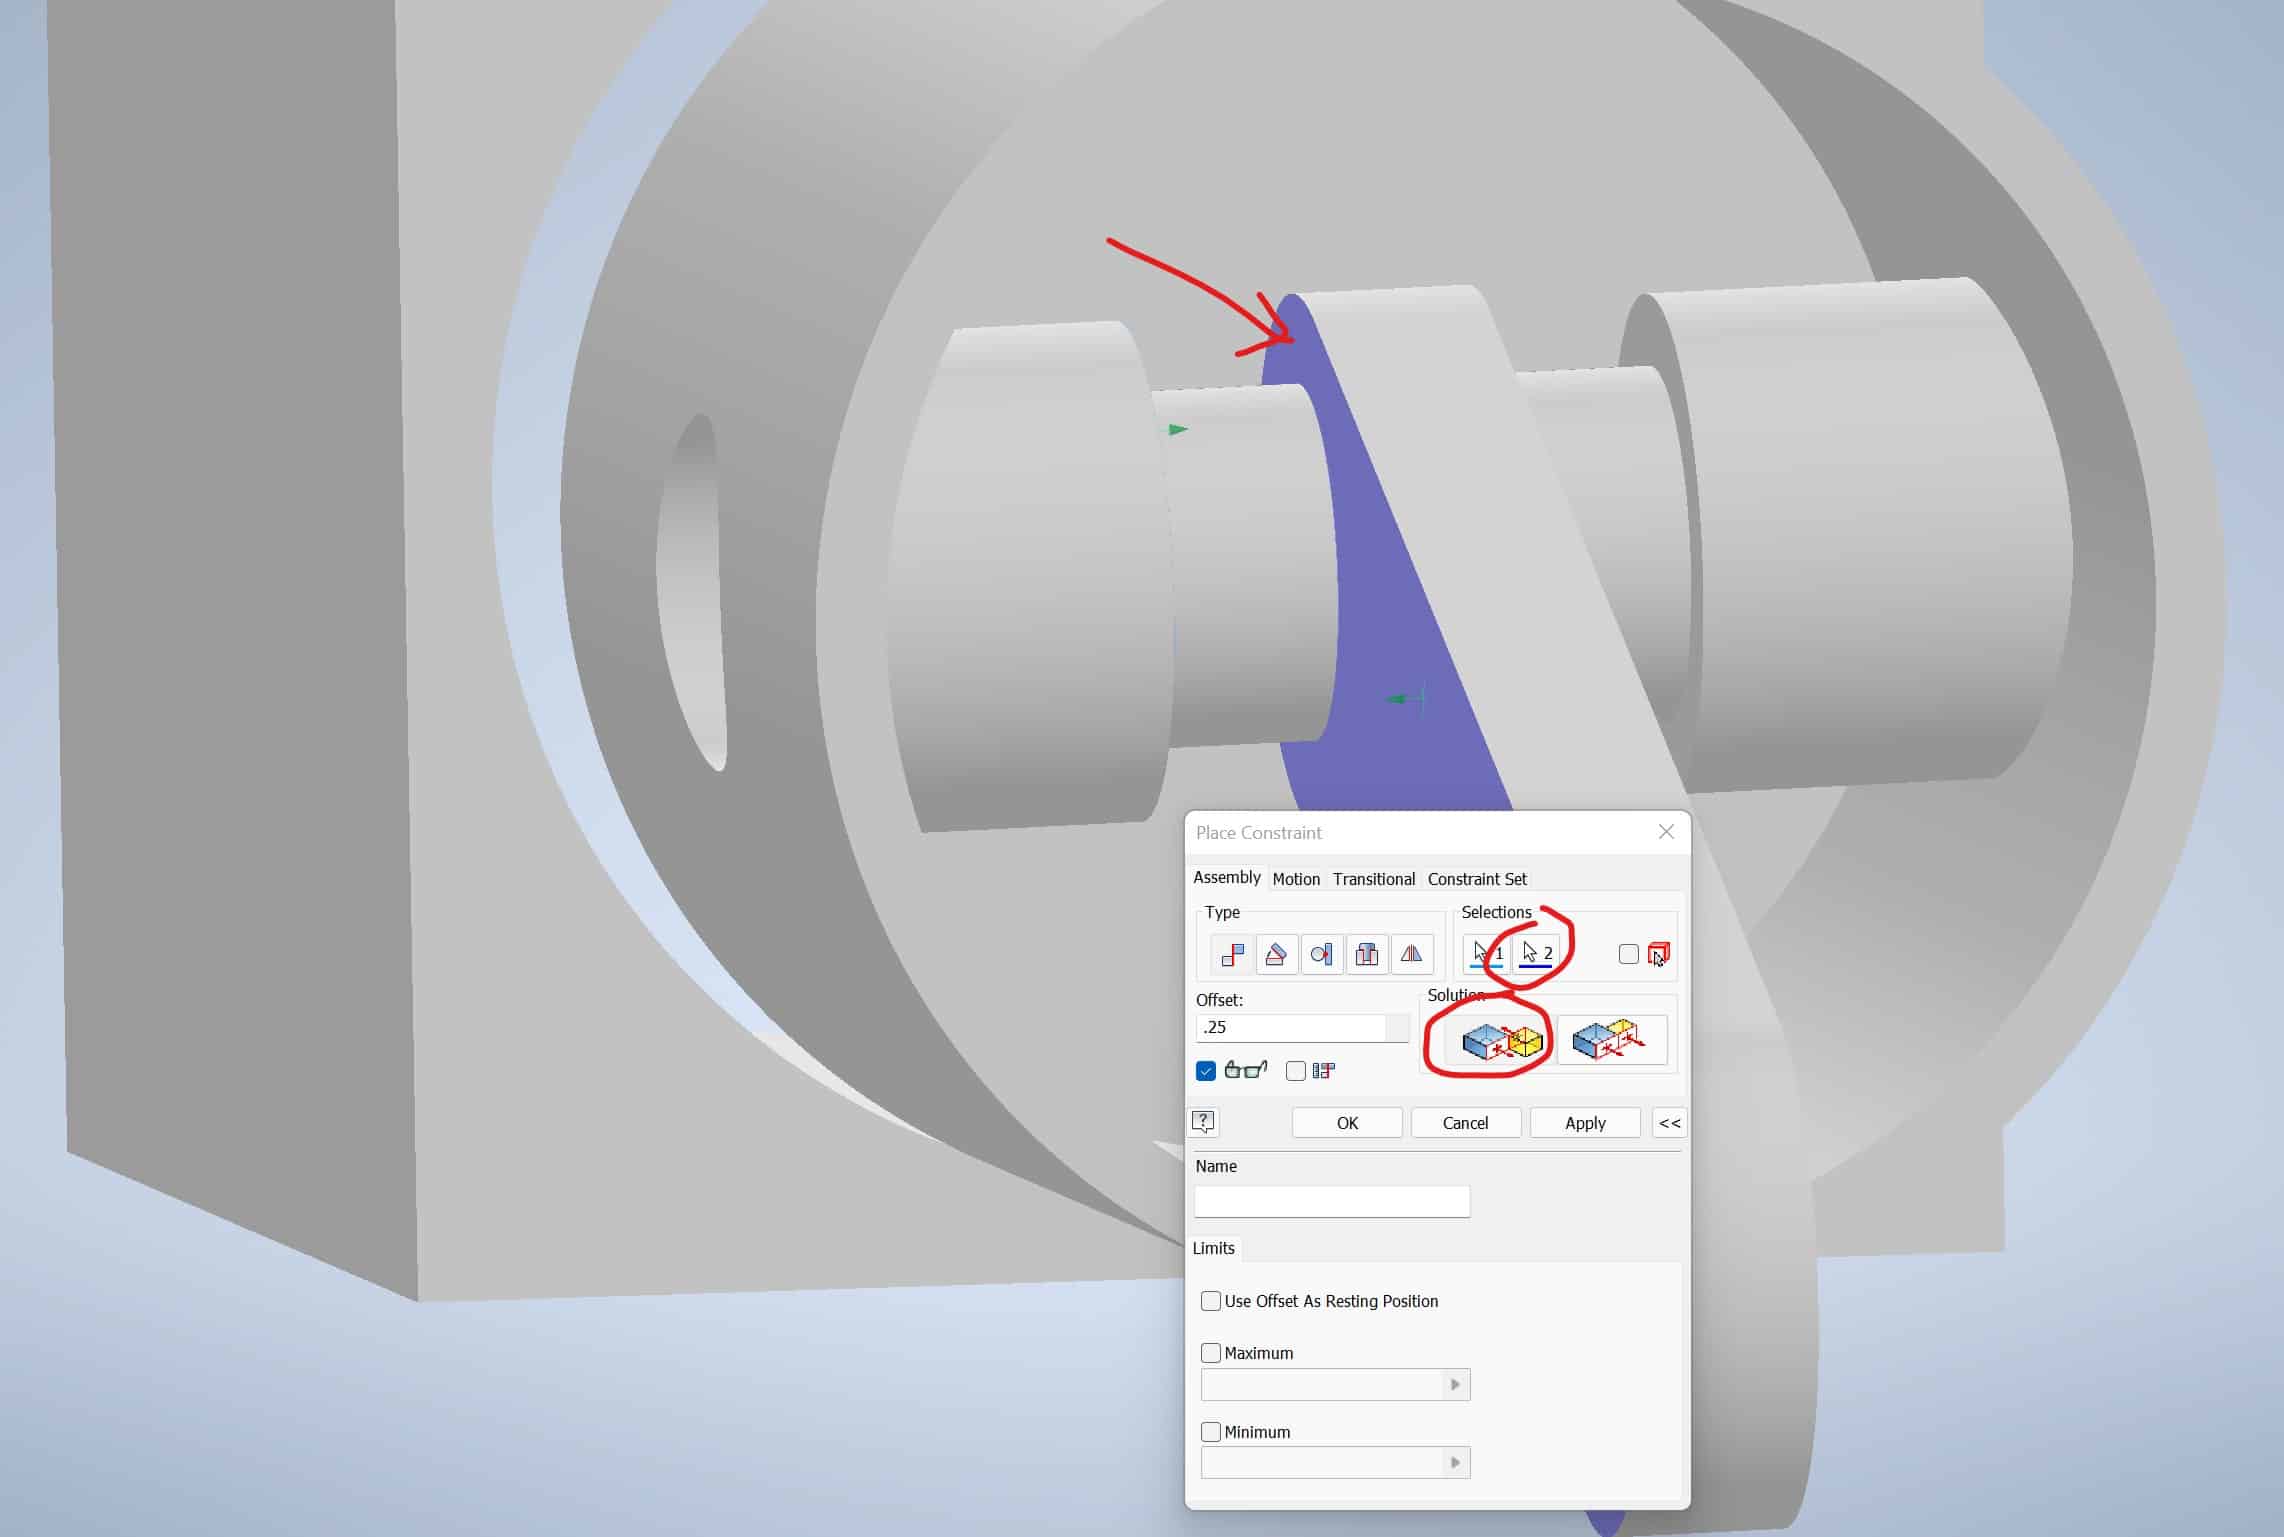
Select the second surface (2) and choose solution type (Mate), and click OK:
Part E is now positioned exactly 0.25 in. from the face of Part A.
The connecting pin – Part B shall be centered on the body of the Part A. Press F6 to go to a Home View, go View on the Ribbon and choose Shaded with Edges visual style:
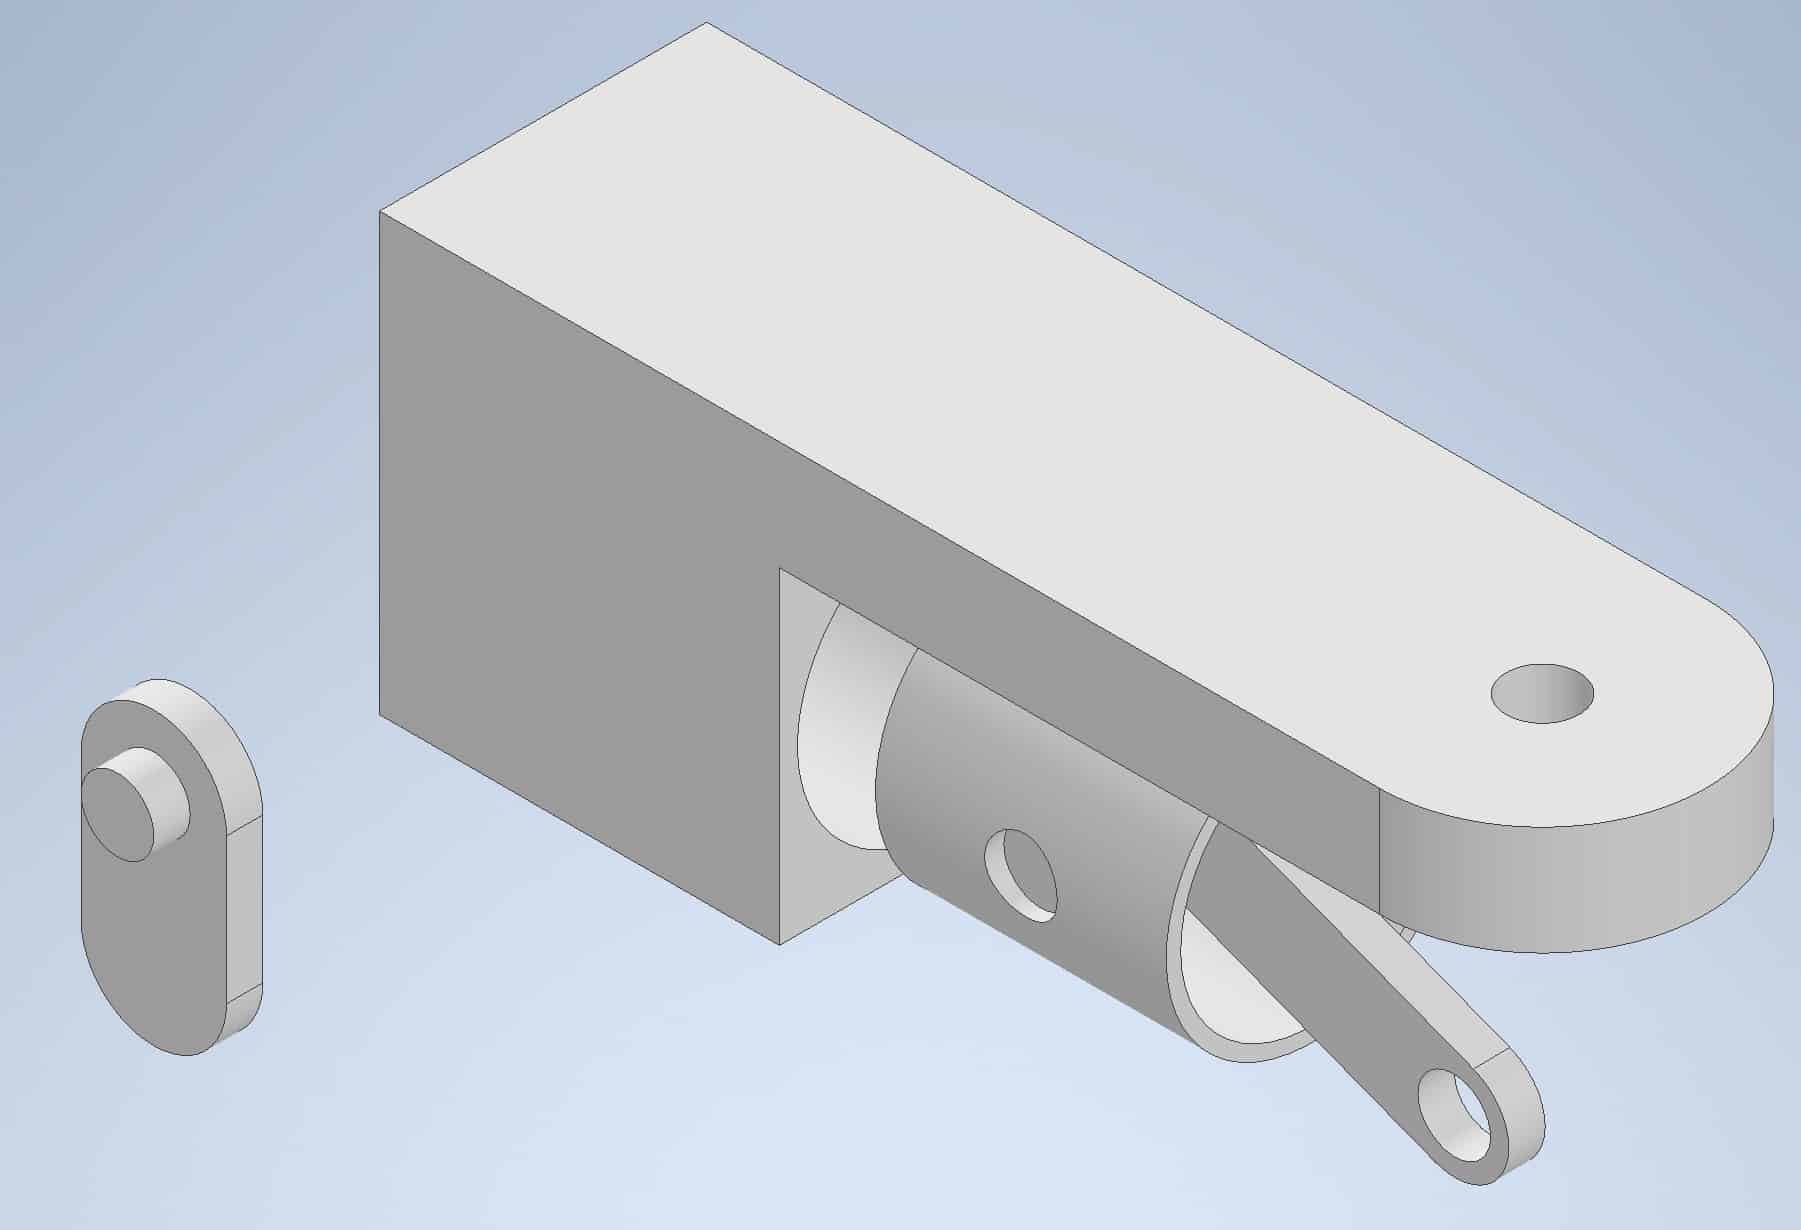
Grab the pin using left-click of your mouse, move it and place the pin in a way so you can see the end outside the Part A:
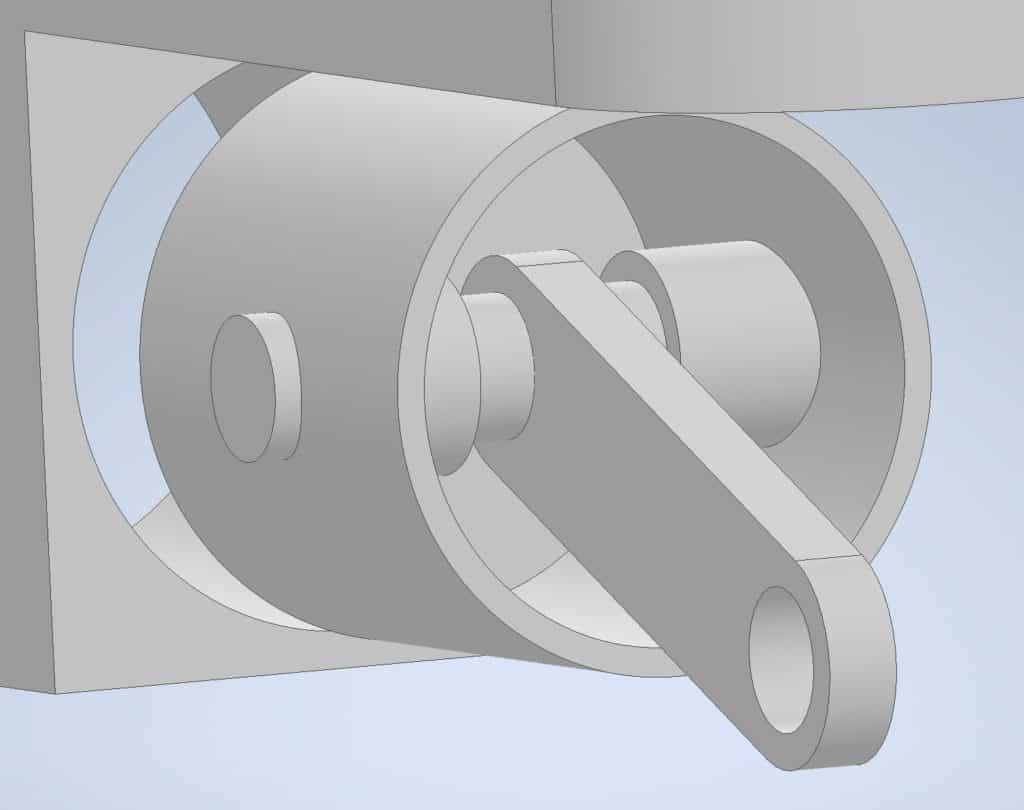
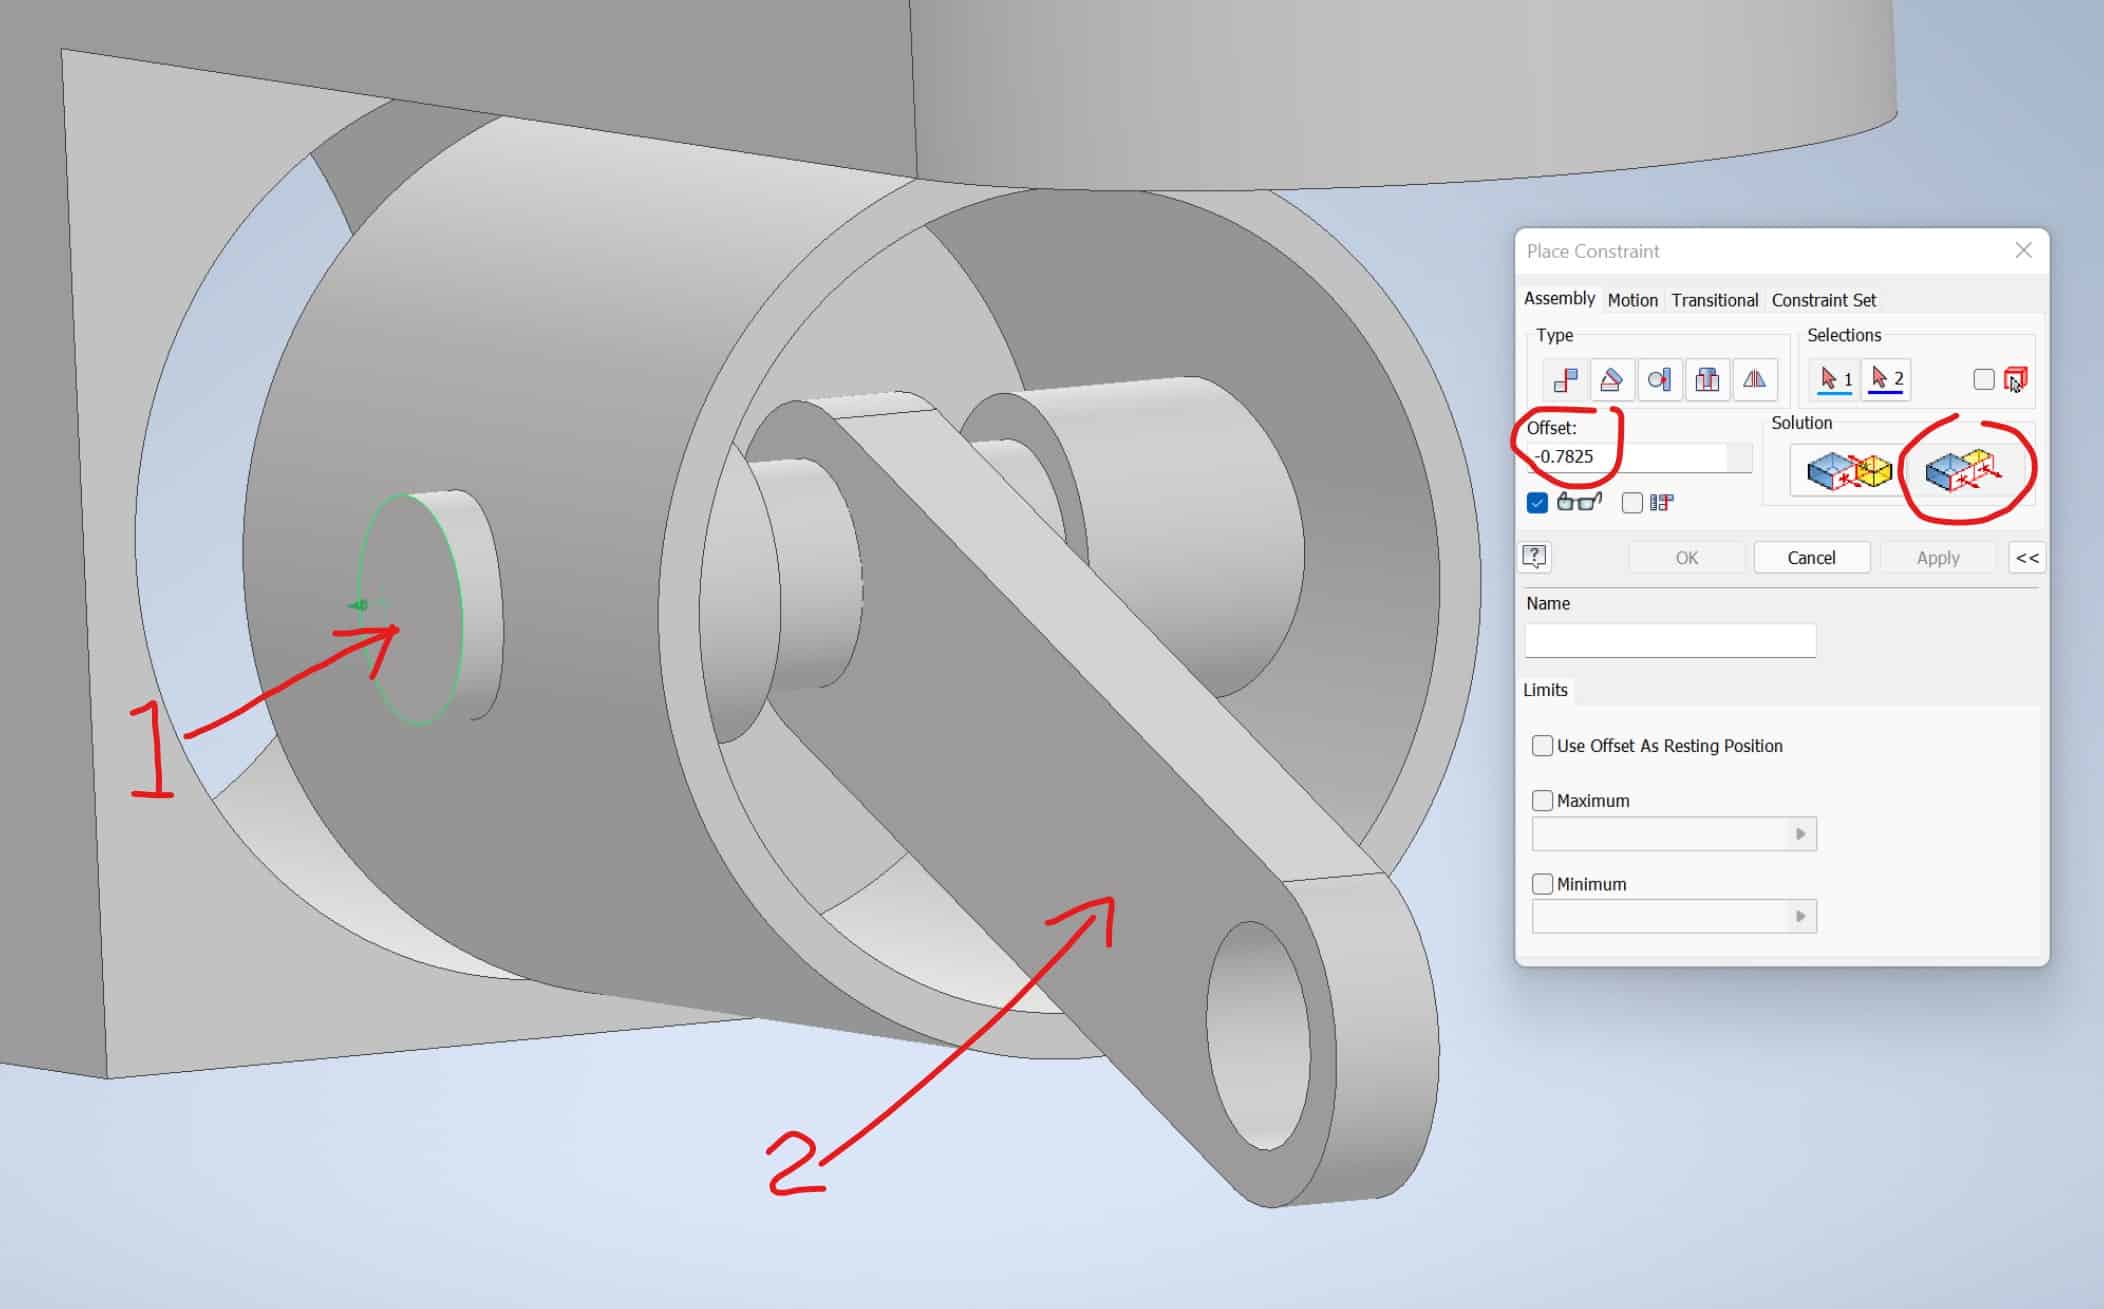
Start Place Constraint tool from the Ribbon. Click on the 1-st surface then the 2-nd, and specify the Offset of -0.7825, and Offset type – Flush, and click OK:
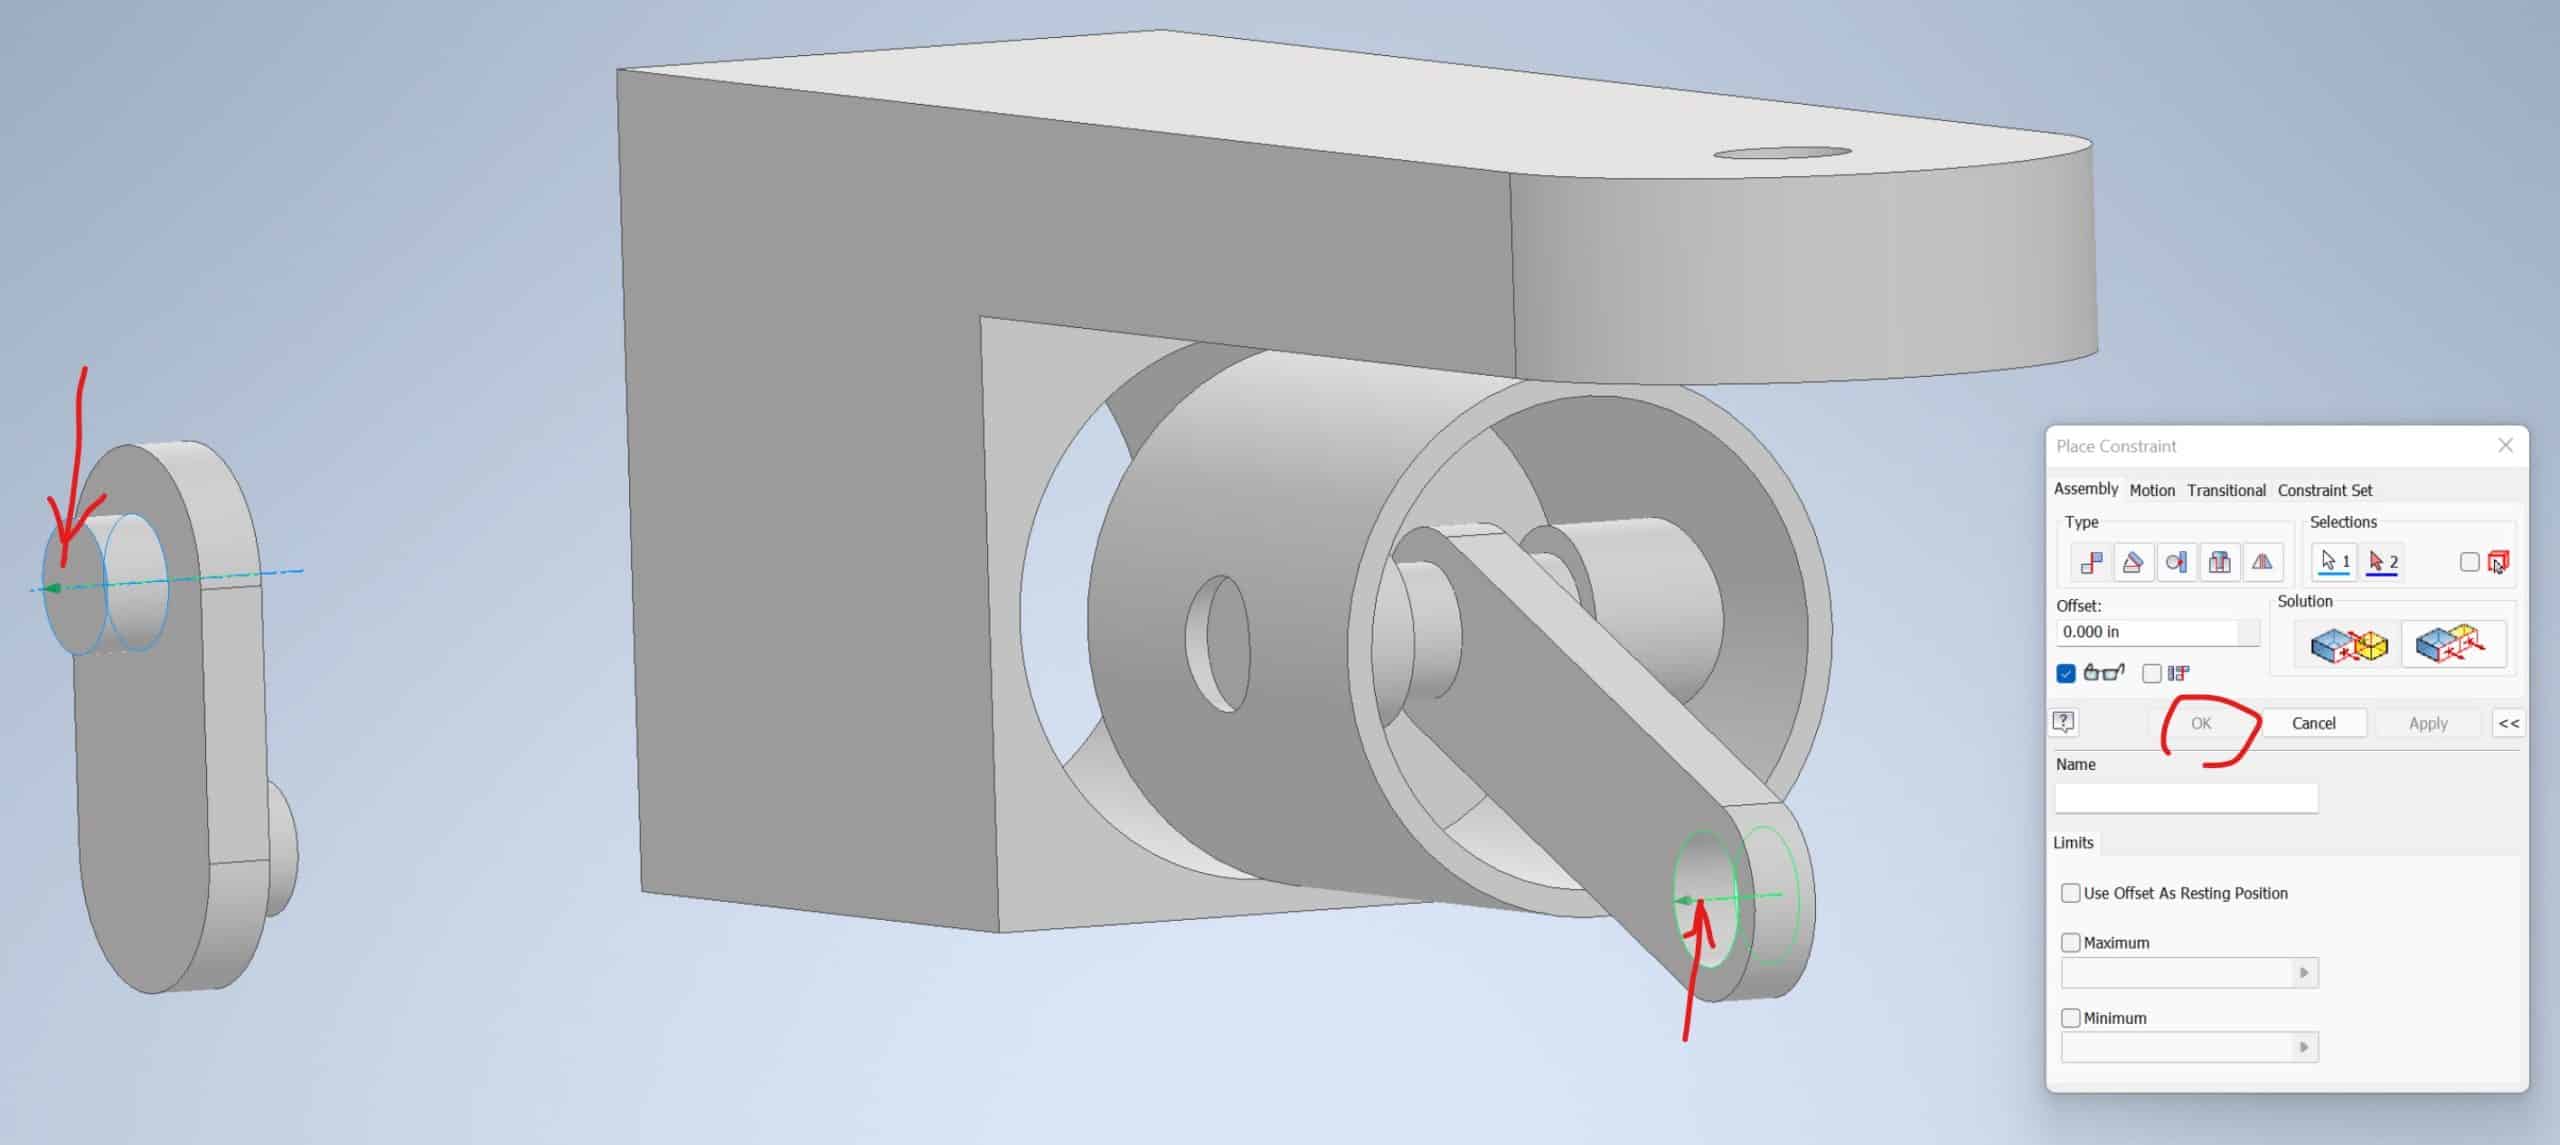
Start Place Constraint tool, align both centerlines and click OK:
Start the Place Constraint again. Click on the first face:
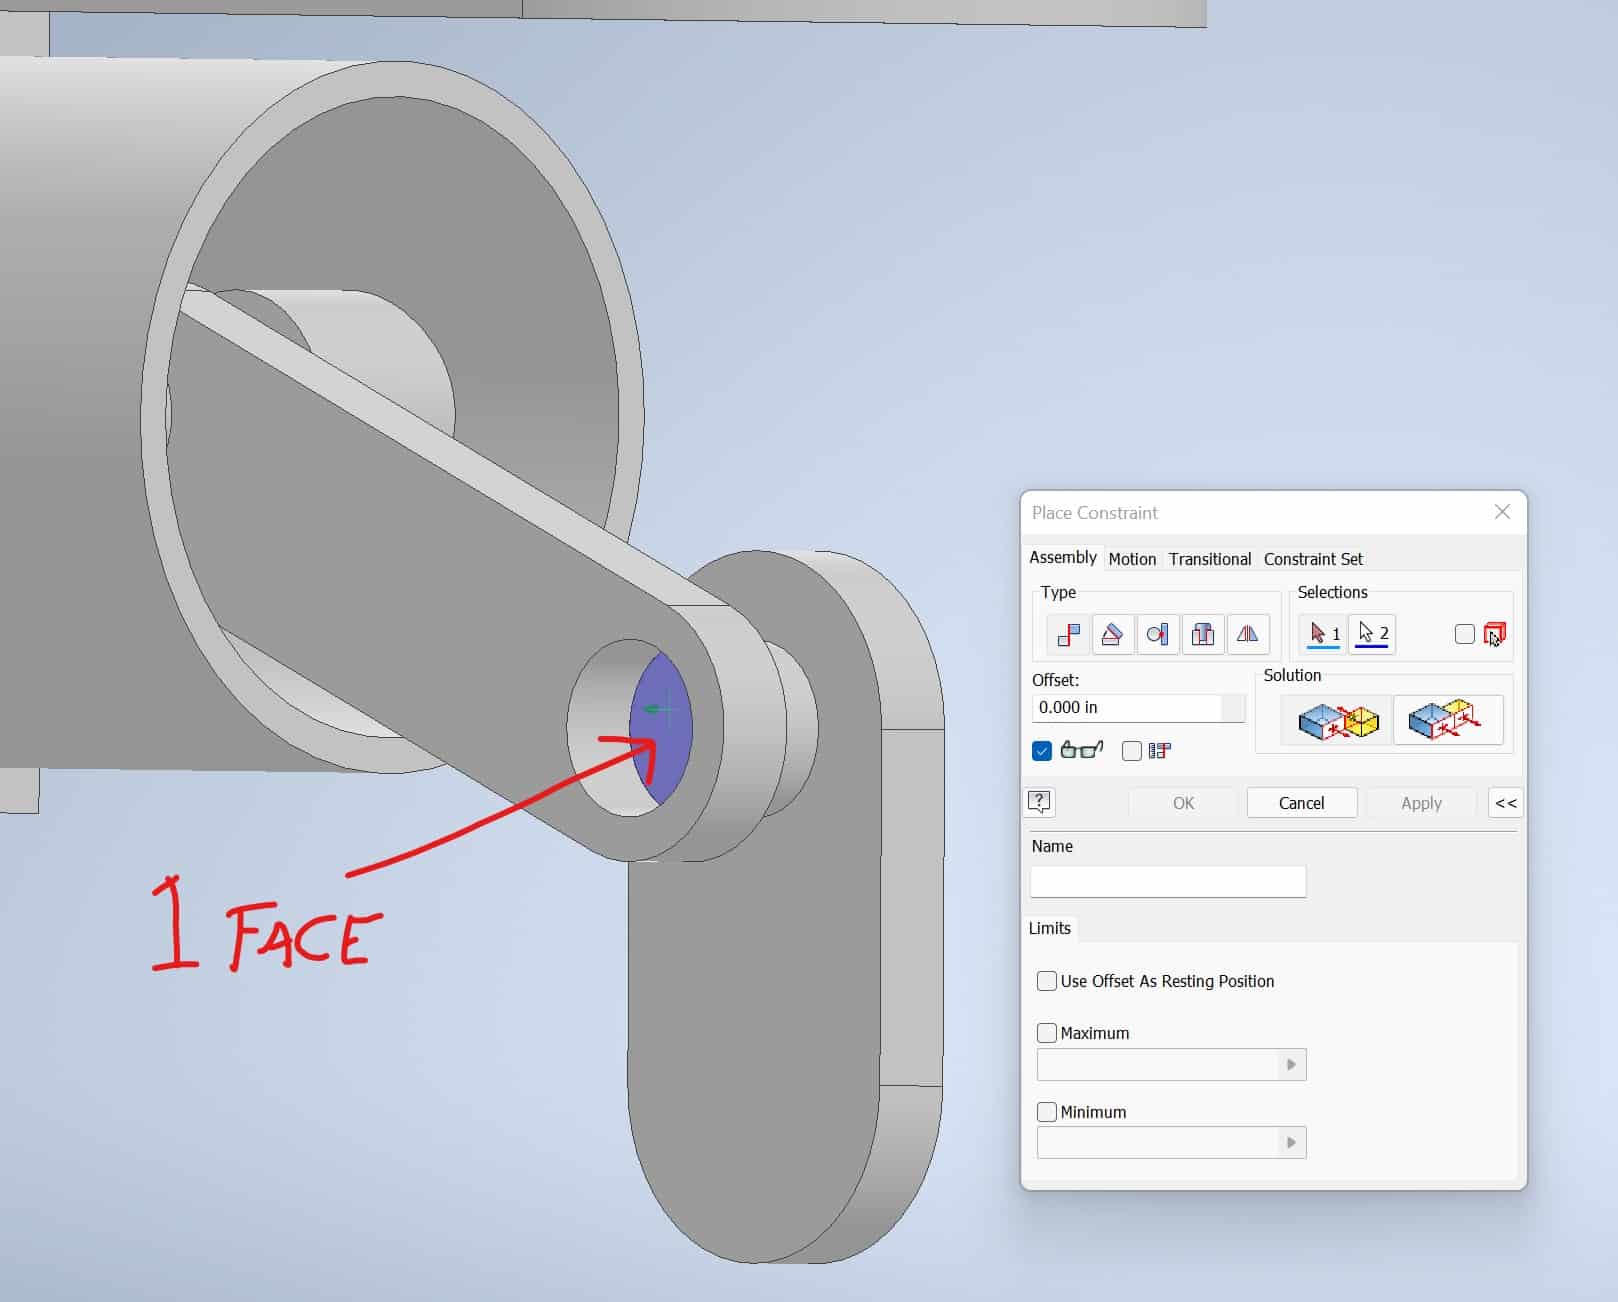
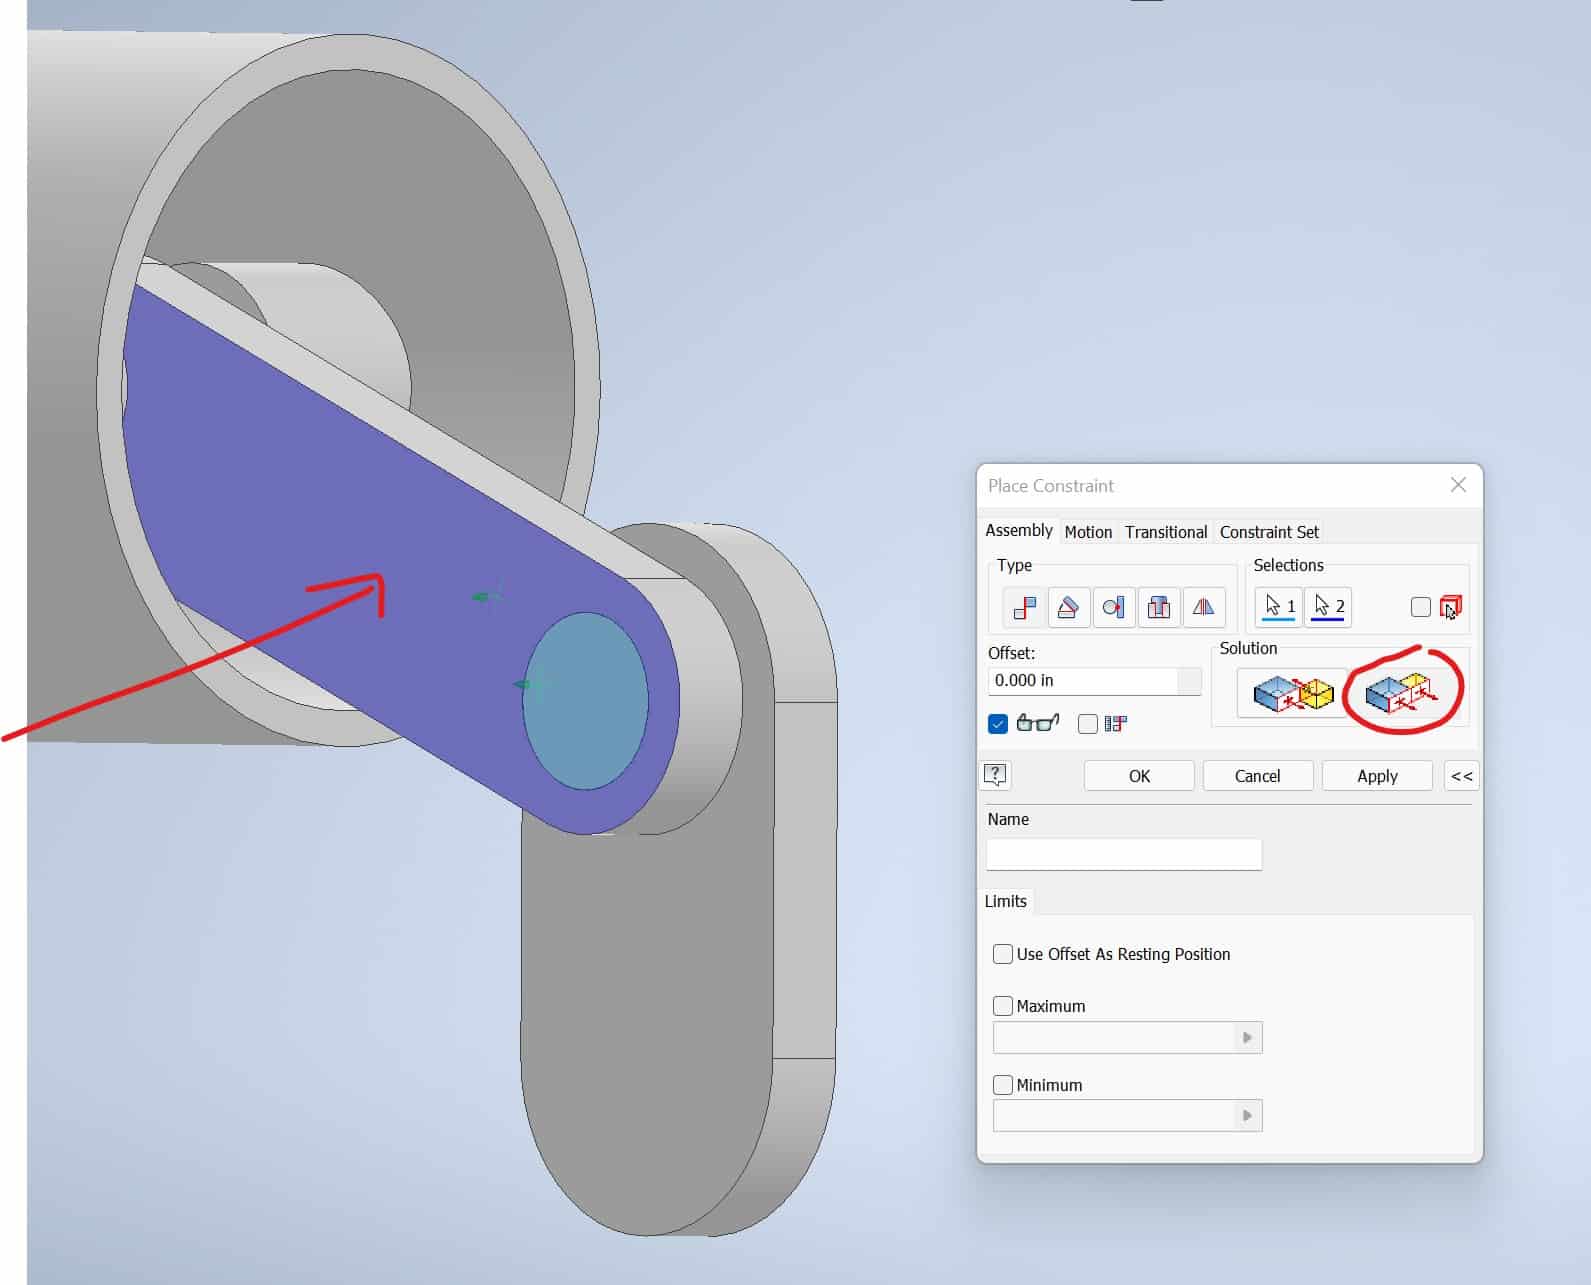
Then the second face and click OK. Make sure the Flush Solution is chosen:
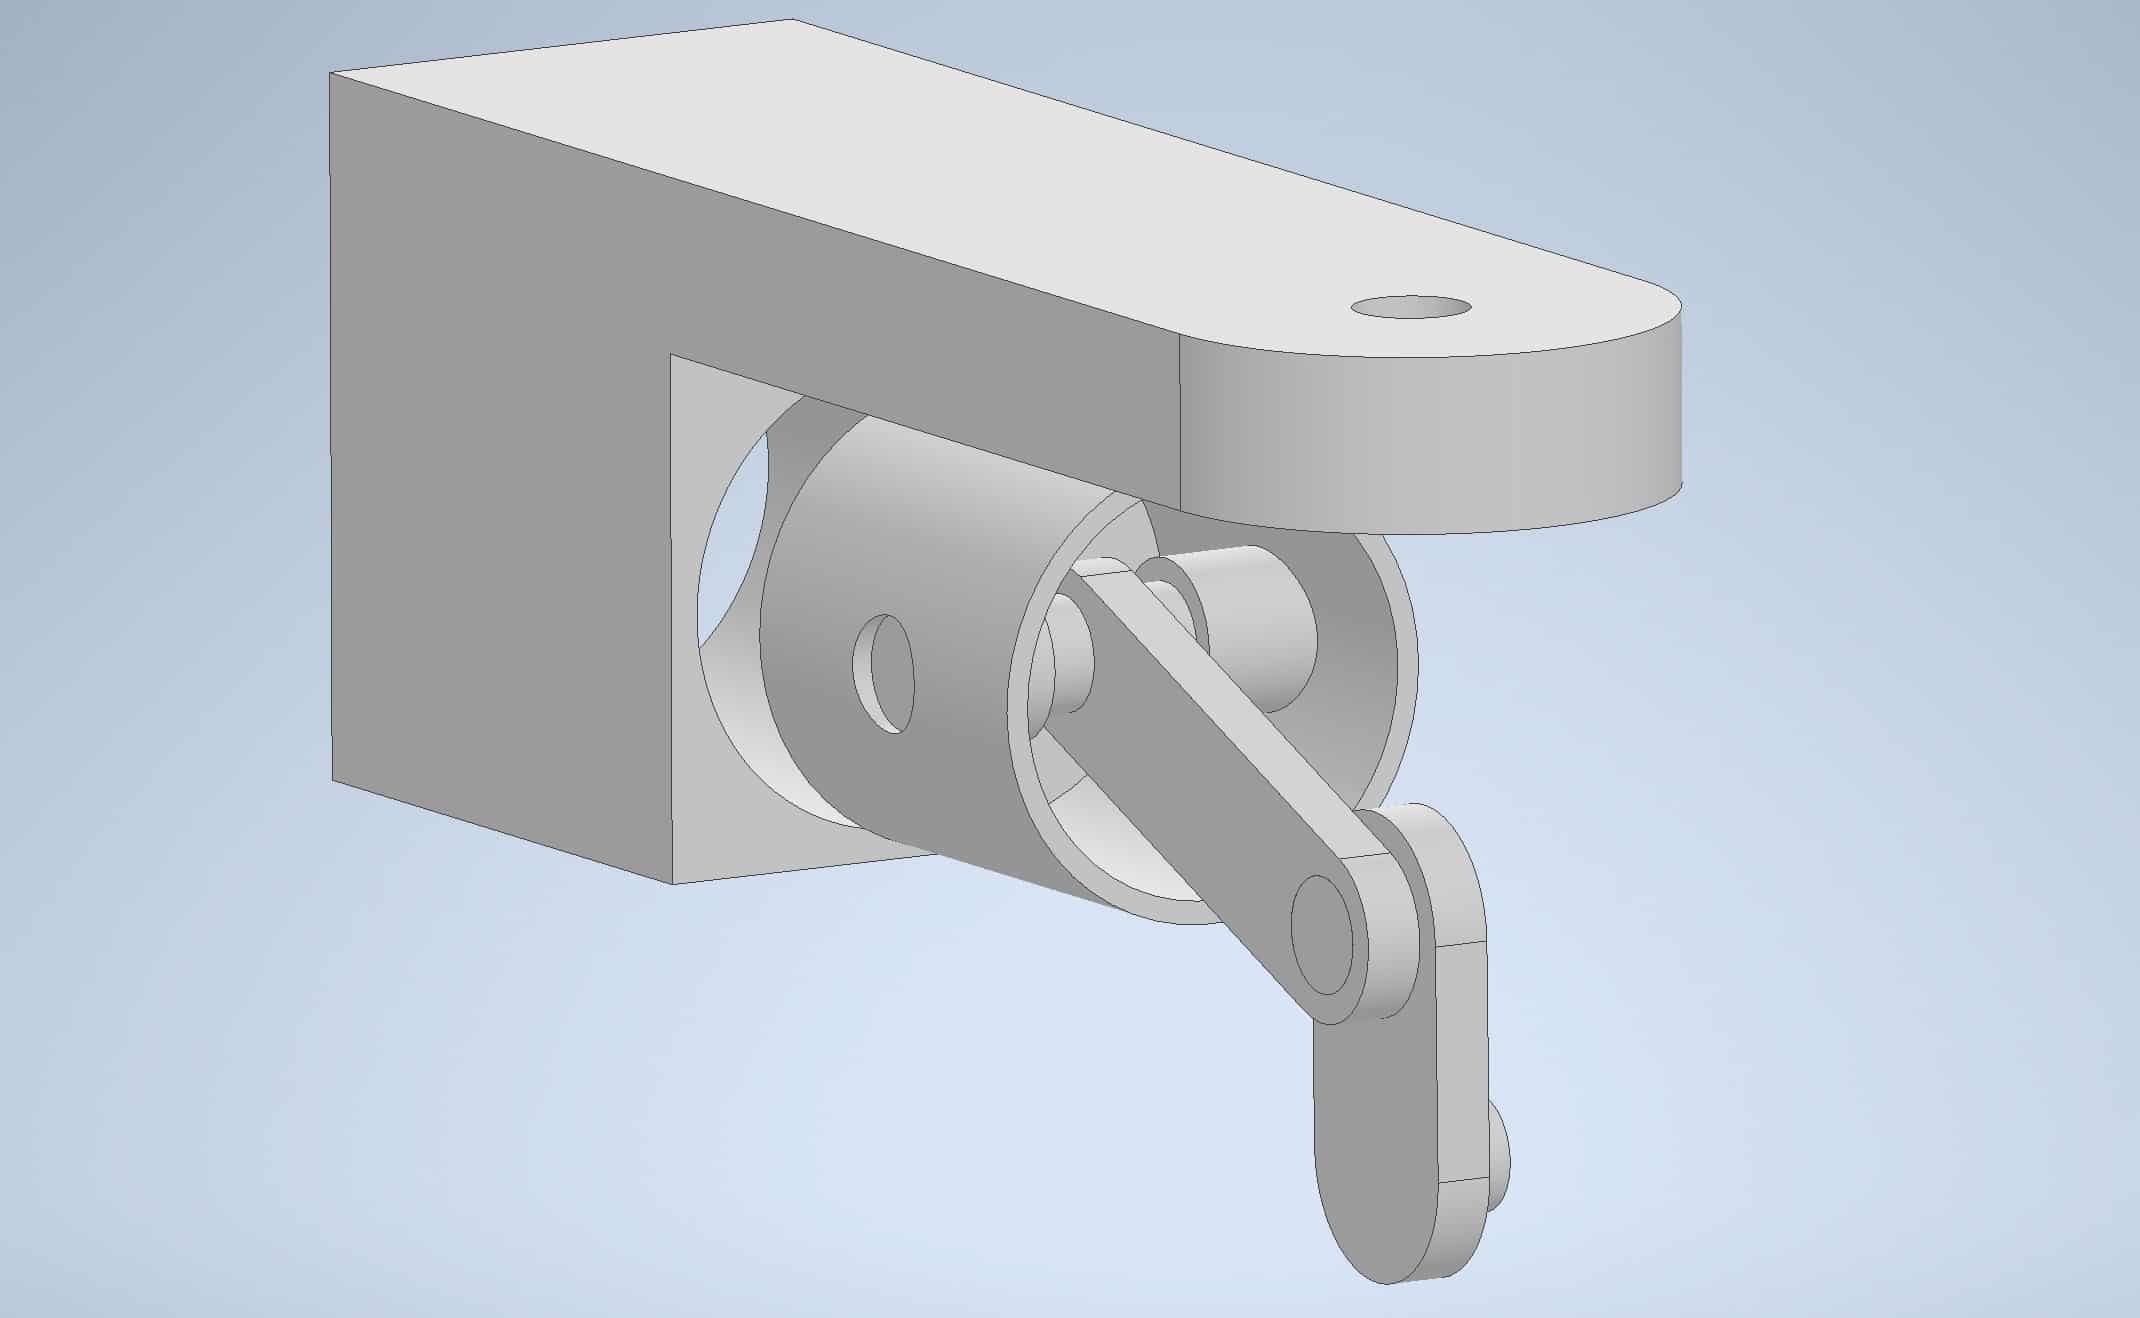
Your Assembly at this point should look like this:
Let’s align the centerline of Part D with the centerline of the hole of Part C. Start Place Constraint tool and select the centerline of the Part C:
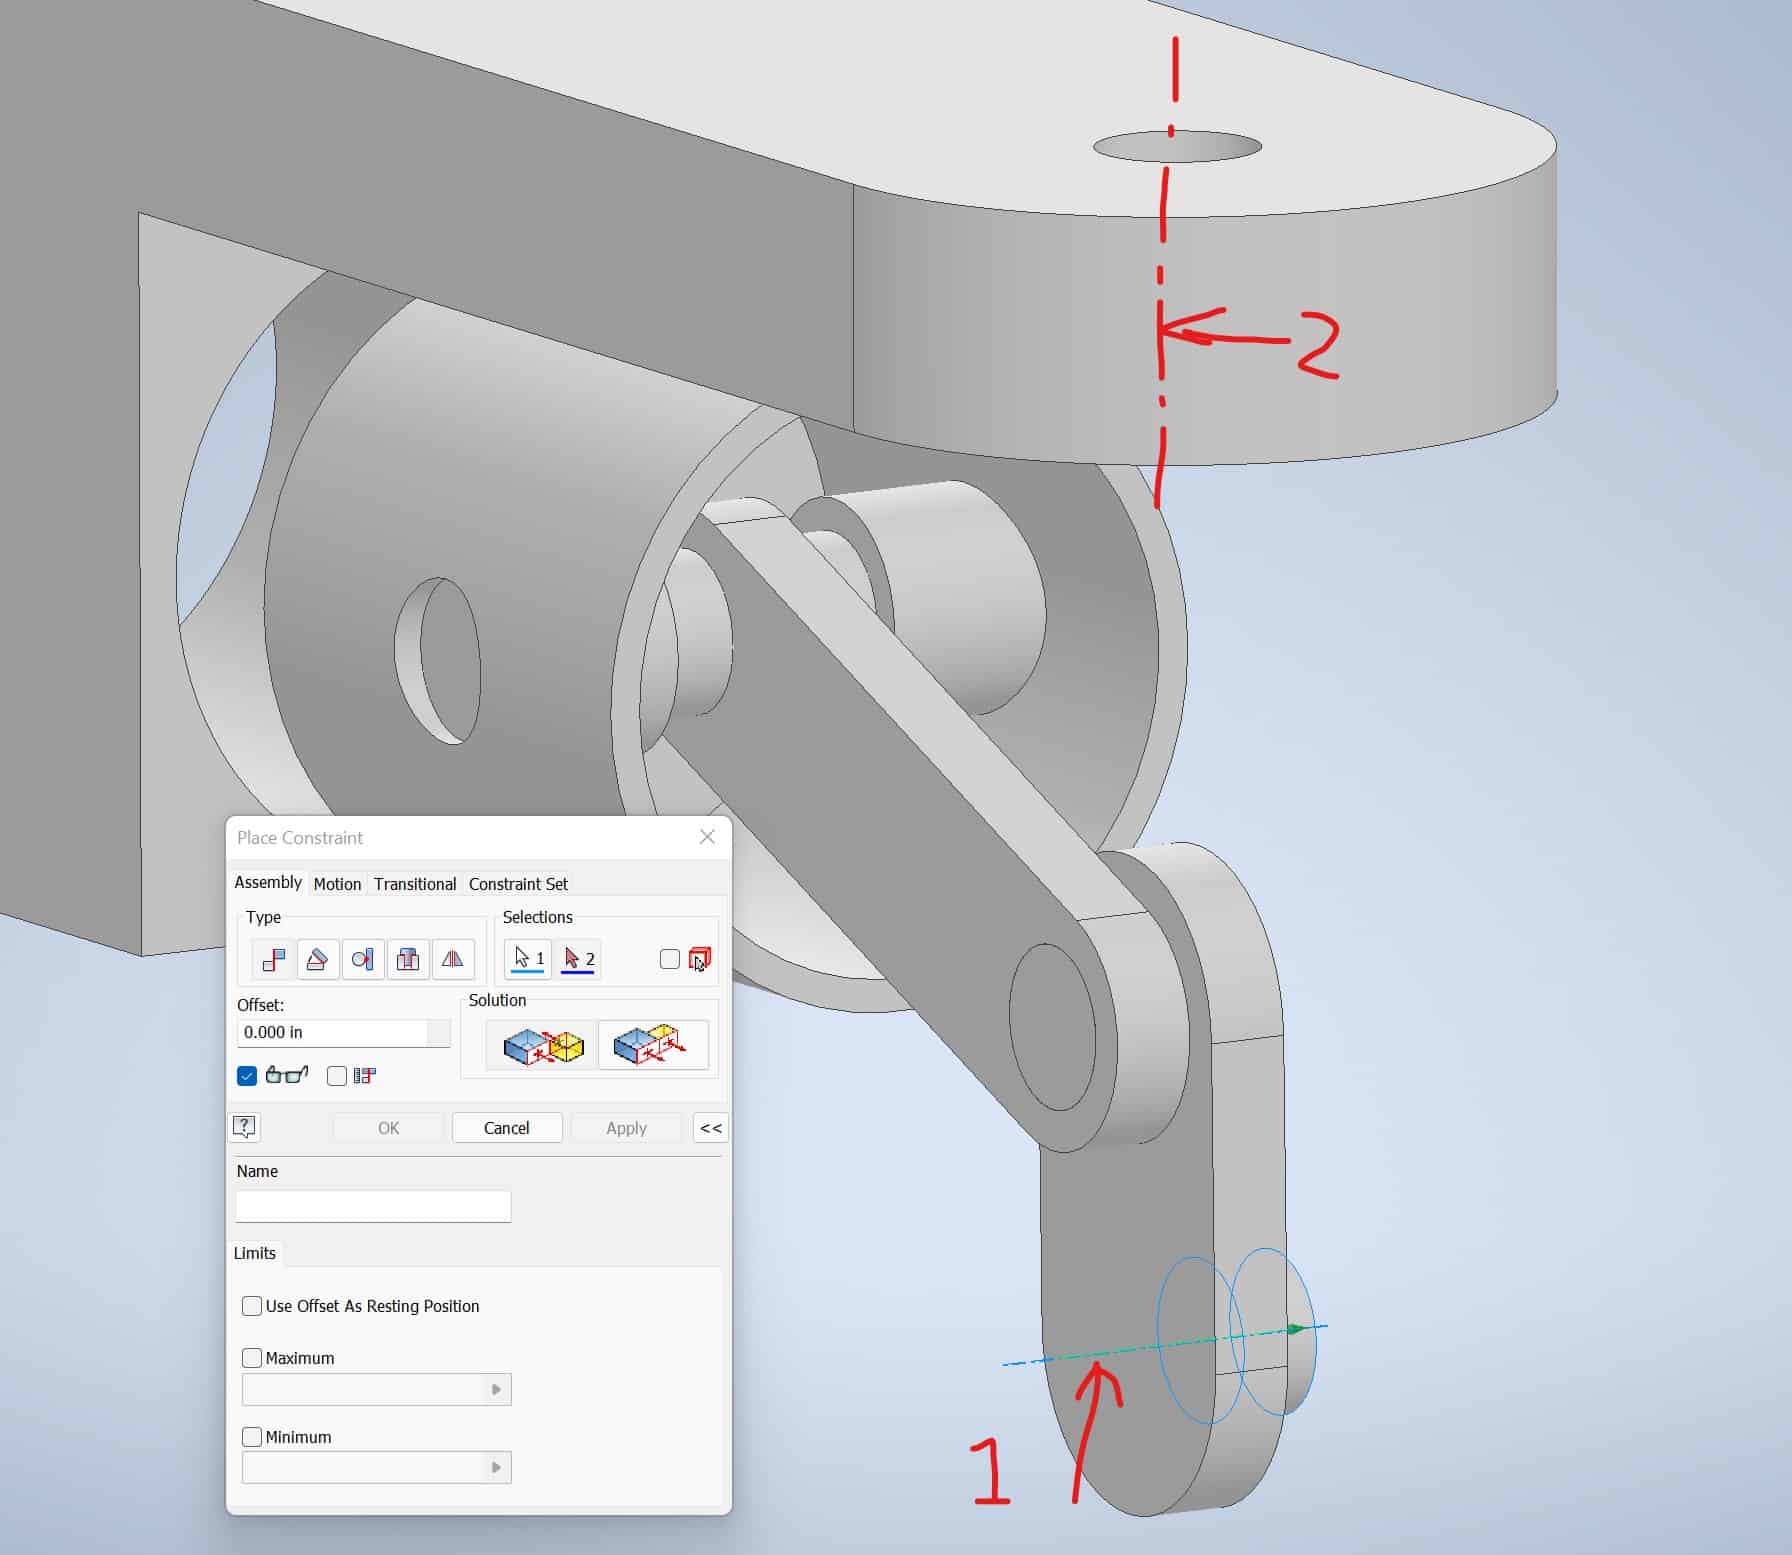
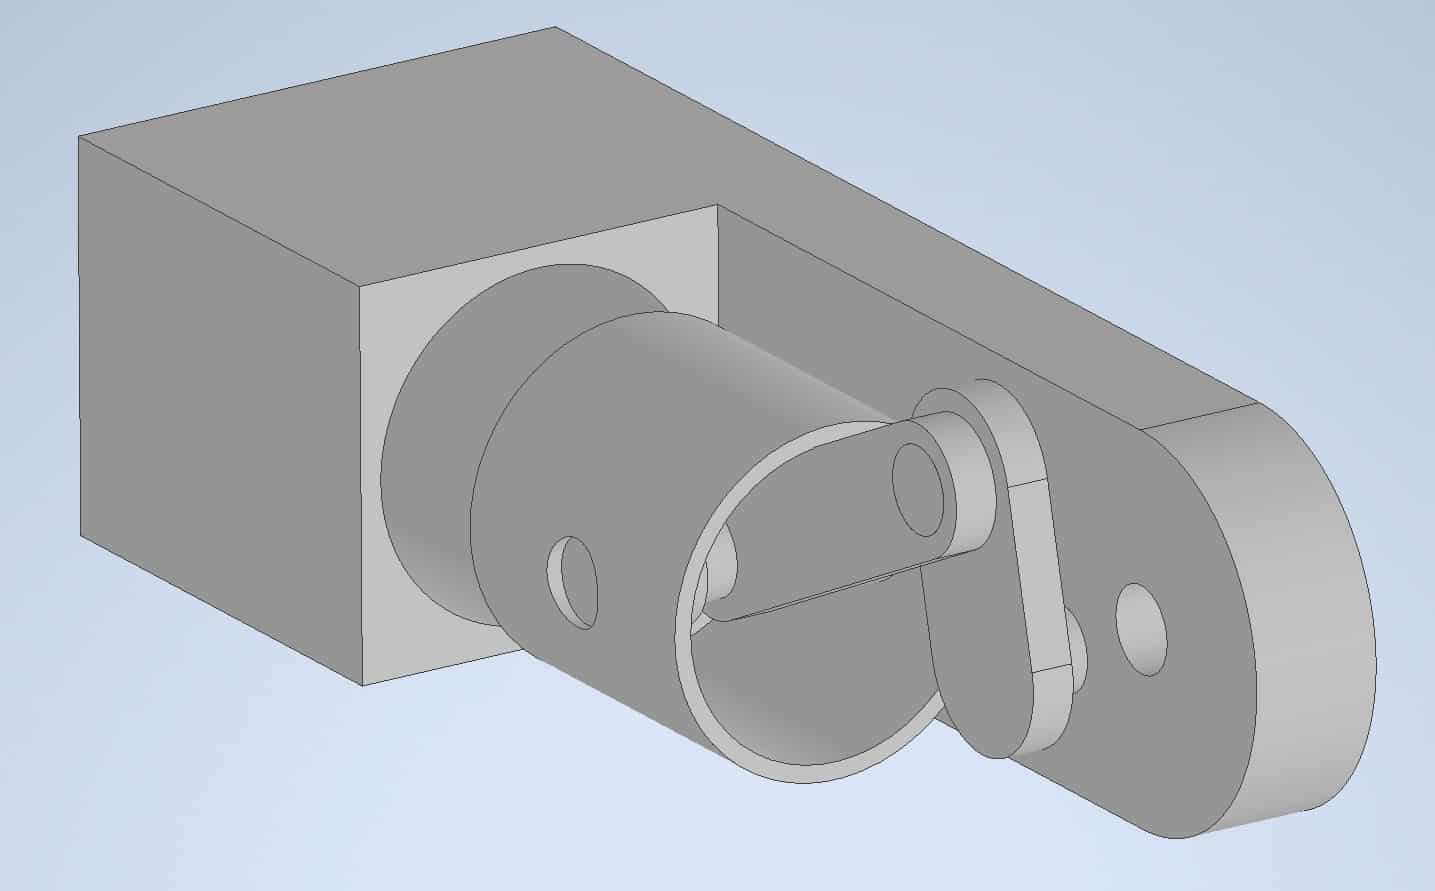
At this point, you should have aligned holes:
Edit / Modify Parts when in Assembly Panel. Assign Colors
The length of Part E needs to be modified. Double click on the part, all other parts will be greyed out:
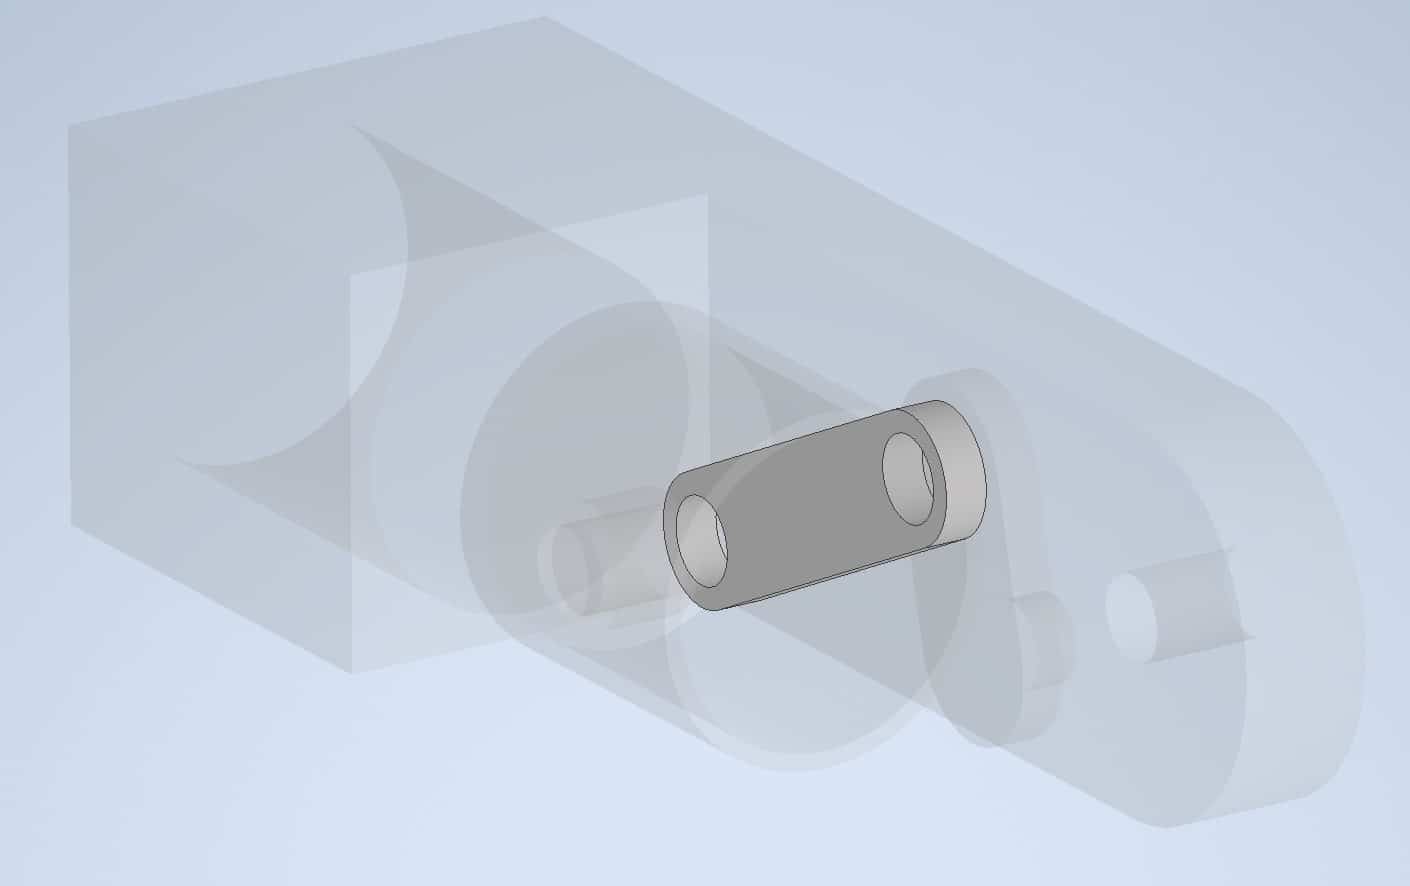
You will notice that all the parts except for the active one will be grayed out:
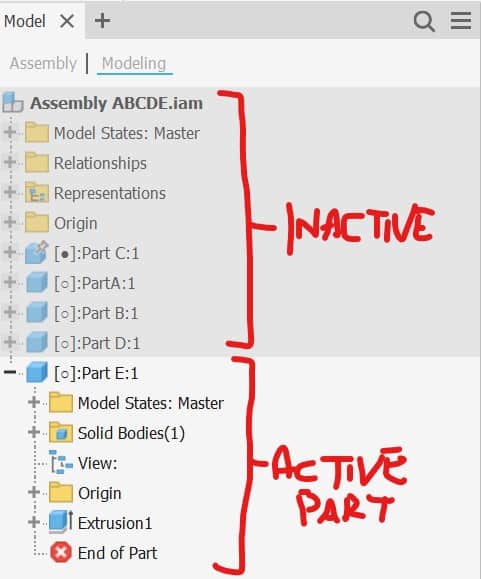
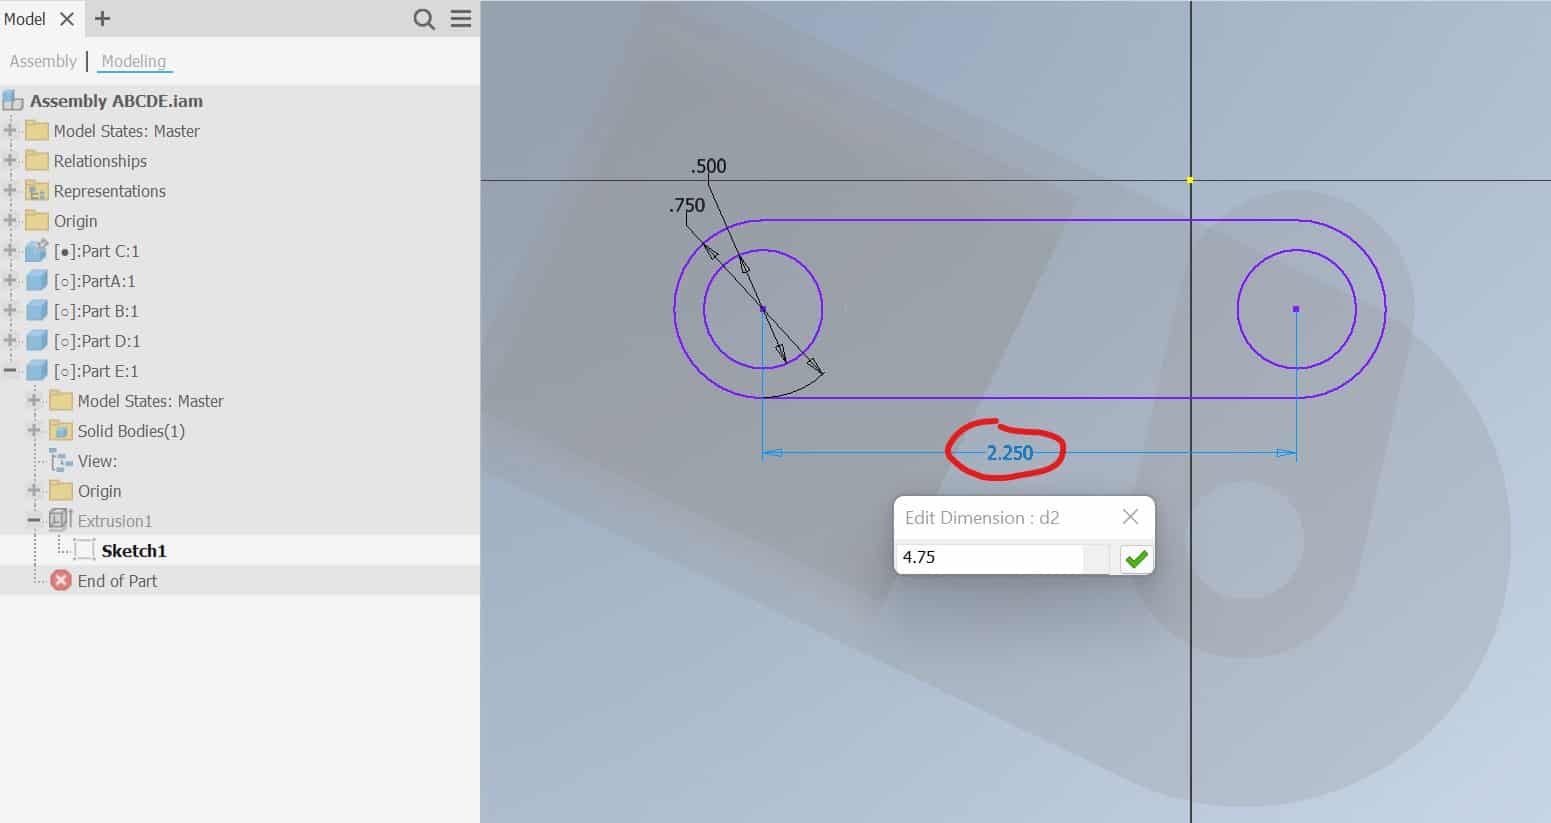
Click on the “+” by the Extrusion 1:
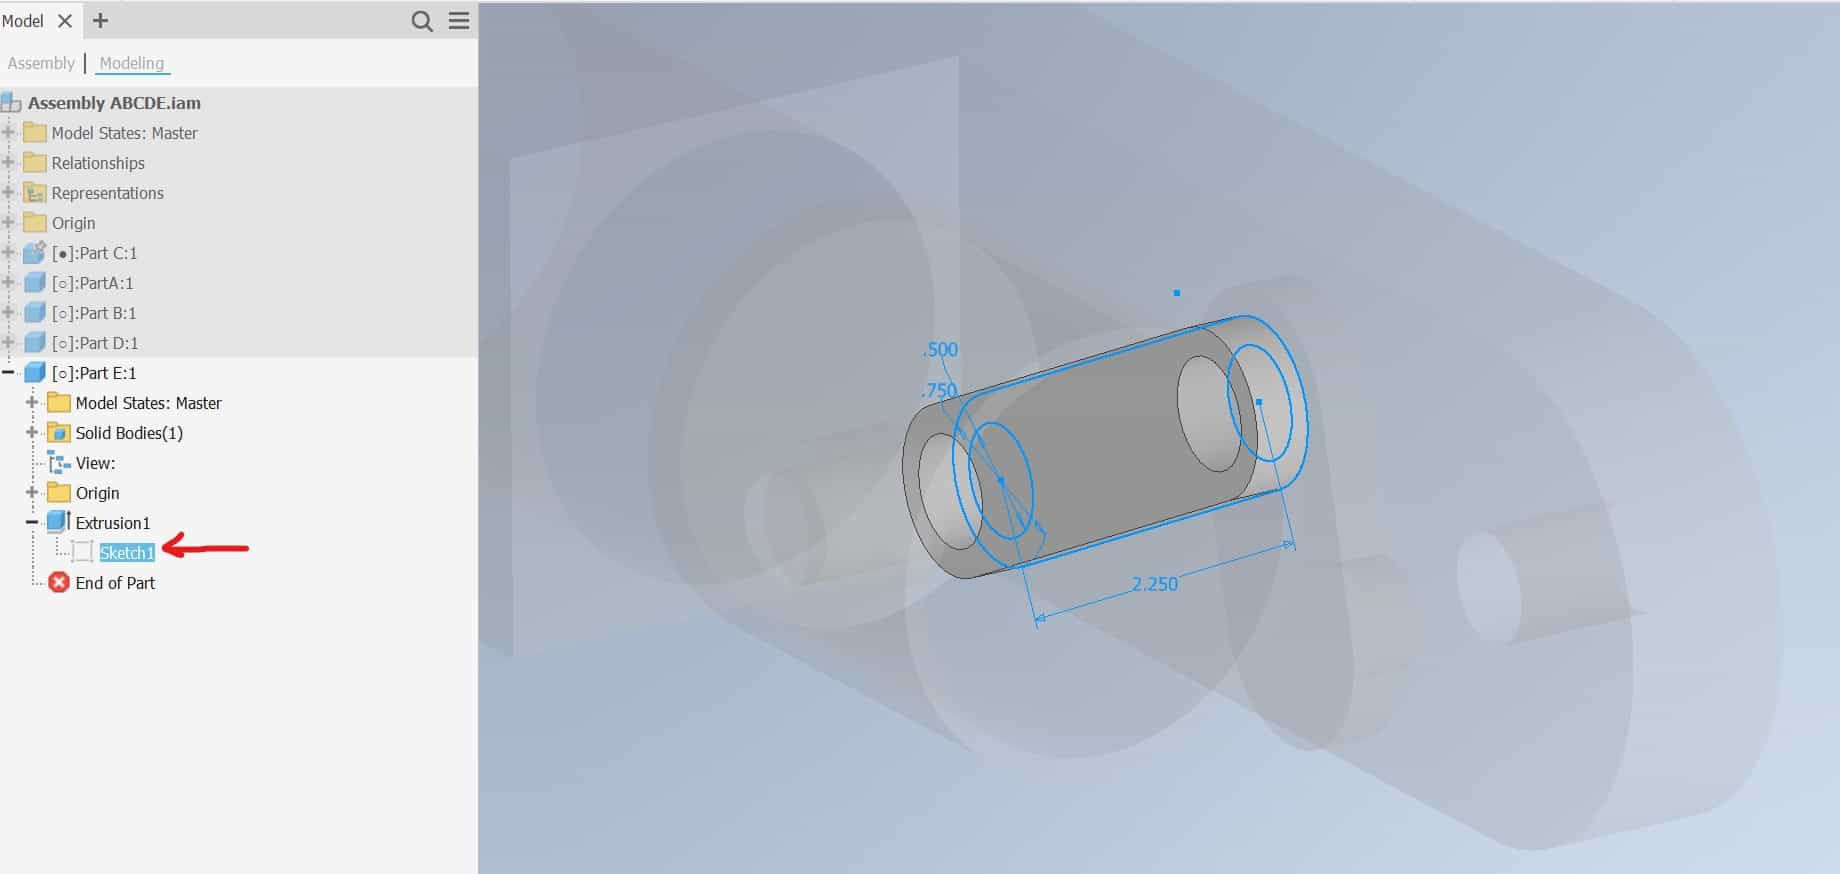
Right-click on the Sketch1 and choose the option from the dropdown menu: Edit Sketch. Double-click the 2.250 dimension and change its value to 4.75:
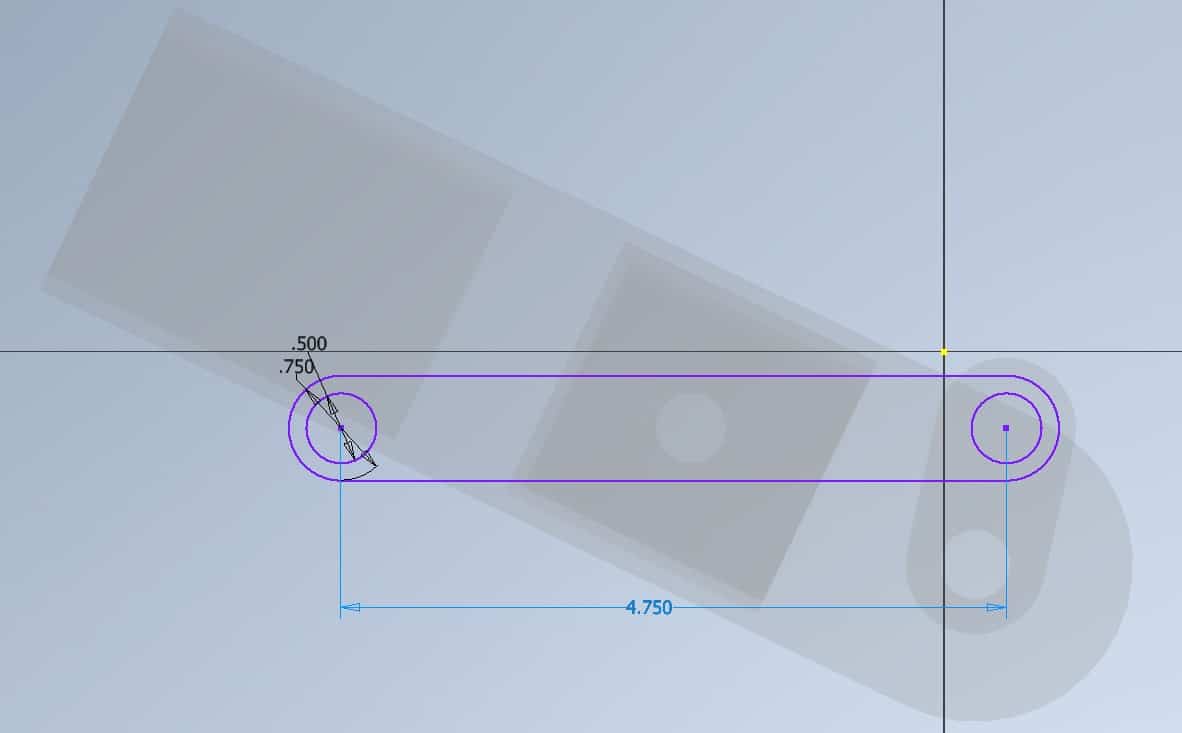
Click OK. The length of this part will change:
Click on the Update and then Return button on the Ribbon in the Manage tab:

Inventor will update your Assembly:
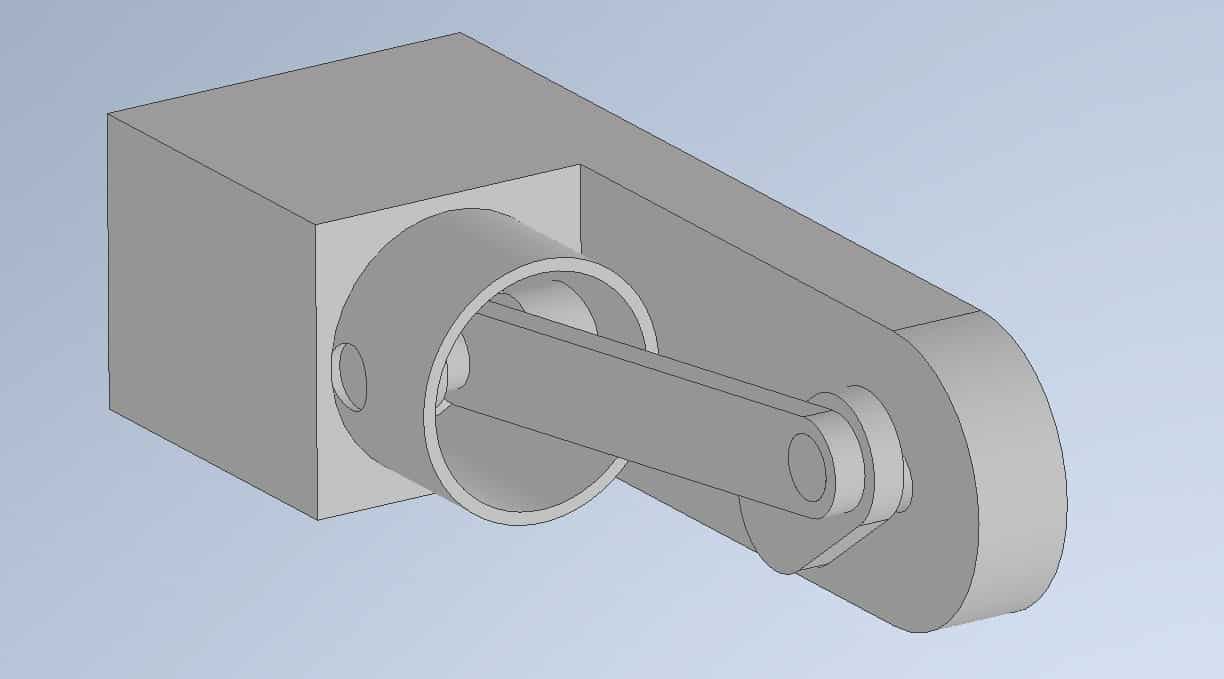
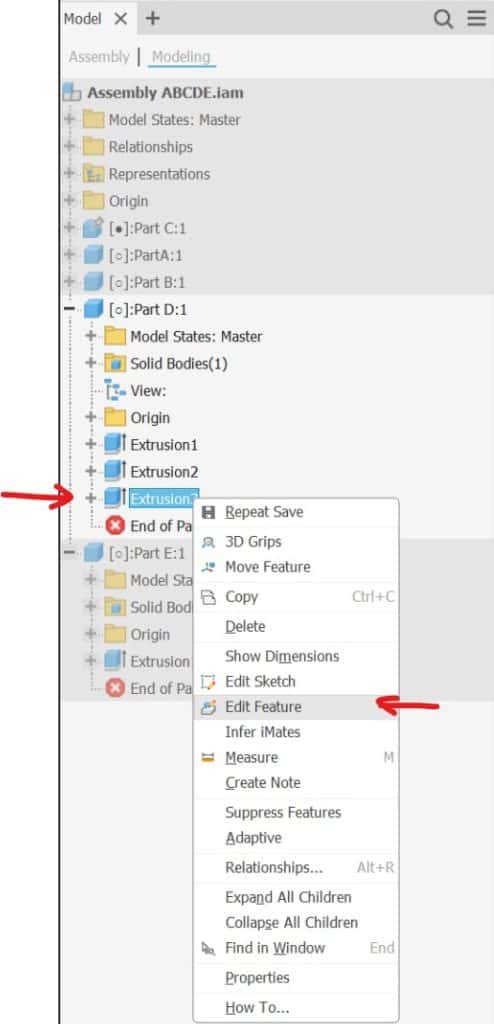
The length of Part D must be modified as well. Double-click on Part D:
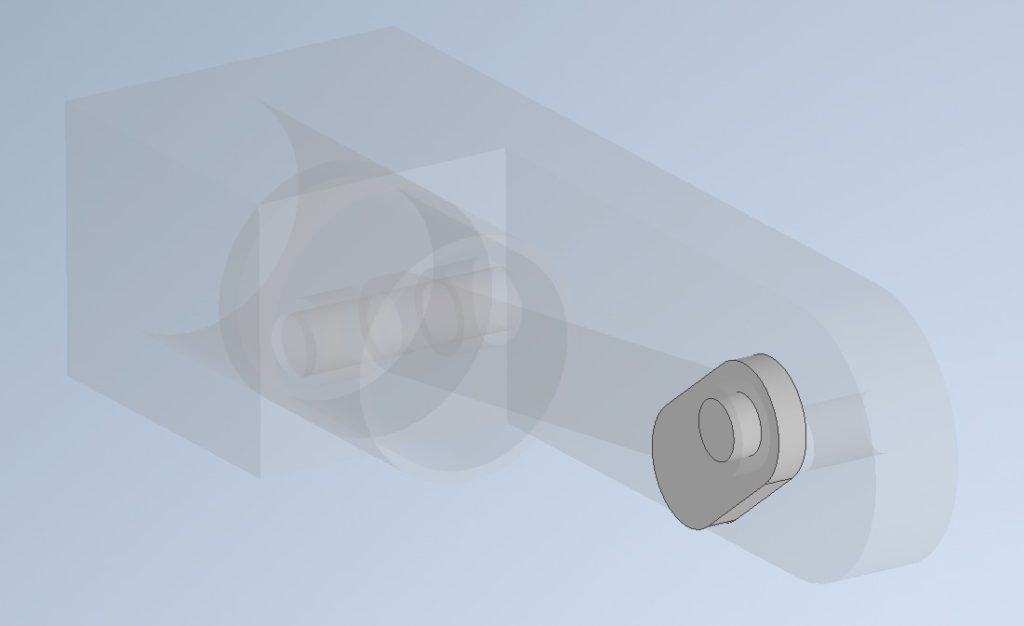
Right-click on Extrusion 3 and from the dropdown menu select Edit Feature:
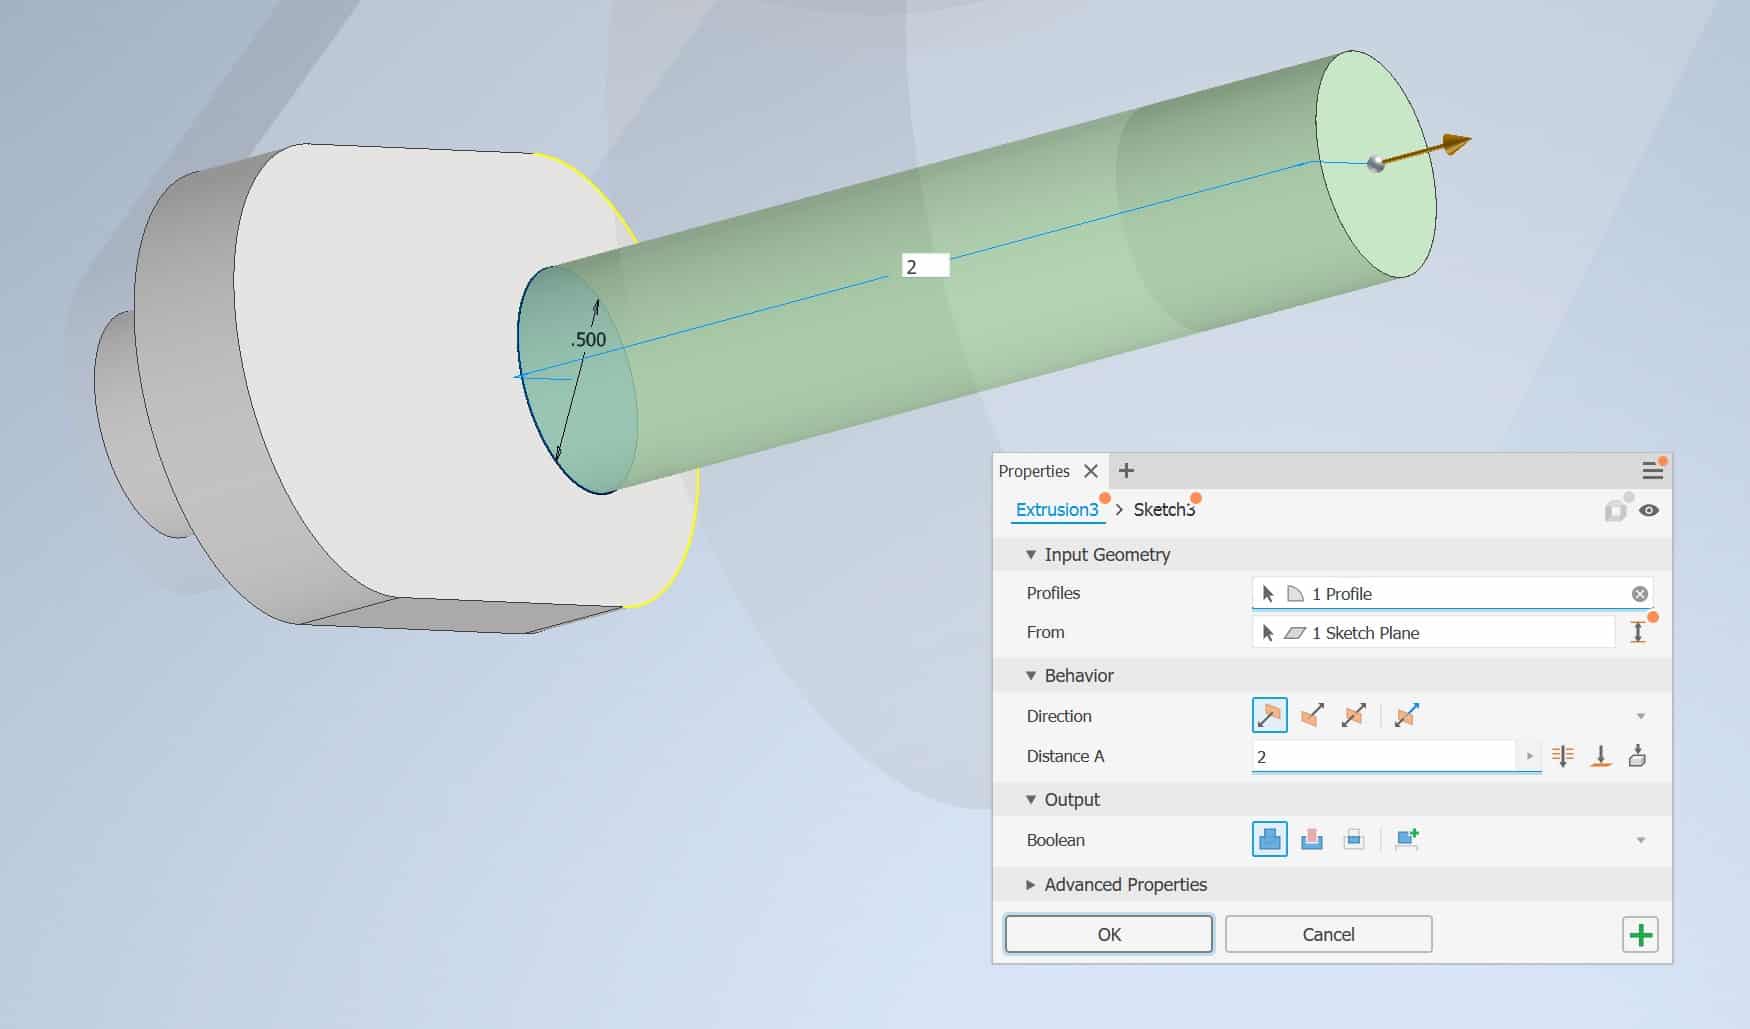
Enter value of 2 inches into a dialog box, and click OK:
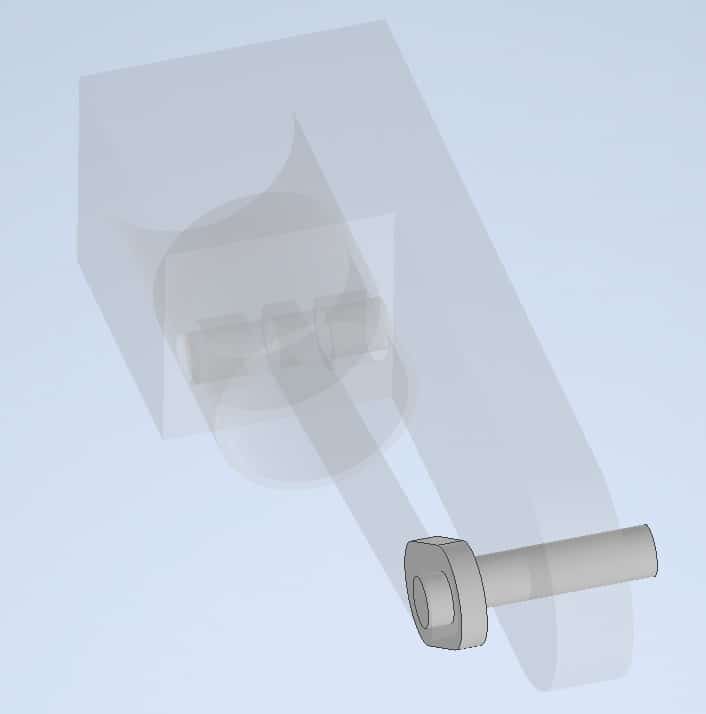
Inventor will update the length:
Click on the Update and then Return button on the Ribbon in the Manage tab:

Updated Assembly:
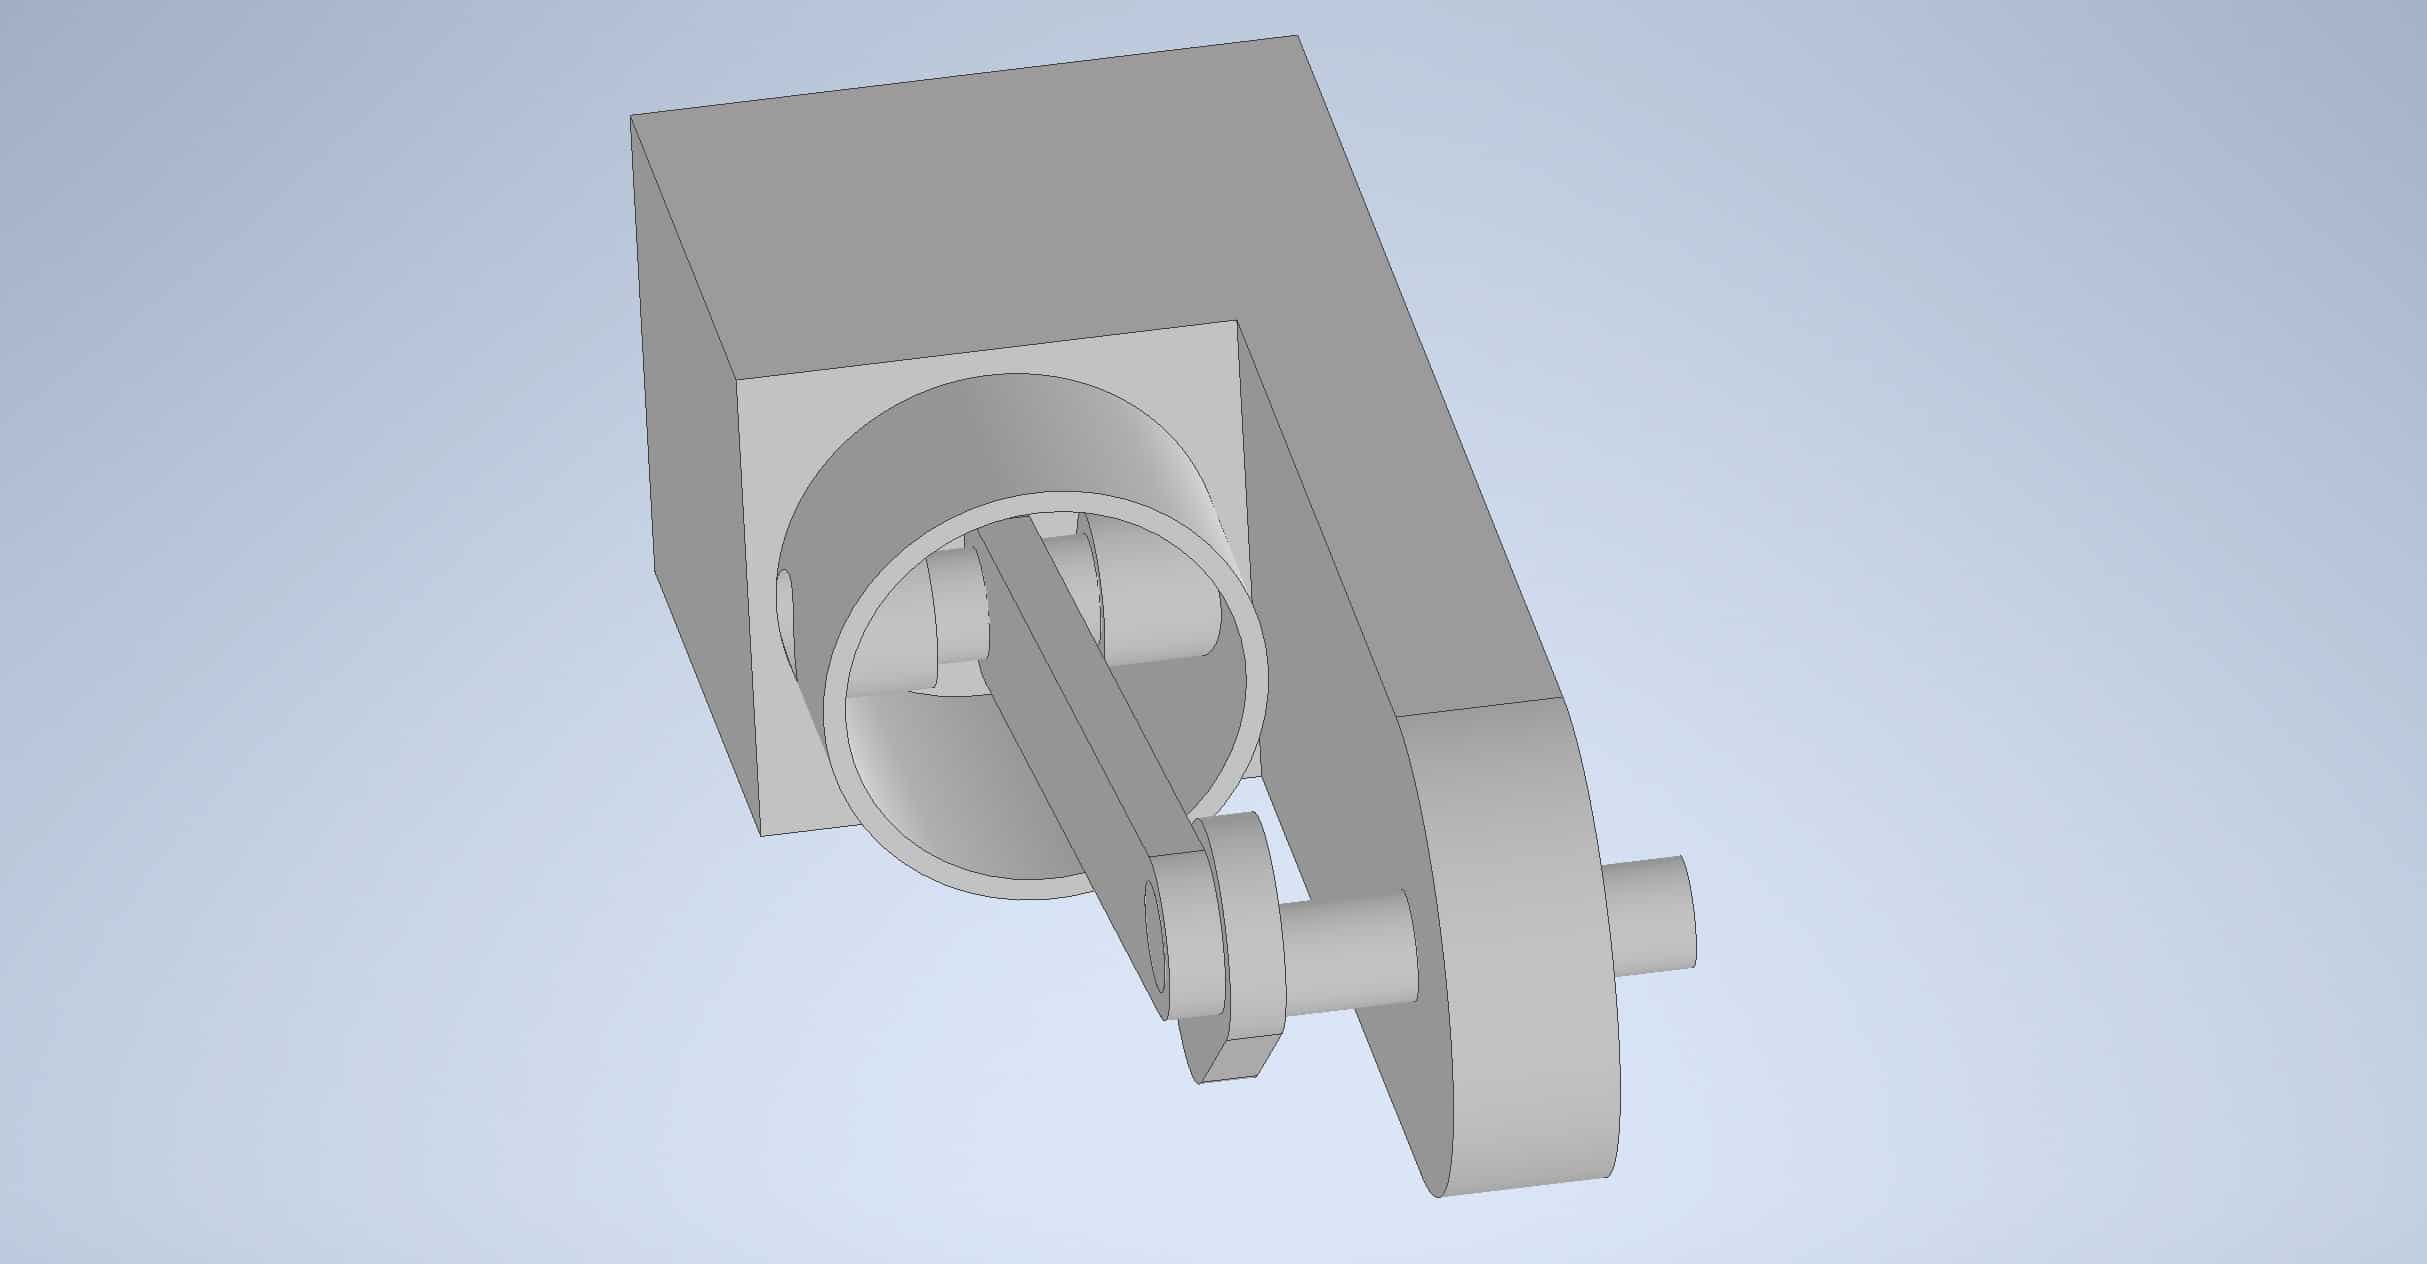
Assign Colors to Different Parts
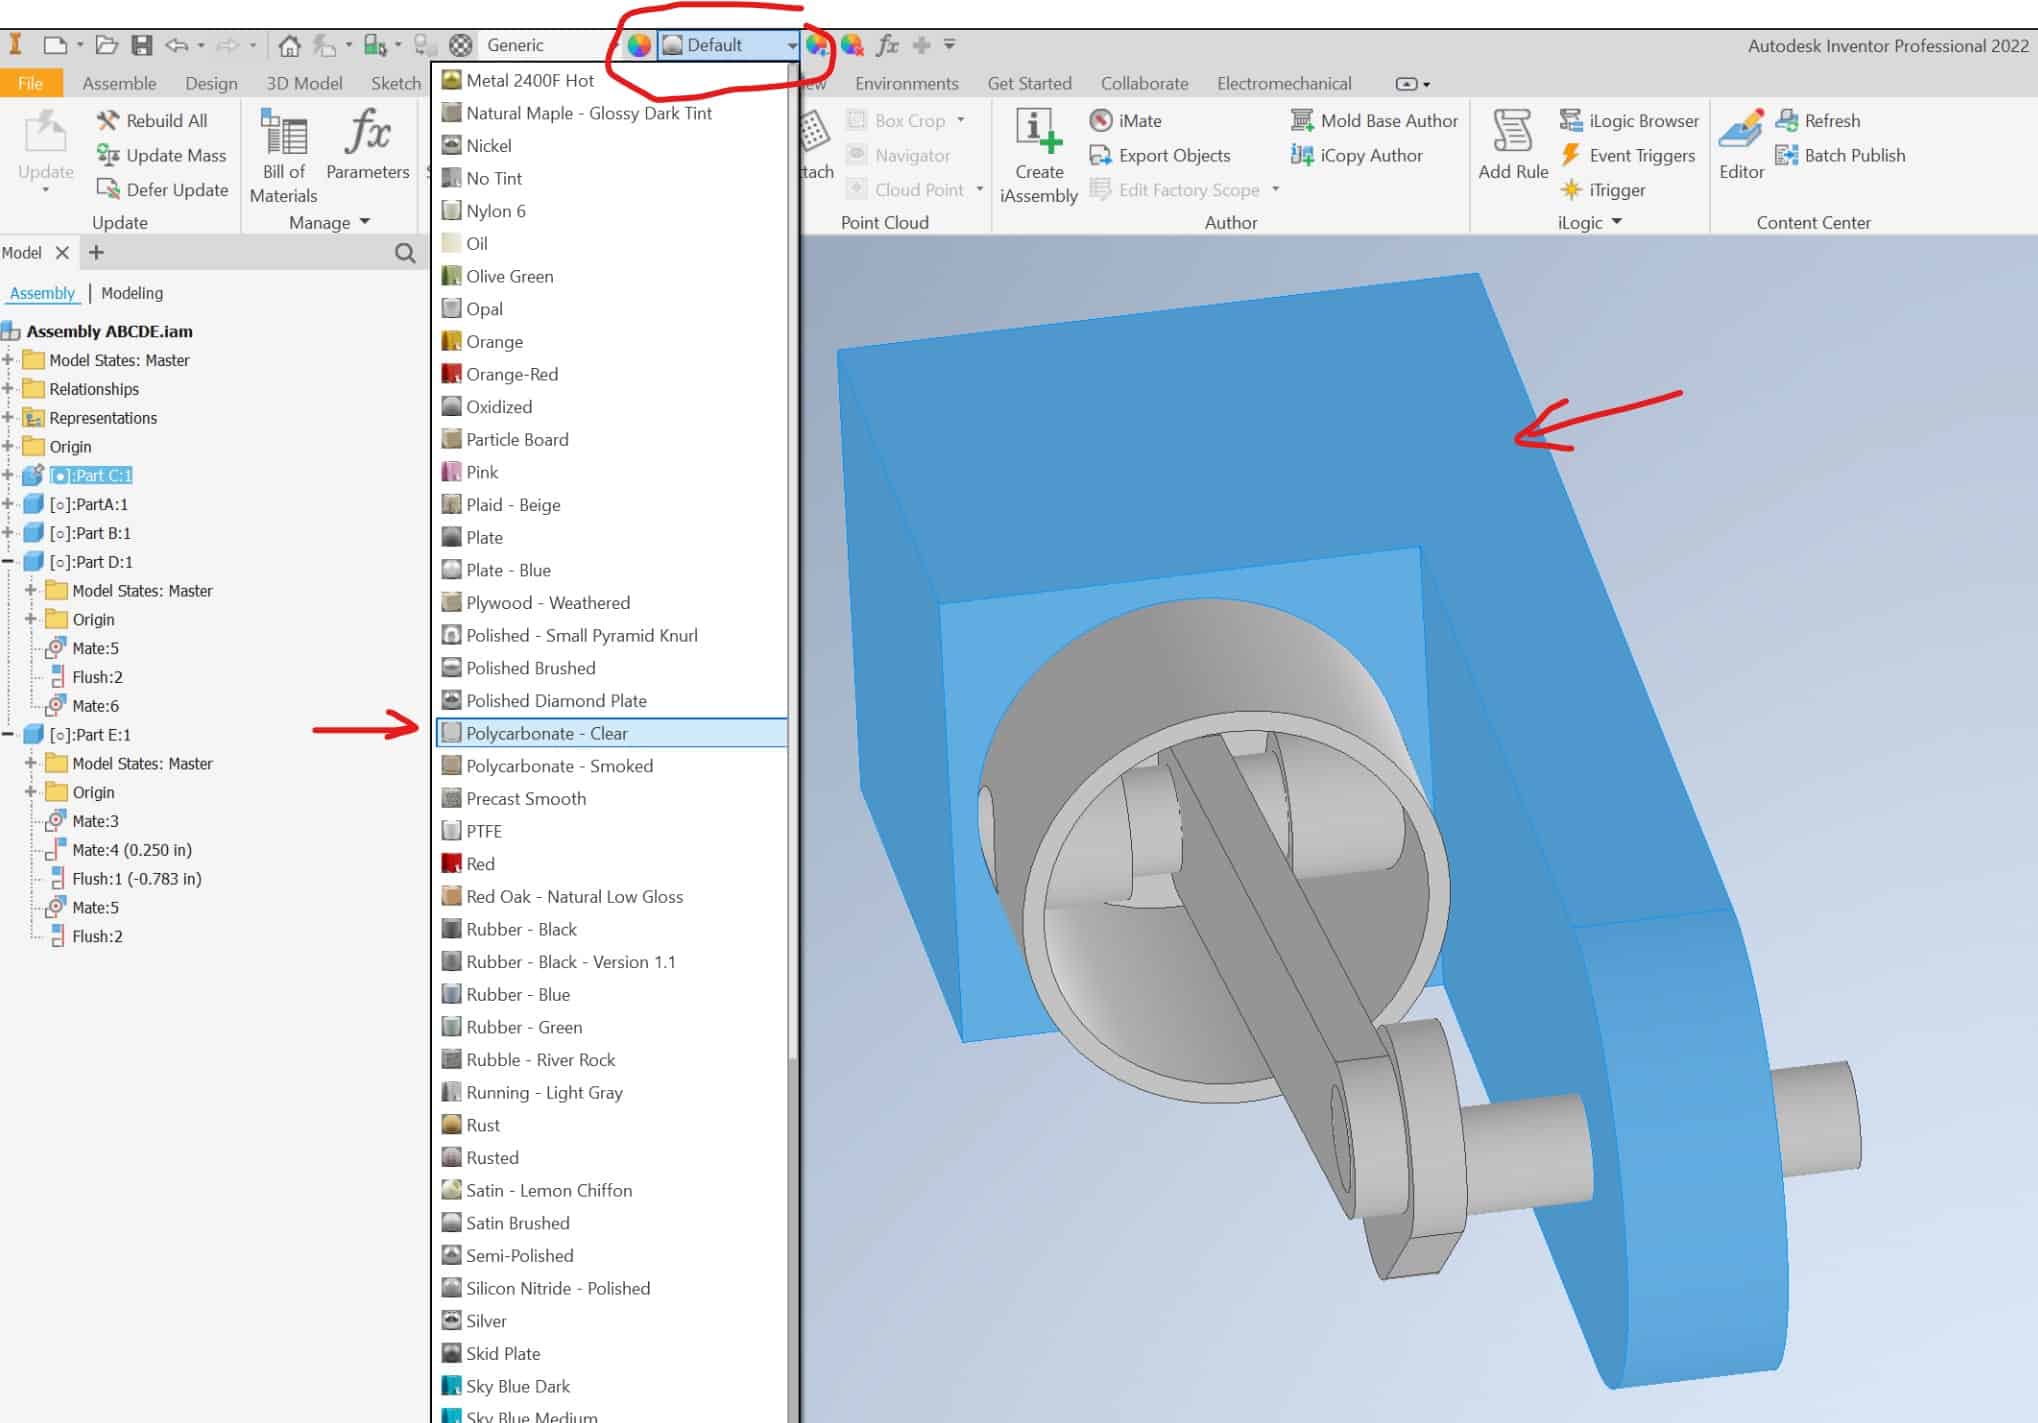
Click on the body of the Part C, go to the Ribbon and from a dropdown menu choose Polycarbonate, Clear:
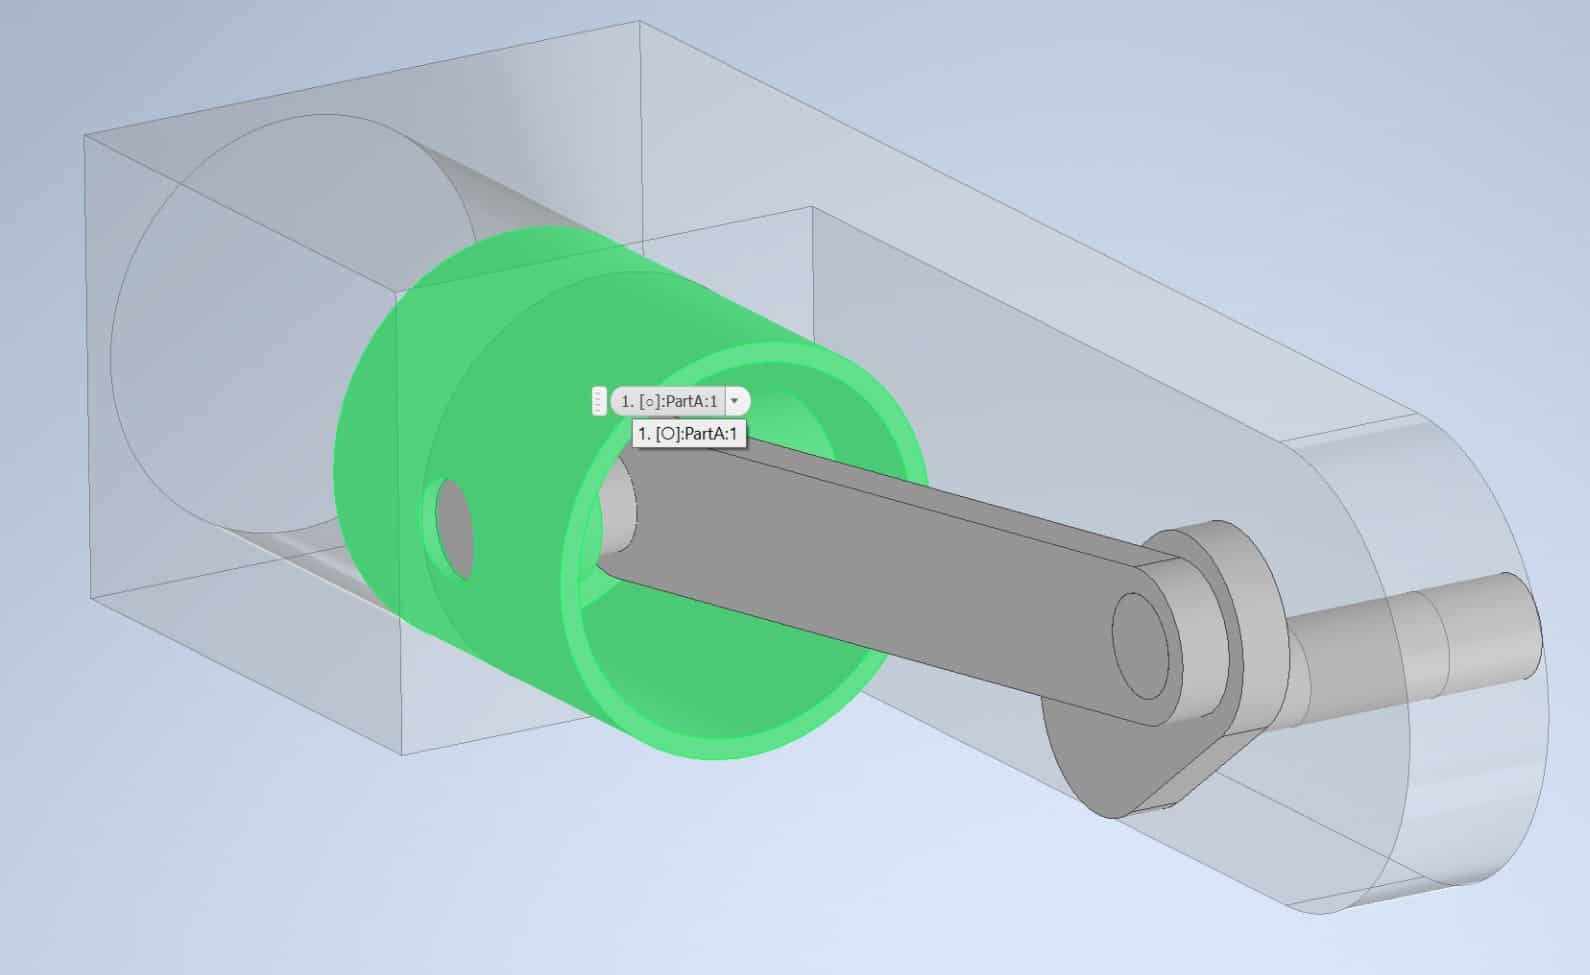
To Part A – apply: Stainless Brushed
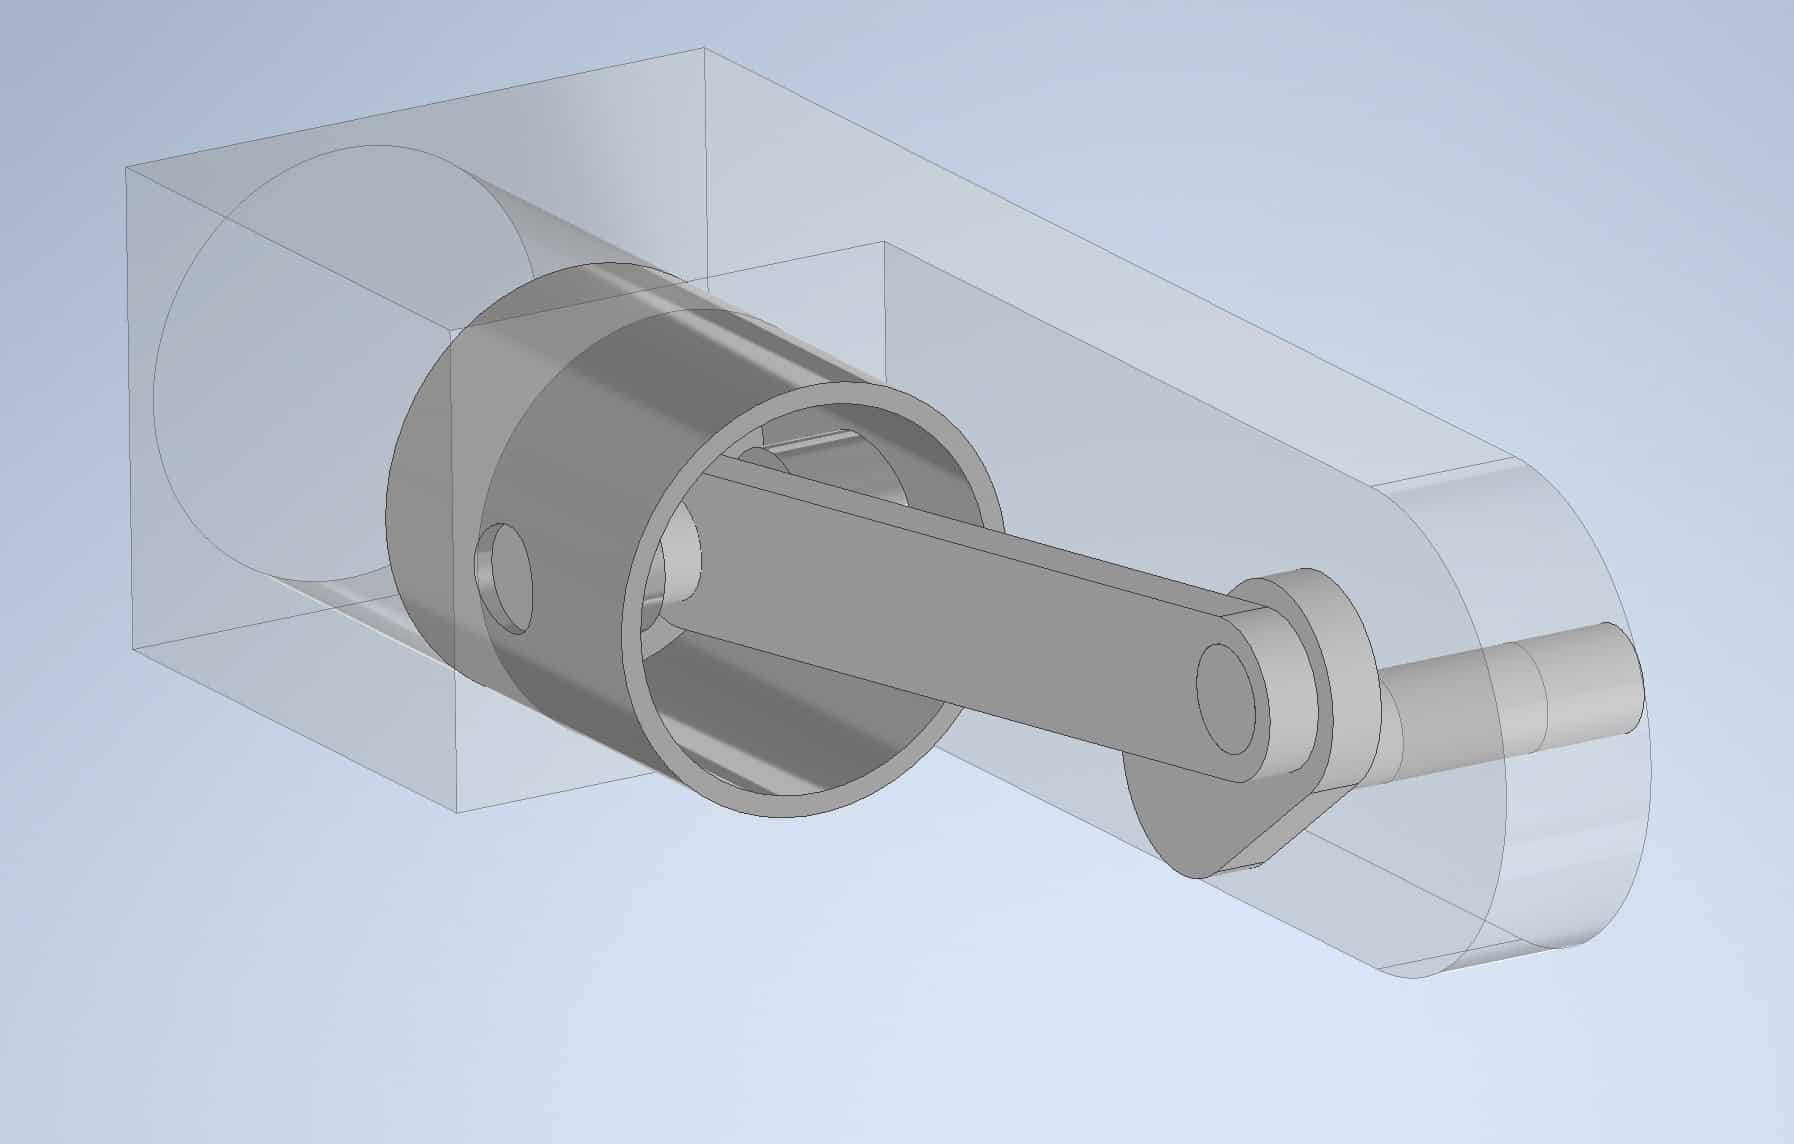
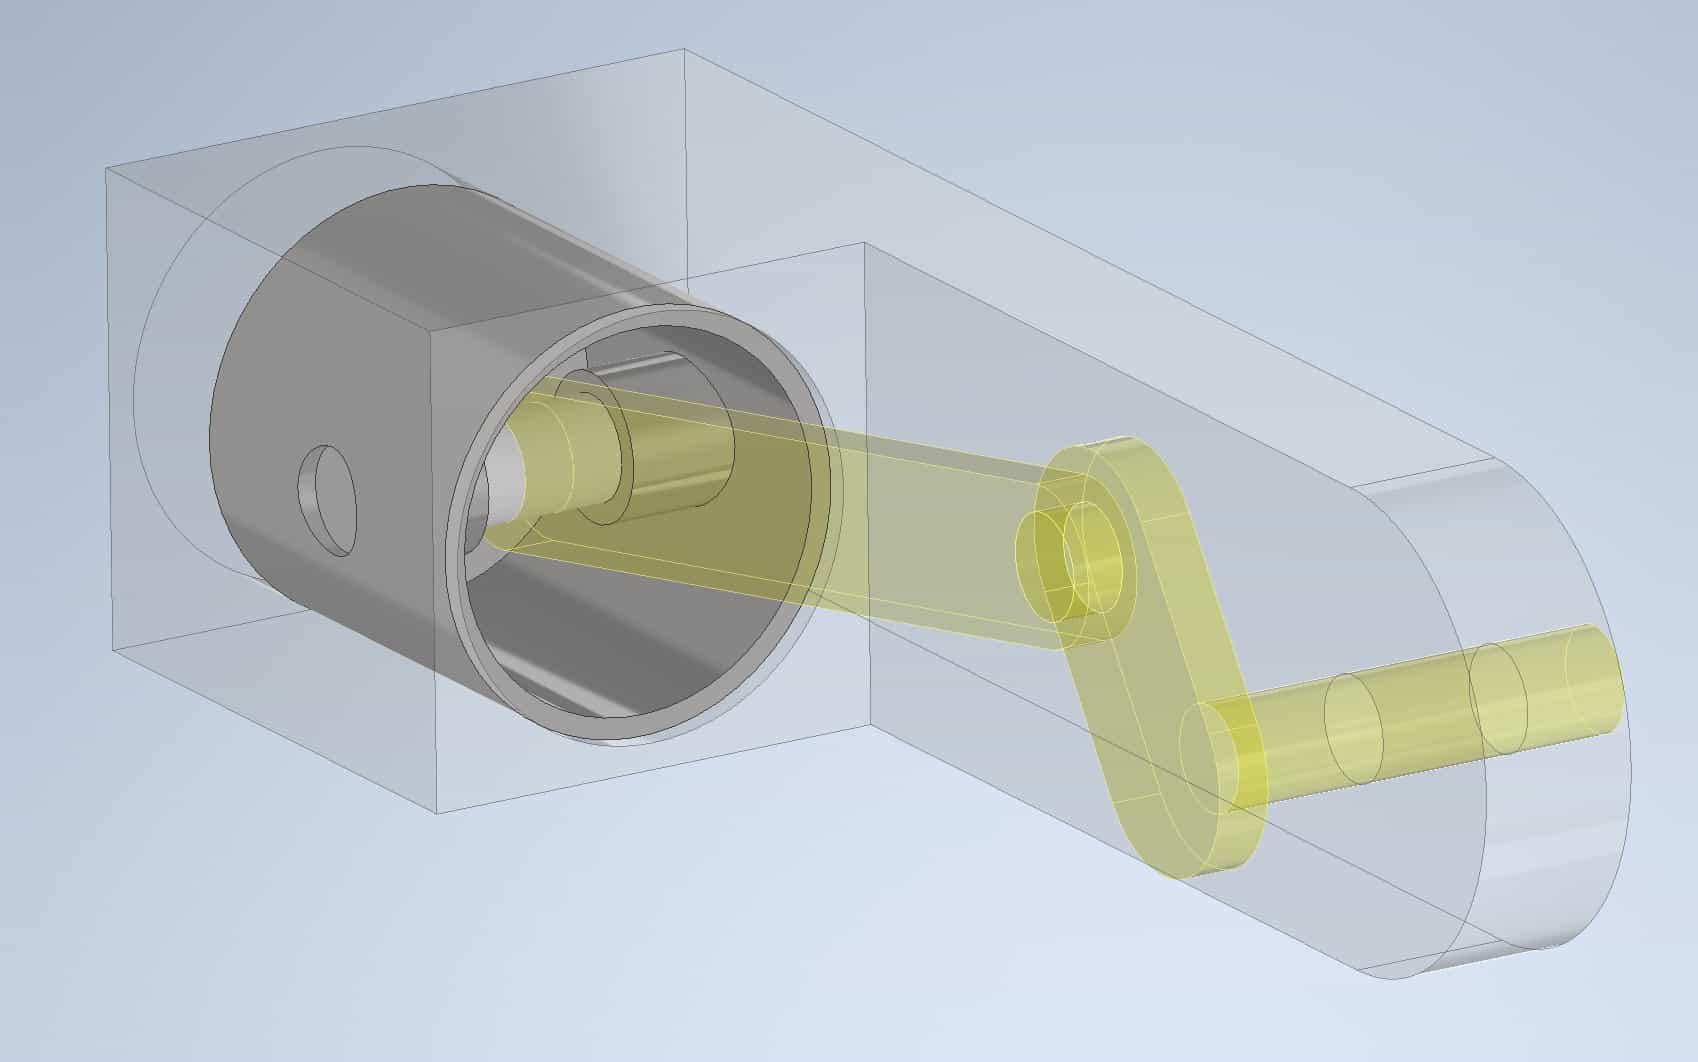
Using the same procedure apply Clear Yellow to parts D and E:
Animate
Go to Assemble tab on the Ribbon and click on the Constrain tool in the Relationships panel:
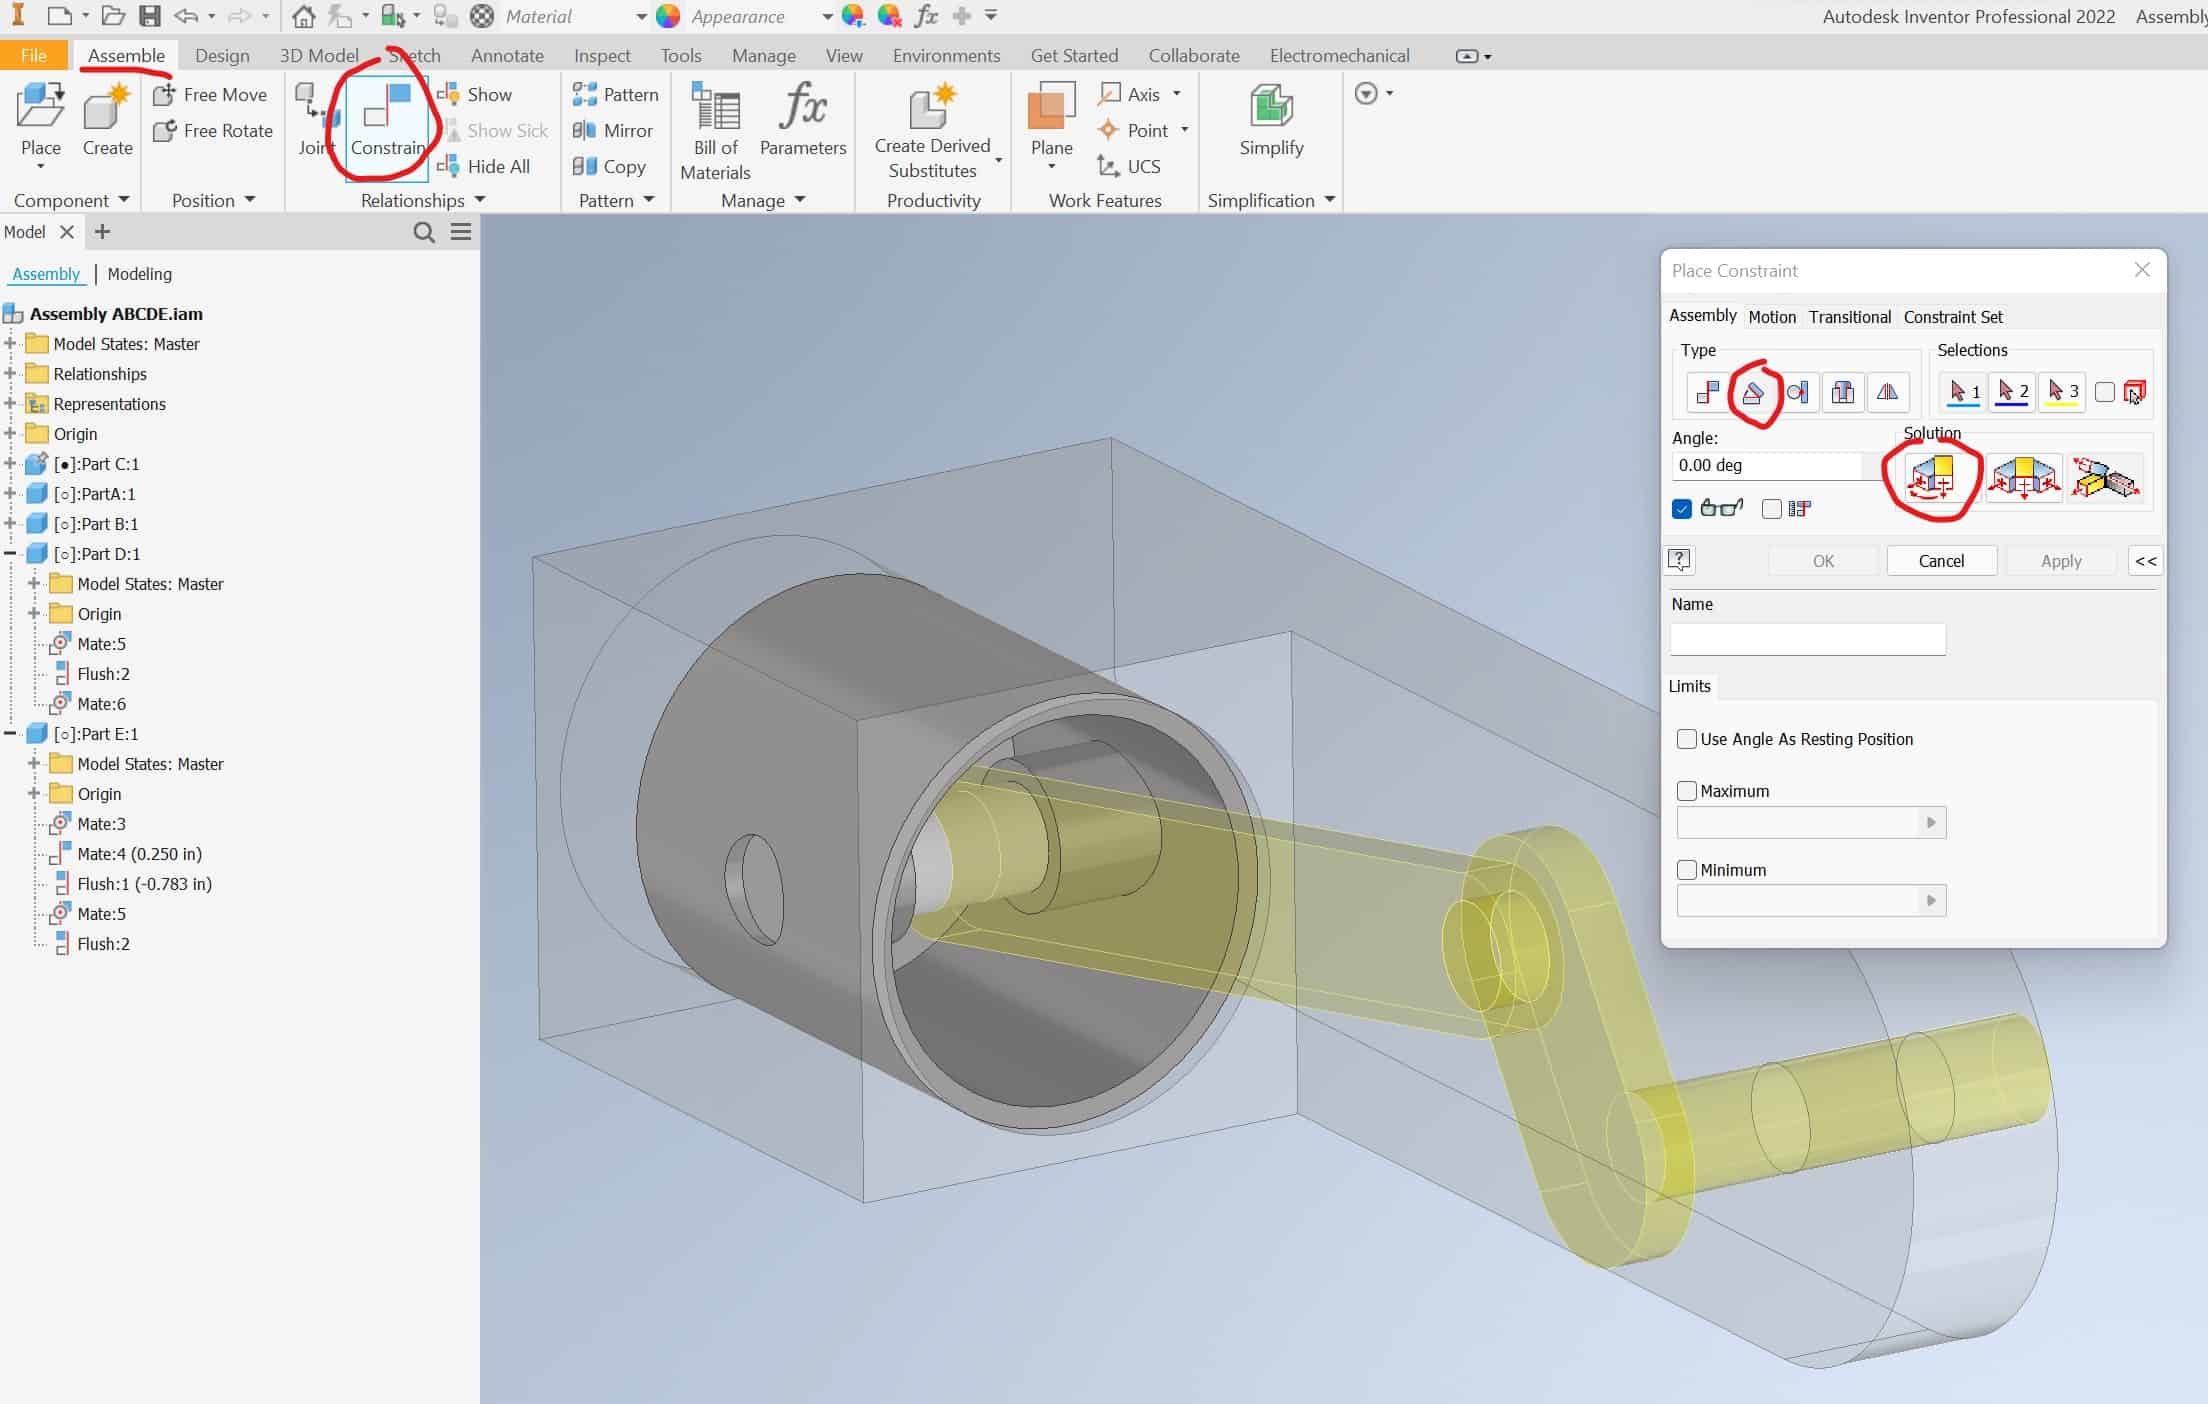
Click on the Angle Constraint and select Direct Angle option.
Click on the surface 1 and then 2:
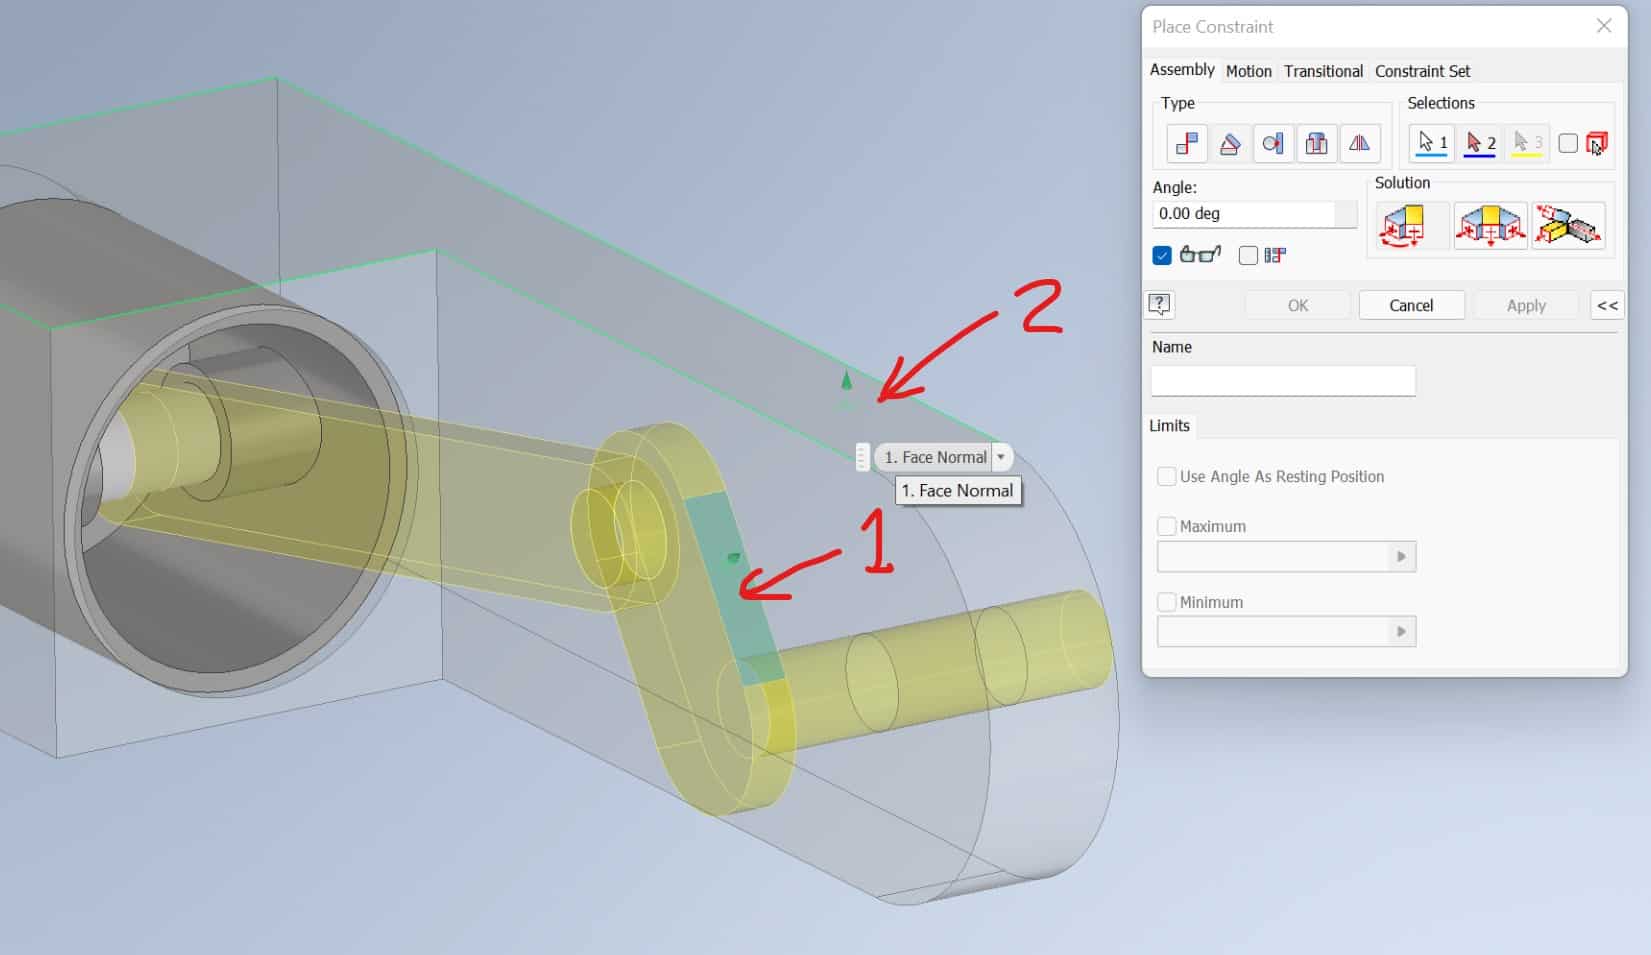
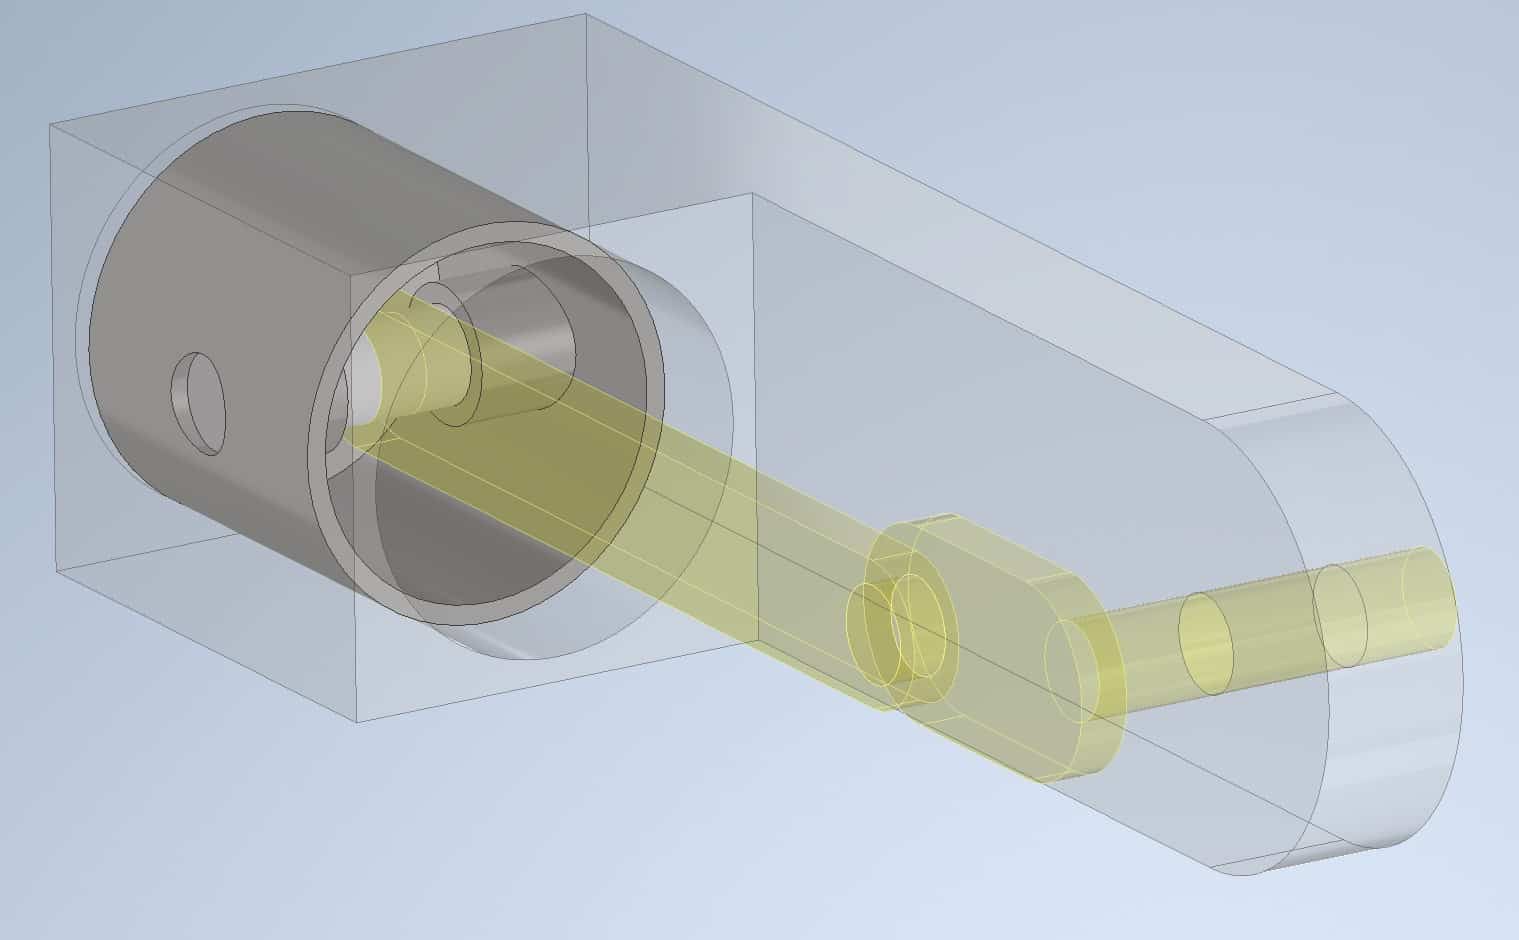
The Inventor will rotate Part D so it is parallel 0 deg. to the side of the Part C:
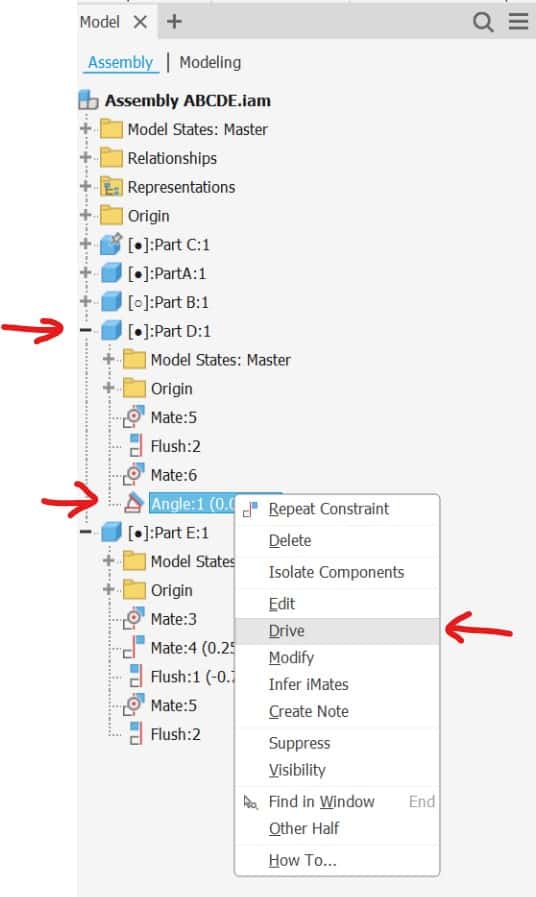
Go to the Assembly Tree. Click on the Part D > Angle1 > Drive:
The Drive dialog box will appear:
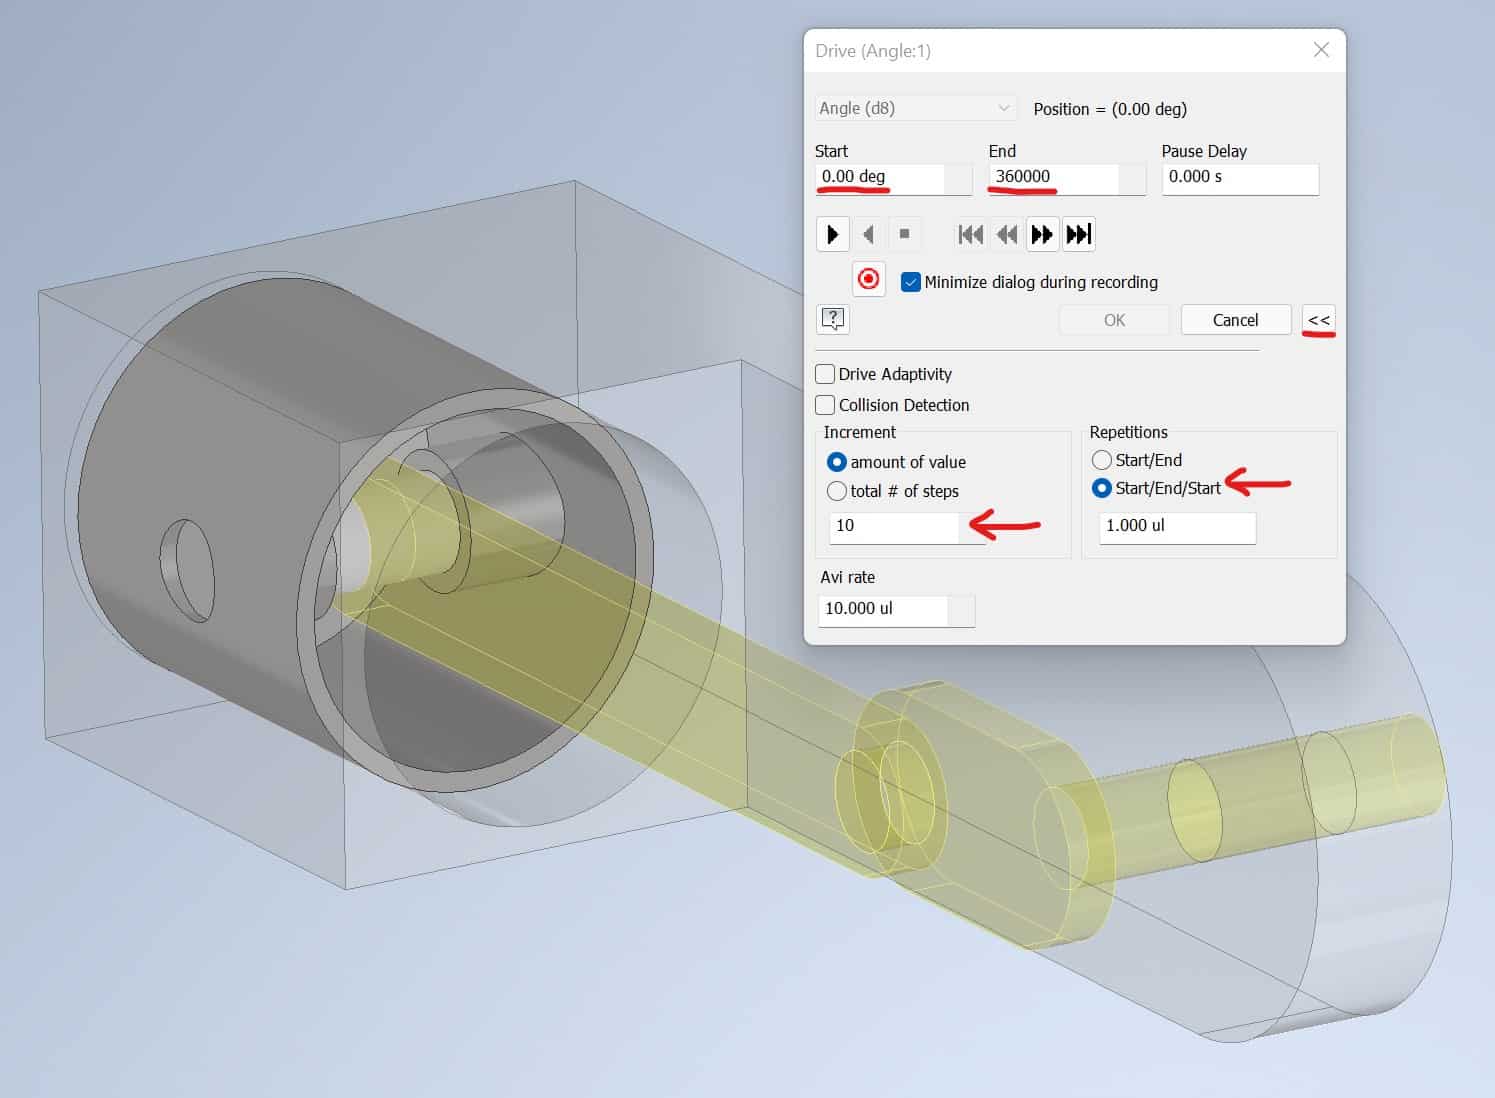
Use PLAY and STOP buttons to start and stop the animation.
Record Movie
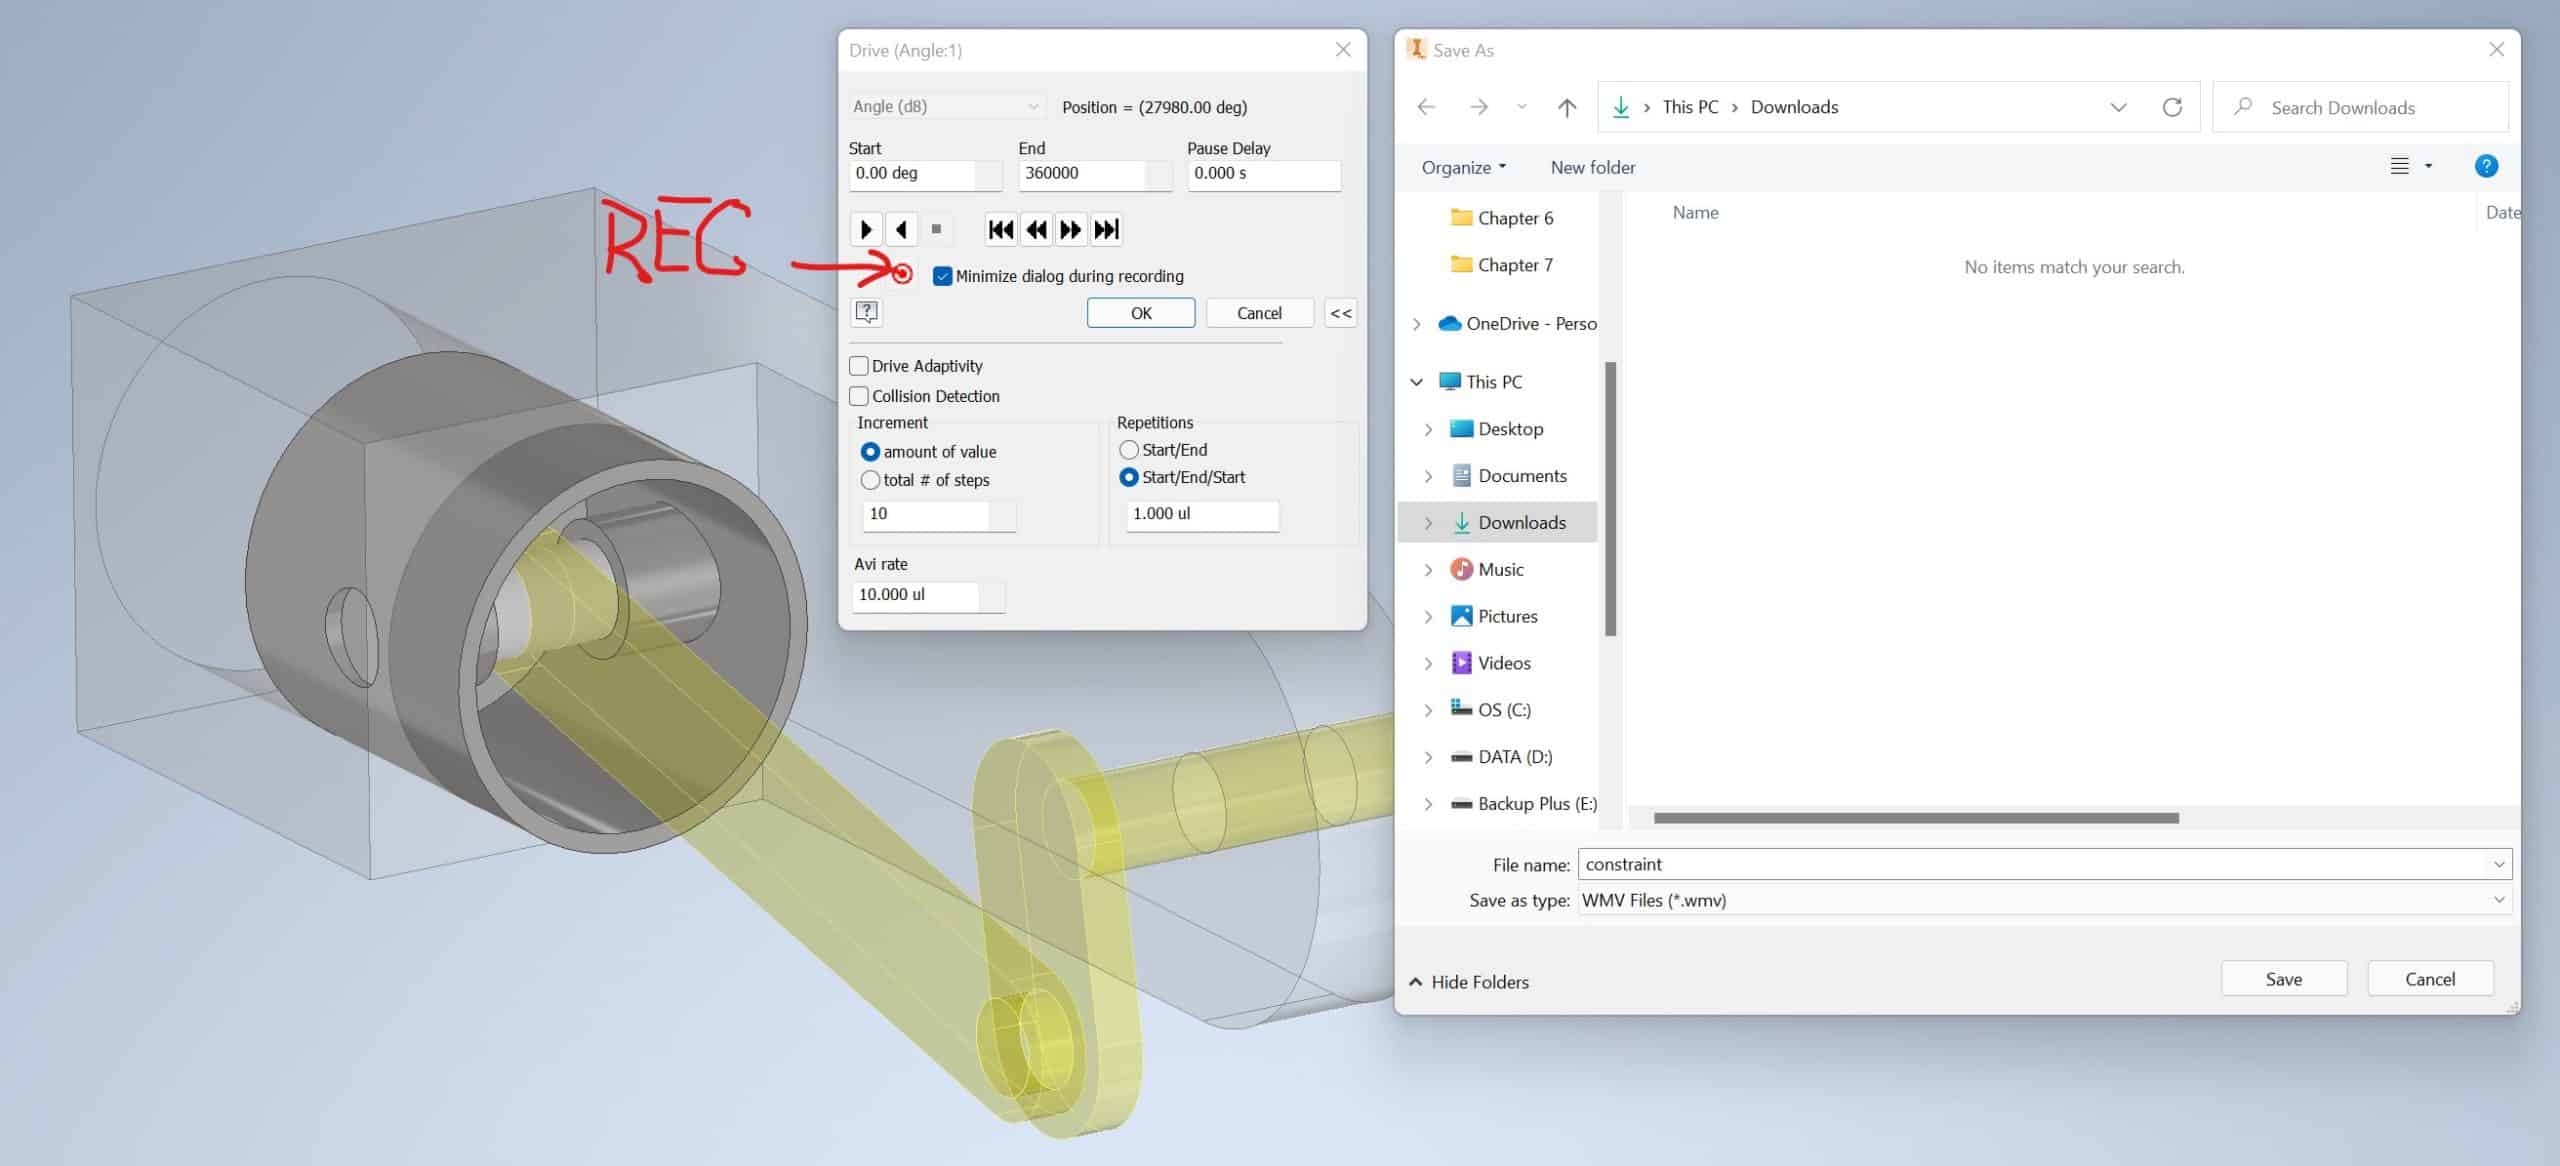
To record an animation to your hard drive click on the Rec button, the dialog box will appear. Choose the location where you want to save the WMV file:
WVM Export Properties dialog box will open, click OK:
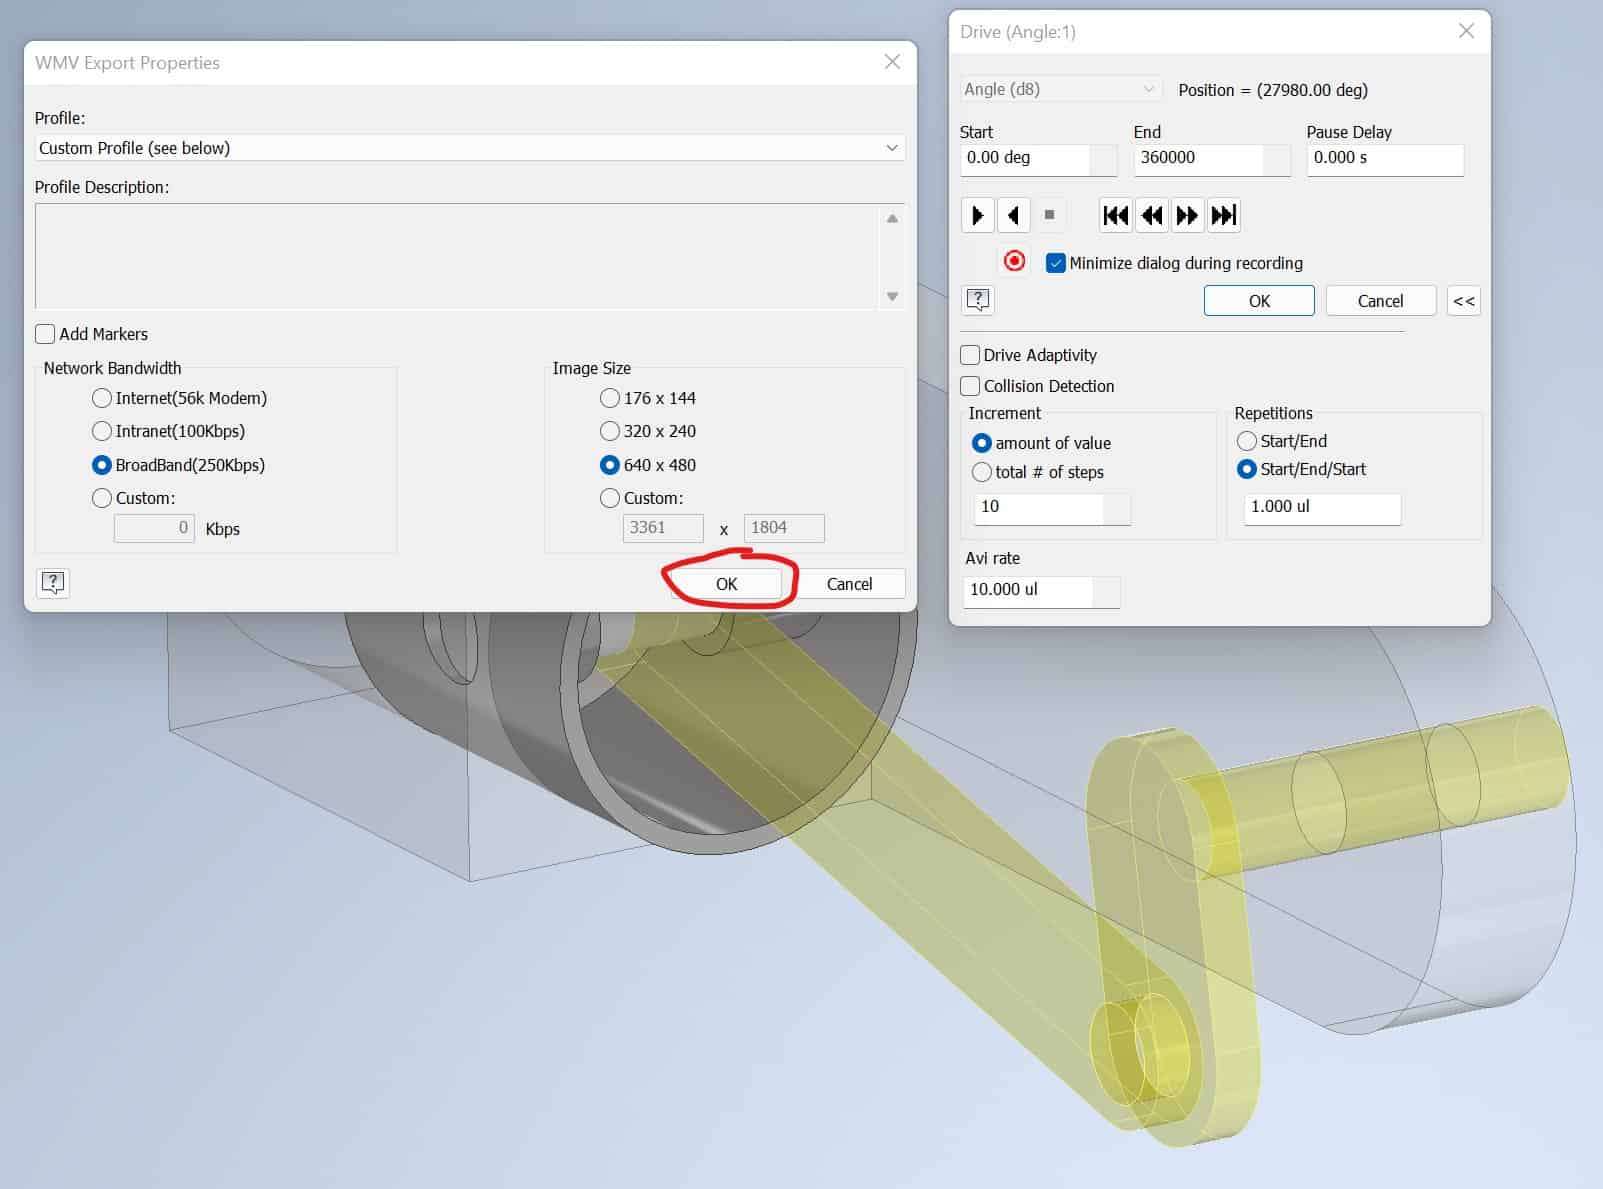
Click PLAY. The Inventor will start animation while recording at the same time WMV file. After 30 seconds Drive dialog box. It should be in the lower-left corner of your screen:

Movie saved to your Hard Drive:
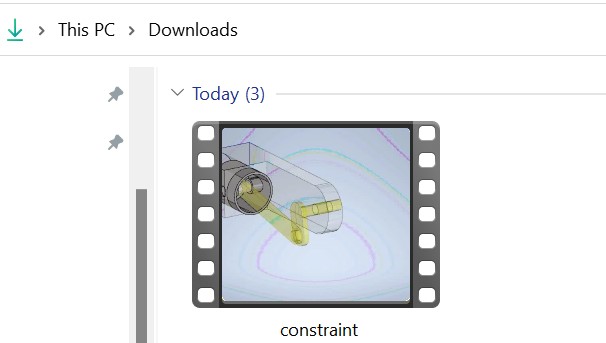
You can play this file in plain Windows Media Player.
Save your Assembly to your local drive.

