Advance Steel has no knee brace tool, so you make one: place a section, drag one end down to the slope you need, and trim both ends against the beam and column with Cut at Object. Then copy it to the other frames with Copy with Adjustment, which fits the copy to the new column.
It takes a few minutes for the first one, and copying is quick after that. Here’s each step.
Contents
- Add a knee brace to your model
- Copy it with the Copy with Adjustment tool
- Copy it with the Advanced Copy tool
How do I model a knee brace in Advance Steel?
The short version:
- Draw a horizontal section.
- Drag one end down to get the slope.
- Trim both ends with the Cut at Object tool.
Here’s each step in detail.
Draw the section and drop one end
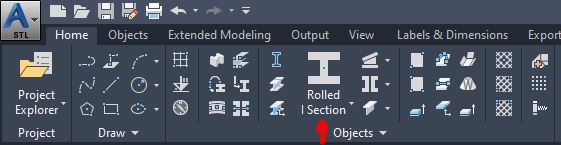
Add the section you want from Home tab > Objects panel:
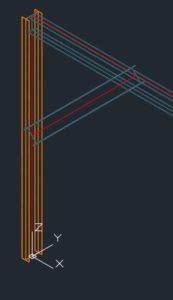
Place it in the drawing, then drag one end to get the angle you want. You can type values to put one end exactly where it needs to be:
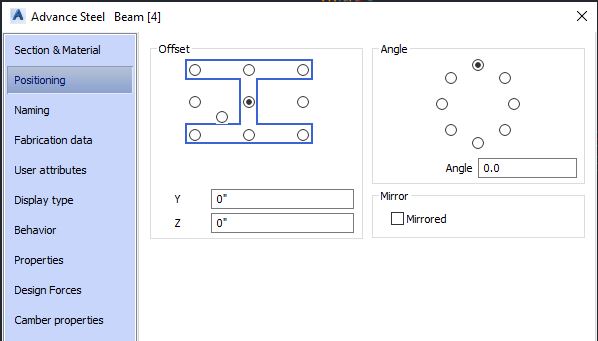
Unless you have a special reason not to, set the positioning to center:
How do I trim the brace ends?
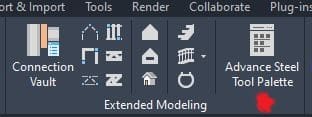
Open the Advance Steel tool palette from Home tab > Extended Modeling:
Go to the Features tab at the bottom left of the palette and pick Cut at Object:
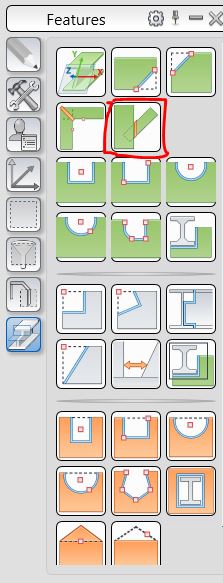
- When asked for the section to cut against, pick the beam or column and press Enter.
- When asked for the section to cut, pick the diagonal brace.
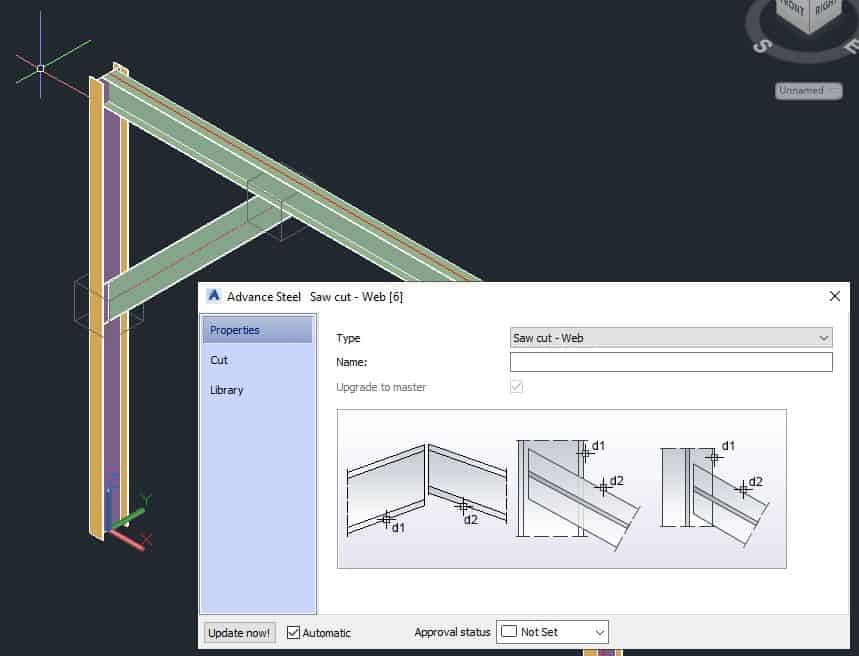
- In the dialog, choose whether you’re cutting against the web or the flange:
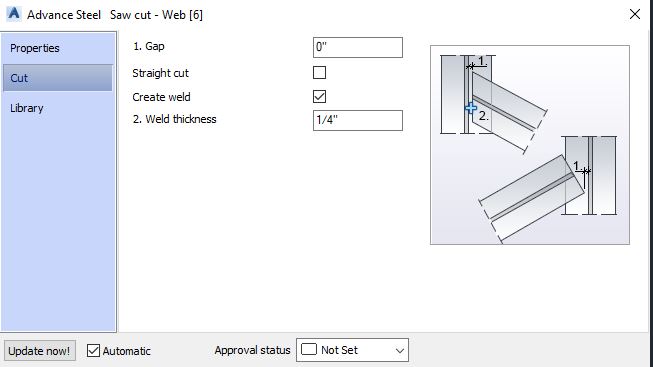
On the Cut tab you can set a gap and weld options:
Close the dialog and do the other end the same way. That’s your first knee brace. Now let’s copy it to the rest of the frames.
How do I copy a knee brace to other frames?
This is my favorite way to copy a knee brace around the model. It’s in the Advance Steel tool palette > Tools:
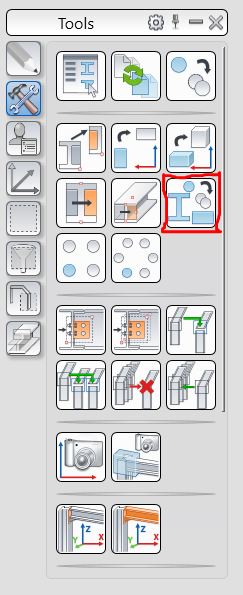
- When asked to select objects, pick the knee brace along with the connection boxes at both ends. Press Enter.
- For the reference element, pick the column next to the brace.
- For the target element, pick the column where you want the new brace.
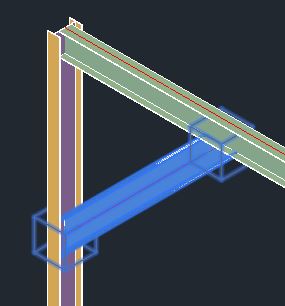
The brace is copied and adjusted to fit the new column.
How do I copy it with Advanced Copy?
Another option is Advanced Copy, in Home tab > Advance Steel Tool Palette > Tools:
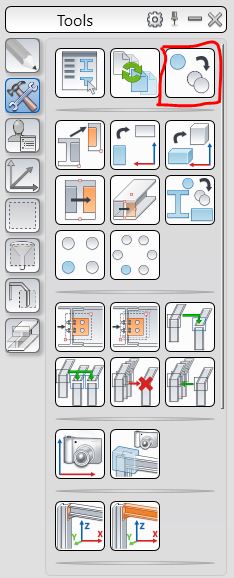
Select the diagonal and its connection boxes:
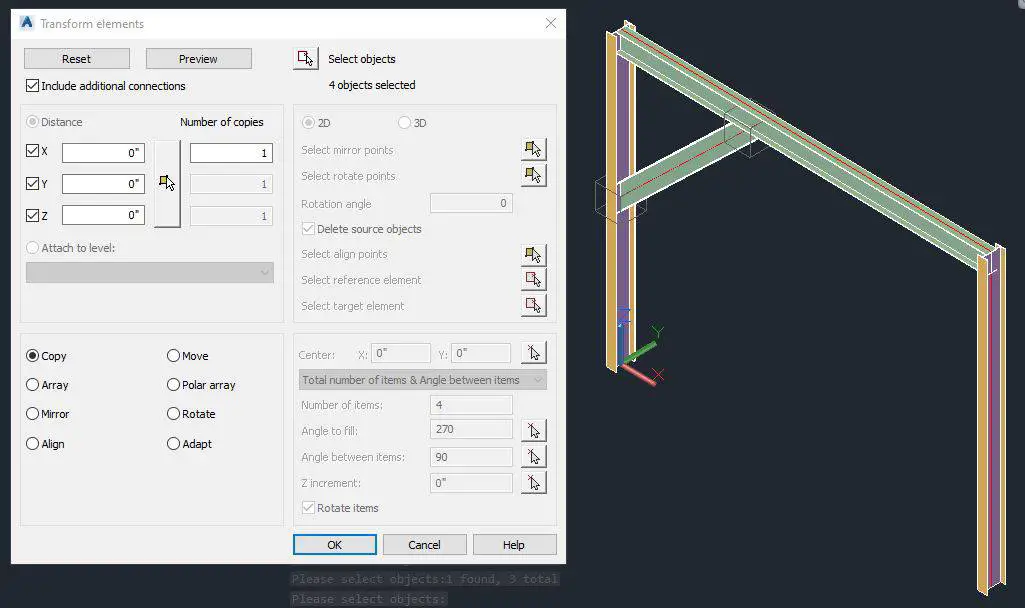
Now pick what kind of copy you want: a plain copy, a rotate, and a few others. For a brace on the other side of the same beam, use Rotate:
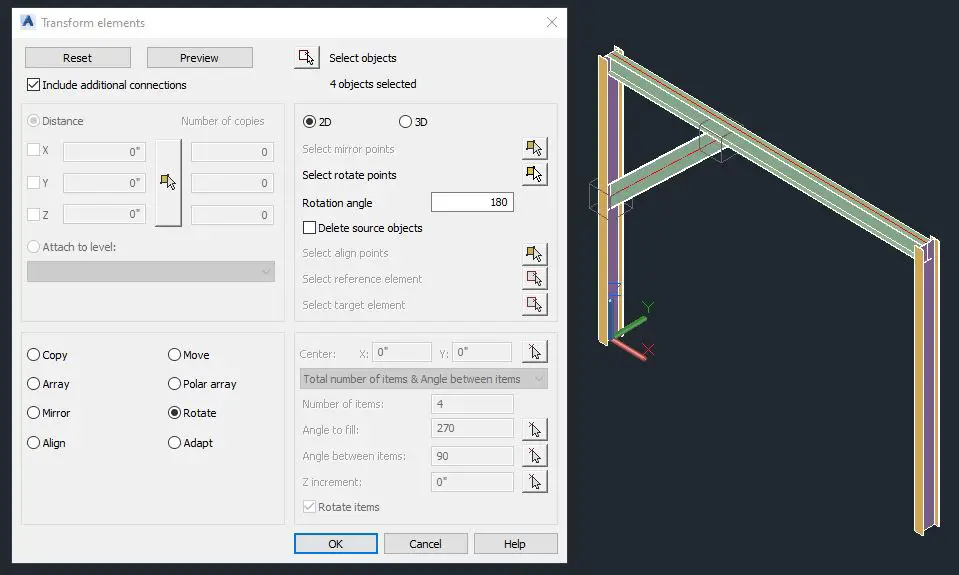
- Make sure 2D is checked.
- Choose Select Rotate Point and click the midpoint of the horizontal beam.
- Type 180 for the angle and press Enter.
- Click Preview. If it looks right, click OK. If not, click Modify and adjust.
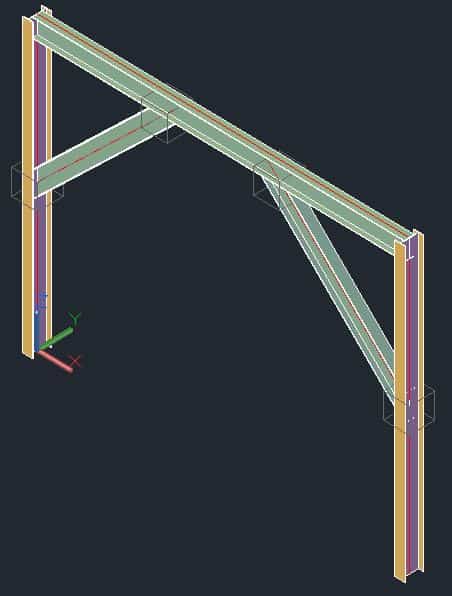
That’s the usual way I add knee braces in Advance Steel. Change the section, the cut or the copy method to suit your job.
What to do when the copied brace doesn’t fit
- The copy didn’t adjust to the new column. Make sure you selected the connection boxes along with the brace, and picked the right reference and target elements.
- The ends aren’t cut. The cuts belong to the connection boxes. Copy them with the brace.
- The brace is on the wrong side. Use Advanced Copy with Rotate, like above, or mirror it.
- The frames aren’t the same. Copy with Adjustment adapts to the target, but check every copy in 3D, especially where column or beam sizes change.
The knee brace size, slope and connections come from the engineer’s drawings. If they’re not shown, ask before you model them.