To extend a beam in Advance Steel, open the Advance Steel Tool Palette from the Home tab, go to Tools > Trim/Extend, pick the member to extend to, and choose whether it should reach that member’s system line, center or face. If you also want the end cut, gap and weld set, use Features > Cut at Object instead. To make a beam a set amount longer, click the grip at its end and type the length.
There are three ways to do it, and the right one depends on what you’re extending to:
- Trim/Extend: extend a beam or column to another member.
- Cut at Object: extend to another member and set the cut type, gap and weld at the same time.
- Grip stretch: lengthen a beam by an exact amount, or to a point in the model.
Below are all three with screenshots, plus how to shorten a beam, what to check afterward, and what to do when it doesn’t work.

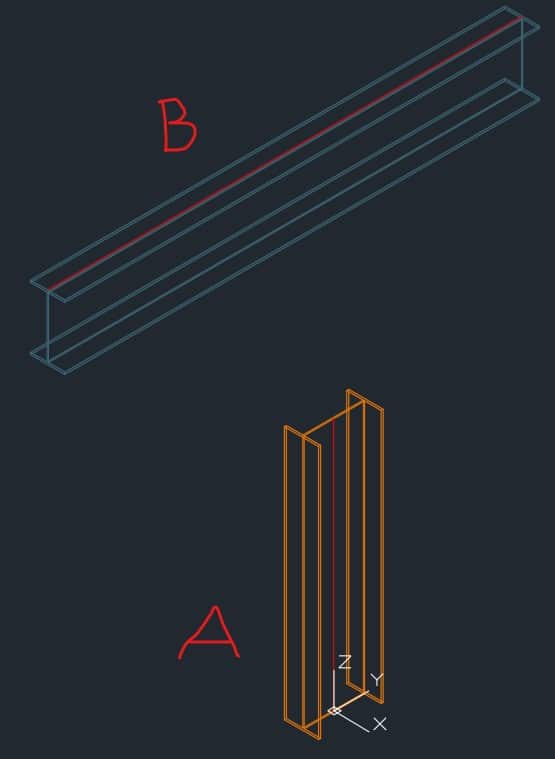
Here’s what we want to do: extend Beam A to Beam B.
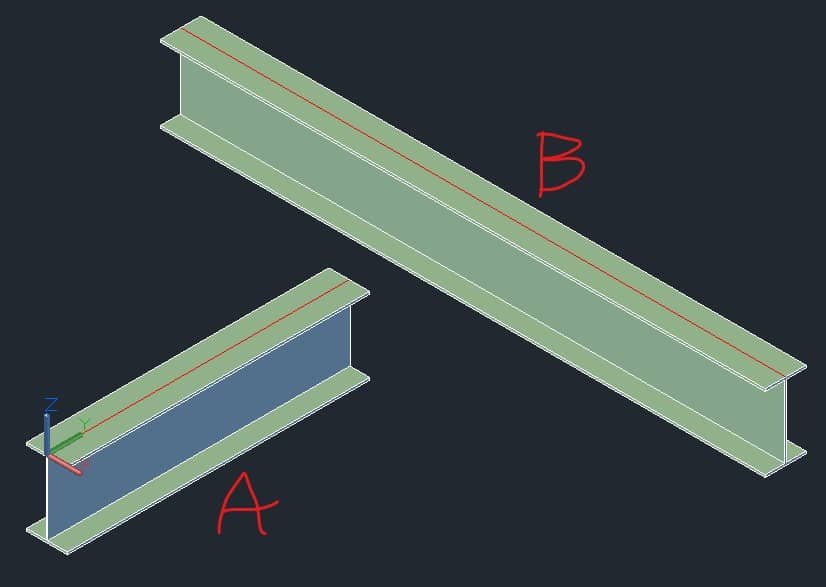
How do I extend a beam to another beam with Trim/Extend?
This tool works for beam-to-beam and column-to-beam situations.
First open the Advance Steel Tool Palette from the Home tab:
Home tab > Advance Steel Tool Palette

Then go to Tools > Trim/Extend. The tool is near the very bottom of the palette, so if you don’t see it, drag the bottom edge of the palette down to make it longer.
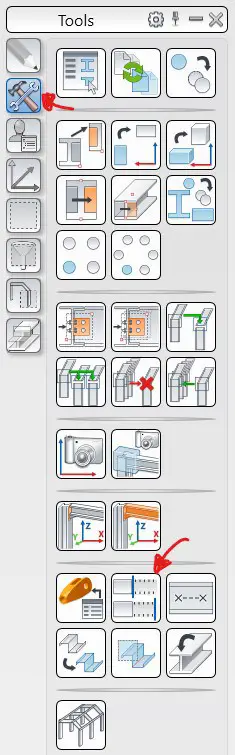
When you start the tool, it asks you to select the operation mode:
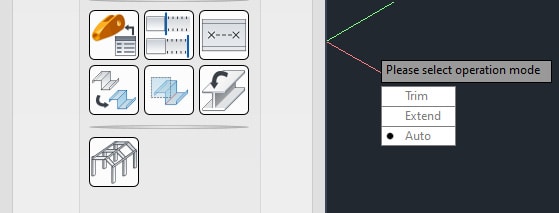
Press ENTER to confirm.
Next, pick where the beam should extend to. You can connect to System, Center, Face or Line:
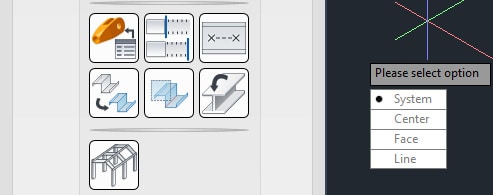
Press ENTER to confirm. If you leave it on System, Advance Steel extends the beam to the red system line of the other member:
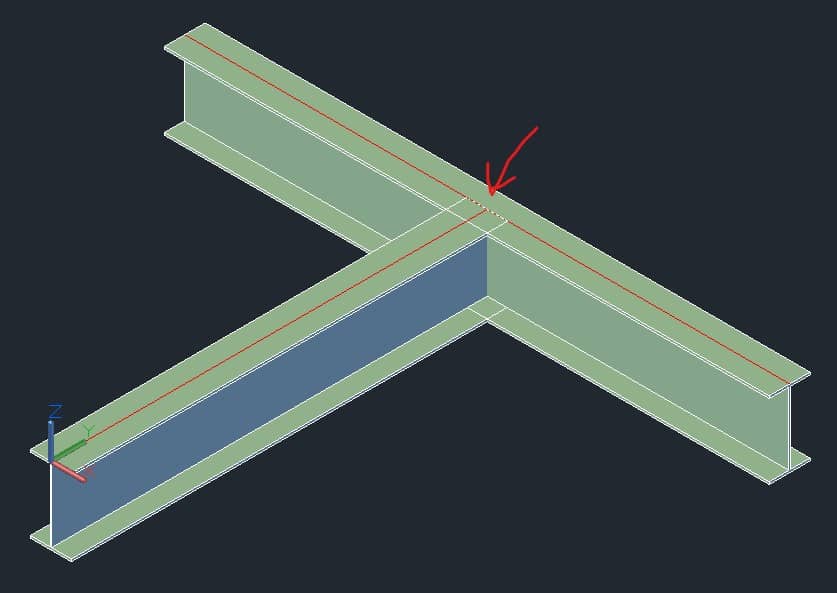
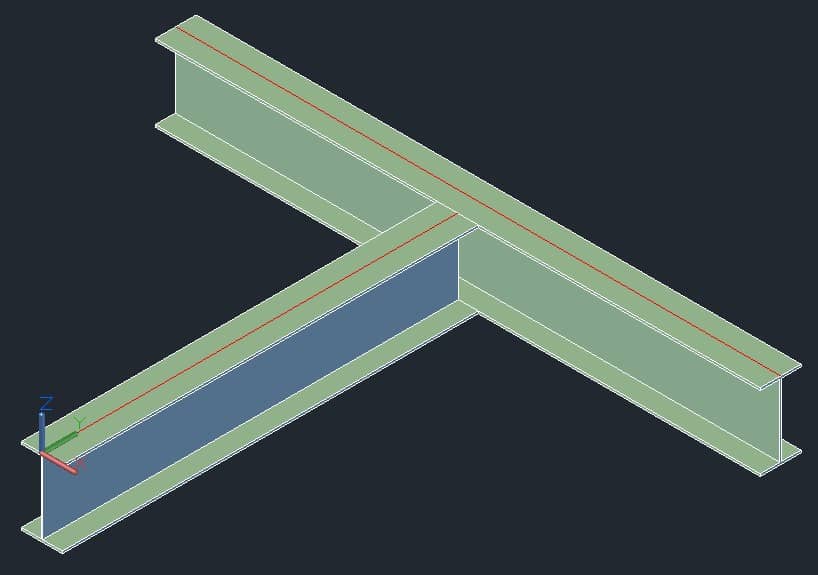
Center extends the beam to the center of the other beam. Face extends it to the outside face of the other beam:
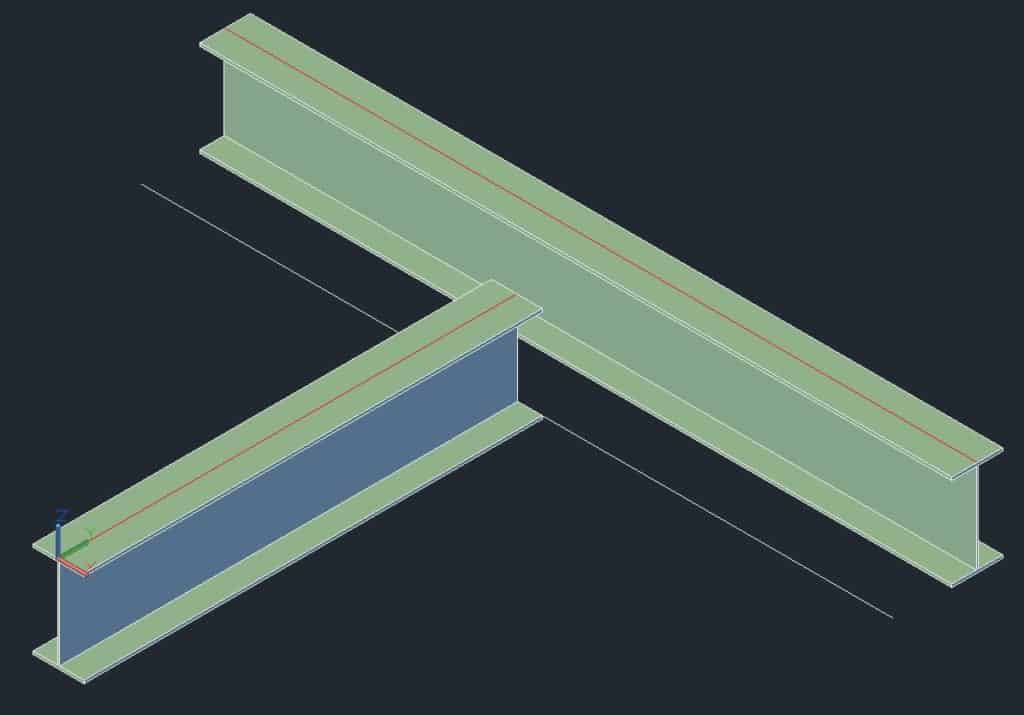
The last option, Line, extends the beam to a line. Advance Steel asks you to pick the points of the line. Press ENTER to confirm, and the beam extends to that line:
How do I extend a column to a beam with Cut at Object?
This is the option I find even more useful. Here we’ll extend Column A up to Beam B:
Open the Advance Steel Tool Palette from the Home tab:
Home tab > Advance Steel Tool Palette
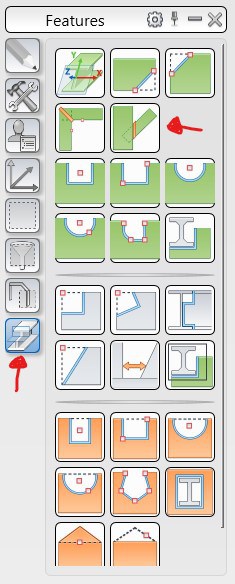
In the palette, go to Features > Cut at Object:
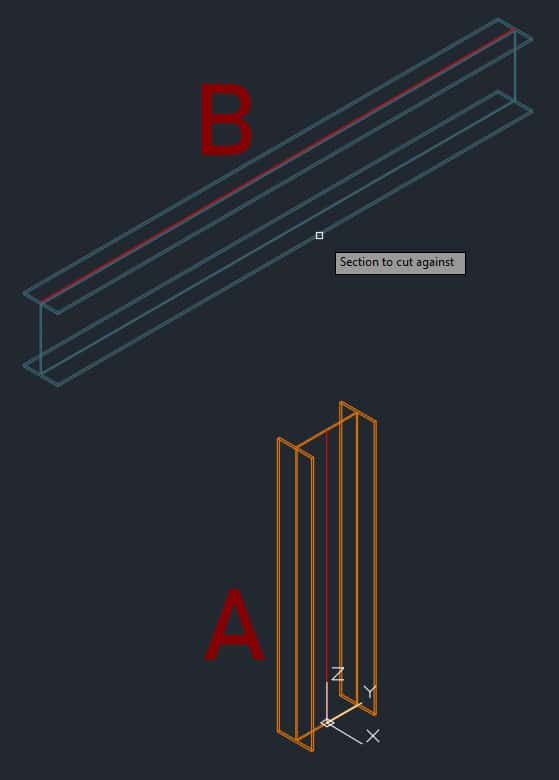
Advance Steel asks for the Section to Cut Against. Select Beam B and press ENTER:
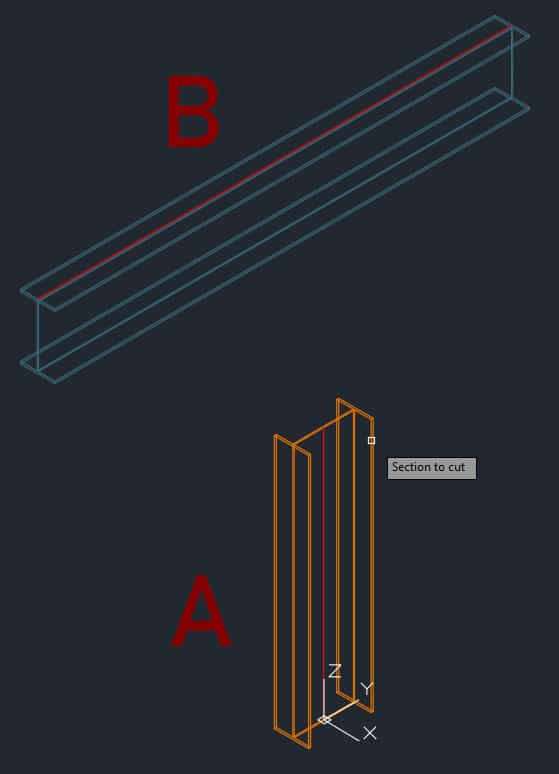
Then it asks for the Section to Cut. Select Column A and press ENTER:
Column A now extends to Beam B. The dialog box opens so you can adjust the cut:
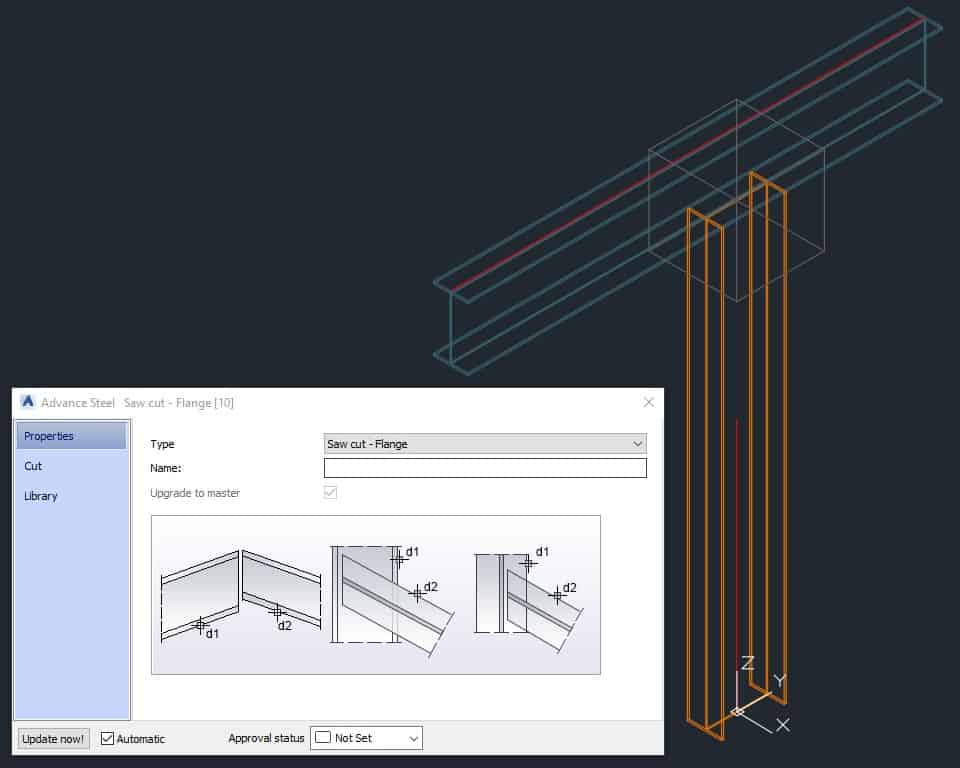
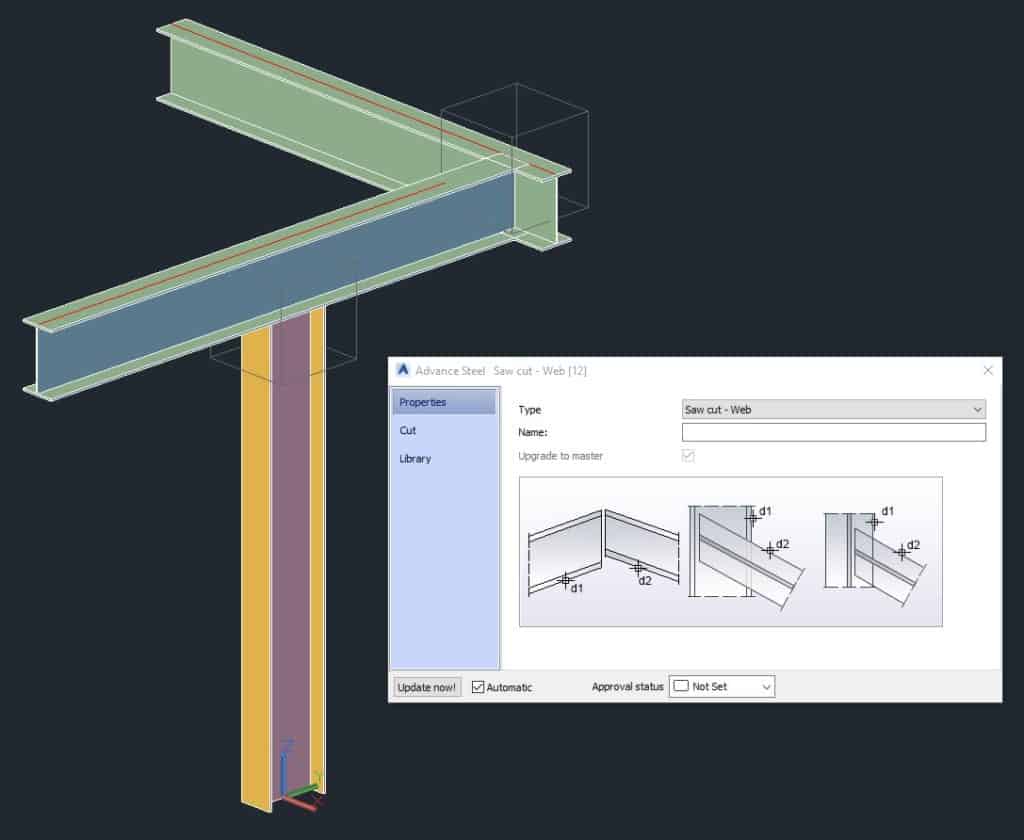
You can choose Saw Cut – Flange, Saw Cut – Web or Miter Cut:
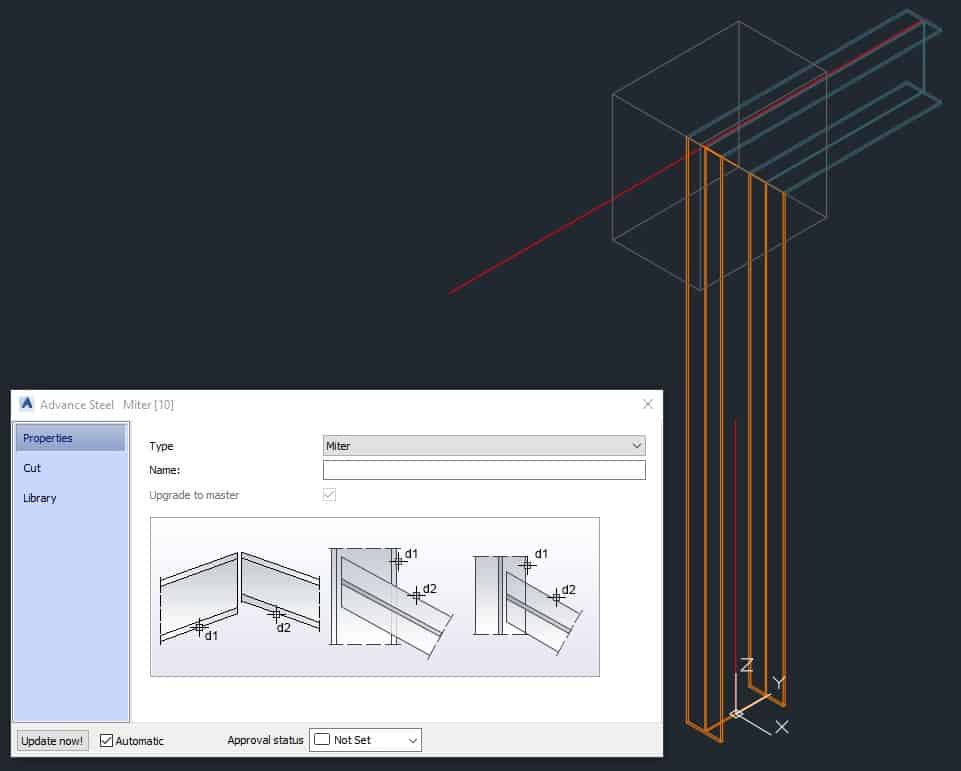
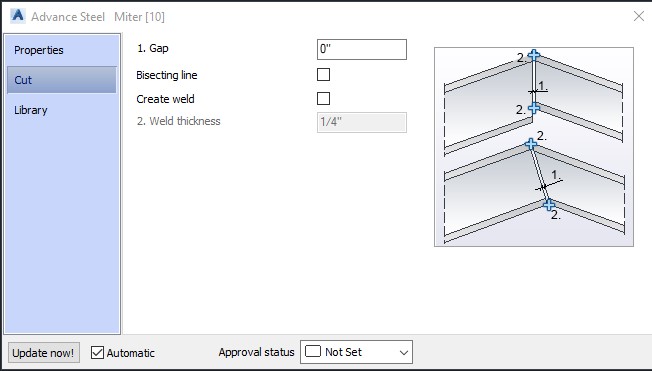
In the Cut section of the dialog box you set things like the gap and the weld:
It works the same way beam to beam:
How do I lengthen (stretch) a beam by an exact amount?
Sometimes there’s nothing to extend to. You just need the beam a few inches longer, or you need it to end at a specific point. For that, use the grip at the end of the beam. There are two ways to do it.
Stretch by a typed value
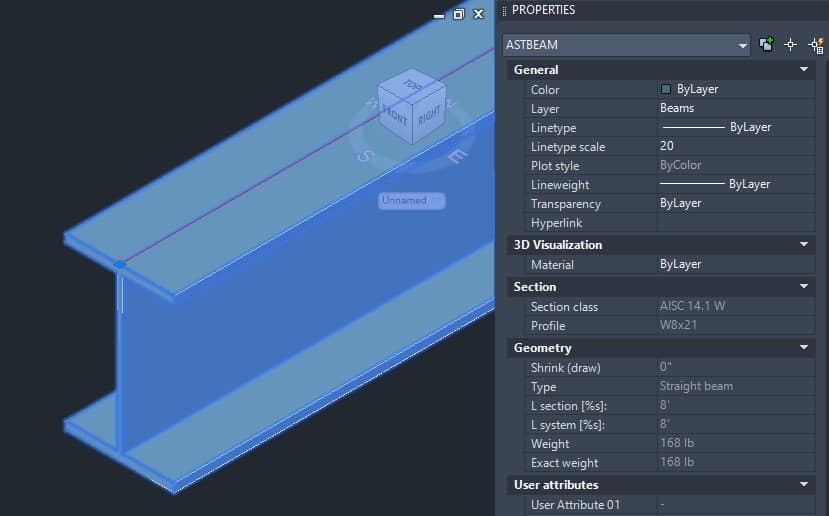
Select the beam you want to stretch. It highlights. Click the blue grip at the end of the beam.
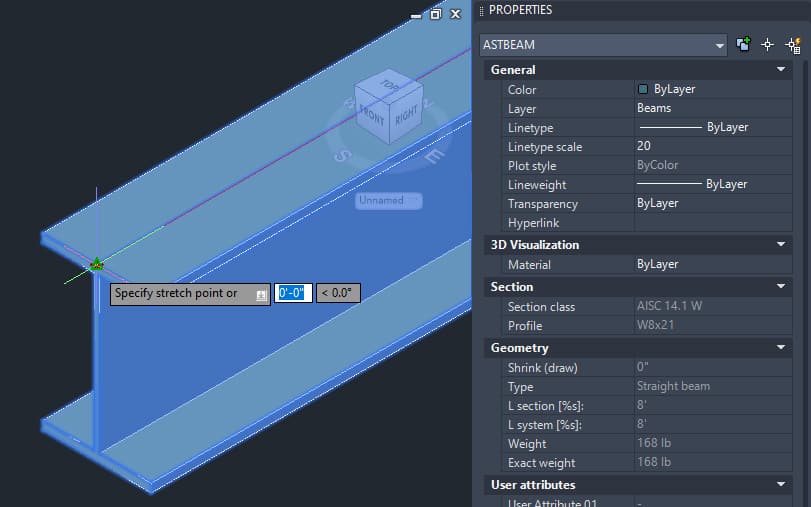
Advance Steel asks you to specify the stretch point, or you can type a value.
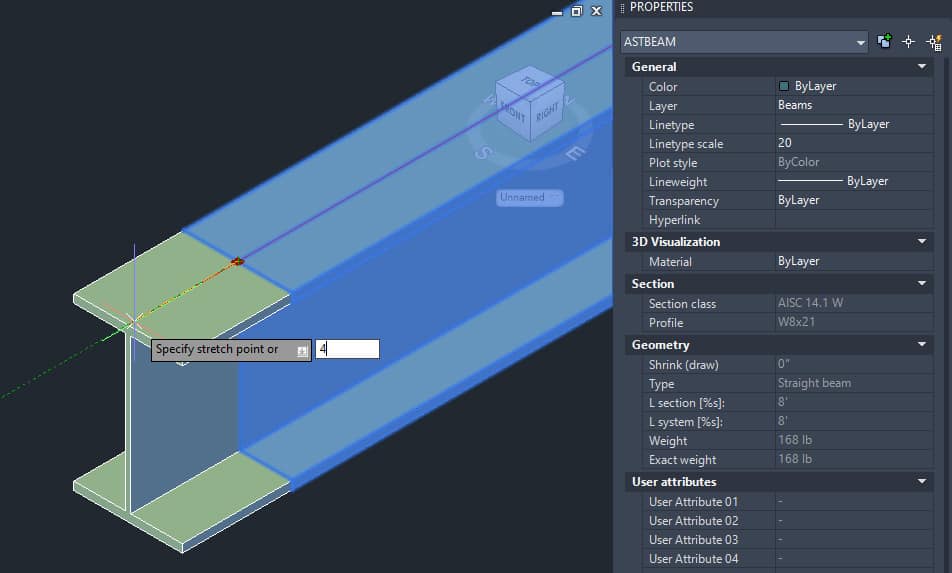
My beam is 8′-0″ long (you can see that in the Geometry properties on the right), and I want it 4″ longer, so I type 4. Make sure the polar tracking line is showing in the direction you want to stretch, as in the screenshot. Press ENTER to confirm.
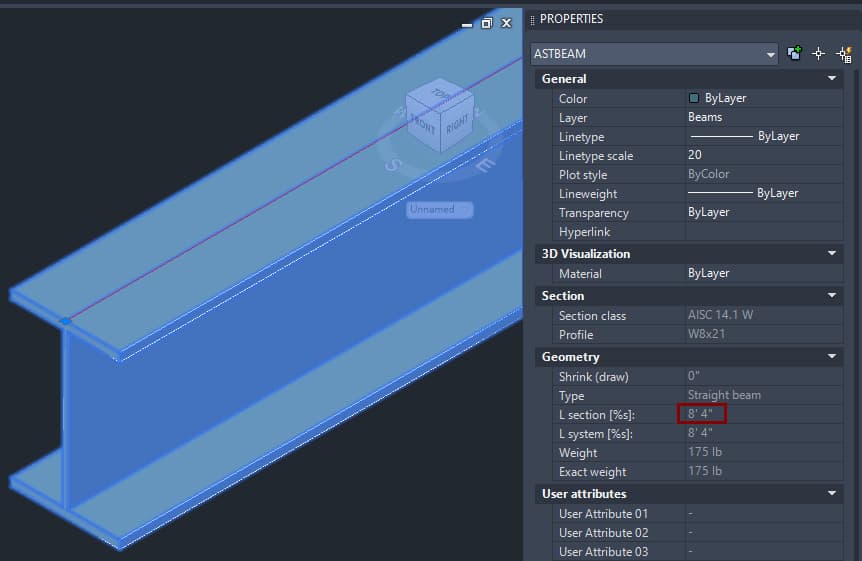
The beam is now 4″ longer. Check the length in the Geometry properties.
Stretch to a point in the model
You can also stretch the beam to a known point in the model. Here I drew a purple T-line and I want the beam to end at its center point, which is 4″ past the end of the beam.
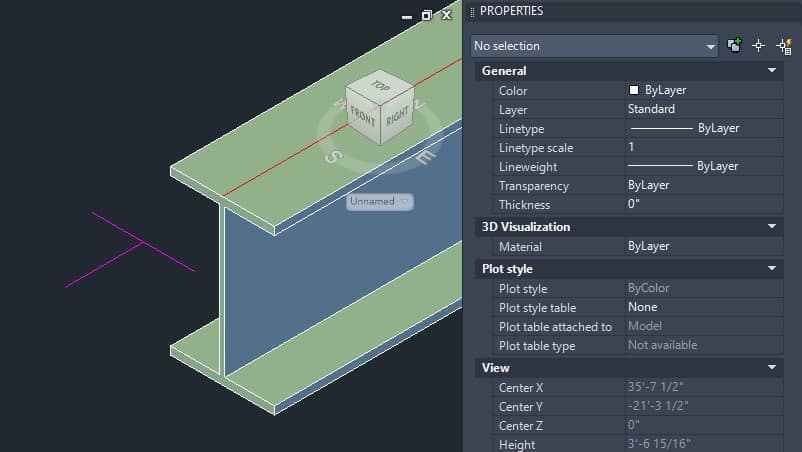
Click the blue grip at the end of the beam. Advance Steel asks for the stretch point.
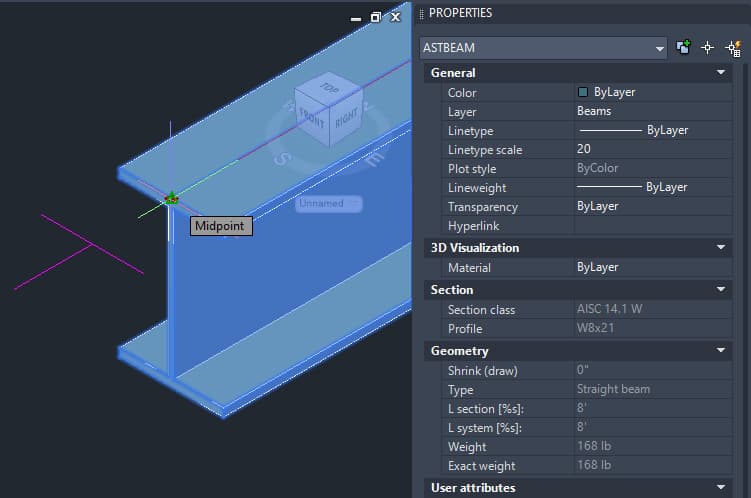
Drag the end of the beam and click the center point of the T-line.
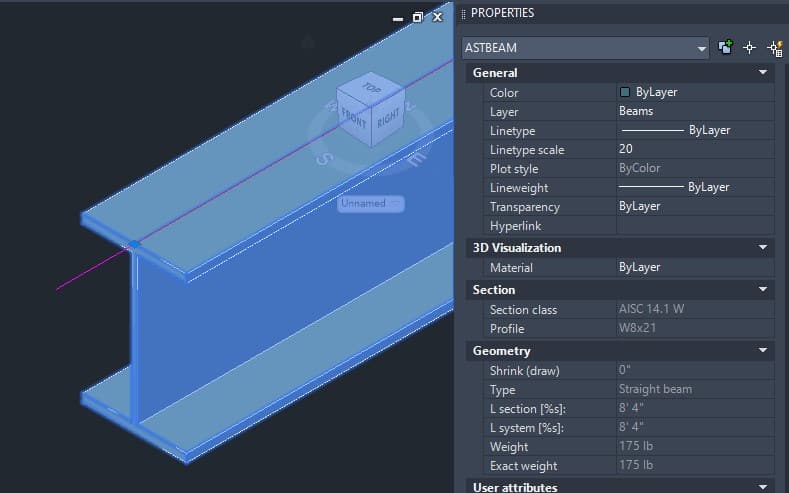
The beam is now 4″ longer. You can confirm it in the Geometry properties in the Properties panel.
Which extend method should I use?
Use Trim/Extend or Cut at Object when the beam needs to meet another member. I prefer Cut at Object because I can set the gap right away. Use the grip stretch when you need an exact length or need the beam to end at a specific point.
| Situation | Tool |
|---|---|
| Beam needs to reach another beam or column | Trim/Extend |
| Member needs to reach another member, with the end cut, gap and weld set | Cut at Object |
| Beam needs to be a set amount longer or shorter | Grip stretch, typed value |
| Beam needs to end at a point or line you already have | Grip stretch to a point, or Trim/Extend with Line |
How do I shorten (trim) a beam in Advance Steel?
The same tools work in reverse:
- Grip stretch: click the end grip, point the polar tracking line back along the beam (toward the other end) and type the amount to take off.
- Trim/Extend: if the beam runs past another member, the tool can trim it back to that member’s system line, center or face.
- Cut at Object also cuts a member back to the one it runs into, with the cut type and gap you set.
What should I check after extending a beam?
Changing a member’s length can affect everything attached to it, so take a minute to check:
- Connections. Look at the joints at both ends. If a connection was already placed, make sure it still fits the new geometry.
- Clearances and gaps. A beam extended to the system line runs into the other member. If it should stop at a face with a gap, use Face or Cut at Object.
- Length in the properties. Check the Geometry properties to make sure you got the length you wanted.
- Numbering. If the model has already been numbered, the changed beam is now a different part. Renumber before you make or update drawings.
What to do when extending doesn’t work
I can’t find Trim/Extend in the Tool Palette. It’s near the bottom of the Tools tab. Drag the bottom edge of the palette down to make it longer.
The beam extends to the wrong place. Check the connect option: System goes to the red system line, Center to the center of the other member, Face to its outside face.
Cut at Object cut the wrong member. The order matters. Pick the member to cut against first, then the member to cut.
The grip stretch went the wrong way or at an angle. Make sure the polar tracking line points along the beam in the direction you want before typing the value.
Related Advance Steel Tutorials
- Split And Merge A Beam In Advance Steel
- Creating Miter Cuts in Advance Steel
- Everything About Gratings In Advance Steel
- Everything About Folded Plate In Advance Steel
- All About Gusset Plate in Advance Steel
- All About Welds & Weld Symbols in Advance Steel
- Advance Steel Levels Demystified
- Workplanes In Advance Steel – Everything You Need To Know
- Advance Steel Workflow Explained
- All About Grid Lines In Advance Steel