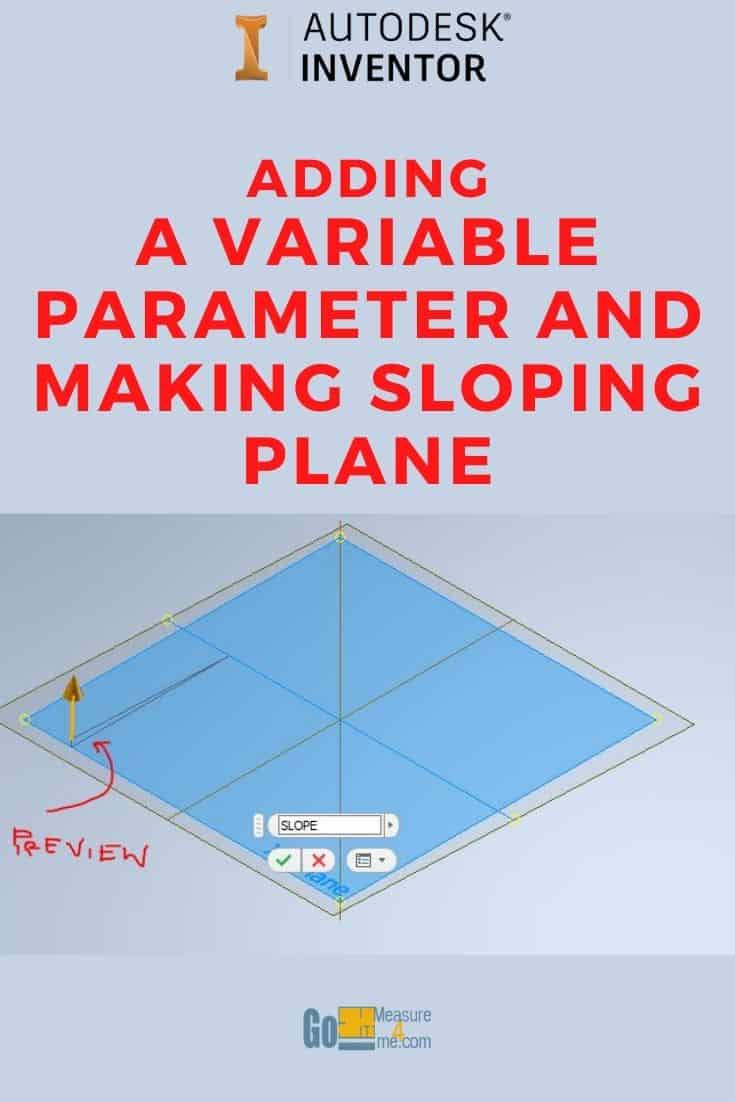
To create an angled work plane in Inventor, click Plane on the 3D Model tab, pick an axis or edge, then pick a plane that runs through it, and type the angle. Even better, type the name of a user parameter like SLOPE instead of a number. Then you can change the slope later by editing one value.
Sketching on a slope comes up all the time: roof framing, a sloped base, a ramp, an angled bracket. Below are the steps with screenshots, followed by how to sketch on the plane, how to enter a roof pitch like 4:12 as an angle, and what to do when the plane goes the wrong way.
How do I create a parameter for the slope?
Start by making a user parameter that holds the angle. Every sloped feature can then point to it.
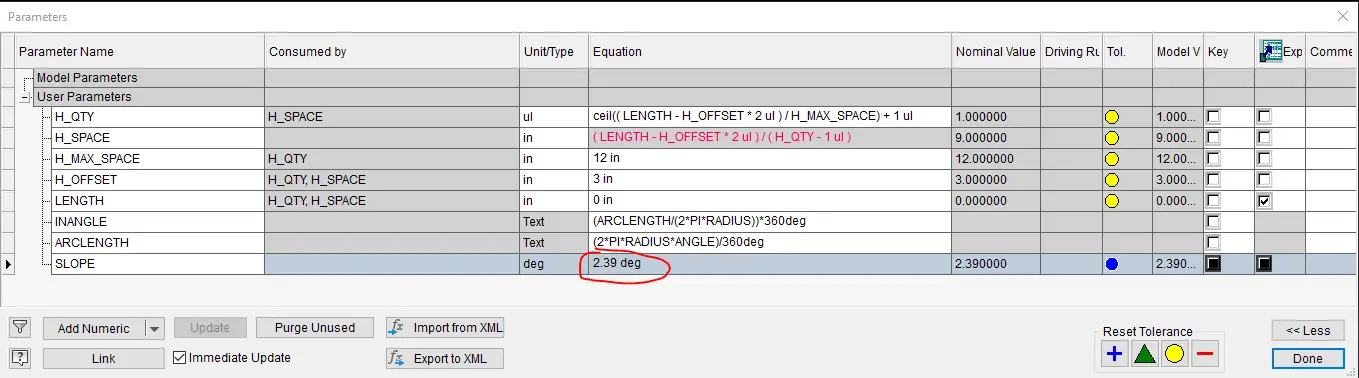
- Open Parameters on the ribbon (the fx icon):


- Click Add Numeric:

- Type a parameter name, for example SLOPE:

- Change the unit to deg so the value is treated as an angle.
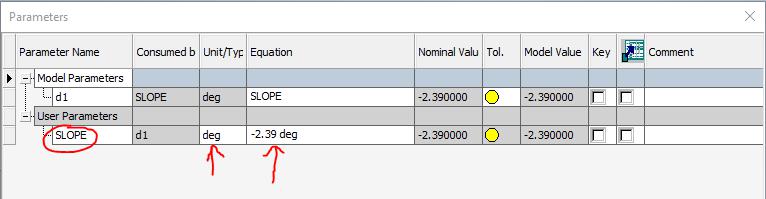
- Enter the slope value in the Equation field and click Done:
How do I create an angled work plane from that parameter?
The plane rotates around an axis, starting from a plane that contains that axis. Here we rotate around the X axis, starting from the XZ plane.
- Expand the Origin folder in the Model browser:

- Make the X Axis visible: right-click the X Axis in the tree and check Visibility:

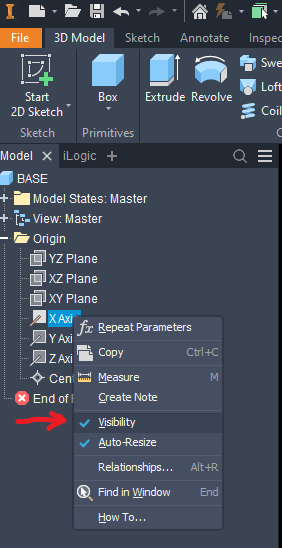
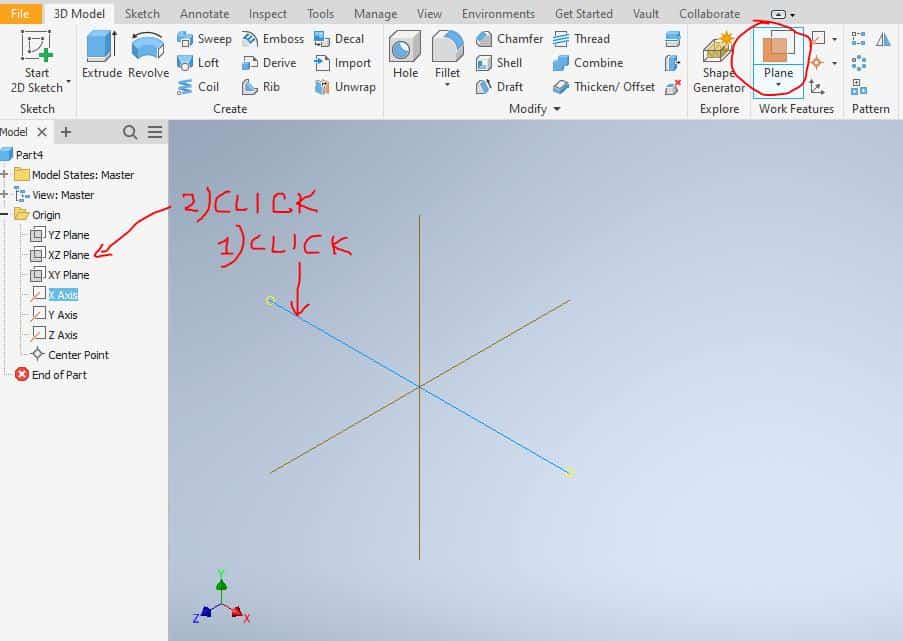
- With the X Axis highlighted, go to Plane on the ribbon and choose the Plane command:

- Select the XZ Plane. This is the axis and plane combination the new plane rotates from:
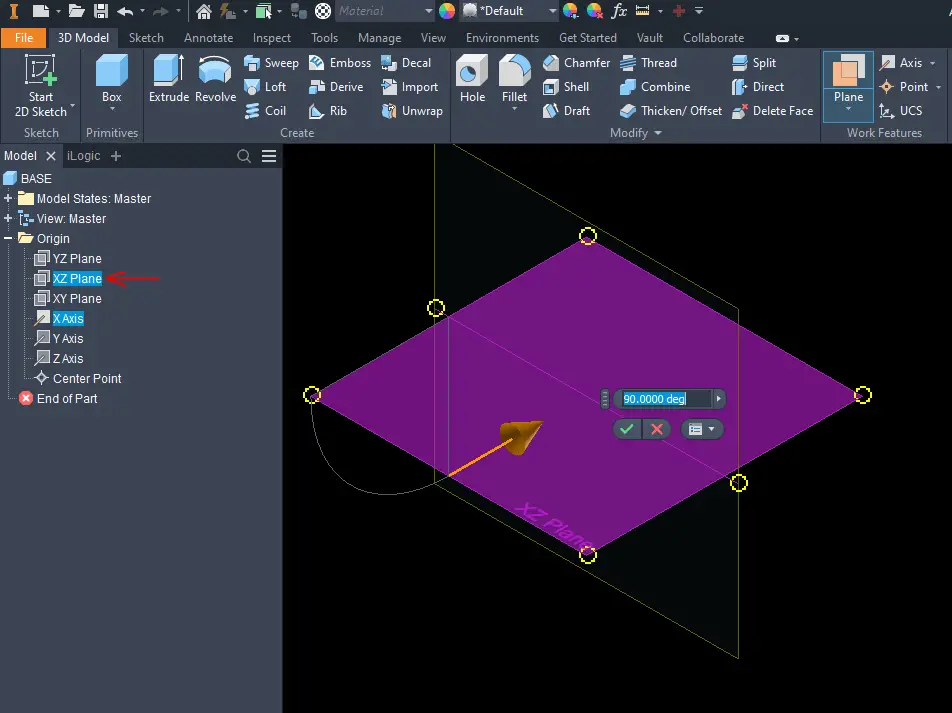
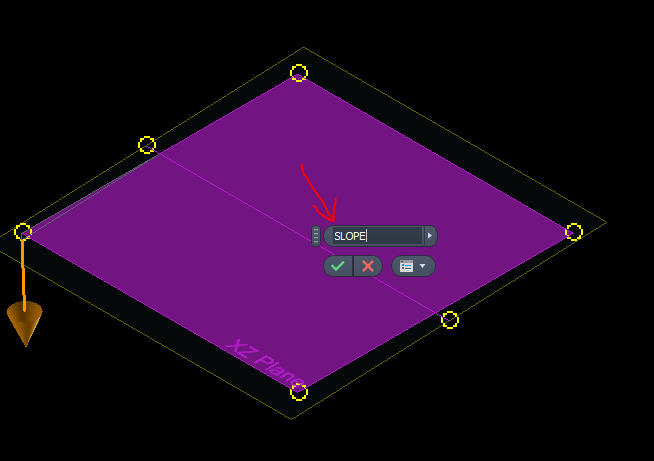
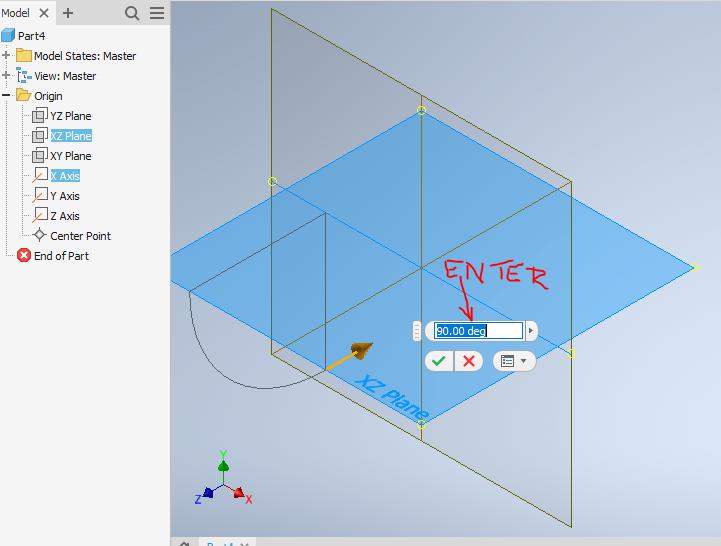
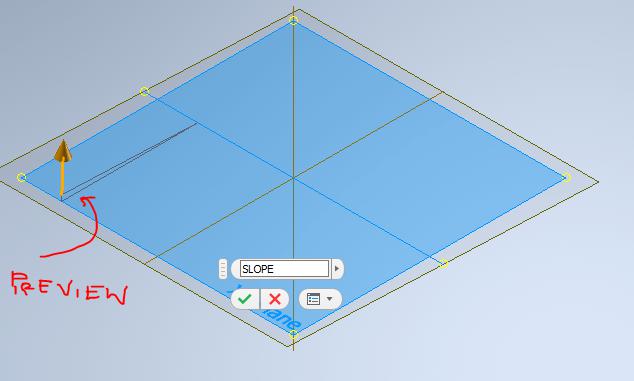
- In the angle box you could type a number, but since we already made the parameter, just type SLOPE. Inventor shows a preview of the angle:
- Click the green check mark to close the box.
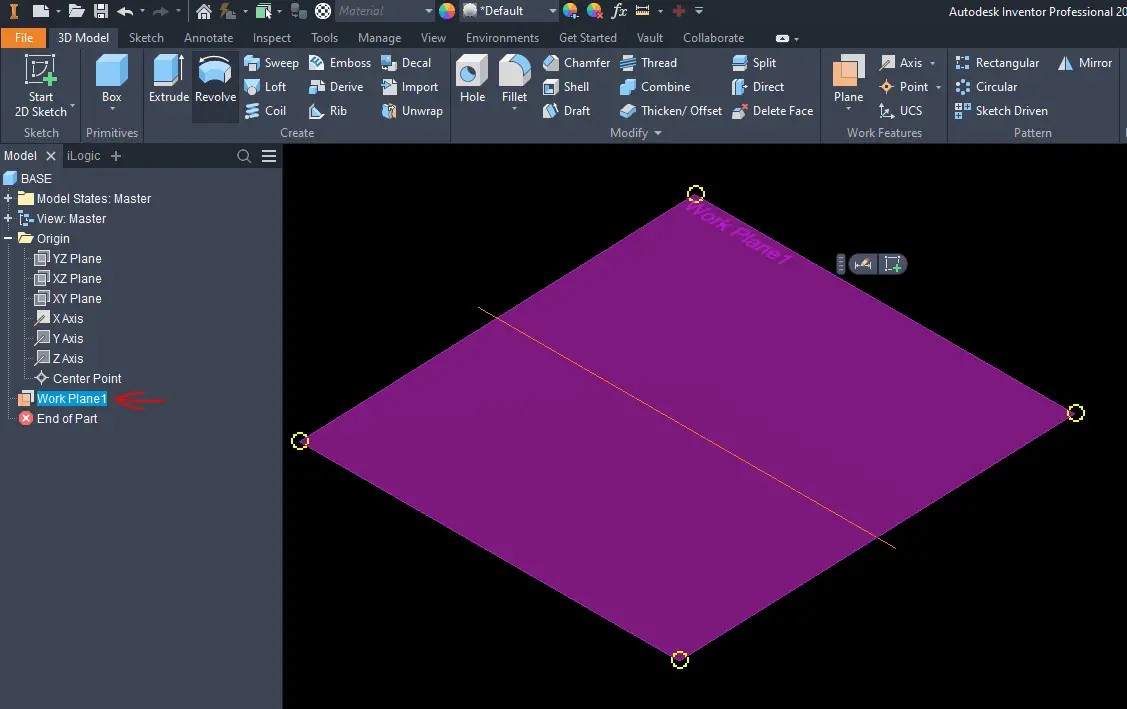
- The sloping plane is created. It shows up in the browser as Work Plane1:
- Rename the plane in the browser so you can find it later:

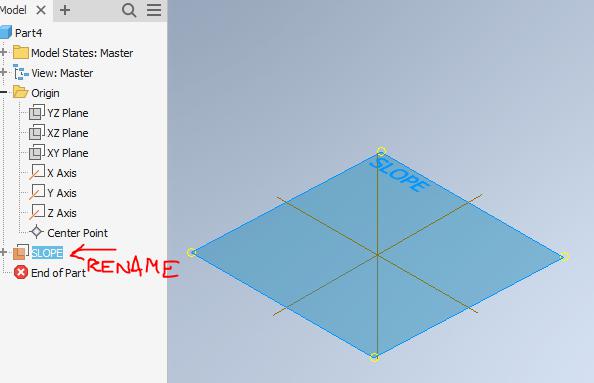
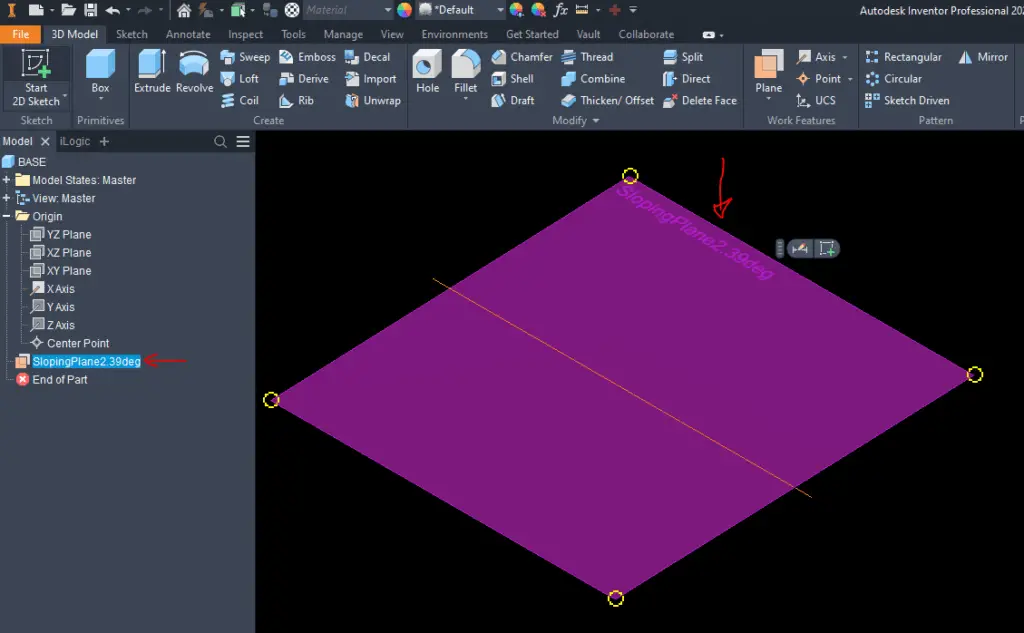
The new name shows up in the browser and on the plane itself:
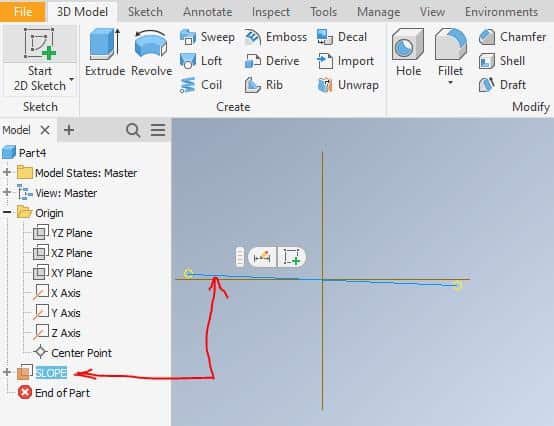
- Go to an elevation view to check the angle is right:
How do I sketch on the sloped plane?
Right-click the plane (in the browser or in the model) and pick New Sketch. Inventor turns the view to look straight at the plane, and everything you draw lies on the slope. Extrude from that sketch the same way as from any other plane.
Because the plane is driven by SLOPE, the sketch and everything built from it follow the plane when you change the angle.
How do I change the slope later?
Open Parameters (the fx icon), change the value in the Equation field for SLOPE and click Done. If the model doesn’t update right away, click Update on the Quick Access Toolbar (or on the Manage tab).
That’s the whole point of the parameter: a design change is one number, not a hunt through features.
How do I enter a roof pitch like 4:12 as an angle?
In construction, slope is often given as rise over run, like 4:12 (4 in. of rise per 12 in. of run). Inventor’s plane wants an angle. The angle is the arctangent of rise ÷ run. Here are the common ones:
| Pitch (rise:run) | Angle |
|---|---|
| 1:12 | 4.76° |
| 2:12 | 9.46° |
| 3:12 | 14.04° |
| 4:12 | 18.43° |
| 5:12 | 22.62° |
| 6:12 | 26.57° |
| 8:12 | 33.69° |
| 12:12 | 45.00° |
Can I use the SLOPE parameter in other features?
Yes, and that’s where it really pays off. Anywhere Inventor asks for an angle, you can type SLOPE instead of a number:
- Sketch dimensions. When you place an angular dimension in a sketch, type SLOPE in the value box. A roof line, a sloped cut or a chamfer angle then matches the plane.
- Feature values. Extrude taper, Chamfer and Revolve angles all accept a parameter.
- Other parameters. You can build on it. For example, a parameter for the run and another for the rise, with SLOPE calculated from them.
When everything sloped in the part points to SLOPE, changing the pitch doesn’t leave one feature behind at the old angle. A common mistake with sloped parts: the plane gets updated, and a sketch dimension typed in by hand doesn’t.
Should I type the angle or use a parameter?
For a one-off plane you’ll never touch again, typing the number is fine. Use a parameter when:
- More than one feature uses the same angle.
- The slope might change during design, like a roof pitch that isn’t final yet.
- You’ll reuse the part as a template for similar parts.
It takes about a minute to set up, and it saves you from hunting through the browser later.
What’s the difference between model parameters and user parameters?
Inventor creates model parameters on its own every time you add a dimension or a feature value. They get names like d0, d1, d2. User parameters are the ones you add yourself with Add Numeric, like SLOPE. Give user parameters clear names, because you’ll type them into dimension boxes and other parameters’ equations. You can also rename model parameters so you know which one is which.
What are the other ways to make an angled plane?
- Angle to Plane around Edge: the same idea as here, but you pick an edge of the part instead of an origin axis. Good when the slope starts at an edge of the model.
- Three Points: for a plane that doesn’t line up with any axis or edge. I go through it, and how to split a part with the plane, in Inventor Lesson 11.
- Two Coplanar Edges: pick two edges that lie in one plane.
What to do when the angled plane doesn’t work
The plane slopes the wrong way. Type -SLOPE in the angle box instead of SLOPE, or pick the plane on the other side.
Inventor won’t accept SLOPE in the box. Check the parameter name matches exactly and that its unit is deg. A parameter in inches or unitless won’t work as an angle.
The angle is right, but the plane is in the wrong place. The rotation axis decides where the plane hinges. Use an edge or a work axis where the slope should start, not the origin axis.
I can’t see the axis to pick it. Right-click it in the Origin folder and turn on Visibility, like in step 2.
Next, sketch something on your new plane, then change SLOPE and watch everything follow.